
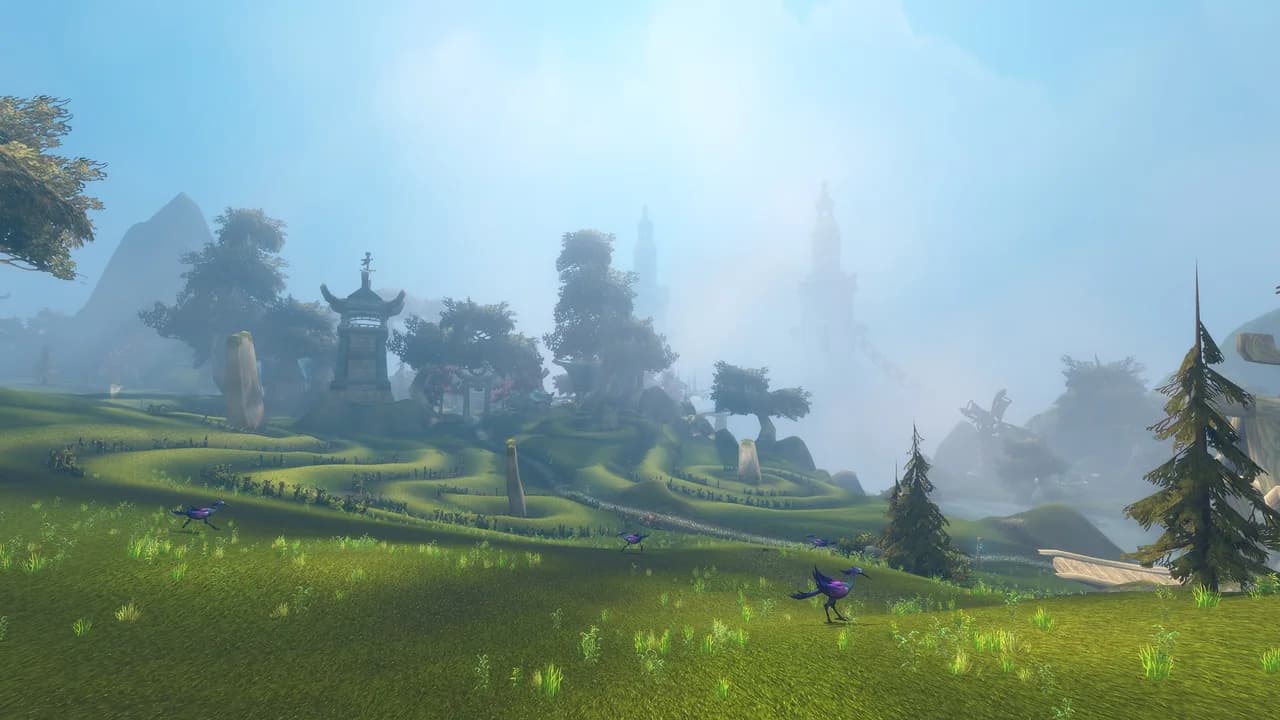
Alliance Skyborne levelling guide
Levels 1–20
Zephras Isle → Loch Modan → Westfall → Darkshore → Redridge Mountains
Begin in Thendal Grove on Zephras Isle, work through Shen'dar Village and the Valanaar council story, then take the skycutter to Dalaran and the Skyborne portal to Stormwind. On the mainland the route visits Westfall, Darkshore and Redridge, with optional Loch Modan and dungeon work along the way, and finishes at Maestra's Post in Ashenvale.
Free 1–20 route · No account needed · Also on CurseForge
· 6 chapters
World of Warcraft imagery © Blizzard Entertainment. Official preview; guide locations may differ. Image source ↗
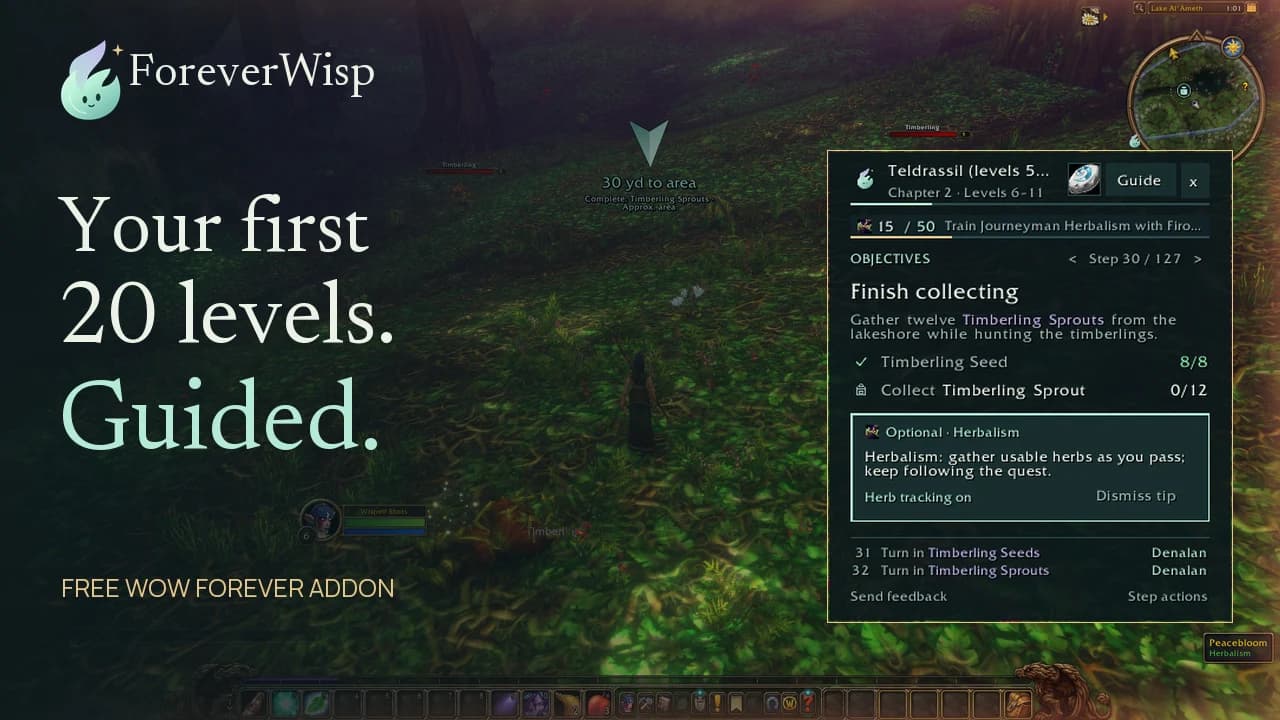
Quest guidance, dungeon trips, gathering and talents. 1:10 · Recorded 30–31 October 2026 · English captions.
Read the video transcript
Spend less time checking where to go and more time enjoying Azeroth. Meet ForeverWisp, your in-game levelling guide for WoW: Forever. Choose a suggested guide, hit start, and set off.
The arrow points you towards your next objective, while the guide keeps the details close by: who to speak to, what to collect, and what’s coming next. As you complete objectives, Wisp tracks your progress and moves the guide forward.
From Northshire to Teldrassil and across the Barrens, there’s a starting route for your character. And there’s room for a few detours. When a dungeon fits your journey, Wisp suggests the trip and helps you prepare. Add it to your route or keep questing.
Taking up a profession? Add gathering reminders along the way, with trainer stops to help you keep progressing. Choose a talent build and see where your next point goes. Travel suggestions help you make your way between stops. And with different themes, you can make the guide feel at home on your screen.
Eight starter routes. Your first 20 levels. All included free. Get ready for November 4th. Download Wisp at foreverwisp.com. Less looking up. More Azeroth.
Your journey,
one chapter at a time.
Choose your character, then start at the beginning or jump to a chapter.
Showing Skyborne and all applicable class quests. Level ranges are approximate checkpoints, not guaranteed XP.
Before you set out
The first chapter covers Thendal Grove and Shen'dar up to the Falaath infiltration and the deliveries for Valanaar. The second follows the Valanaar council through Windfield Orchard, Fillion's rescue, the eastern watchtower, Shadowgale Forest and the Shrine of Akir before the departure to Dalaran and Bolvar in Stormwind. The third offers an optional Loch Modan circuit through Ironforge, then works Westfall from Sentinel Hill. The fourth and fifth chapters take the Stormwind boat to Auberdine for the first Darkshore loops and the southern coast. The last finishes northern Darkshore, visits Redridge through Stormwind and returns to Darkshore for the road south into Ashenvale.
This is a prepared route candidate. The level bands are recommendations, and normal solo XP sufficiency has not been measured. Finish accepted work and use your actual level. Optional group encounters and catch-up grinding are not assumed to fund the next chapter.
- Choose the Alliance Skyborne guide for the High Order continuation. Horde Skyborne have a separate route.
- Keep quest notes, the Mark of Akir and delivery items until their steps are complete.
- Check minimum levels on individual quests. The chapter ranges are approximate checkpoints.
- Keep your shared quests when taking a class detour so you can rejoin the route afterwards.
Class quests and unlocks
Warrior: Your Thendal introduction leads to Blademaster Ren. At Valanaar, accept The Skybreaker Bulwark from Seena Skybreaker and keep it for the Shrine of Akir outing. Finish the island lesson and check Defensive Stance. The Stormwind Bartleby sequence is optional recovery if the stance is still missing, subject to the live trainer offer.
Hunter: Visit Tai’ree in Thendal, then complete Valanaar’s three taming trials with each quest’s own rod. Finish the separate Training the Beast delivery too. The route does not establish every later Hunter class quest.
Mage: The opening uses your Glowing Recall Crystal to introduce Dorii Brightwhisper. For the optional Windbough Wand, take Speak with Belann from Anathamaas Aetherwind in Valanaar and follow Boughs in the Wind during the standing-stones outing. This is not a complete inventory of every later Mage quest.
Rogue: Meet Akeri in the Thendal watchtower. On the Stormwind visit before Redridge, Renzik gives Redridge Rendezvous for Lucius on the dock west of the Lakeshire bridge. Alther's Mill needs Lockpicking, Thieves' Tools and practice on the training boxes before Lucius's Lockbox opens. The optional poison chain from Mathias Shaw in SI:7 needs level 20 and takes you to Agent Kearnen and Klaven's Tower in Westfall. Pickpocket the key before killing its carrier.
Druid: The route includes Xyton's introduction, the Ursera spirit trial and Child of Nature from Dalaran to Sheldras Moontree in Stormwind, who offers Moonglade. At level 16, travel from Auberdine to Darnassus for A Lesson to Learn and Lessons Anew, then deliver Moonglade and take Trial of the Lake from Dendrite. The cure chain continues in Darkshore with The Principal Source, Gathering the Cure and Curing the Sick, and needs five Earthroot. Power over Poison and the optional Cat Form chain follow at level 20 after Redridge. Collect Trial of the Sea Lion's Darkshore pendant half off the north coast and keep it, because the Westfall half belongs to the 20–30 route. Check each spell reward in your spellbook. Complete native offers and travel still need verification.
CHAPTER 01 · LEVELS 1–8
Zephras Isle (levels 1–8)
Ailee Farheart sends you to Rorian the Dayseeker at Thendal's great tree. The first outings cover the vuldren, cirrusflies, the Cirrusfly Queen and Yala Windwatcher's standing stones, with Halaan and Myriaal's watchtower tasks in between. Rorian then hands you Aetheen of the Gales and your class note, and the ursera caves and Hanaa Nightwind's temple ruins lead south to Constable Aonda in Shen'dar Village. Shen'dar's quest givers cover the bandit cave, the hippogryph nesting grounds, Raan Wildwind's camp and the Falaath infiltration. The chapter ends when Aonda gives you To Valanaar and Deliver the Signet.
- For Falling With Style, put Walk on Air on your action bar at the top of the watchtower, then jump towards the village and use it while falling.
- Keep the Mark of Akir for Falaath. In the northern inn, go upstairs and use the brown wardrobe, staying for the meeting until Among the Faithful gives credit. Sania can replace a lost mark.
- WANTED: Vulgara the Insatiable is an optional level-8 elite. Take it only if you plan to group for her.
Quest order 129 steps
Ailee FarheartZephras Isle~42.8, 23.4
- 01
AcceptComing of Age
- 02
DoComing of AgeRorian the Dayseeker · ~42.1, 23.5
Walk west to the great tree and speak with Rorian at its entrance.
- 03
Hand inComing of AgeRorian the Dayseeker · ~42.1, 23.5
Walk west to the great tree and speak with Rorian at its entrance. Turn in Coming of Age to Rorian the Dayseeker.
- 04
AcceptHarmony in BalanceRorian the Dayseeker · ~42.1, 23.5
- 01
Elatrell FeatherlightZephras Isle~43.4, 24.8
- 05
AcceptInfestation Investigation
- 05
Pesky CirrusflyZephras Isle~44.2, 28.2
- 06
DoInfestation Investigation
Kill eight Pesky Cirrusflies in the eastern grove. Finish any remaining vuldren there before returning to the village.
- 06
Juvenile VuldrenZephras Isle~44.8, 24.4
- 07
DoHarmony in Balance
Head east into Thendal Grove and kill eight Vuldren Juveniles. Work on the cirrusflies during the same outing if Infestation Investigation is in your log.
- 08
Hand inInfestation InvestigationElatrell Featherlight · ~43.4, 24.8
- 09
AcceptThe Cirrusfly QueenLevel 2+Elatrell Featherlight · ~43.4, 24.8
- 10
AcceptThe Anchors of ZephrasHalaan Hawk-Eye · ~43.8, 24.0
Climb the Thendal watchtower and speak with Halaan Hawk-Eye at the top. Accept The Anchors of Zephras.
- 11
DoThe Anchors of ZephrasHalaan Hawk-Eye · ~43.8, 24.0
Speak with Halaan and borrow his gift to view the distant anchor pylon. Wait for the native objective before handing in; no trip to the pylon is needed.
- 12
Hand inThe Anchors of ZephrasHalaan Hawk-Eye · ~43.8, 24.0
- 13
AcceptFalling With StyleMyriaal Mistwake on the watchtower · ~43.6, 24.0
At the top of the Thendal watchtower, speak with Myriaal Mistwake beside Halaan and accept Falling With Style.
- 14
DoFalling With StyleWatchtower ledge · ~43.6, 24.0
At the top of the Thendal watchtower, put Walk on Air on your action bar and check that it is ready. Jump toward the village and use it while falling. Check quest credit, then report to Rorian.
- 07
Rorian the DayseekerZephras Isle~42.1, 23.5
- 15
Hand inHarmony in Balance
- 16
Hand inFalling With Style
- 17
AcceptElemental Unrest
- 18
AcceptHarvesting WindstonesDalia the Collector · ~43.2, 24.0
- 15
Falorne FallwindZephras Isle~43.2, 24.8
- 19
AcceptReading the Ley Lines
- 19
Approach to the cirrusfly hiveZephras Isle~49.2, 22.4
- 20
DoThe Cirrusfly Queen
Continue east to the hive and kill the Cirrusfly Queen. Clear nearby cirrusflies before engaging her and watch your health while poisoned.
- 20
Yala WindwatcherZephras Isle~47.3, 21.9
- 21
DoElemental Unrest
Take the northeastern path to the standing stones and speak with Yala Windwatcher.
- 22
Hand inElemental Unrest
Take the northeastern path to the standing stones and speak with Yala Windwatcher. Turn in Elemental Unrest to Yala Windwatcher.
- 23
AcceptAgitators
- 21
Al’Aketh ConvertZephras Isle~45.2, 19.4
- 24
DoAgitators
Around the standing stones, kill seven Al'Aketh Converts and six Roiling Winds. Complete both counts before returning to Yala.
- 24
Thendal Grove Ley LineZephras Isle~46.4, 17.9
- 25
DoReading the Ley Lines
At the Thendal Standing Stones, stand beside the glowing ley line and cast Read Ley Line from your spellbook. Let the cast finish and check objective credit. Finish the nearby grove work before returning to the village.
- 25
Windstone deposits in Thendal GroveZephras Isle~46.6, 24.6
- 26
DoHarvesting Windstones
Collect Raw Windstones along the rocky ridges and stone walls during the Queen and standing-stones outing. Finish any missing clusters on the way back to Thendal, then return to Dalia.
- 26
Yala WindwatcherZephras Isle~47.3, 21.9
- 27
Hand inAgitators
- 28
AcceptReturn to RorianLevel 3+
- 27
Dalia the CollectorZephras Isle~43.2, 24.0
- 29
Hand inHarvesting Windstones
- 30
Hand inReading the Ley LinesFalorne Fallwind · ~43.2, 24.8
- 31
Hand inThe Cirrusfly QueenElatrell Featherlight · ~43.4, 24.8
- 32
DoReturn to RorianRorian the Dayseeker · ~42.1, 23.5
Return along the village path to Rorian at the great tree and report on the Al’Aketh.
- 33
Hand inReturn to RorianRorian the Dayseeker · ~42.1, 23.5
Return along the village path to Rorian at the great tree and report on the Al’Aketh. Turn in Return to Rorian to Rorian the Dayseeker.
- 34
AcceptAetheen of the GalesLevel 4+Rorian the Dayseeker · ~42.1, 23.5
- 29
Class quests
 Warrior
 Hunter
 Rogue
 Druid
 Mage15 steps · choose your class above to show only yours
- 35
AcceptThe Warrior's Path
WarriorRorian the Dayseeker · ~42.1, 23.5 - 36
AcceptThe Way of the Hunter
HunterRorian the Dayseeker · ~42.1, 23.5 - 37
AcceptAt Home in the Shadows
RogueRorian the Dayseeker · ~42.1, 23.5 - 38
AcceptA Student of Nature
DruidRorian the Dayseeker · ~42.1, 23.5 - 39
AcceptA Student of the Arcane
MageRorian the Dayseeker · ~42.1, 23.5 - 40
DoThe Warrior's Path
WarriorBlademaster Ren · ~43.7, 24.1Read the Crumpled Note, then enter the village watchtower and speak with Blademaster Ren.
- 41
DoThe Way of the Hunter
HunterTai'ree Farsight · ~42.5, 23.7Read the Scribbled Note, then meet Tai'ree Farsight near the centre of Thendal Grove.
- 42
DoAt Home in the Shadows
RogueAkeri Duskblade · ~43.7, 24.3Read the Simple Note, then enter the village watchtower and speak with Akeri Duskblade.
- 43
DoA Student of Nature
DruidXyton Silverwind · ~41.7, 23.3Read the Folded Parchment, then meet Xyton Silverwind on the ground floor of the great tree behind Rorian.
- 44
DoA Student of the Arcane
MageDorii Brightwhisper · ~41.5, 23.7Examine the Glowing Recall Crystal in your bags. Then meet Dorii Brightwhisper inside the building behind Rorian.
- 45
Hand inThe Warrior's Path
WarriorBlademaster Ren · ~43.7, 24.1Read the Crumpled Note, then enter the village watchtower and speak with Blademaster Ren. Turn in The Warrior's Path.
- 46
Hand inAt Home in the Shadows
RogueAkeri Duskblade · ~43.7, 24.3Read the Simple Note, then enter the village watchtower and speak with Akeri Duskblade. Turn in At Home in the Shadows.
- 47
Hand inThe Way of the Hunter
HunterTai'ree Farsight · ~42.5, 23.7Read the Scribbled Note, then meet Tai'ree Farsight near the centre of Thendal Grove. Turn in The Way of the Hunter.
- 48
Hand inA Student of Nature
DruidXyton Silverwind · ~41.7, 23.3Read the Folded Parchment, then meet Xyton Silverwind on the ground floor of the great tree behind Rorian. Turn in A Student of Nature.
- 49
Hand inA Student of the Arcane
MageDorii Brightwhisper · ~41.5, 23.7Examine the Glowing Recall Crystal in your bags. Then meet Dorii Brightwhisper inside the building behind Rorian. Turn in A Student of the Arcane.
- 35
Aetheen of the GalesZephras Isle~42.6, 23.6
- 50
DoAetheen of the Gales
Meet Aetheen in Thendal village before heading to the ursera caves.
- 51
Hand inAetheen of the Gales
Meet Aetheen in Thendal village before heading to the ursera caves. Turn in Aetheen of the Gales to Aetheen of the Gales.
- 52
AcceptFoul Matriarch
- 53
AcceptAggressive EncroachmentValreaa Valewind · ~42.4, 25.0
- 50
Ursera ScavengerZephras Isle~35.6, 25.0
- 54
DoFoul Matriarch
Leave Thendal toward the ursera grounds to the west. Kill eight Ursera Scavengers, then find Urs’anah in the den near 35.4, 25.4 and collect her head. Finish any remaining Scrawny Ursera claws on the way back before returning to Aetheen.
- 54
Scrawny UrseraZephras Isle~38.0, 26.4
- 55
DoAggressive Encroachment
Kill Scrawny Ursera west of Thendal, around 38.0, 26.4, and collect six claws. Finish them during the den outing, then return to Valreaa.
- 55
Aetheen of the GalesZephras Isle~42.6, 23.6
- 56
Hand inFoul Matriarch
- 57
AcceptThe Next Step
- 58
AcceptThe Adventurer
- 59
Hand inAggressive EncroachmentValreaa Valewind · ~42.4, 25.0
- 56
Hanaa NightwindZephras Isle~38.2, 30.2
- 60
AcceptAl'Aketh Thugs
- 60
Malduko CloudcrushZephras Isle~36.4, 33.2
- 61
DoAl'Aketh Thugs
At the temple ruins southwest of Hanaa, kill six Al’Aketh Brutes, four Neophytes and Malduko Cloudcrush. Return to Hanaa, then continue south to Shen’dar.
- 61
Hanaa NightwindZephras Isle~38.2, 30.2
- 62
Hand inAl'Aketh Thugs
- 62
Constable AondaZephras Isle~45.3, 45.3
- 63
DoThe Next Step
Follow the road south to Shen’dar Village. Meet Constable Aonda at the main lodge.
- 64
Hand inThe Next Step
Follow the road south to Shen’dar Village. Meet Constable Aonda at the main lodge. Turn in The Next Step to Constable Aonda.
- 65
AcceptWelcome to Shen'dar Village
Accept Welcome to Shen’dar Village from Constable Aonda at the main lodge after delivering Aetheen’s message.
- 66
AcceptThe High OrderRathiril Sunlance · ~45.0, 46.4
- 67
DoThe High OrderRathiril Sunlance · ~45.0, 46.4
Speak to Rathiril Sunlance in Shen’dar and listen through the conversation. Hand in here before starting the field outing.
- 68
Hand inThe High OrderRathiril Sunlance · ~45.0, 46.4
- 69
AcceptA Magical AffrontRathiril Sunlance · ~45.0, 46.4
After finishing The High Order with Rathiril, accept A Magical Affront before collecting the remaining village tasks.
- 70
DoWelcome to Shen'dar VillageRathiril Sunlance · ~45.0, 46.4
In the main lodge, speak with Rathiril Sunlance around the corner from Aonda. Then visit Coriella Calmbreeze at the village inn and use the quest conversation. Return to Aonda once both conversations are complete.
- 71
Hand inWelcome to Shen'dar Village
Return to Constable Aonda at Shen’dar’s main lodge and turn in Welcome to Shen’dar Village. Take The Criminal Element before leaving.
- 72
AcceptThe Criminal Element
- 73
AcceptPilfered WindstonesTeeri Wellwind · ~44.4, 45.0
- 74
AcceptHippogryph HarrassmentTeeri Wellwind · ~44.4, 45.0
- 75
AcceptThe Problem With PrideclawsIndari Sunseam · ~44.6, 44.4
- 76
AcceptA Little BeautyTaleen Shimmerthread · ~44.8, 44.2
- 63
Zerril SoftbreezeZephras Isle~43.8, 43.8
- 77
AcceptRestocking the Larders
- 77
Bounty Available: Vulgara the Insatiable!Zephras Isle~43.4, 45.9
- 78
AcceptWANTED: Vulgara the InsatiableOptional
Optional elite bounty: check the board beside Danarii Bellowveil for WANTED: Vulgara the Insatiable. Take it only if you plan to group for her.
- 78
Highlands BanditZephras Isle~47.0, 39.8
- 79
DoThe Criminal Element
Take the northern path to the waterfall cave. Kill ten Highlands Bandits and “Badwind” Bennic, clearing the entrance before advancing inside.
- 80
DoPilfered WindstonesHighlands bandit cave — pilfered windstones · ~47.0, 39.8
Kill the Highlands Bandits and collect ten Pilfered Windstones during The Criminal Element. Loot the bandits before leaving their cave. Keep the stones while finishing the accepted wildlife work on this circuit, then return to Shen’dar.
- 79
PrideclawZephras Isle~41.2, 45.6
- 81
DoThe Problem With Prideclaws
Collect ten Prideclaw Pelts in the Shen’dar Highlands while travelling between the village and the northern bandit outing. Finish the pelts before returning to Indari.
- 81
Windshaper novices west of Shen’darZephras Isle~38.4, 48.8
- 82
DoA Magical Affront
Defeat six Windshaper Novice Seers west of Shen’dar. Work along the edge of their camp and finish the accepted nearby wildlife collections before returning to the village.
- 82
Hippogryph YouthZephras Isle~37.8, 51.0
- 83
DoHippogryph Harrassment
In the hippogryph nesting grounds southwest of Shen’dar, kill eight Youths, six Protectors and one Matriarch. Collect Taleen’s down feathers during this same outing before returning to the village.
- 84
DoA Little Beauty
Gather eight Hippogryph Down feathers around the southwest nesting grounds while completing Teeri’s hippogryph hunt. Finish both assignments before returning.
- 83
Shen’dar galestridersZephras Isle~41.6, 45.2
- 85
DoRestocking the Larders
Keep three Small Eggs and eight Strider Meat from the Shen’dar wildlife outings. Check your bags after the hippogryph trip and finish any remaining strider collection nearby before returning to Zerril.
- 86
DoThe AdventurerRaan Wildwind · ~41.6, 44.8
Follow the road to Raan Wildwind and deliver the message before continuing the regional journey.
- 87
Hand inThe AdventurerRaan Wildwind · ~41.6, 44.8
- 88
AcceptThe Great OutdoorsRaan Wildwind · ~41.6, 44.8
- 89
DoThe Great OutdoorsRaan Wildwind · ~41.6, 44.8
At Raan Wildwind’s campfire, use /sit and wait for Boosted Rest. If the sitting objective doesn’t update, type /sit again while you are already seated. Check both native objectives before handing in; no crafting materials or profession are required.
- 90
Hand inThe Great OutdoorsRaan Wildwind · ~41.6, 44.8
- 91
AcceptCamping 101: MiningOptionalRaan Wildwind · ~41.6, 44.8
Ask Raan Wildwind for Camping 101: Mining. Take it if offered, or skip the lesson and continue your route.
- 92
AcceptCamping 101: CookingOptionalRaan Wildwind · ~41.6, 44.8
Ask Raan Wildwind for Camping 101: Cooking. Take it if offered, or skip the lesson and continue your route.
- 93
AcceptCamping 101: HerbalismOptionalRaan Wildwind · ~41.6, 44.8
Ask Raan Wildwind for Camping 101: Herbalism. Take it if offered, or skip the lesson and continue your route.
- 85
Zerril SoftbreezeZephras Isle~43.8, 43.8
- 94
Hand inRestocking the Larders
- 95
Hand inThe Problem With PrideclawsIndari Sunseam · ~44.6, 44.4
- 96
Hand inA Little BeautyTaleen Shimmerthread · ~44.8, 44.2
- 97
Hand inHippogryph HarrassmentTeeri Wellwind · ~44.4, 45.0
- 98
Hand inPilfered WindstonesTeeri Wellwind · ~44.4, 45.0
- 94
Constable AondaZephras Isle~45.3, 45.3
- 99
Hand inThe Criminal Element
- 100
AcceptInfiltrating the CultLevel 5+
- 101
DoInfiltrating the CultSania Silverstream · ~44.9, 45.2
Speak with Sania in Shen’dar Village to begin the infiltration.
- 102
Hand inInfiltrating the CultSania Silverstream · ~44.9, 45.2
Speak with Sania in Shen’dar Village to begin the infiltration. Turn in Infiltrating the Cult to Sania Silverstream.
- 103
AcceptFalaath VillageSania Silverstream · ~44.9, 45.2
- 104
Hand inA Magical AffrontRathiril Sunlance · ~45.0, 46.4
Return to Rathiril in Shen’dar and report the six defeated novice seers during the village hand-in visit.
- 99
Missionary JasaanZephras Isle~46.8, 56.2
- 105
DoFalaath Village
Keep the Mark of Akir and follow the road to Falaath Village. Speak with Missionary Jasaan at its entrance. If the mark is lost, return to Sania for a replacement.
- 106
Hand inFalaath Village
Keep the Mark of Akir and follow the road to Falaath Village. Speak with Missionary Jasaan at its entrance. If the mark is lost, return to Sania for a replacement. Turn in Falaath Village to Missionary Jasaan.
- 107
AcceptAmong the Faithful
- 105
Wardrobe upstairs in the northern Falaath innZephras Isle~48.8, 53.8
- 108
DoAmong the Faithful
Enter the northern Falaath inn near 48.8, 53.8 and go upstairs. Interact with the brown wardrobe beside the sparkling area. Stay for the meeting until the quest log confirms completion, then return to Aonda in Shen’dar.
- 108
Constable AondaZephras Isle~45.3, 45.3
- 109
Hand inAmong the Faithful
- 110
AcceptHavoc in the Highlands
- 111
AcceptThe Western Watch
- 112
AcceptStolen SuppliesDanarii Bellowveil · ~45.2, 45.2
- 109
Vulgara the InsatiableZephras Isle~42.6, 52.2
- 113
DoWANTED: Vulgara the InsatiableOptional
On the way south to the Western Watch, climb the hill at 42.6,52.2 and kill Vulgara the Insatiable, a level 8 elite, for her head. Bring a group or skip her.
- 113
Peacekeeper VaanielZephras Isle~42.0, 62.6
- 114
DoThe Western Watch
Take the southwestern road to the western watchtower. Find Peacekeeper Vaaniel at the tower approach.
- 115
Hand inThe Western Watch
Take the southwestern road to the western watchtower. Find Peacekeeper Vaaniel at the tower approach. Turn in The Western Watch to Peacekeeper Vaaniel.
- 116
AcceptA Last Request
- 117
DoA Last RequestBloody Note beside Vaaniel · ~42.4, 62.1
Collect and read the Bloody Note beside Vaaniel. At the base of the nearby watchtower, recover Raani’s Lucky Feather from the fallen Raani Windgazer and the family signet from Arvensus Shadowsong. Then use the spiral stairs to reach Skypriest Aanders at the top and kill him. Check all objectives before returning to Aonda.
- 114
Al'Aketh StormcallerZephras Isle~47.2, 54.4
- 118
DoHavoc in the Highlands
Return to Falaath’s ruins. Kill six Al’Aketh Stormcallers and four Living Lightning, then kill Commander Cyclas and collect his head. Loot the Stormcallers for Stolen Supplies at the same time, then return north to Shen’dar for Danarii and Aonda.
- 118
Falaath Village: Al’Aketh Stormcaller suppliesZephras Isle~48.8, 53.8
- 119
DoStolen Supplies
Kill Al’Aketh Stormcallers and collect ten Stolen Shen’dar Supplies while clearing Falaath’s ruins for Havoc in the Highlands. Deliver them to Danarii in Shen’dar.
- 119
Zerril SoftbreezeZephras Isle~43.8, 43.8
- 120
DoCamping 101: CookingOptional
Visit Zerril Softbreeze in Zephras Isle. Check the price and learn Cooking through the trainer window. You can skip this lesson and keep questing.
- 121
Hand inCamping 101: CookingOptional
Speak with Zerril Softbreeze and turn in Camping 101: Cooking when the quest is ready.
- 122
DoCamping 101: MiningOptionalMessana Crestwind · ~44.8, 44.4
Build Mining to 20 while following your quests. Finish this lesson with Messana Crestwind when your route brings you nearby. You can leave it pending and keep questing.
- 123
Hand inCamping 101: MiningOptionalMessana Crestwind · ~44.8, 44.4
Speak with Messana Crestwind and turn in Camping 101: Mining when the quest is ready.
- 120
Danarii BellowveilZephras Isle~45.2, 45.2
- 124
Hand inStolen Supplies
- 125
Hand inWANTED: Vulgara the InsatiableOptional
Bring Vulgara’s head to Danarii Bellowveil.
- 126
Hand inHavoc in the HighlandsConstable Aonda · ~45.3, 45.3
- 127
Hand inA Last RequestConstable Aonda · ~45.3, 45.3
- 128
AcceptTo ValanaarLevel 6+Constable Aonda · ~45.3, 45.3
- 129
AcceptDeliver the SignetConstable Aonda · ~45.3, 45.3
- 124
CHAPTER 02 · LEVELS 8–12
Zephras Isle (levels 8–12)
In Valanaar, deliver the signet and Aonda's report in the upper council room, then meet Elaadrin Evengale in the High Order lodge. Aamelia's Windfield Orchard work, Dondallion's Missing Scholar rescue and Fillion's Mission lead to Catching Wind at the Overlook Standing Stones. Tower Defense sends you to Yorana Windyreed at the eastern watchtower, then The Turncoat, Shadowgale Forest and Elegael Thornpaw's camp fill the next outing. Desperate Times and Prepare for Battle lead through the Shrine of Akir to Lorthuna at the Rohashi Spires. What Comes Next then takes you by skycutter to Dalaran and through the Skyborne portal to Bolvar in Stormwind.
- Catching Wind needs six readings from Windstone Formations with the Index Esoteria. Check the counter before returning to Elaadrin.
- Making Our Move needs seven Guardians, seven Spiritcallers and seven Blademasters on the approach to the Shrine of Akir. Finish all three counts before reporting to Hyusaa Quickbreeze.
- Take Journey to Sentinel Hill from Bolvar and keep it for Gryan Stoutmantle in Westfall.
Quest order 211 steps
- 01
GoSuggested level 8
Players are usually around level 8 by this point. If you are lower, finish the accepted work nearby before moving on; the route continues either way.
- 01
Nyalah BrightfireZephras Isle~60.6, 72.6
- 02
AcceptCrab Season
During the Valanaar stop, visit Nyalah Brightfire and accept Crab Season. Keep the task for the lakeshore return from the eastern watchtower.
- 02
Donaal DownbreezeZephras Isle~62.2, 72.6
- 03
GoSet your hearthstone in ValanaarOptional
Speak with Donaal Downbreeze and make Valanaar your home. Valanaar is the return point from Fillion’s cave and Shadowgale Forest.
- 04
AcceptBlood TitheAlvarion Windfield · ~62.0, 73.2
Inside Alvarion’s building in Valanaar, accept Blood Tithe. Hearing his story is an optional objective, so listen now if you want it ticked off. You meet Aamelia at Windfield Orchard after your other errands in Valanaar.
- 03
Valanaar upper council roomZephras Isle~66.1, 76.6
- 05
DoDeliver the Signet
Enter Valanaar’s council tower, climb the inside stairs and follow the outer ramp to Talaanis in the upper council room. Bring the Shadowsong signet to Talaanis in Valanaar’s upper council room during the same visit as Aonda’s report.
- 06
Hand inDeliver the Signet
Enter Valanaar’s council tower, climb the inside stairs and follow the outer ramp to Talaanis in the upper council room. Bring the Shadowsong signet to Talaanis in Valanaar’s upper council room during the same visit as Aonda’s report. Turn in Deliver the Signet to Talaanis Shadowsong.
- 07
DoTo Valanaar
Carry Aonda’s report southeast to Valanaar. Enter the large tower, climb the inside stairs, then use the outer ramp from the landing to reach Valennia in the upper council room.
- 08
Hand inTo Valanaar
Carry Aonda’s report southeast to Valanaar. Enter the large tower, climb the inside stairs, then use the outer ramp from the landing to reach Valennia in the upper council room. Turn in To Valanaar to Valennia Stormfist.
- 09
AcceptThe Supreme Magister
Accept The Supreme Magister from Valennia in the upper council room during the report hand-in visit.
- 10
AcceptBuggedValennia Stormfist · ~66.2, 76.6
- 05
Elaadrin EvengaleZephras Isle~66.4, 79.8
- 11
DoThe Supreme Magister
Leave the council tower by the ramps and stairs. Go to the High Order lodge in southeastern Valanaar and speak with Elaadrin Evengale.
- 12
Hand inThe Supreme Magister
Take the ramps and stairs down from the council tower. Go to the High Order lodge in southeastern Valanaar and turn in The Supreme Magister to Elaadrin Evengale. Accept A Grand Adventure during this visit.
- 13
AcceptThe Missing ScholarDondallion Whisperwind · ~66.2, 79.8
After turning in The Supreme Magister, speak with Dondallion in the same lodge and accept The Missing Scholar before heading west.
- 14
AcceptUnwelcome VisitorsLevel 8+Iaadaria Bitterwind · ~66.2, 79.6
Before leaving the High Order lodge, accept Unwelcome Visitors from Iaadaria. Keep it for the later Shadowgale Forest circuit.
- 11
Aamelia WindfieldZephras Isle~46.6, 81.8
- 15
DoBlood Tithe
From Valanaar, follow the road west to Windfield Orchard and find Aamelia Windfield. She moves between the orchard house area and the northern field; if she is not at the marker, look along the orchard paths. Alvarion’s story in Valanaar is an optional objective and does not hold up the quest.
- 16
Hand inBlood Tithe
Find Aamelia at Windfield Orchard and turn in Blood Tithe. Collect her apple, flutterfly and galestrider tasks before starting the fieldwork.
- 17
AcceptMake Yourself Useful
- 18
AcceptOrnery Ornery Galestriders
- 19
AcceptFlutterfly Dust
- 20
DoMake Yourself UsefulWindfield Orchard apples and bandits · ~47.6, 82.7
Gather ten Ripe Stormapples around Windfield Orchard and defeat five Hungry Bandits. The bandits can hide among the trees; clear a small area before collecting and keep an open path back to Aamelia.
- 15
Malfunctioning Cyclone ConstructZephras Isle~48.6, 78.2
- 21
AcceptWhat Is My Purpose?
Speak with the Malfunctioning Cyclone Construct northeast of the orchard and accept What Is My Purpose? Keep its message for the return to Aamelia.
- 21
Gustberry Lowlands flutterfliesZephras Isle~51.9, 83.4
- 22
DoFlutterfly Dust
Use the supplied Flutterfly Swatter on flutterflies in the Gustberry Lowlands. Pick up the dust they leave until you have five. Keep the swatter for Aamelia; collect the dust while hunting the nearby galestriders.
- 22
Galestriders east of Windfield OrchardZephras Isle~49.4, 81.6
- 23
DoOrnery Ornery Galestriders
Hunt Ornery Galestriders east of the orchard and collect seven Lowlands Galestrider Tenderloins. Collect Flutterfly Dust in the same lowlands before returning to Aamelia.
- 23
Aamelia WindfieldZephras Isle~46.6, 81.8
- 24
Hand inMake Yourself Useful
Return to Aamelia at Windfield Orchard and hand in this completed task with the other orchard work.
- 25
Hand inOrnery Ornery Galestriders
Return to Aamelia at Windfield Orchard and hand in this completed task with the other orchard work.
- 26
DoWhat Is My Purpose?
Speak with Aamelia about the malfunctioning construct during the orchard return. Keep the report while finishing the accepted orchard tasks; return all completed work together.
- 27
Hand inWhat Is My Purpose?
Give Aamelia the construct’s report, then stay with her. She has more work for you around the orchard before you head north-east to the Bloodstained Satchel.
- 28
Hand inFlutterfly Dust
Return to Aamelia at Windfield Orchard and hand in this completed task with the other orchard work.
- 29
AcceptThe Hills Have Eyes
Before leaving the orchard, take The Hills Have Eyes from Aamelia Windfield.
- 24
Bandit HighwaymanZephras Isle~47.6, 74.4
- 30
DoThe Hills Have Eyes
Follow the road north from the orchard and kill Bandit Highwaymen for seven Blood-Stained Bandit Masks. They hold the road between 43,74 and 48,74. Take single pulls, then return to Aamelia.
- 30
Aamelia WindfieldZephras Isle~46.6, 81.8
- 31
Hand inThe Hills Have Eyes
Bring the masks to Aamelia Windfield and turn in The Hills Have Eyes.
- 32
AcceptStanding Our Ground
Stay with Aamelia and accept Standing Our Ground.
- 31
Ferauu the BludgeonZephras Isle~47.6, 78.0
- 33
DoStanding Our Ground
Speak with Aamelia when you are ready, then follow her to the north edge of the orchard. Stand with her against Ferauu the Bludgeon and his bandits until the quest log confirms the stand. If the event stalls, use Do this quest later.
- 34
Hand inStanding Our GroundAamelia Windfield · ~47.5, 78.4
Turn in Standing Our Ground to Aamelia where the fight ended.
- 35
AcceptDeliver the NewsAamelia Windfield · ~47.5, 78.4
Accept Deliver the News from Aamelia. Keep it for Alvarion in Valanaar.
- 33
Bloodstained SatchelZephras Isle~53.3, 72.2
- 36
DoThe Missing Scholar
From Windfield Orchard, head north-east to the road and look for the Bloodstained Satchel near 53.3,72.2. Inspect it and take the next part of The Missing Scholar.
- 37
Hand inThe Missing Scholar
Inspect the Bloodstained Satchel beside the road near 53.3,72.2. Turn in this search and take the rescue follow-up before entering the cave.
- 38
AcceptThe Missing Scholar
At the Bloodstained Satchel, accept the rescue follow-up before going into the cave.
- 36
Cave entrance to FillionZephras Isle~51.4, 69.0
- 39
DoThe Missing Scholar
Enter the cave near 51.4,69.0 and find Fillion inside near 50.6,65.4. Use his conversation to carry him out to the bedroll near 52.0,69.4. Stay until both rescue objectives receive credit.
- 40
Hand inThe Missing ScholarFillion Flamebreeze · ~52.0, 69.4
Speak with Fillion at the bedroll near 52.0,69.4 after carrying him clear. Turn in the rescue and take his offered follow-up before leaving.
- 41
AcceptThe Missing ScholarFillion Flamebreeze · ~52.0, 69.4
Take Fillion's final Missing Scholar quest at the bedroll before returning into the cave.
- 39
Shriekling MatriarchZephras Isle~52.0, 65.8
- 42
DoThe Missing Scholar
Return through the cave entrance near 51.4,69.0. Kill the Shriekling Matriarch inside near 52.0,65.8 and collect her head. Keep it for Dondallion in the High Order lodge in Valanaar.
- 42
Dondallion WhisperwindZephras Isle~66.2, 79.8
- 43
Hand inThe Missing Scholar
Bring the Matriarch’s head to Dondallion in the High Order lodge; if he does not take it, Fillion Flamebreeze beside him does. Fillion waits in the same lodge with Fillion’s Mission.
- 44
AcceptFillion’s MissionFillion Flamebreeze · ~66.2, 79.8
After handing Dondallion the Matriarch’s head, accept Fillion’s Mission from Fillion in the same lodge.
- 45
DoFillion’s MissionElaadrin Evengale · ~66.4, 79.8
Speak with Elaadrin Evengale beside Fillion in the High Order lodge.
- 46
Hand inFillion’s MissionElaadrin Evengale · ~66.4, 79.8
Turn in Fillion’s Mission to Elaadrin, then accept Catching Wind from him.
- 47
AcceptCatching WindElaadrin Evengale · ~66.4, 79.8
Accept Catching Wind from Elaadrin in the High Order lodge after Fillion’s Mission. Keep the Index Esoteria for the standing-stones visit.
- 43
Windstone Formations at Overlook Standing StonesZephras Isle~47.5, 68.6
- 48
DoCatching Wind
Travel to the Overlook Standing Stones in Shen’dar Highlands. Use the supplied Index Esoteria on Windstone Formations around the stones until the quest log records all six elemental-current readings. Watch for hostile Windshapers and keep the Index for Elaadrin.
- 48
Alvarion WindfieldZephras Isle~62.0, 73.2
- 49
DoDeliver the News
Back in Valanaar from the standing stones, find Alvarion Windfield beside the inn and give him Aamelia’s news.
- 50
Hand inDeliver the News
Turn in Deliver the News to Alvarion Windfield.
- 49
Syriel NightrainZephras Isle~57.8, 75.4
- 51
DoCamping 101: HerbalismOptional
Build Herbalism to 20 while following your quests. Finish this lesson with Syriel Nightrain when your route brings you nearby. You can leave it pending and keep questing.
- 52
Hand inCamping 101: HerbalismOptional
Speak with Syriel Nightrain and turn in Camping 101: Herbalism when the quest is ready.
- 51
Enchanted Skyhoppers around ValanaarZephras Isle~63.1, 77.6
- 53
DoBugged
Look for Skyhoppers near people around Valanaar, including the inn and tower, and kill them until eight enchanted ones register in the quest log. Check quest credit as you go and finish before leaving the city for the watchtower.
- 53
Elaadrin EvengaleZephras Isle~66.4, 79.8
- 54
Hand inCatching Wind
Return to Elaadrin in the High Order lodge with the Index Esoteria. Turn in Catching Wind, then collect Avenged Tenfold and In Service of Zephras before leaving.
- 55
AcceptAvenged Tenfold
- 56
AcceptIn Service of Zephras
Accept In Service of Zephras from Elaadrin before leaving the High Order lodge.
- 57
AcceptA Grand Adventure
Accept A Grand Adventure from Elaadrin in the High Order lodge.
- 54
Valanaar upper council roomZephras Isle~66.1, 76.6
- 58
DoIn Service of Zephras
Cross Valanaar to the council tower. Climb the inside stairs, then follow the outer ramp to Valennia in the upper council room.
- 59
Hand inIn Service of Zephras
Enter Valanaar’s council tower, climb the inside stairs and follow the outer ramp to the top. Turn in In Service of Zephras to Valennia, then accept Tower Defense during the same visit.
- 60
Hand inBuggedValennia Stormfist · ~66.2, 76.6
- 61
AcceptTower Defense
Speak with Valennia Stormfist and accept Tower Defense.
- 58
Ealaane NimbuswalkerZephras Isle~65.8, 74.4
- 62
AcceptAid For The Refugees
Speak with Ealaane in the Valanaar refugee camp and accept Aid For The Refugees. Collect her other offered task before leaving for the forest.
- 63
AcceptThe Fate of a Loved One
Before leaving Ealaane, accept The Fate of a Loved One. Look for Resaan during the same Ban’aethal ruins circuit.
- 62
Lotheluum StarbreezeZephras Isle~64.0, 75.0
- 64
AcceptUnnerving Silence
Beside Ealaane, speak with Lotheluum Starbreeze and accept Unnerving Silence. Keep it for the Shadowgale Forest visit.
- 64
Yorana at East Pylon WatchtowerZephras Isle~69.4, 67.3
- 65
DoTower Defense
Go to the eastern watchtower outside Valanaar and report to Yorana Windyreed.
- 66
Hand inTower Defense
Go to the eastern watchtower outside Valanaar and report to Yorana Windyreed. Turn in Tower Defense to Yorana Windyreed.
- 67
AcceptDisrupting Logistics
Speak with Yorana Windyreed and accept Disrupting Logistics.
- 68
AcceptBreaking the Breaker
Speak with Yorana Windyreed and accept Breaking the Breaker.
- 65
Al'Aketh HealerZephras Isle~64.4, 66.2
- 69
DoDisrupting Logistics
Fight down the hill in Gustberry Lowlands. Kill four Al’Aketh Healers and eight Brawlers during the relief effort.
- 70
DoBreaking the BreakerCommander Belguilos · ~65.6, 65.4
Find Commander Belguilos at the villa at the foot of the hill and kill her before returning to the relief force.
- 69
Al'Aketh cultists, Gustberry FieldsZephras Isle~63.3, 63.6
- 71
DoAvenged Tenfold
Kill Al’Aketh Preachers, Pillagers and Brawlers and collect ten Al’Aketh Windstone Charms in the Gustberry Fields north of Valanaar. The Stormchasers further north rarely drop them. Return to Elaadrin before taking the High Order’s report to the council.
- 71
Yorana at East Pylon WatchtowerZephras Isle~69.4, 67.3
- 72
Hand inBreaking the Breaker
Speak with Yorana Windyreed and turn in Breaking the Breaker.
- 73
Hand inDisrupting Logistics
Speak with Yorana Windyreed and turn in Disrupting Logistics.
- 74
AcceptReturn to Valanaar
Speak with Yorana Windyreed and accept Return to Valanaar.
- 72
Valanaar upper council roomZephras Isle~66.1, 76.6
- 75
DoReturn to Valanaar
Carry Yorana’s report back to Valennia in the upper council room.
- 76
Hand inReturn to Valanaar
Carry Yorana’s report back to Valennia in the upper council room. Turn in Return to Valanaar to Valennia Stormfist.
- 77
AcceptThe High Elder's Request
Speak with Valennia Stormfist and accept The High Elder's Request.
- 78
DoThe High Elder's Request
Speak with Talaanis in the same council room about the attacks on the pylons.
- 79
Hand inThe High Elder's Request
Speak with Talaanis in the same council room about the attacks on the pylons. Turn in The High Elder's Request to Talaanis Shadowsong.
- 80
AcceptThe Turncoat
Speak with Talaanis Shadowsong and accept The Turncoat.
- 75
Class quests
Mage4 steps · choose your class above to show only yours- 81
AcceptSpeak with Belann
MageOptionalLevel 10+Anathamaas Aetherwind · ~65.8, 80.4For the optional Windbough Wand, speak with Anathamaas Aetherwind in Valanaar and accept Speak with Belann. It needs level 10; skip the chain if you are not 10 yet.
- 82
DoSpeak with Belann
MageOptionalBelann Windwood · ~62.8, 77.4Speak with Belann Windwood in Valanaar. Turn in Speak with Belann and take Boughs in the Wind before leaving him.
- 83
Hand inSpeak with Belann
MageOptionalBelann Windwood · ~62.8, 77.4 - 84
AcceptBoughs in the Wind
MageOptionalBelann Windwood · ~62.8, 77.4
- 81
Windsong Lake crawlersZephras Isle~64.1, 61.5
- 85
DoCrab Season
Collect six Windsong Crawler Meat from crawlers beside Windsong Lake on the way north toward Shadowgale Forest. Keep the meat for Nyalah on the next Valanaar visit.
- 85
Strange HermitZephras Isle~54.0, 39.0
- 86
AcceptThe Strange Hermit
Find the Strange Hermit in Shadowgale Forest near 54,39. Accept The Strange Hermit and speak with him at the camp. Check nearby enemy levels before continuing north.
- 87
DoThe Strange Hermit
Follow the forest paths to the Strange Hermit near 54.0,39.0. Speak with him and finish his conversation before taking any offered forest tasks.
- 88
Hand inThe Strange Hermit
Finish the conversation with the Strange Hermit. Take his offered forest quests before heading north.
- 89
AcceptThe Forest's Bounty
Take The Forest's Bounty from the Strange Hermit before leaving. The quest log may call its eight Zephyrseeds Shadowgale Acorns.
- 90
AcceptFree the Hollows
Take Free the Hollows from the Strange Hermit before heading north. Complete any accepted forest and refugee work together.
- 86
Wind Hollows in Ban'aethalZephras Isle~58.2, 31.0
- 91
DoFree the Hollows
Go north to Ban'aethal and kill ten Wind Hollows. Search the ruins for any accepted refugee objectives on the same visit before returning to the Strange Hermit.
- 92
DoAid For The RefugeesBan'aethal ruins search area · ~58.2, 31.0
Search the ruins of Ban'aethal for eight Abandoned Belongings. Gather them while clearing any accepted Wind Hollow work and looking for Resaan. Finish the forest supplies before returning to Valanaar.
- 91
Resaan NimbuswalkerZephras Isle~57.0, 29.4
- 93
DoThe Fate of a Loved One
Find Resaan Nimbuswalker's body in northern Ban'aethal near 57.0,29.4 and recover his heirloom. Finish any other accepted ruins work before leaving.
- 93
Shadowgale ShrieklingsZephras Isle~59.9, 38.4
- 94
DoUnwelcome Visitors
During the Shadowgale Forest visit, hunt Shadowgale Shrieklings near 59.9,38.4 and collect eight Shriekling Talons. Check enemy levels and take single pulls. Give the talons to Iaadaria on this forest return to Valanaar. If the fights or drops are poor, choose Do this quest later and continue the route.
- 94
Zephyrseed search area in Shadowgale ForestZephras Isle~57.0, 39.4
- 95
DoThe Forest's Bounty
Gather eight Zephyrseeds from the forest floor. Watch for them during the northern forest trip, then finish any missing seeds before returning to the Strange Hermit.
- 95
Elegael ThornpawZephras Isle~61.6, 39.2
- 96
DoUnnerving Silence
From the shriekling hunt, go east to Elegael Thornpaw at the north-eastern edge of Shadowgale Forest and speak with him.
- 97
Hand inUnnerving Silence
Turn in Unnerving Silence to Elegael Thornpaw.
- 98
AcceptTears of the Lady
Accept Tears of the Lady from Elegael.
- 99
AcceptFeathers for Binding
Accept Feathers for Binding from Elegael.
- 100
AcceptUnwanted and Unworthy
Accept Unwanted and Unworthy from Elegael.
- 96
Vayn MoongazeZephras Isle~63.8, 36.0
- 101
AcceptMercy Falls on Deaf Ears
Vayn Moongaze stands a short way north-east of Elegael. Accept Mercy Falls on Deaf Ears; the ears come from the same camp.
- 101
Shadowgale ShrieklingZephras Isle~58.3, 39.4
- 102
DoFeathers for Binding
Kill Shadowgale Shrieklings around Elegael for 20 Pristine Shriekling Feathers. They are the shrieklings from Unwelcome Visitors.
- 102
Lady's Tear MossZephras Isle~60.8, 38.6
- 103
DoTears of the Lady
While you hunt, pick eight Lady’s Tear Moss from the forest floor west of Elegael.
- 103
Al'Aketh Footsoldiers and StormchasersZephras Isle~63.6, 37.2
- 104
DoUnwanted and Unworthy
Clear the Al’Aketh camp east of Elegael for ten Bloodied Heirlooms from its Footsoldiers and Stormchasers.
- 105
DoMercy Falls on Deaf Ears
Keep fighting in the same camp until you have five Al’Aketh Cultist’s Ears.
- 104
Elegael ThornpawZephras Isle~61.6, 39.2
- 106
Hand inTears of the Lady
Return to Elegael and turn in Tears of the Lady.
- 107
Hand inUnwanted and Unworthy
Turn in Unwanted and Unworthy to Elegael.
- 108
Hand inFeathers for Binding
Turn in Feathers for Binding to Elegael.
- 109
AcceptThe Ties That Bind
Accept The Ties That Bind from Elegael.
- 110
AcceptThe Wounds of Betrayal
Accept The Wounds of Betrayal from Elegael.
- 106
Commander HaalienZephras Isle~65.5, 36.5
- 111
DoThe Ties That Bind
Kill Commander Haalien at the eastern edge of the camp and take his head. He also drops a Ripped Missive.
- 112
AcceptRipped Missive
Read the Ripped Missive Haalien dropped to start the quest.
- 111
Vayn MoongazeZephras Isle~63.8, 36.0
- 113
Hand inMercy Falls on Deaf Ears
Turn in Mercy Falls on Deaf Ears to Vayn Moongaze.
- 113
Jorel WindsingerZephras Isle~64.4, 34.5
- 114
DoThe Wounds of Betrayal
Enter the Nightfang Den just north of Vayn. Heal seven injured druids inside and find Jorel Windsinger.
- 114
Elegael ThornpawZephras Isle~61.6, 39.2
- 115
Hand inThe Wounds of Betrayal
Leave the den and turn in The Wounds of Betrayal to Elegael.
- 116
DoRipped Missive
Give Elegael the Ripped Missive.
- 117
Hand inRipped Missive
Turn in Ripped Missive to Elegael.
- 118
Hand inThe Ties That Bind
Turn in The Ties That Bind to Elegael.
- 119
AcceptThe Fate of the Den
Accept The Fate of the Den from Elegael. Keep the orders for Lotheluum in Valanaar.
- 115
Strange HermitZephras Isle~54.0, 39.0
- 120
Hand inThe Forest's Bounty
- 121
Hand inFree the Hollows
- 120
Fendaal WindstoneZephras Isle~56.8, 61.0
- 122
AcceptAl'Aketh Assassins
On the way back south from Shadowgale Forest, go to the secluded house just inside Shen’dar Highlands. Below it, speak with Fendaal Windstone and accept Al’Aketh Assassins.
- 122
Dead Cultist inside the houseZephras Isle~56.0, 58.7
- 123
DoThe Turncoat
Enter the secluded house above Fendaal and find the Al’Aketh turncoat inside.
- 124
Hand inThe Turncoat
Inside the secluded house, find the Al’Aketh turncoat. Turn in The Turncoat to Dead Cultist.
- 125
AcceptUnfortunate News
Speak with Dead Cultist and accept Unfortunate News.
- 123
Al'Aketh AssassinZephras Isle~56.0, 60.6
- 126
DoAl'Aketh Assassins
Speak with Fendaal below the turncoat’s house, then kill ten Al’Aketh Assassins around the house while investigating The Turncoat. Report back to Fendaal before returning to Valanaar.
- 127
Hand inAl'Aketh AssassinsFendaal Windstone · ~56.8, 61.0
- 126
Wind-Infused BoughZephras Isle~48.4, 68.2
- 128
DoBoughs in the Wind
MageOptionalOn the way to or from Fendaal’s camp, collect the Wind-Infused Bough around 48.4, 68.2, just east of the Overlook Standing Stones. Keep it for Belann Windwood in Valanaar.
- 128
Nyalah BrightfireZephras Isle~60.6, 72.6
- 129
Hand inCrab Season
Bring the six pieces of crawler meat to Nyalah in Valanaar.
- 129
Belann WindwoodZephras Isle~62.8, 77.4
- 130
Hand inBoughs in the Wind
MageOptionalBring the Wind-Infused Bough to Belann Windwood in Valanaar and collect the Windbough Wand.
- 130
Ealaane NimbuswalkerZephras Isle~65.8, 74.4
- 131
Hand inAid For The Refugees
- 132
Hand inThe Fate of a Loved One
- 131
Lotheluum StarbreezeZephras Isle~64.0, 75.0
- 133
DoThe Fate of the Den
Beside Ealaane, give Lotheluum Starbreeze the orders and tell him what happened at the den.
- 134
Hand inThe Fate of the Den
Turn in The Fate of the Den to Lotheluum.
- 133
Valanaar upper council roomZephras Isle~66.1, 76.6
- 135
DoUnfortunate News
Recover the damaged blue crystal beneath the turncoat’s body and bring it to Talaanis in Valanaar.
- 136
Hand inUnfortunate News
Recover the damaged blue crystal beneath the turncoat’s body and bring it to Talaanis in Valanaar. Turn in Unfortunate News to Talaanis Shadowsong.
- 137
AcceptThe Cult's True Plans
Speak with Talaanis Shadowsong and accept The Cult's True Plans.
- 138
DoThe Cult's True Plans
Speak with Talaanis and remain for the council’s conversation about the crystal.
- 139
Hand inThe Cult's True Plans
Speak with Talaanis Shadowsong and turn in The Cult's True Plans.
- 140
AcceptDesperate Times
Speak with Talaanis Shadowsong and accept Desperate Times.
- 135
Iaadaria BitterwindZephras Isle~66.2, 79.6
- 141
Hand inUnwelcome Visitors
During the return from Shadowgale Forest, visit Iaadaria in the High Order lodge and turn in the collected talons before travelling to the eastern watchtower.
- 142
Hand inAvenged TenfoldElaadrin Evengale · ~66.6, 79.8
- 143
DoA Grand AdventureElaadrin Evengale · ~66.4, 79.8
Speak with Elaadrin and stay for his briefing. Wait until the conversation objective is complete.
- 144
Hand inA Grand AdventureElaadrin Evengale · ~66.4, 79.8
Turn in A Grand Adventure to Elaadrin after his briefing. While you are with him, use his Desperate Times dialogue to recruit him. Ayessa at the Windshaper lodge is the other recruit.
- 141
Valanaar upper council roomZephras Isle~66.1, 76.6
- 145
DoDesperate Times
Speak to Valennia in the council room. Recruit Ayessa Dawnsinger at the Windshaper lodge and Elaadrin Evengale in the High Order lodge using their quest dialogue, then return to Valennia. Both recruitment counters must be complete.
- 146
Hand inDesperate Times
Speak with Valennia Stormfist and turn in Desperate Times.
- 147
AcceptPrepare for Battle
Speak with Valennia Stormfist and accept Prepare for Battle.
- 145
Class quests
DruidWarriorHunter17 steps · choose your class above to show only yours- 148
GoLevel 10 for The Great Ursera Spirit
DruidThe Great Ursera Spirit needs level 10. If you are lower, finish the accepted work nearby or gain the remaining XP before taking it; the route continues either way.
- 149
AcceptThe Great Ursera Spirit
DruidLotheluum Starbreeze · ~64.0, 75.0Speak with Lotheluum Starbreeze in Valanaar and accept The Great Ursera Spirit.
- 150
GoLevel 10 for The Skybreaker Bulwark
WarriorThe Skybreaker Bulwark needs level 10. If you are lower, finish the accepted work nearby or gain the remaining XP before taking it; the route continues either way.
- 151
AcceptThe Skybreaker Bulwark
WarriorSeena Skybreaker · ~59.8, 72.8Speak with Seena Skybreaker in Valanaar and accept The Skybreaker Bulwark. Keep this class quest while you follow the island storyline to the Shrine of Akir.
- 152
GoLevel 10 for Taming the Beast
HunterTaming the Beast needs level 10. If you are lower, finish the accepted work nearby or gain the remaining XP before taking it; the route continues either way.
- 153
AcceptTaming the Beast
HunterQuel'ana Quickgale · ~59.6, 72.6 - 154
DoTaming the Beast
HunterWindsong Crawlers by the water west of Valanaar · ~52.8, 75.2Windsong Crawlers live by the water. The nearest are west of Valanaar, around 53, 75. Use the Taming Rod on one and let the cast finish without attacking. Return to Quel’ana when the quest log confirms the taming objective.
- 155
Hand inTaming the Beast
HunterQuel'ana Quickgale · ~59.6, 72.6Return to Quel'ana Quickgale on the west side of Valanaar and turn in this taming lesson. Collect the next lesson before leaving.
- 156
AcceptTaming the Beast
HunterQuel'ana Quickgale · ~59.6, 72.6 - 157
DoTaming the Beast
HunterOrnery Galestrider · ~60.0, 73.2Use the new Taming Rod on an Ornery Galestrider in the nearby Gustberry Lowlands, around 60.0, 73.2. After the quest log confirms the tame, return to Quel’ana.
- 158
Hand inTaming the Beast
HunterQuel'ana Quickgale · ~59.6, 72.6Return to Quel'ana Quickgale on the west side of Valanaar and turn in this taming lesson. Collect the next lesson before leaving.
- 159
AcceptTaming the Beast
HunterQuel'ana Quickgale · ~59.6, 72.6 - 160
DoTaming the Beast
HunterVuldren Alpha · ~59.6, 73.0Use the final Taming Rod on a Vuldren Alpha just outside Valanaar, around 59.6, 73.0. After receiving credit, return to Quel’ana to learn Tame Beast.
- 161
Hand inTaming the Beast
HunterQuel'ana Quickgale · ~59.6, 72.6Return to Quel'ana Quickgale on the west side of Valanaar and turn in this taming lesson. Collect the next lesson before leaving.
- 162
AcceptTraining the Beast
HunterQuel'ana Quickgale · ~59.6, 72.6 - 163
DoTraining the Beast
HunterQuel'dora Quickgale · ~59.6, 72.5Meet Quel'dora Quickgale beside the hunter trainer in Valanaar to finish the pet-training lesson.
- 164
Hand inTraining the Beast
HunterQuel'dora Quickgale · ~59.6, 72.5Speak with Quel'dora beside the hunter trainer and turn in Training the Beast. Check the spellbook and pet abilities before returning to the island route.
- 148
Valennia StormfistZephras Isle~61.2, 71.0
- 165
DoPrepare for Battle
Make any needed purchases in Valanaar, then meet Valennia on the eastern road leading north from town.
- 166
Hand inPrepare for Battle
Make any needed purchases in Valanaar, then meet Valennia on the eastern road leading north from town. Turn in Prepare for Battle to Valennia Stormfist.
- 167
AcceptMaking Our Move
- 165
Class quests
Druid5 steps · choose your class above to show only yours- 168
DoThe Great Ursera Spirit
DruidUrs’endris near the northeast waterfall · ~69.8, 61.5From Valennia on the eastern road, head north-east to Urs’endris beside the waterfall below the Shrine of Akir, near 69.8,61.5.
- 169
Hand inThe Great Ursera Spirit
DruidUrs’endris near the northeast waterfall · ~69.8, 61.5Find Urs’endris beside the waterfall northeast of Valanaar, below the Shrine of Akir. Turn in The Great Ursera Spirit and accept Strength and Mercy before leaving.
- 170
AcceptStrength and Mercy
DruidUrs’endris near the northeast waterfall · ~69.8, 61.5Speak with Urs'endris and accept Strength and Mercy.
- 171
DoStrength and Mercy
DruidUr'endra · ~54.0, 65.4From Urs’endris, go west across the Gustberry Lowlands to Ur’endra near 54.0,65.4 and kill her, then return east to Urs’endris at the waterfall.
- 172
Hand inStrength and Mercy
DruidUrs’endris near the northeast waterfall · ~69.8, 61.5Return to Urs’endris at the waterfall and turn in Strength and Mercy. Check your spellbook for Bear Form, then continue north to the Shrine of Akir for Making Our Move.
- 168
Al’Aketh camps below the Shrine of AkirZephras Isle~61.6, 50.5
- 173
DoMaking Our Move
Fight toward the Shrine of Akir, killing seven Guardians, seven Spiritcallers and seven Blademasters. Report to Hyusaa Quickbreeze near the shrine steps.
- 173
Zaal StormshieldZephras Isle~56.6, 50.3
- 174
DoThe Skybreaker Bulwark
WarriorDuring the Shrine of Akir outing, find Zaal Stormshield around 56.6,50.3, west of the main shrine objective area. Clear nearby enemies one at a time, defeat Zaal and collect the Skybreaker Bulwark. Then continue Making Our Move and the shrine storyline. Keep the shield for Seena when the route returns to Valanaar.
- 174
Hyusaa QuickbreezeZephras Isle~63.8, 50.4
- 175
Hand inMaking Our Move
- 176
AcceptThe Inner Sanctum
- 177
DoThe Inner SanctumValennia Stormfist · ~65.2, 50.4
Enter the shrine’s inner sanctum and find Valennia. Use the entrance and clear the approach with the allied force.
- 178
Hand inThe Inner SanctumValennia Stormfist · ~65.2, 50.4
Enter the shrine’s inner sanctum and find Valennia. Use the entrance and clear the approach with the allied force. Turn in The Inner Sanctum to Valennia Stormfist.
- 179
AcceptConfront LorthunaValennia Stormfist · ~65.2, 50.4
Speak with the wounded Valennia inside the Sanctum of Storms and accept Confront Lorthuna.
- 180
DoConfront LorthunaSanctum of Storms — portal approach · ~65.2, 50.4
Use the portal inside the sanctum to reach the Rohashi Spires. Join Elaadrin and Ayessa in the confrontation with Lorthuna; remain for the encounter until the objective is complete.
- 175
Elaadrin EvengaleZephras Isle~66.4, 79.8
- 181
Hand inConfront Lorthuna
After the confrontation, return to Elaadrin at the High Order lodge in Valanaar. Turn in Confront Lorthuna and take The Fate of Zephras before leaving.
- 182
AcceptThe Fate of Zephras
Accept The Fate of Zephras from Elaadrin during the same High Order lodge visit.
- 181
Valanaar upper council roomZephras Isle~66.1, 76.6
- 183
DoThe Fate of Zephras
Return to the large council tower in Valanaar. Climb the inside stairs, then follow the outer ramp to the upper room. Speak with Talaanis about the danger to Zephras.
- 184
Hand inThe Fate of Zephras
Find Talaanis in Valanaar’s upper council room. Speak with her about the danger to Zephras and turn in The Fate of Zephras; accept What Comes Next before leaving.
- 185
AcceptWhat Comes Next
Accept What Comes Next from Talaanis before leaving the upper council room.
- 183
Seena SkybreakerZephras Isle~59.8, 72.8
- 186
Hand inThe Skybreaker Bulwark
WarriorReturn the Skybreaker Bulwark to Seena Skybreaker in Valanaar and check Defensive Stance in your spellbook. Continue your Alliance departure quest. If you already know the stance, the later Stormwind lesson is an optional recovery path; do not mark any uncompleted quest rewarded.
- 186
Elaadrin EvengaleZephras Isle~66.4, 79.8
- 187
DoWhat Comes Next
Return to Elaadrin in the High Order lodge in Valanaar to prepare for departure.
- 188
Hand inWhat Comes Next
Leave the council tower and return to Elaadrin in the High Order lodge in Valanaar. Turn in What Comes Next and take The Magical City of Dalaran before going to the dock.
- 189
AcceptThe Magical City of Dalaran
Accept The Magical City of Dalaran from Elaadrin in the High Order lodge before boarding the ship.
- 187
Denaaris StargaleAlterac Mountains~12.4, 56.2
- 190
DoThe Magical City of Dalaran
Go to the dock just outside the High Order lodge. Board the skycutter bound for Dalaran and remain aboard until it arrives. Find Denaaris Stargale in the Sky Enclave.
Travel directions to Alterac Mountains
- 191
Hand inThe Magical City of Dalaran
If still on Zephras Isle, go to the dock outside the High Order lodge and board the skycutter bound for Dalaran. Stay aboard until it arrives before disembarking. In Dalaran’s Sky Enclave, speak with Denaaris Stargale and turn in The Magical City of Dalaran. Take Welcome to Azeroth before using the Stormwind portal.
- 192
AcceptWelcome to Azeroth
Accept Welcome to Azeroth from Denaaris beside the Skyborne Portal to Stormwind in Dalaran’s Sky Enclave.
- 190
Archmage Ansirem RuneweaverAlterac Mountains~14.0, 59.6
- 193
AcceptChild of Nature
DruidBefore using the portal, accept Child of Nature from Archmage Ansirem Runeweaver, a short walk from Denaaris in Dalaran. It sends you to Sheldras Moontree, the Druid trainer in Stormwind who also offers Moonglade.
- 193
Highlord Bolvar FordragonStormwind City~80.2, 38.4
- 194
DoWelcome to Azeroth
Use the Skyborne Portal to Stormwind beside Denaaris. In Stormwind, follow the streets to the Keep and speak with Highlord Bolvar Fordragon.
- 195
Hand inWelcome to Azeroth
Speak with Highlord Bolvar Fordragon in Stormwind Keep and turn in Welcome to Azeroth.
- 196
AcceptJourney to Sentinel Hill
Accept Journey to Sentinel Hill from Highlord Bolvar Fordragon before leaving this visit. Carry the message to the next planned hub.
- 194
Class quests
WarriorDruid15 steps · choose your class above to show only yours- 197
AcceptA Warrior's Training
WarriorOptionalIlsa Corbin · ~80.5, 59.7If you missed the island Defensive Stance lesson, accept A Warrior’s Training from Ilsa Corbin in the Old Town barracks during this Stormwind visit. Skip this optional recovery if you already have the stance.
- 198
DoA Warrior's Training
WarriorOptionalHarry Burlguard · ~76.9, 53.2On your first Stormwind visit, speak with Ilsa Corbin in the Old Town barracks. Take the defensive lesson and meet Harry Burlguard in the nearby Pig and Whistle tavern.
- 199
Hand inA Warrior's Training
WarriorOptionalHarry Burlguard · ~76.9, 53.2 - 200
AcceptBartleby the Drunk
WarriorOptionalHarry Burlguard · ~76.9, 53.2 - 201
DoBartleby the Drunk
WarriorOptionalBartleby · ~76.8, 52.8Speak with Bartleby at the other end of the Pig and Whistle bar. Take his challenge before leaving.
- 202
Hand inBartleby the Drunk
WarriorOptionalBartleby · ~76.8, 52.8 - 203
AcceptBeat Bartleby
WarriorOptionalBartleby · ~76.8, 52.8 - 204
DoBeat Bartleby
WarriorOptionalBartleby · ~76.8, 52.8Challenge Bartleby inside the tavern. Fight until he yields, then speak with him again; do not leave after the fight without taking the mug handoff.
- 205
Hand inBeat Bartleby
WarriorOptionalBartleby · ~76.8, 52.8 - 206
AcceptBartleby's Mug
WarriorOptionalBartleby · ~76.8, 52.8 - 207
DoBartleby's Mug
WarriorOptionalHarry Burlguard · ~76.9, 53.2Give Bartleby’s Mug to Harry Burlguard in the same tavern. Check that Defensive Stance is available before rejoining the mainland route.
- 208
Hand inBartleby's Mug
WarriorOptionalHarry Burlguard · ~76.9, 53.2 - 209
DoChild of Nature
DruidSheldras Moontree · ~35.9, 67.3After reporting to Bolvar, find Sheldras Moontree beside the pool in Stormwind’s Park.
- 210
Hand inChild of Nature
DruidSheldras Moontree · ~35.9, 67.3Find Sheldras Moontree beside the pool in Stormwind’s Park. Speak with Sheldras Moontree and turn in Child of Nature.
- 211
AcceptMoonglade
DruidSheldras Moontree · ~35.9, 67.3Find Sheldras Moontree beside the pool in Stormwind’s Park and accept Moonglade. Keep it; the route delivers it during the level-16 Druid trip from Darnassus.
- 197
CHAPTER 03 · LEVELS 12–14
Loch Modan and Westfall (levels 12–14)
From Stormwind, the Deeprun Tram and the Dun Morogh road lead to an optional Loch Modan circuit through Thelsamar, the Valley of Kings, Silver Stream Mine, Farstrider Lodge and Ironband's Excavation. Report to Ironforge and an optional Hall of Thanes group trip come on the way back. Skip those optional steps to go straight to Westfall, where the Furlbrows and Saldeans start the farm work and Gryan Stoutmantle takes Bolvar's referral at Sentinel Hill. Two People's Militia outings then cover the northern Defias farms, Gold Coast Quarry and the coast before you hand in Westfall Stew.
- Keep the Ceramic Jar for Snowbound empty through the Valley of Kings work. Fill it at the snow beside the South Gate tunnel and carry it to Norric Lochthane.
- Alba Fairmoon's Testing the Wells uses the sample kit at the Jansen Stead and Molsen Farm wells. Her Murloc Gills needs seven Longshore Murloc Gills from the coast outing.
- Keep Gryan's The Defias Brotherhood if you take it. It goes to Wiley the Black in Lakeshire later in the route.
Quest order 122 steps
- 01
AcceptDeeprun Rat RoundupOptional
Optional: cross Stormwind to the Dwarven District, enter the Deeprun Tram and ride to Ironforge. Find Monty on the Ironforge platform and accept Deeprun Rat Roundup. To go straight to Westfall instead, skip this and the other optional Ironforge-side steps.
- 01
- 02
DoDeeprun Rat RoundupOptional
Stay on the Ironforge side of the depot. Target an unclaimed Deeprun Rat, move close and use the supplied Rat Catcher’s Flute. Capture five rats and lead them back to Monty. Use the native counter; do not kill them. If captures remain unavailable after one platform check, defer the chain and continue the route.
- 02
- 03
Hand inDeeprun Rat RoundupOptional
Bring the five captured rats to Monty and claim Deeprun Rat Roundup’s reward. If you want the optional delivery, collect Me Brother, Nipsy now and keep it for the next planned Stormwind visit.
- 03
Gryth Thurden at IronforgeIronforge~55.9, 47.9
- 04
GoLearn the Ironforge flight pathOptional
Before riding the tram back, you can leave the depot through Tinker Town to Gryth Thurden at the Great Forge gryphon roost and learn the Ironforge flight path. It is optional; skip it if you already know it or would rather keep moving.
- 04
Vidra HearthstoveLoch Modan~34.8, 49.3
- 05
AcceptThelsamar Blood SausagesOptional
From the Ironforge tram depot, leave the city by its main gate, follow the road east through Dun Morogh, and use North Gate Pass into Loch Modan. Follow the road to Thelsamar. Accept Thelsamar Blood Sausages from Vidra Hearthstove before collecting the other town quests.
- 05
Mountaineer KadrellLoch Modan~34.2, 47.8
- 06
AcceptRat CatchingOptional
- 07
AcceptMountaineer Stormpike's TaskOptional
- 06
Grenhild DarktalonLoch Modan~36.4, 48.2
- 08
AcceptSnowboundOptional
Accept Snowbound from Grenhild Darktalon in Thelsamar. Keep the Ceramic Jar empty through the Valley of Kings work. Fill it at South Gate only when ready to take the northern road to Norric.
- 08
Thorgrum Borrelson at ThelsamarLoch Modan~33.9, 50.8
- 09
GoLearn the Thelsamar flight pathOptional
Speak with Thorgrum Borrelson while you are in Thelsamar. Learn this flight path if needed, then continue the nearby quests.
- 09
Mountaineer CobbleflintLoch Modan~22.1, 73.1
- 10
AcceptIn Defense of the King's LandsOptional
With the Thelsamar quests collected and the Ceramic Jar still empty, follow the road south to the Valley of Kings. Accept In Defense of the King’s Lands from Mountaineer Cobbleflint before starting the trogg hunt.
- 11
AcceptThe Trogg ThreatOptionalCaptain Rugelfuss · ~23.2, 73.7
Enter the Valley of Kings guard tower and climb the stairs to Captain Rugelfuss on the third floor. Speak with Captain Rugelfuss and accept The Trogg Threat.
- 10
Stonesplinter TroggLoch Modan~29.6, 72.5
- 12
DoIn Defense of the King's LandsOptional
From the southern guard tower, kill ten Stonesplinter Troggs and ten Scouts around the valley entrance.
- 13
DoThe Trogg ThreatOptionalStonesplinter Scout · ~29.6, 72.9
Kill troggs in the Stonesplinter camps and collect eight Trogg Stone Teeth.
- 12
Mountaineer CobbleflintLoch Modan~22.1, 73.1
- 14
Hand inIn Defense of the King's LandsOptional
- 14
Mountaineer GravelgawLoch Modan~23.5, 76.4
- 15
AcceptIn Defense of the King's LandsOptional
- 15
Stonesplinter SkullthumperLoch Modan~28.0, 81.2
- 16
DoIn Defense of the King's LandsOptional
Kill ten Skullthumpers and ten Seers in the Stonesplinter camps. Check both counts before returning to the tower.
- 16
Mountaineer GravelgawLoch Modan~23.5, 76.4
- 17
Hand inIn Defense of the King's LandsOptional
- 17
Mountaineer WallbangLoch Modan~23.5, 74.5
- 18
AcceptIn Defense of the King's LandsOptional
- 18
Stonesplinter ShamanLoch Modan~37.5, 86.2
- 19
DoIn Defense of the King's LandsOptional
Kill ten Stonesplinter Shaman and ten Bonesnappers in the southern camps before leaving for the eastern shore. Pull carefully around casters and return to Mountaineer Wallbang with both counts complete.
- 19
Mountaineer WallbangLoch Modan~23.5, 74.5
- 20
Hand inIn Defense of the King's LandsOptional
- 21
Hand inThe Trogg ThreatOptionalCaptain Rugelfuss · ~23.2, 73.7
Enter the Valley of Kings guard tower and climb the stairs to Captain Rugelfuss on the third floor. Speak with Captain Rugelfuss and turn in The Trogg Threat.
- 20
Snow beside the South Gate tunnelLoch Modan~19.9, 62.6
- 22
DoSnowboundOptional
Use the Ceramic Jar on the snow beside the South Gate tunnel, on the Loch Modan side, then carry the Jar of Snow straight to Norric Lochthane outside his house on the northwest shore.
- 22
Mountaineer StormpikeLoch Modan~24.8, 18.4
- 23
DoMountaineer Stormpike's TaskOptional
Follow the road north from Thelsamar to Mountaineer Stormpike at the northern guard tower.
- 24
Hand inMountaineer Stormpike's TaskOptional
- 25
AcceptStormpike's OrderOptional
- 26
AcceptFilthy PawsOptional
- 23
Norric LochthaneLoch Modan~41.8, 19.0
- 27
Hand inSnowboundOptional
Hand the Jar of Snow to Norric Lochthane outside his house on the northwest shore, then head west to Silver Stream Mine.
- 27
Miners' League CratesLoch Modan~35.5, 19.9
- 28
DoFilthy PawsOptional
Enter Silver Stream Mine and recover four loads of Miners' Gear. Look for the supply containers while clearing your route through the mine.
- 28
Mountaineer StormpikeLoch Modan~24.8, 18.4
- 29
Hand inFilthy PawsOptional
- 29
Tunnel Rat kobolds beside the road south of the northern guard towerLoch Modan~25.0, 30.5
- 30
DoRat CatchingOptional
Kill Tunnel Rat kobolds for twelve Tunnel Rat Ears. They drop in and around Silver Stream Mine, so you may already have most of them. Finish the count at the kobold camps beside the road south from the northern guard tower to Thelsamar.
- 30
Bears, boars and spiders in the woods north of ThelsamarLoch Modan~35.5, 33.0
- 31
DoThelsamar Blood SausagesOptional
Collect three Bear Meat, three Boar Intestines and three Spider Ichor in the woodland around Thelsamar.
- 31
Mountaineer KadrellLoch Modan~34.2, 47.8
- 32
Hand inRat CatchingOptional
- 32
Vidra HearthstoveLoch Modan~34.8, 49.3
- 33
Hand inThelsamar Blood SausagesOptional
- 33
Jern HornhelmLoch Modan~37.2, 47.4
- 34
AcceptIronband's ExcavationOptionalLevel 13+
- 34
Bingles BlastenheimerLoch Modan~63.6, 47.9
- 35
AcceptBingles' Missing SuppliesOptional
- 35
Marek IronheartLoch Modan~81.8, 61.7
- 36
AcceptCrocolisk HuntingOptional
At Farstrider Lodge, enter the building and find Marek Ironheart in the right-hand hall. Speak with Marek Ironheart and accept Crocolisk Hunting.
- 37
AcceptTwisting the KnifeOptional
While at Farstrider Lodge for Crocolisk Hunting, ask Marek Ironheart for Twisting the Knife if you want the extra named-crocolisk hunt.
- 36
Daryl the YounglingLoch Modan~83.5, 65.5
- 38
AcceptA Hunter's BoastOptional
Inside Farstrider Lodge, find Daryl the Youngling in the left-hand hall. Speak with Daryl the Youngling and accept A Hunter's Boast.
- 38
Mountain BuzzardLoch Modan~79.3, 66.9
- 39
DoA Hunter's BoastOptional
Once ready for a timed hunt, kill six Mountain Buzzards near Farstrider Lodge and return to Daryl within fifteen minutes. Do not start another outing during the timer.
- 39
Daryl the YounglingLoch Modan~83.5, 65.5
- 40
Hand inA Hunter's BoastOptional
- 40
Toolbucket with Bingles’ WrenchLoch Modan~48.7, 30.1
- 41
DoBingles' Missing SuppliesOptional
Search the northern islands and shoreline for Bingles’ Wrench, Screwdriver, Hammer and Blastencapper. Collect all four while finishing accepted crocolisk work. Pull the island troggs carefully, keep a retreat clear and avoid the Large Loch Crocolisk. Return to Bingles before the excavation trip.
- 41
Discarded Fishing ToolboxLoch Modan~45.8, 43.3
- 42
AcceptSilver of the WavesOptional
Optional dive after gathering Bingles’ supplies: check the debris underwater near 45.8,43.3 for the Discarded Fishing Toolbox and accept Silver of the Waves. Watch your breath and nearby level 19–20 threshadons. If the toolbox is absent, the offer is unavailable or the approach is unsafe, choose Do this quest later and continue Crocolisk Hunting. Do not search the whole lake. Keep the hair clip for the western-shore return.
- 42
Loch CrocoliskLoch Modan~62.4, 51.5
- 43
DoCrocolisk HuntingOptional
Collect five Crocolisk Meat and six Crocolisk Skins from ordinary Loch Crocolisks along the shore. Avoid the Large Loch Crocolisk. Finish the collection during the Bingles outing and turn it in at Farstrider Lodge before the excavation.
- 44
DoTwisting the KnifeOptionalDaggerfang · ~62.8, 51.4
During the Bingles and crocolisk shore outing, check the eastern lakeshore around 62.8, 51.4 for Daggerfang. If you find him and can manage the fight, defeat him and loot Marek’s Croc-Hunting Knife. Make one pass while doing the other shore work. If he is absent or the fight is too difficult, choose Do this quest later and continue to the planned returns.
- 43
Bingles BlastenheimerLoch Modan~63.6, 47.9
- 45
Hand inBingles' Missing SuppliesOptional
- 45
Marek IronheartLoch Modan~81.8, 61.7
- 46
Hand inCrocolisk HuntingOptional
- 47
Hand inTwisting the KnifeOptional
On the lodge return, give Marek his Croc-Hunting Knife in the right-hand hall. If you have not found it, leave the optional quest pending and continue the route.
- 46
Daryl the YounglingLoch Modan~83.5, 65.5
- 48
AcceptA Hunter's ChallengeOptional
- 48
Elder Mountain BoarLoch Modan~75.7, 46.6
- 49
DoA Hunter's ChallengeOptional
Go north-west from the lodge to the Elder Mountain Boars (level 16–17) on the slopes around 75–77, 42–51. Kill five and return to Daryl within twelve minutes. If those boars are taken, the main herd grazes further west around 61–70, 34–42.
- 49
Daryl the YounglingLoch Modan~83.5, 65.5
- 50
Hand inA Hunter's ChallengeOptional
- 50
Magmar FellhewLoch Modan~64.9, 66.7
- 51
DoIronband's ExcavationOptional
Visit Explorer Fellhew at Ironband’s Excavation in southeastern Loch Modan. Stay with the dwarves at the camp and keep out of the dig; its troggs can be several levels higher and wait for the later return.
- 52
Hand inIronband's ExcavationOptional
- 53
AcceptExcavation Progress ReportOptionalProspector Ironband · ~65.9, 65.6
- 51
Jern HornhelmLoch Modan~37.2, 47.4
- 54
DoExcavation Progress ReportOptional
Carry Ironband's Progress Report back to Jern Hornhelm in Thelsamar.
- 55
Hand inExcavation Progress ReportOptional
- 56
AcceptReport to IronforgeOptional
- 54
Khara DeepwaterLoch Modan~39.5, 39.2
- 57
DoSilver of the WavesOptional
Keep the Monogrammed Silver Hair Clip while finishing the Loch outing. After collecting Report to Ironforge in Thelsamar, take it to Khara Deepwater at the fishing hut by the western shore, around 39.5,39.2. The clip comes from accepting the toolbox quest. Do not search for another one.
- 58
Hand inSilver of the WavesOptional
At the fishing hut near 39.5,39.2, give the Monogrammed Silver Hair Clip to Khara Deepwater. Then return to the planned Loch work or departure.
- 57
Prospector StormpikeIronforge~74.6, 11.7
- 59
DoReport to IronforgeOptional
Keep Ironband’s Progress Report while finishing the remaining Loch outing. Before taking the Deeprun Tram, enter the Hall of Explorers’ library in Ironforge and deliver it to Prospector Stormpike.
- 60
Hand inReport to IronforgeOptional
Enter the Hall of Explorers’ library in Ironforge to find Prospector Stormpike. Speak with Prospector Stormpike and turn in Report to Ironforge.
- 59
Furen LongbeardStormwind City~64.6, 37.2
- 61
DoStormpike's OrderOptional
Ride the Deeprun Tram back to Stormwind. The tram leaves you in the Dwarven District, a few yards from Furen Longbeard: bring him Stormpike’s request.
- 62
Hand inStormpike's OrderOptional
- 61
Dungar Longdrink at StormwindStormwind City~71.6, 72.3
- 63
GoLearn the Stormwind flight pathOptional
On your way out of Stormwind, speak with Dungar Longdrink by the Trade District gate and learn the Stormwind flight path. You can then fly between Stormwind, Sentinel Hill and later Lakeshire.
- 63
- 64
GoSuggested level 12
Players are usually around level 12 by this point. If you are lower, finish the accepted work nearby before moving on; the route continues either way.
- 64
Farmer FurlbrowWestfall~60.0, 19.4
- 65
AcceptThe Forgotten Heirloom
If you are still in Ironforge, ride the Deeprun Tram back to Stormwind first. Leave Stormwind by the main gate and follow the road south through Elwynn Forest past Goldshire, then west past Westbrook Garrison into Westfall. Check Farmer Furlbrow at the broken wagon beside the road for The Forgotten Heirloom.
- 66
AcceptWestfall StewVerna Furlbrow · ~59.9, 19.4
Check Verna Furlbrow by the broken wagon on entering Westfall for Westfall Stew.
- 67
AcceptPoor Old BlanchyVerna Furlbrow · ~59.9, 19.4
Check Verna Furlbrow for Poor Old Blanchy before leaving the wagon.
- 65
Farmer SaldeanWestfall~56.0, 31.2
- 68
AcceptThe Killing Fields
Accept The Killing Fields from Farmer Saldean at his farm. Ozwin Ironsprocket in the barn just west offers an optional quest for parts from the same Harvest Watchers.
- 68
Ozwin IronsprocketWestfall~51.6, 32.2
- 69
AcceptHarvesting the HarvestersOptional
Optional: in the barn just west of Saldean’s farm, speak with Ozwin Ironsprocket and accept Harvesting the Harvesters. Its parts drop from the Harvest Watchers you kill for The Killing Fields, but slowly.
- 69
Salma SaldeanWestfall~56.4, 30.5
- 70
DoWestfall Stew
Carry her recipe to Salma Saldean at the farm beyond the fork in the road.
- 71
Hand inWestfall Stew
Give the recipe to Salma Saldean.
- 72
AcceptWestfall Stew
Check Salma for the ingredient quest Westfall Stew after delivering Verna’s recipe.
- 73
AcceptGoretusk Liver Pie
Accept Goretusk Liver Pie from Salma Saldean.
- 70
Gryan StoutmantleWestfall~56.3, 47.5
- 74
AcceptThe People's Militia
Accept The People’s Militia from Gryan Stoutmantle at Sentinel Hill.
- 75
DoJourney to Sentinel Hill
Report to Gryan Stoutmantle when the route reaches Sentinel Hill. Keep this alongside Report to Gryan Stoutmantle; both finish at the same tower.
- 76
Hand inJourney to Sentinel Hill
- 77
AcceptPatrolling WestfallCaptain Danuvin · ~56.4, 47.6
Check Captain Danuvin at Sentinel Hill for Patrolling Westfall.
- 74
Scout GaliaanWestfall~54.0, 53.0
- 78
AcceptRed Leather Bandanas
Check Scout Galiaan at Sentinel Hill for Red Leather Bandanas.
- 78
Alba FairmoonWestfall~52.4, 53.0
- 79
AcceptTesting the Wells
- 80
AcceptMurloc Gills
Alba Fairmoon offers Murloc Gills beside Testing the Wells. Accept both.
- 79
Thor at Sentinel HillWestfall~56.5, 52.5
- 81
GoLearn the Sentinel Hill flight pathOptional
Speak with Thor while you are in Sentinel Hill. Learn this flight path if needed, then continue the nearby quests.
- 81
Furlbrow fieldsWestfall~52.0, 31.0
- 82
DoPoor Old Blanchy
Collect eight Handfuls of Oats around the farms. Gather them while clearing the northern Defias; keep clear of dangerous harvest machines.
- 82
Furlbrow farmhouseWestfall~49.0, 19.0
- 83
DoThe Forgotten Heirloom
Go west to the pumpkin farm. Search the wardrobe inside Furlbrow’s farmhouse for his pocket watch; clear the doorway before entering.
- 83
Riverpaw GnollWestfall~52.1, 14.6
- 84
DoPatrolling Westfall
From Furlbrow’s farmhouse, go north into the hills and kill Riverpaw Gnolls and Scouts for eight Gnoll Paws. Their camps are around 45,14 and 52,14, and at 56.5,13 just north of Jansen Stead, so finish on the way east to the Jansen Stead well. Keep the paws for Captain Danuvin at Sentinel Hill.
- 84
North coast murlocsWestfall~54.5, 9.5
- 85
DoMurloc Gills
From the gnoll camps, go north to the beach at 53–56,8–11 and kill Murloc Raiders and Coastrunners for seven Longshore Murloc Gills. Take three Murloc Eyes for Westfall Stew while you are there, then head south to the Jansen Stead well.
- 85
Farmer FurlbrowWestfall~60.0, 19.4
- 86
Hand inThe Forgotten Heirloom
Return the watch to Farmer Furlbrow by the broken wagon.
- 87
Hand inPoor Old BlanchyVerna Furlbrow · ~59.9, 19.4
Return the oats to Verna at the wagon.
- 86
Harvest WatcherWestfall~54.2, 30.8
- 88
DoHarvesting the HarvestersOptional
Collect fourteen Golem Isosprings and five Harvester Gyrostabilizers from Harvest Watchers while you work on The Killing Fields. If they have not all dropped by then, keep the quest for later and continue the route.
- 88
Saldean fieldsWestfall~56.0, 32.0
- 89
DoThe Killing Fields
Kill twenty Harvest Watchers in Saldean’s and neighbouring fields. Clear toward the northern farm work instead of pulling deep into a crowded field.
- 90
Hand inThe Killing FieldsFarmer Saldean · ~56.0, 31.2
Return to Farmer Saldean.
- 89
Ozwin IronsprocketWestfall~51.6, 32.2
- 91
Hand inHarvesting the HarvestersOptional
- 91
Goretusks south of Saldean’s farmWestfall~55.5, 42.8
- 92
DoGoretusk Liver Pie
Kill goretusks for eight Goretusk Livers. Young Goretusks roam the northern farms, and the nearest big group grazes in the fields south of Saldean’s farm, towards Sentinel Hill.
- 92
Salma SaldeanWestfall~56.4, 30.5
- 93
Hand inGoretusk Liver Pie
Return the livers to Salma Saldean.
- 93
- 94
AcceptHarvesting the HarvestersOptional
If Precessive Autocognition Assembly is already in your bags, read it to start this optional delivery. Continue the route if it has not dropped.
- 94
Ozwin IronsprocketWestfall~51.6, 32.2
- 95
DoHarvesting the HarvestersOptional
Keep any Precessive Autocognition Assembly found during the harvest-golem work. Bring it to Ozwin with the other harvester parts on the Saldean Farm return; do not keep farming for this optional drop.
- 96
Hand inHarvesting the HarvestersOptional
- 95
Northern Defias farmsWestfall~48.0, 35.0
- 97
DoThe People's Militia
Kill fifteen Defias Trappers and fifteen Defias Smugglers around Jangolode Mine, Molsen Farm and Furlbrow’s pumpkin farm. Combine this with the watch and oat collection.
- 97
Defias Trappers and Smugglers, northern farmsWestfall~46.3, 38.3
- 98
DoRed Leather Bandanas
Red Leather Bandanas drop from the same Defias Trappers and Smugglers the militia asks for, around the northern farms. Collect fifteen while you finish that count, then take them to Scout Galiaan at Sentinel Hill.
- 99
DoTesting the WellsMolsen Farm well · ~46.2, 38.3
Use the Well Water Sample Kit at Molsen Farm’s well (46.2, 38.3). The Jansen Stead sample (56.7, 18.7) is taken on the northern farm trip; if it is missing, go back for it before returning to Alba at Sentinel Hill.
- 98
Gryan StoutmantleWestfall~56.3, 47.5
- 100
Hand inThe People's Militia
Report back to Gryan at Sentinel Hill.
- 101
AcceptThe People's Militia
Accept the next The People’s Militia from Gryan after the northern Defias report.
- 102
Hand inPatrolling WestfallCaptain Danuvin · ~56.4, 47.6
Bring the paws to Captain Danuvin.
- 100
Scout GaliaanWestfall~54.0, 53.0
- 103
Hand inRed Leather Bandanas
Return the bandanas to Scout Galiaan.
- 103
Alba FairmoonWestfall~52.4, 53.0
- 104
Hand inTesting the Wells
- 105
Hand inMurloc Gills
Turn in Murloc Gills to Alba Fairmoon with Testing the Wells.
- 104
Alexston Farmstead and Gold Coast QuarryWestfall~34.0, 52.0
- 106
DoThe People's Militia
Work through the Gold Coast Quarry and Alexston Farmstead west of Sentinel Hill. Kill fifteen Defias Pillagers and fifteen Defias Looters. Break up caster pulls and retreat along cleared ground.
- 106
- 107
AcceptCaptain Sander's Hidden TreasureOptional
If a coastal murloc dropped Captain Sander’s Treasure Map while you collected the gills, read it to accept Captain Sander’s Hidden Treasure. Do not farm for the map.
- 107
Captain's FootlockerWestfall~25.9, 47.8
- 108
DoCaptain Sander's Hidden TreasureOptional
If a murloc dropped Captain Sander’s map, go on from Alexston Farmstead to the western beach and inspect the Captain’s Footlocker.
- 109
Hand inCaptain Sander's Hidden TreasureOptional
Return to Captain's Footlocker and turn in Captain Sander's Hidden Treasure.
- 110
AcceptCaptain Sander's Hidden TreasureOptional
Inspect Captain's Footlocker and accept Captain Sander's Hidden Treasure.
- 108
Broken BarrelWestfall~40.5, 47.8
- 111
DoCaptain Sander's Hidden TreasureOptional
Follow the clue inland to the broken barrel beside the ruined chimney. Inspect it and take the next clue.
- 112
Hand inCaptain Sander's Hidden TreasureOptional
Return to Broken Barrel and turn in Captain Sander's Hidden Treasure.
- 113
AcceptCaptain Sander's Hidden TreasureOptional
Inspect Broken Barrel and accept Captain Sander's Hidden Treasure.
- 111
Old JugWestfall~40.6, 17.0
- 114
DoCaptain Sander's Hidden TreasureOptional
Follow the next clue north to the old jug beside the windmill. Stay on the cleared farm tracks.
- 115
Hand inCaptain Sander's Hidden TreasureOptional
Return to Old Jug and turn in Captain Sander's Hidden Treasure.
- 116
AcceptCaptain Sander's Hidden TreasureOptional
Inspect Old Jug and accept Captain Sander's Hidden Treasure.
- 114
Locked ChestWestfall~26.0, 16.9
- 117
DoCaptain Sander's Hidden TreasureOptional
From the northern windmill, head northwest to the small coastal island and open the locked chest for the treasure. This completes the map branch; do not farm additional maps.
- 118
Hand inCaptain Sander's Hidden TreasureOptional
Return to Locked Chest and turn in Captain Sander's Hidden Treasure.
- 117
Gryan StoutmantleWestfall~56.3, 47.5
- 119
Hand inThe People's Militia
Report back to Gryan at Sentinel Hill.
- 120
AcceptThe Defias BrotherhoodLevel 14+
Speak with Gryan Stoutmantle again and accept The Defias Brotherhood. Keep it for the Redridge visit; you deliver it in Lakeshire.
- 119
Young Goretusks north of Sentinel HillWestfall~54.0, 42.9
- 121
DoWestfall Stew
Kill vultures, goretusks and coastal murlocs and collect three each of Stringy Vulture Meat, Goretusk Snouts and Murloc Eyes. Also collect three Okra. Use the native target hints for any remaining ingredient.
- 121
Salma SaldeanWestfall~56.4, 30.5
- 122
Hand inWestfall Stew
Before leaving Westfall, follow the road north from Sentinel Hill to Salma Saldean and hand in Westfall Stew. The road continues north to Elwynn Forest and Stormwind; you can also walk back to Thor and fly.
- 122
CHAPTER 04 · LEVELS 14–16
Darkshore (levels 14–16)
Train and repair in Stormwind, then take the boat from Stormwind Harbor to Auberdine and accept Buzzbox 827 from Wizbang Cranktoggle at the top of the inn. The first Darkshore loops cover the shore south and west of town, the furbolg camp, Bashal'Aran, the red crystal and Ameth'Aran. The northern wrecks, Cliffspring River and the cave for Cave Mushrooms follow before Barithras Moonshade sends you to Onu. Druids at level 16 then travel to Darnassus and Moonglade for their next lessons.
- Fill the water container for As Water Cascades at the Auberdine moonwell before carrying it to the red crystal east of town.
- Destroying Asterion's seal for Bashal'Aran happens at the ancient flame in Ameth'Aran. Finish the ruins work before going back north.
- Deep Ocean, Vast Sea needs the lockboxes from both wrecks north of Auberdine. Surface between wrecks and before your breath runs low.
Quest order 103 steps
- 01
GoSuggested level 14
Players are usually around level 14 by this point. If you are lower, finish the accepted work nearby before moving on; the route continues either way.
- 01
Wizbang CranktoggleDarkshore~37.0, 44.1
- 02
AcceptBuzzbox 827
Go to Stormwind: fly from Sentinel Hill if Thor offers Stormwind, otherwise follow the road north through Westfall into Elwynn Forest and on to the city. Train and repair in the city, then go to Stormwind Harbor and board the Auberdine boat at the southernmost dock. Confirm its destination and stay aboard until it docks in Darkshore. In Auberdine, climb to the top floor of the inn and accept Buzzbox 827 from Wizbang Cranktoggle.
Travel directions to Darkshore
- 03
GoSet your hearthstone in AuberdineOptionalInnkeeper Shaussiy · ~37.0, 44.1
Speak with Innkeeper Shaussiy and make Auberdine your home. Auberdine is the return point for the Darkshore circuits and for the trip back from Redridge.
- 02
Tharnariun TreetenderDarkshore~38.8, 43.4
- 04
AcceptPlagued Lands
- 05
AcceptHow Big a Threat?Terenthis · ~39.4, 43.5
- 04
WANTED: Murkdeep!Darkshore~37.2, 44.2
- 06
AcceptWANTED: Jai'vhanel
Inspect WANTED: Murkdeep! and accept WANTED: Jai'vhanel.
- 06
Gwennyth Bly'LeggondeDarkshore~36.6, 45.6
- 07
AcceptWashed Ashore
- 08
GoLearn the Auberdine flight pathOptionalCaylais Moonfeather at Auberdine · ~36.4, 45.6
Speak with Caylais Moonfeather while you are in Auberdine. Learn this flight path if needed, then continue the nearby quests.
- 07
Beached Sea CreatureDarkshore~36.4, 50.9
- 09
DoWashed Ashore
Inspect the beached sea creature just south of Auberdine and recover its bones.
- 09
Tide crawlers on the shore south of AuberdineDarkshore~35.7, 48.4
- 10
DoBuzzbox 827
Collect six Crawler Legs along the shore south of Auberdine and place them in Buzzbox 827.
- 10
Rabid Thistle BearDarkshore~38.2, 52.6
- 11
DoPlagued Lands
Use the trap on a living Rabid Thistle Bear and bring the captured bear to Tharnariun in Auberdine. If the trap is lost, ask him for another.
- 12
DoHow Big a Threat?Corrupt furbolg camp · ~39.3, 53.5
Investigate the corrupt furbolg camp south of Auberdine, then report to Terenthis.
- 11
Buzzbox 827Darkshore~36.6, 46.3
- 13
Hand inBuzzbox 827
Return to Buzzbox 827 and turn in Buzzbox 827.
- 14
AcceptBuzzbox 411
Inspect Buzzbox 827 and accept Buzzbox 411.
- 15
Hand inWashed AshoreGwennyth Bly'Leggonde · ~36.6, 45.6
- 16
AcceptWashed AshoreGwennyth Bly'Leggonde · ~36.6, 45.6
- 13
Cerellean WhiteclawDarkshore~35.7, 43.7
- 17
AcceptFor Love Eternal
- 17
Darkshore ThresherDarkshore~32.3, 43.2
- 18
DoBuzzbox 411
Collect three Thresher Eyes from the water west of Auberdine. Keep them for the later Buzzbox 411 visit on the northern coast. Surface between fights.
- 18
Skeletal Sea TurtleDarkshore~31.8, 46.3
- 19
DoWashed Ashore
Recover the remains from the skeletal sea turtle in the water west of Auberdine. Surface before running out of breath.
- 19
Gwennyth Bly'LeggondeDarkshore~36.6, 45.6
- 20
Hand inWashed Ashore
- 20
Barithras MoonshadeDarkshore~37.3, 43.6
- 21
AcceptCave Mushrooms
- 22
AcceptThe Red CrystalSentinel Glynda Nal'Shea · ~37.7, 43.4
- 21
Tharnariun TreetenderDarkshore~38.8, 43.4
- 23
Hand inPlagued Lands
- 24
AcceptCleansing of the Infected
- 25
Hand inHow Big a Threat?Terenthis · ~39.4, 43.5
- 26
AcceptHow Big a Threat?Terenthis · ~39.4, 43.5
- 27
AcceptThundris WindweaverTerenthis · ~39.4, 43.5
- 23
Thundris WindweaverDarkshore~37.4, 40.1
- 28
AcceptTools of the Highborne
Go around Auberdine’s northern building to the rear terrace for Thundris Windweaver. Speak with Thundris Windweaver and accept Tools of the Highborne.
- 29
AcceptBashal'Aran
Go around Auberdine’s northern building to the rear terrace for Thundris Windweaver. Speak with Thundris Windweaver and accept Bashal'Aran.
- 30
DoThundris Windweaver
Go around Auberdine’s northern building to the rear terrace for Thundris Windweaver. Speak with Thundris Windweaver in Auberdine about the corrupt furbolgs.
- 31
Hand inThundris Windweaver
Go around Auberdine’s northern building to the rear terrace for Thundris Windweaver. Speak with Thundris Windweaver and turn in Thundris Windweaver.
- 32
AcceptThe Cliffspring River
Go around Auberdine’s northern building to the rear terrace for Thundris Windweaver. Speak with Thundris Windweaver and accept The Cliffspring River.
- 28
Buzzbox 411Darkshore~42.0, 28.6
- 33
Hand inBuzzbox 411
Return to Buzzbox 411 and turn in Buzzbox 411.
- 34
AcceptBuzzbox 323
Inspect Buzzbox 411 and accept Buzzbox 323.
- 33
Moonstalker RuntDarkshore~43.6, 28.9
- 35
DoBuzzbox 323
Collect six Moonstalker Fangs while travelling along the northern Darkshore coast, then deliver them to Buzzbox 323.
- 35
Darkshore~44.3, 36.4
- 36
DoBashal'Aran
Investigate the blue aura at Bashal'Aran and speak with Asterion in the ruins.
- 37
Hand inBashal'AranAsterion · ~44.2, 36.3
- 38
AcceptBashal'AranAsterion · ~44.2, 36.3
- 39
DoBashal'AranVile Sprite · ~44.6, 36.6
Kill the grell and collect eight Grell Earrings around Asterion.
- 40
Hand inBashal'AranAsterion · ~44.2, 36.3
- 41
AcceptBashal'AranAsterion · ~44.2, 36.3
- 42
DoBashal'AranDeth'ryll Satyr · ~45.5, 36.5
Kill the enemies and collect the Ancient Moonstone Seal at Bashal'Aran and return to Asterion.
- 43
Hand inBashal'AranAsterion · ~44.2, 36.3
- 44
AcceptBashal'AranAsterion · ~44.2, 36.3
- 36
Darkshore~47.2, 48.7
- 45
DoThe Red Crystal
Locate the large red crystal on a raised ledge above the moonkin area against the eastern mountain wall, east of Auberdine. Keep the report for Sentinel Glynda Nal’Shea and continue south-west to Ameth’Aran; you report it on the next Auberdine return.
- 45
Cursed HighborneDarkshore~41.9, 57.3
- 46
DoTools of the Highborne
From the Red Crystal, head south-west to Ameth’Aran. Collect seven Highborne Relics in the ruins while reading the tablets.
- 46
Sentinel Tysha MoonbladeDarkshore~40.3, 59.7
- 47
AcceptThe Fall of Ameth'Aran
- 47
Ancient FlameDarkshore~42.4, 61.8
- 48
DoBashal'Aran
Use the ancient flame at Ameth'Aran to destroy the seal. Complete the other ruins work before returning north to Asterion.
- 48
The Lay of Ameth'AranDarkshore~43.3, 58.7
- 49
DoThe Fall of Ameth'Aran
Read both historical tablets in Ameth'Aran and return to Sentinel Tysha Moonblade nearby.
- 49
Jai'vhanelDarkshore~45.0, 58.2
- 50
DoWANTED: Jai'vhanel
While approaching Ameth’Aran, look for Jai’vhanel by the mountain base north of the ruins. Recover her feather and finish the nearby ruins before returning to Glynda.
- 50
Sentinel Tysha MoonbladeDarkshore~40.3, 59.7
- 51
Hand inThe Fall of Ameth'Aran
- 51
Beached Sea TurtleDarkshore~37.1, 62.2
- 52
AcceptBeached Sea Turtle
Inspect the beached remains at the marked coast and accept Beached Sea Turtle. Keep the sample for the next Auberdine return.
- 52
Blackwood PathfinderDarkshore~39.3, 52.2
- 53
DoHow Big a Threat?
Kill eight Blackwood Pathfinders and five Windtalkers at the furbolg camps.
- 53
Rabid Thistle Bears between the furbolgs and Ameth’AranDarkshore~39.0, 59.0
- 54
DoCleansing of the Infected
Kill twenty Rabid Thistle Bears in the forest between the furbolg camp and Ameth’Aran, and south of the ruins if you are still short. Finish the count before returning to Tharnariun.
- 54
Beached Sea TurtleDarkshore~37.1, 62.2
- 55
DoBeached Sea Turtle
Keep the recovered remains for Gwennyth in Auberdine. Finish the other work on this outing before returning to the docks.
- 55
Sentinel Glynda Nal'SheaDarkshore~37.7, 43.4
- 56
Hand inThe Red Crystal
- 57
Hand inWANTED: Jai'vhanel
- 58
AcceptAs Water Cascades
- 56
Gwennyth Bly'LeggondeDarkshore~36.6, 45.6
- 59
Hand inBeached Sea Turtle
- 59
Mysterious Red CrystalDarkshore~47.3, 48.7
- 60
DoAs Water Cascades
Fill the water container at the Auberdine moonwell, carry it to the red crystal on the raised ledge above the moonkin area against the eastern mountain wall and use it there.
- 61
Hand inAs Water Cascades
Return to Mysterious Red Crystal and turn in As Water Cascades.
- 62
AcceptThe Fragments Within
Inspect Mysterious Red Crystal and accept The Fragments Within.
- 60
TerenthisDarkshore~39.4, 43.5
- 63
Hand inHow Big a Threat?
- 64
AcceptA Lost Master
- 65
AcceptThe Tower of AlthalaxxSentinel Elissa Starbreeze · ~39.0, 43.5
Find Sentinel Elissa Starbreeze on the second floor of Auberdine’s eastern building. Speak with Sentinel Elissa Starbreeze and accept The Tower of Althalaxx.
- 66
Hand inCleansing of the InfectedTharnariun Treetender · ~38.8, 43.4
- 67
AcceptTharnariun's HopeTharnariun Treetender · ~38.8, 43.4
- 63
Gorbold SteelhandDarkshore~38.1, 41.2
- 68
AcceptDeep Ocean, Vast Sea
- 69
Hand inTools of the HighborneThundris Windweaver · ~37.4, 40.1
Go around Auberdine’s northern building to the rear terrace for Thundris Windweaver. Speak with Thundris Windweaver and turn in Tools of the Highborne.
- 68
Silver Dawning's LockboxDarkshore~38.2, 28.8
- 70
DoDeep Ocean, Vast Sea
Recover the Silver Dawning’s Lockbox and Mist Veil’s Lockbox from the two wrecks north of Auberdine. Surface between wrecks and before breath runs low; clear nearby murlocs before entering and keep the exit in sight. No water-breathing spell or potion is assumed.
- 70
AsterionDarkshore~44.2, 36.3
- 71
Hand inBashal'Aran
From Silver Dawning’s Lockbox on the coast, head south-east to Bashal’Aran. Speak with Asterion and turn in Bashal’Aran.
- 71
Beached Sea CreatureDarkshore~41.9, 31.5
- 72
AcceptBeached Sea Creature
Inspect the beached remains at the marked coast and accept Beached Sea Creature. Keep the sample for the next Auberdine return.
- 72
Beached Sea TurtleDarkshore~44.2, 20.6
- 73
AcceptBeached Sea Turtle
Inspect the beached remains at the marked coast and accept Beached Sea Turtle. Keep the sample for the next Auberdine return.
- 73
Cliffspring River WaterfallDarkshore~50.8, 25.6
- 74
DoThe Cliffspring River
Follow the Cliffspring River to its first waterfall and draw a water sample from the pool there.
- 75
Hand inBuzzbox 323Buzzbox 323 · ~51.3, 24.6
Return to Buzzbox 323 and turn in Buzzbox 323.
- 76
AcceptBuzzbox 525Buzzbox 323 · ~51.3, 24.6
Inspect Buzzbox 323 and accept Buzzbox 525.
- 74
Scaber StalkDarkshore~55.0, 36.8
- 77
DoCave Mushrooms
Follow the north bank of Cliffspring River uphill to the cave behind the waterfall. Gather five Scaber Stalks and one Death Cap inside. Search the upper passage on the right and its far end for a Death Cap. Keep a clear route back to the entrance.
- 77
Thundris WindweaverDarkshore~37.4, 40.1
- 78
Hand inThe Cliffspring River
Go around Auberdine’s northern building to the rear terrace for Thundris Windweaver. Speak with Thundris Windweaver and turn in The Cliffspring River.
- 79
AcceptThe Blackwood CorruptedLevel 15+
Go around Auberdine’s northern building to the rear terrace for Thundris Windweaver. Speak with Thundris Windweaver and accept The Blackwood Corrupted.
- 80
Hand inDeep Ocean, Vast SeaGorbold Steelhand · ~38.1, 41.2
- 78
Archaeologist HolleeDarkshore~37.4, 41.8
- 81
AcceptThe Absent Minded Prospector
- 81
Sentinel Glynda Nal'SheaDarkshore~37.7, 43.4
- 82
DoThe Fragments Within
Bring the crystal fragments back to Sentinel Glynda Nal'Shea in Auberdine.
- 83
Hand inThe Fragments Within
- 84
Hand inCave MushroomsBarithras Moonshade · ~37.3, 43.6
- 85
AcceptOnuBarithras Moonshade · ~37.3, 43.6
- 86
AcceptWANTED: Murkdeep!WANTED: Murkdeep! · ~37.2, 44.2
Read the wanted notice in Auberdine and accept the Murkdeep bounty.
- 82
Beached Sea CreatureDarkshore~41.9, 31.5
- 87
DoBeached Sea Creature
Keep the recovered remains for Gwennyth in Auberdine. Finish the other work on this outing before returning to the docks.
- 87
Gwennyth Bly'LeggondeDarkshore~36.6, 45.6
- 88
Hand inBeached Sea Creature
- 88
Beached Sea TurtleDarkshore~44.2, 20.6
- 89
DoBeached Sea Turtle
Keep the recovered remains for Gwennyth in Auberdine. Finish the other work on this outing before returning to the docks.
- 89
Gwennyth Bly'LeggondeDarkshore~36.6, 45.6
- 90
Hand inBeached Sea Turtle
- 90
Class quests
Druid13 steps · choose your class above to show only yours- 91
AcceptA Lesson to Learn
DruidLevel 16+Mathrengyl Bearwalker · ~35.4, 8.4At level 16, travel from Auberdine to Darnassus. Take the Rut’theran Village boat from the Auberdine pier, or fly there if you already know that flight path, then use the portal into Darnassus. In the Cenarion Enclave, follow the spiral ramp in the northwestern tree building to Mathrengyl Bearwalker on the balcony one level up and accept A Lesson to Learn. Keep your Darkshore quests; this trip returns to Auberdine.
Travel directions to Darnassus
- 92
AcceptLessons Anew
DruidMathrengyl Bearwalker · ~35.4, 8.4While with Mathrengyl Bearwalker, also accept Lessons Anew. The later cure needs five Earthroot: buy or trade for them, or gather them with Herbalism you already have. Do not change professions for this lesson.
- 93
DoMoonglade
DruidDendrite Starblaze · ~56.2, 30.4While with Mathrengyl Bearwalker, train Teleport: Moonglade if you do not have it yet. Cast it, then enter the building directly ahead in Nighthaven and take the stairs up to Dendrite Starblaze.
Travel directions to Moonglade
- 94
Hand inMoonglade
DruidDendrite Starblaze · ~56.2, 30.4Speak with Dendrite Starblaze upstairs in Nighthaven and turn in Moonglade.
- 95
DoA Lesson to Learn
DruidDendrite Starblaze · ~56.2, 30.6Stay upstairs with Dendrite Starblaze in Nighthaven. Turn in A Lesson to Learn and take Trial of the Lake before leaving him.
- 96
Hand inA Lesson to Learn
DruidDendrite Starblaze · ~56.2, 30.6 - 97
DoLessons Anew
DruidDendrite Starblaze · ~56.2, 30.6While upstairs with Dendrite Starblaze in Nighthaven, deliver Lessons Anew.
- 98
Hand inLessons Anew
DruidDendrite Starblaze · ~56.2, 30.6Turn in Lessons Anew to Dendrite Starblaze upstairs in Nighthaven. Take The Principal Source and its sampler before leaving.
- 99
AcceptThe Principal Source
DruidDendrite Starblaze · ~56.2, 30.6 - 100
AcceptTrial of the Lake
DruidDendrite Starblaze · ~56.2, 30.6 - 101
DoTrial of the Lake
DruidBauble Container · ~54.3, 55.7Dive into Lake Elune’ara and retrieve a Shrine Bauble from a Bauble Container. Return to the Shrine of Remulos beside Tajarri and use the bauble before its native timer expires. If it expires, obtain another bauble; an expired attempt is not completion. At the shrine, use the bauble beside Keeper Remulos; do not dive again while carrying it.
- 102
Hand inTrial of the Lake
DruidTajarri · ~36.5, 40.1 - 103
AcceptTrial of the Sea Lion
DruidTajarri · ~36.5, 40.1Speak with Tajarri and accept Trial of the Sea Lion. Keep it: the Darkshore pendant half is off the north coast on this visit, and the Westfall half and shrine visit follow in the 20–30 route.
- 91
CHAPTER 05 · LEVELS 16–16
Darkshore (level 16)
This short chapter follows the southern Darkshore shore from Auberdine. Collect the beached remains, defeat Murkdeep at his camp and find Prospector Remtravel at the excavation, then turn inland to Onu at the Grove of the Ancients. Buzzbox 525 and the Master's Glaive come next, where the Twilight Tome opens Return to Onu and It's All Fun and Games Until... The chapter ends as you meet Therylune at the Glaive.
- Use the Phial of Scrying at the Master's Glaive to create the bowl that lets you speak with Onu.
- Loot a Peerless Eye from the nearby Twilight Disciples or Thugs before leaving the Glaive. Take isolated enemies.
- Remtravel's escort follow-up is a group task. Attempt it with help or leave it.
Quest order 26 steps
- 01
GoSuggested level 16
Players are usually around level 16 by this point. If you are lower, finish the accepted work nearby before moving on; the route continues either way.
- 01
Beached Sea CreatureDarkshore~36.0, 70.9
- 02
AcceptBeached Sea Creature
From Auberdine, follow the shoreline south to these remains and accept Beached Sea Creature. Clear the nearby murlocs before approaching; the other coastal samples lie further south on the same outing.
Travel directions to Darkshore
- 03
DoBeached Sea Creature
Inspect the coastal remains and keep the recovered sample for Gwennyth in Auberdine. Continue the same southern-coast outing before returning to town.
- 02
Murkdeep’s coastal campDarkshore~36.4, 76.5
- 04
DoWANTED: Murkdeep!
Continue south along the shore to Murkdeep’s camp. Clear the shore carefully and approach the campfire to start the encounter. Defeat the waves and Murkdeep. Retreat and defer if you cannot control the adds; this is not a single isolated pull.
- 04
Beached Sea CreatureDarkshore~32.7, 80.8
- 05
AcceptBeached Sea Creature
Inspect these remains on the southern Darkshore coast and accept Beached Sea Creature. Clear the nearby murlocs before approaching; collect the other coastal samples before the planned Auberdine return.
- 06
DoBeached Sea Creature
Inspect the coastal remains and keep the recovered sample for Gwennyth in Auberdine. Continue the same southern-coast outing before returning to town.
- 05
Beached Sea TurtleDarkshore~31.7, 83.7
- 07
AcceptBeached Sea Turtle
Inspect these remains on the southern Darkshore coast and accept Beached Sea Turtle. Clear the nearby murlocs before approaching; collect the other coastal samples before the planned Auberdine return.
- 08
DoBeached Sea Turtle
Inspect the coastal remains and keep the recovered sample for Gwennyth in Auberdine. Continue the same southern-coast outing before returning to town.
- 07
Prospector RemtravelDarkshore~35.7, 83.7
- 09
DoThe Absent Minded Prospector
Find Prospector Remtravel at the southern Darkshore excavation while completing the nearby southern-coast quests.
- 10
Hand inThe Absent Minded Prospector
Return to Prospector Remtravel and claim the reward for The Absent Minded Prospector.
- 11
AcceptThe Absent Minded ProspectorOptional
Optional group escort: The Absent Minded Prospector continues as a quest-level 20 escort. Accept it only if you have help now; nothing else on the route needs it.
- 12
DoThe Absent Minded ProspectorOptional
Optional group escort: stay with Remtravel through the excavation and protect him until the quest log confirms success. Attempt this with help; it is not required to continue.
- 09
OnuDarkshore~43.5, 76.3
- 13
DoOnu
From the southern coast, head inland to the east and follow the road to the Grove of the Ancients. Speak with Onu.
- 14
Hand inOnu
- 15
AcceptThe Master's Glaive
- 13
Grizzled Thistle Bears by Buzzbox 525Darkshore~39.6, 81.0
- 16
DoBuzzbox 525
Kill Grizzled Thistle Bears and collect four Grizzled Scalps south of Auberdine and deliver them to Buzzbox 525.
- 16
Buzzbox 525Darkshore~41.4, 80.6
- 17
Hand inBuzzbox 525
Return to Buzzbox 525 and turn in Buzzbox 525.
- 17
Darkshore~38.5, 86.5
- 18
DoThe Master's Glaive
Investigate the Master's Glaive. Use the Phial of Scrying to create the bowl and speak with Onu through it.
- 19
Hand inThe Master's GlaiveMaster's Glaive: Scrying Bowl (use the Phial of Scrying) · ~38.5, 86.5
Use the Scrying Bowl you just created at the Master's Glaive and turn in the investigation to Onu.
- 20
AcceptThe Twilight CampMaster's Glaive: Scrying Bowl (use the Phial of Scrying) · ~38.5, 86.5
Use your Scrying Bowl at the Master's Glaive and accept The Twilight Camp from Onu.
- 21
DoThe Twilight CampTwilight Tome · ~38.5, 86.0
Look for the written clue in the Twilight camp at the Master's Glaive.
- 22
Hand inThe Twilight CampTwilight Tome · ~38.5, 86.0
Return to Twilight Tome and turn in The Twilight Camp.
- 23
AcceptReturn to OnuTwilight Tome · ~38.5, 86.0
Inspect Twilight Tome and accept Return to Onu.
- 24
AcceptIt's All Fun and Games Until...Twilight Tome · ~38.5, 86.0
After taking Return to Onu, inspect the same Twilight Tome at the Master’s Glaive for It’s All Fun and Games Until... Accept the task before leaving. If the offer is absent, use Quest unavailable? to set it aside and continue to Onu.
- 25
DoIt's All Fun and Games Until...Twilight Disciple · ~38.2, 86.3
Before leaving the Master’s Glaive, loot a Peerless Eye from the nearby Twilight Disciples or Twilight Thugs. Take isolated enemies and watch for disciple healing. Check only the enemies on your approach and exit. If no eye drops, use Quest unavailable? to defer this quest and continue to Onu. Keep any eye for Thundris Windweaver on the planned Auberdine return.
- 26
AcceptTherylune's EscapeTherylune · ~38.6, 87.3
At the Master’s Glaive, find Therylune. Accept Therylune’s Escape only when ready to start immediately. If she is absent or the approach is unsafe, defer it and continue the southern outing.
- 18
CHAPTER 06 · LEVELS 16–20
Darkshore and Redridge Mountains (levels 16–20)
Escort Therylune out of the Master's Glaive, take Mathystra Relics from Onu and recover Anaya's pendant at Ameth'Aran on the way back to Auberdine. Fill the Cleansing Bowl before the northern loop to Gelkak Gyromast, Mathystra Ruins, the Tower of Althalaxx and the Blackwood bonfire. Then take the boat to Stormwind for Philmor's Favor and continue to Redridge, where the Lakeshire quests send you back through Goldshire and Stormwind, with an optional Westfall Defias chain and Deadmines group. After the Redridge finish, return to Auberdine for Gershala Nightwhisper, hand the relics to Onu, deliver Terenthis's cloak to Volcor and follow Kerlonian and Balthule's letter into Ashenvale to finish at Maestra's Post.
- Keep the Mathystra Relics and the next A Lost Master delivery. Both are handed in on the southern road after Redridge.
- Blackrock Menace and Blackrock Blockade need level 18, and Murloc Poachers needs level 20. All three are optional, so skip them if you are below the requirement.
- Gyromast's Revenge, the later Defias Brotherhood steps and the Deadmines are group content. Bring help or leave them for later.
Quest order 182 steps
Therylune escape endpointDarkshore~40.5, 87.1
- 01
DoTherylune's Escape
Escort Therylune out of the Master’s Glaive immediately after accepting. Stay with her until the native quest log confirms the escape. Carry the completed report to Therysil on the later Ashenvale coast visit.
- 01
OnuDarkshore~43.5, 76.3
- 02
DoReturn to Onu
Carry the Insane Scribbles to Onu at the Grove of the Ancients.
- 03
Hand inReturn to Onu
- 02
- 04
GoSuggested level 16
Players are usually around level 16 by this point. If you are lower, finish the accepted work nearby before moving on; the route continues either way.
- 04
OnuDarkshore~43.5, 76.3
- 05
AcceptMathystra Relics
- 06
AcceptSwelling ForcesOptionalArbal · ~43.6, 76.4
Find Arbal in the Grove for the optional Swelling Forces hunt. Its 26 naga kills can be combined with Mathystra Relics, but some enemies reach level 21.
- 05
Anaya DawnrunnerDarkshore~41.8, 60.7
- 07
DoFor Love Eternal
On the way back north from the Grove of the Ancients, stop at Ameth’Aran. Find Anaya Dawnrunner, kill her spirit and recover her pendant.
- 07
Cerellean WhiteclawDarkshore~35.7, 43.7
- 08
Hand inFor Love Eternal
- 09
AcceptFruit of the SeaGubber Blump · ~36.1, 44.9
- 08
Gwennyth Bly'LeggondeDarkshore~36.6, 45.6
- 10
Hand inBeached Sea Creature
- 11
Hand inBeached Sea Creature
- 12
Hand inBeached Sea Turtle
- 10
Sentinel Glynda Nal'SheaDarkshore~37.7, 43.4
- 13
Hand inWANTED: Murkdeep!
Return to Sentinel Glynda Nal'Shea and claim the reward for WANTED: Murkdeep!.
- 13
Thundris WindweaverDarkshore~37.4, 40.1
- 14
Hand inIt's All Fun and Games Until...
On the Auberdine return, deliver the Peerless Eye to Thundris Windweaver. If the eye did not drop, keep the quest for later and continue the town hand-ins.
- 14
Gelkak GyromastDarkshore~56.7, 13.5
- 15
AcceptGyromast's Retrieval
Before leaving Auberdine, fill the Cleansing Bowl at the town moonwell; you place it at the Blackwood bonfire at the end of this loop. Then follow the road north-east to the northern tip of Darkshore, past the Tower of Althalaxx and Mathystra Ruins (you work both on the way back). Find Gelkak Gyromast on the small rocky rise at the shoreline north of Mathystra Ruins and accept Gyromast’s Retrieval.
- 15
Giant ForeststriderDarkshore~61.2, 14.9
- 16
DoGyromast's Retrieval
Kill reef crawlers, foreststriders and Greymist murlocs on the northern coast and collect the three pieces of Gelkak’s key after speaking with him. Finish any missing pieces during the final beach work and check all three counters before returning. The subsequent mechanical encounter is not part of this quest.
- 16
Moonstalker SireDarkshore~61.9, 8.6
- 17
DoA Lost Master
Finish A Lost Master in the hills just north of the Giant Foreststriders: kill Moonstalker Sires and Matriarchs until you hold five Fine Moonstalker Pelts, counting any you took in the south. Each Matriarch arrives with a Runt, and Sires strike hard from behind, so pull them one at a time. Keep the pelts for Terenthis in Auberdine.
- 17
Gelkak GyromastDarkshore~56.7, 13.5
- 18
Hand inGyromast's Retrieval
Look for Gelkak Gyromast on the small rocky rise at the shoreline north of Mathystra Ruins. Speak with Gelkak Gyromast and turn in Gyromast's Retrieval.
- 19
AcceptGyromast's RevengeOptional
Optional group quest: Gyromast’s Revenge ends with a level-20 elite robot. Accept it from Gelkak Gyromast only if you have help; nothing else on the route needs it.
- 18
Beached Sea TurtleDarkshore~53.1, 18.1
- 20
AcceptBeached Sea Turtle
Inspect the beached remains at the marked coast and accept Beached Sea Turtle. Keep the sample for the next Auberdine return.
- 21
DoBeached Sea Turtle
Keep the recovered remains for Gwennyth in Auberdine. Finish the other work on this outing before returning to the docks.
- 20
Reef CrawlerDarkshore~44.8, 21.8
- 22
DoFruit of the Sea
While you are on the north coast, kill Reef Crawlers along the shore for six Fine Crab Chunks. The marker shows a group just west of here. Gubber Blump takes them on the next Auberdine stop.
- 22
Strange LockboxDarkshore~48.9, 11.3
- 23
GoCollect the Darkshore pendant half
DruidOptionalIf Trial of the Sea Lion is in your log, swim out from the north coast to the Strange Lockbox and loot the Half Pendant of Aquatic Agility. Keep it for the Westfall half in the 20–30 route.
- 23
The Threshwackonator 4100Darkshore~55.8, 18.3
- 24
DoGyromast's RevengeOptional
Optional group encounter: use Gyromast’s key to activate the Threshwackonator, lead it back and defeat it when it turns hostile. Bring help; do not treat the robot as a normal solo target.
- 24
Gelkak GyromastDarkshore~56.7, 13.5
- 25
Hand inGyromast's RevengeOptional
Return to Gelkak Gyromast and claim the reward for Gyromast's Revenge.
- 25
Mathystra RelicDarkshore~58.0, 25.9
- 26
DoMathystra Relics
Collect six Mathystra Relics from the ground in the northern ruins. Naga here range up to level 21. Check their levels and use clear approaches to the relics. Bring help or defer this quest if the pulls are too difficult. Keep the relics for the next southern-road visit to Onu.
- 27
DoSwelling ForcesOptionalStormscale naga in Mathystra Ruins · ~58.0, 25.9
Optional hunt: kill 12 Myrmidons, 8 Sorceresses and 6 Warriors in Mathystra Ruins while collecting the relics. Enemies reach level 21. Bring help or skip this hunt if the fights are too difficult.
- 26
Balthule ShadowstrikeDarkshore~55.0, 24.9
- 28
DoThe Tower of Althalaxx
From Mathystra Ruins, go west to Balthule Shadowstrike near the Tower of Althalaxx.
- 29
Hand inThe Tower of Althalaxx
- 30
AcceptThe Tower of Althalaxx
- 31
DoThe Tower of AlthalaxxDark Strand Fanatic · ~56.1, 25.4
Kill the cultists and collect four Worn Parchments around the tower. Remain outside the tower interior.
- 32
Hand inThe Tower of Althalaxx
- 33
AcceptThe Tower of Althalaxx
- 28
Cliffspring Falls cave mouthDarkshore~54.9, 33.3
- 34
DoThe Principal Source
DruidFollow the north bank of Cliffspring River east of the Blackwood camp to the cave mouth beside the waterfall and fill the Empty Cliffspring Falls Sampler there. Keep clear of the naga inside. Bring the filled sample to Alanndarian Nightsong on the next Auberdine return.
- 34
Blackwood Furbolg North BonfireDarkshore~52.4, 33.4
- 35
DoThe Blackwood Corrupted
Use the Cleansing Bowl you filled at the Auberdine moonwell. Head south to the northern Blackwood camps, gather fruit, nuts and grain, mix the bowl and place it by their bonfire near the river. This summons Xabraxxis, a level-19 corruptor. Check your readiness before summoning and bring help or return later if needed. Kill him and recover his talisman.
- 35
Den MotherDarkshore~51.5, 38.3
- 36
DoTharnariun's Hope
Enter the Den Mother's cave and kill her. Clear nearby bears first and bring help if the fight is too difficult.
- 36
Thundris WindweaverDarkshore~37.4, 40.1
- 37
Hand inThe Blackwood Corrupted
Walk west back to Auberdine. Go around Auberdine’s northern building to the rear terrace for Thundris Windweaver. Speak with Thundris Windweaver and turn in The Blackwood Corrupted.
- 37
Class quests
Druid2 steps · choose your class above to show only yours- 38
Hand inThe Principal Source
DruidAlanndarian Nightsong · ~37.7, 40.7Deliver the filled sample to Alanndarian Nightsong in Auberdine and take Gathering the Cure before leaving.
- 39
AcceptGathering the Cure
DruidAlanndarian Nightsong · ~37.7, 40.7
- 38
Tharnariun TreetenderDarkshore~38.8, 43.4
- 40
Hand inTharnariun's Hope
- 41
Hand inA Lost MasterTerenthis · ~39.4, 43.5
- 42
AcceptA Lost MasterTerenthis · ~39.4, 43.5
- 40
Gwennyth Bly'LeggondeDarkshore~36.6, 45.6
- 43
Hand inBeached Sea Turtle
- 43
Class quests
Druid4 steps · choose your class above to show only yours- 44
DoGathering the Cure
DruidLunar Fungal Bloom · ~43.4, 46.0Collect twelve Lunar Funguses from Lunar Fungal Blooms in the moonkin caves east of Auberdine. Bring them with five Earthroot to Alanndarian. Earthroot may come from trade or Herbalism you already have; do not change professions for this lesson. Without Earthroot, defer the chain and continue; restore it when you have them.
- 45
Hand inGathering the Cure
DruidAlanndarian Nightsong · ~37.7, 40.7Bring all five Earthroot and twelve Lunar Funguses to Alanndarian Nightsong in Auberdine. Turn in Gathering the Cure, then take Curing the Sick and the Curative Animal Salve.
- 46
AcceptCuring the Sick
DruidAlanndarian Nightsong · ~37.7, 40.7 - 47
DoCuring the Sick
DruidSickly Deer south of Auberdine · ~41.6, 46.0Use the Curative Animal Salve on ten Sickly Deer in the woods around Auberdine and south of Cliffspring River. Cure them rather than killing them. Keep the completed quest: Dendrite takes it on the level-20 Moonglade visit.
- 44
Gubber BlumpDarkshore~36.1, 44.9
- 48
Hand inFruit of the Sea
Next to Gwennyth, speak with Gubber Blump and turn in Fruit of the Sea.
- 48
Manifest Clerk PhilmorStormwind City~30.5, 28.8
- 49
AcceptPhilmor’s Favor
If still in Auberdine, board the direct Stormwind boat from the western pier, confirm its destination and remain aboard until Stormwind Harbor. At the harbor, find Manifest Clerk Philmor and accept Philmor’s Favor. Keep the shipment for Elaine during the city circuit before leaving for Redridge. If the offer is absent, defer this chain and continue the planned city errands.
Travel directions to Stormwind City
- 49
Elaine TriasStormwind City~66.6, 73.4
- 50
DoPhilmor’s Favor
Carry Philmor’s shipment to Elaine Trias in the Trade District cheese shop. Stay in the city for her follow-up before leaving for Redridge.
- 50
Class quests
Rogue2 steps · choose your class above to show only yours- 51
AcceptRedridge Rendezvous
RogueRenzik "The Shiv" · ~78.3, 71.0Speak with Renzik "The Shiv" and accept Redridge Rendezvous. Before you leave Stormwind, train Lockpicking with a Rogue trainer: Lucius’s lockbox task at Alther’s Mill needs it.
- 52
AcceptMathias and the Defias
RogueOptionalLevel 20+Master Mathias Shaw · ~78.3, 70.7Enter SI:7 in Stormwind’s Old Town, climb one flight of stairs and turn left to Mathias Shaw’s room. Speak with Master Mathias Shaw and accept Mathias and the Defias. Optional here: it needs level 20. If you are not 20 yet, carry on; the level-20 class detour offers it once you reach 20.
- 51
Elaine TriasStormwind City~66.6, 73.4
- 53
Hand inPhilmor’s Favor
Give Philmor’s shipment to Elaine Trias and claim the reward. Accept Gatehouse Goods before leaving her.
- 54
AcceptGatehouse Goods
After Philmor’s Favor, accept Gatehouse Goods from Elaine Trias in the cheese shop.
- 55
DoGatehouse GoodsTrias shop: Gatehouse Door upstairs · ~66.6, 73.4
Take the shipment upstairs in the Trias shop and use it by the stockroom entrance. Check the native quest counter, then return downstairs. This is a delivery event; do not look for an enemy to kill.
- 56
Hand inGatehouse Goods
Return downstairs to Elaine Trias and claim the Gatehouse Goods reward before continuing through Stormwind.
- 53
Guard ParkerRedridge Mountains~10.2, 71.5
- 57
AcceptEncroaching Gnolls
From Stormwind, leave through the main gate and follow the road south to Goldshire, then take the east road through Elwynn Forest into Redridge. Meet Guard Parker, who patrols the road by the Three Corners, and accept Encroaching Gnolls.
- 57
Deputy FeldonRedridge Mountains~25.6, 60.0
- 58
DoEncroaching Gnolls
Continue to Lakeshire and look for Deputy Feldon south of its bridge.
- 59
Hand inEncroaching Gnolls
Continue along the road toward Lakeshire. Find Deputy Feldon at the south end of the bridge over Lake Everstill and turn in Encroaching Gnolls; take his follow-up before crossing into town.
- 60
AcceptAssessing the Threat
Accept Assessing the Threat from Deputy Feldon.
- 61
AcceptShow of Force
Speak to Deputy Feldon and accept Show of Force.
- 62
GoLearn the Lakeshire flight pathOptionalAriena Stormfeather at Lakeshire · ~25.3, 59.0
Speak with Ariena Stormfeather while you are in Lakeshire. Learn this flight path if needed, then continue the nearby quests.
- 58
Marshal MarrisRedridge Mountains~28.4, 49.0
- 63
AcceptBlackrock MenaceOptional
Speak to Marshal Marris and accept Blackrock Menace. Optional: it needs level 18. Skip it if you are below 18; the 20–30 guide offers it again in Redridge.
- 64
AcceptBlackrock BlockadeOptional
Speak to Marshal Marris and accept Blackrock Blockade. Optional: it needs level 18. Skip it if you are below 18; the 20–30 guide offers it again in Redridge.
- 65
AcceptThe Lost ToolsForeman Oslow · ~27.1, 48.6
Check Foreman Oslow by the Lakeshire bridge for The Lost Tools.
- 63
Verner OsgoodRedridge Mountains~25.9, 47.3
- 66
AcceptThe Price of Shoes
Check Verner Osgood in Lakeshire for The Price of Shoes. Keep his note for Smith Argus on the later pass through Goldshire.
- 66
Magistrate SolomonRedridge Mountains~24.9, 44.5
- 67
AcceptMessenger to Stormwind
Check Magistrate Solomon in Lakeshire for Messenger to Stormwind before the city return.
- 67
DarcyRedridge Mountains~21.5, 44.3
- 68
AcceptA Free Lunch
Check Darcy at the Lakeshire inn for A Free Lunch.
- 68
Dockmaster BarenRedridge Mountains~22.6, 47.4
- 69
AcceptSelling Fish
Speak to Dockmaster Baren and accept Selling Fish.
- 69
Wiley the BlackRedridge Mountains~21.4, 45.2
- 70
DoThe Defias Brotherhood
Carry Gryan’s message to Redridge. Enter the Lakeshire inn and climb the stairs to Wiley the Black on the upper floor.
- 71
Hand inThe Defias Brotherhood
Enter the Lakeshire inn and climb the stairs to Wiley the Black on the upper floor. Turn in The Defias Brotherhood to Wiley the Black.
- 72
AcceptThe Defias BrotherhoodOptional
Enter Lakeshire’s inn and take the stairs to Wiley the Black on the upper floor. Accept The Defias Brotherhood from Wiley the Black. Keep Wiley’s Note. You hand it to Gryan on the later Westfall return.
- 70
Chef BreannaRedridge Mountains~17.6, 43.8
- 73
AcceptRedridge Goulash
Check Chef Breanna in Lakeshire for Redridge Goulash.
- 73
Class quests
Rogue3 steps · choose your class above to show only yours- 74
DoRedridge Rendezvous
RogueLucius · ~23.1, 52.2Find Lucius on the L-shaped dock west of Lakeshire’s bridge. Speak with him and take the next lesson before leaving. Keep your current shared quests. Return to the saved mainland route after the lockpicking trial.
- 75
Hand inRedridge Rendezvous
RogueLucius · ~23.1, 52.2Find Lucius on the L-shaped dock west of Lakeshire’s bridge. Speak with Lucius and turn in Redridge Rendezvous.
- 76
AcceptAlther's Mill
RogueLucius · ~23.1, 52.2Find Lucius on the L-shaped dock west of Lakeshire’s bridge. Speak with Lucius and accept Alther's Mill.
- 74
ShawnRedridge Mountains~24.2, 53.6
- 77
AcceptHilary's Necklace
Check the children fishing beside Lake Everstill for Hilary’s Necklace.
- 77
Lake Everstill shallowsRedridge Mountains~34.9, 54.0
- 78
DoHilary's Necklace
Search underwater for Hilary’s necklace, combining the swim with the toolbox search where the markers allow. Surface between searches.
- 79
DoThe Lost ToolsLake Everstill wreck · ~35.9, 54.0
Search the bottom of Lake Everstill for Oslow’s toolbox. Use the quest marker, surface before running out of breath and avoid swimming through hostile packs.
- 78
Lucius's LockboxRedridge Mountains~47.0, 44.7
- 80
DoAlther's Mill
RogueTrain Lockpicking and keep your Thieves’ Tools. At Alther’s Mill, practise on the training boxes. Keep going until Lockpicking is 70 (80 is safer): Lucius’s box needs 25, but the Duskwood Chest in Klaven’s Tower, your next Rogue quest, needs 70, and these boxes are the only practice on the route. Then open Lucius’s Lockbox for the Token of Thievery and return to Lucius in Lakeshire.
- 80
Southeastern Blackrock campRedridge Mountains~65.6, 78.7
- 81
DoBlackrock MenaceOptional
Follow the south-bank road east to the Blackrock camps in southeastern Redridge. Kill ordinary Blackrock Grunts and Outrunners and collect ten Battleworn Axes. Keep away from Stonewatch Keep and the high-level cave camps.
- 81
Southeastern Blackrock camp suppliesRedridge Mountains~66.1, 73.6
- 82
DoBlackrock BlockadeOptional
At the Blackrock camps south of Stonewatch Keep, loot ten Stolen Supplies from water barrels, grain sacks and meat haunches and eight Stolen Weapons from weapon racks while collecting Battleworn Axes.
- 82
Southern Lake Everstill murlocsRedridge Mountains~43.7, 72.2
- 83
DoSelling Fish
Kill murlocs along the southern bank of Lake Everstill and collect ten Spotted Sunfish. Pull onto land and avoid the deep-water creatures. Fishing is not required.
- 83
Southern Redridge wildlifeRedridge Mountains~31.9, 65.0
- 84
DoRedridge Goulash
Gather five Tough Condor Meat, five Great Goretusk Snouts and five Crisp Spider Meat from ordinary wildlife along the southern Redridge roads as you sweep west from the lake toward the gnoll camps. Avoid named enemies and crowded camps.
- 84
Redridge Mongrel and Poacher camps south of the roadRedridge Mountains~26.2, 81.1
- 85
DoAssessing the Threat
Continue west to the gnoll camps south of the road. Kill ten Redridge Mongrels and six Redridge Poachers.
- 85
Redridge ThrasherRedridge Mountains~8.5, 67.8
- 86
DoShow of Force
Kill the gnoll thrashers and collect five Spiked Collars west of the Redridge road while completing the nearby gnoll outing. Check the native counter before leaving; these are not the northern Brute and Mystic targets.
- 86
Guard ParkerRedridge Mountains~10.2, 71.5
- 87
DoA Free Lunch
Carry the lunch to Guard Parker on the road leading toward Duskwood. Stay on the road; there is no need to enter Duskwood for this delivery.
- 88
Hand inA Free Lunch
Give the lunch to Guard Parker.
- 89
AcceptVisit the Herbalist
Accept Visit the Herbalist from Guard Parker after the lunch delivery.
- 87
Marshal MarrisRedridge Mountains~28.4, 49.0
- 90
Hand inBlackrock MenaceOptional
Turn in Blackrock Menace to Marshal Marris.
- 91
Hand inBlackrock BlockadeOptional
Turn in Blackrock Blockade to Marshal Marris.
- 92
Hand inThe Lost ToolsForeman Oslow · ~27.1, 48.6
Return the toolbox to Foreman Oslow.
- 93
AcceptThe Everstill BridgeForeman Oslow · ~27.1, 48.6
Check Foreman Oslow for The Everstill Bridge.
- 90
Dockmaster BarenRedridge Mountains~22.6, 47.4
- 94
Hand inSelling Fish
Turn in Selling Fish to Dockmaster Baren.
- 95
AcceptMurloc PoachersOptional
Walk down to the Lakeshire dock and check Dockmaster Baren for Murloc Poachers. Optional: it needs level 20. Skip it if you are below 20; the 20–30 guide offers it again in Redridge.
- 94
Chef BreannaRedridge Mountains~17.6, 43.8
- 96
Hand inRedridge Goulash
Return the ingredients to Chef Breanna.
- 96
Martie JainroseRedridge Mountains~16.8, 46.3
- 97
DoVisit the Herbalist
Return to Lakeshire and find Martie Jainrose at the west end of town.
- 98
Hand inVisit the Herbalist
Speak with Martie.
- 99
AcceptDelivering Daffodils
Accept Delivering Daffodils from Martie.
- 97
DarcyRedridge Mountains~21.5, 44.3
- 100
DoDelivering Daffodils
Bring the bouquet back to Darcy at the inn.
- 101
Hand inDelivering Daffodils
Give Darcy the daffodils.
- 100
LuciusRedridge Mountains~23.1, 52.2
- 102
Hand inAlther's Mill
RogueFind Lucius on the L-shaped dock west of Lakeshire’s bridge. Speak with Lucius and turn in Alther's Mill.
- 102
HilaryRedridge Mountains~24.1, 53.6
- 103
Hand inHilary's Necklace
Bring the necklace to Hilary in Lakeshire.
- 103
Deputy FeldonRedridge Mountains~25.6, 60.0
- 104
Hand inAssessing the Threat
Report your count to Deputy Feldon near the Lakeshire bridge.
- 105
Hand inShow of Force
Turn in Show of Force to Deputy Feldon.
- 104
Smith ArgusElwynn Forest~41.7, 65.5
- 106
DoThe Price of Shoes
From Lakeshire, follow the road west through Elwynn Forest and carry Verner’s note to Smith Argus in Goldshire.
- 107
Hand inThe Price of Shoes
Give the note to Smith Argus.
- 108
AcceptReturn to Verner
Take Return to Verner from Smith Argus. Keep the crate during the planned Westfall and Stormwind visits.
- 106
Gryan StoutmantleWestfall~56.3, 47.5
- 109
DoThe Defias BrotherhoodOptional
From Goldshire, follow the road west past Westbrook Garrison into Westfall. Give Wiley’s note to Gryan Stoutmantle at Sentinel Hill.
- 110
Hand inThe Defias BrotherhoodOptional
Turn in The Defias Brotherhood to Gryan Stoutmantle. If you are doing the Deadmines, take his next task, a delivery to Mathias Shaw in Stormwind.
- 109
General Marcus JonathanStormwind City~69.2, 82.7
- 111
DoMessenger to Stormwind
From Goldshire, follow the road north to Stormwind; after the optional Westfall excursion you are already in the city. Carry Solomon’s report to General Marcus Jonathan at the city entrance.
- 112
Hand inMessenger to Stormwind
Deliver the report to the General.
- 113
AcceptMessenger to Stormwind
Take the General’s response for Messenger to Stormwind. Keep it for the return to Lakeshire.
- 111
Argos NightwhisperStormwind City~36.6, 67.2
- 114
AcceptThe Corruption Abroad
During this Stormwind visit, find Argos Nightwhisper and accept The Corruption Abroad. Keep his message for Gershala on the Auberdine return after Redridge. Argos offers it only from level 18. If he has nothing for you yet, continue with the city errands; if you come back through Stormwind for the Auberdine boat after Redridge, call on him then.
- 114
Class quests
Rogue14 steps · choose your class above to show only yours- 115
DoMathias and the Defias
RogueOptionalAgent Kearnen · ~68.4, 70.0Leave Stormwind through the main gate and follow the road west through Elwynn Forest into Westfall, or fly if Dungar Longdrink offers Sentinel Hill. Visit Agent Kearnen beside the southeastern Westfall tower. Carry Thieves' Tools and prepare Lockpicking before starting the tower work.
- 116
Hand inMathias and the Defias
RogueOptionalAgent Kearnen · ~68.4, 70.0 - 117
AcceptKlaven's Tower
RogueOptionalAgent Kearnen · ~68.4, 70.0 - 118
DoKlaven's Tower
RogueOptionalDuskwood Chest · ~70.4, 73.9Read Kearnen's Journal. Pickpocket the Defias Tower Key from a Malformed Defias Drone without killing it first. Sneak into the tower and climb its stairs to the top floor. Open the Duskwood Chest beside Klaven for the journal and leave. Return both required items to Mathias Shaw. The tower contains stronger enemies, so use stealth and retreat if necessary.
- 119
Hand inKlaven's Tower
RogueOptionalMaster Mathias Shaw · ~78.3, 70.7Enter SI:7 in Stormwind’s Old Town, climb one flight of stairs and turn left to Mathias Shaw’s room. Speak with Master Mathias Shaw and turn in Klaven's Tower.
- 120
AcceptThe Touch of Zanzil
RogueOptionalMaster Mathias Shaw · ~78.3, 70.7Enter SI:7 in Stormwind’s Old Town, climb one flight of stairs and turn left to Mathias Shaw’s room. Speak with Master Mathias Shaw and accept The Touch of Zanzil.
- 121
DoThe Touch of Zanzil
RogueOptionalDoc Mixilpixil · ~80.0, 70.1Inside SI:7 in Stormwind’s Old Town, take the stairs down to the basement to find Doc Mixilpixil. Speak with him for treatment of the tower poison.
- 122
Hand inThe Touch of Zanzil
RogueOptionalDoc Mixilpixil · ~80.0, 70.1Inside SI:7 in Stormwind’s Old Town, take the stairs down to the basement to Doc Mixilpixil. Speak with Doc Mixilpixil and turn in The Touch of Zanzil.
- 123
AcceptThe Touch of Zanzil
RogueOptionalDoc Mixilpixil · ~80.0, 70.1 - 124
DoThe Touch of Zanzil
RogueOptionalDoc Mixilpixil · ~80.0, 70.1Target Doc Mixilpixil and use /lay. Stay nearby until the examination objective completes, then turn it in.
- 125
Hand inThe Touch of Zanzil
RogueOptionalDoc Mixilpixil · ~80.0, 70.1 - 126
AcceptThe Touch of Zanzil
RogueOptionalDoc Mixilpixil · ~80.0, 70.1 - 127
DoThe Touch of Zanzil
RogueOptionalFelicia Gump · ~69.3, 71.3If you still need the cure, buy Simple Wildflowers at Fragrant Flowers and a Leaded Vial from a general or alchemy supplier. Loot the thread from the floor of The Finest Thread shop by Cathedral Square. Obtain a Bronze Tube from Billibub in the Dwarven District if stocked, or through trade. Bring one of each to Doc Mixilpixil and use the cure. Do not wait indefinitely for vendor stock or change professions.
- 128
Hand inThe Touch of Zanzil
RogueOptionalDoc Mixilpixil · ~80.0, 70.1Inside SI:7 in Stormwind’s Old Town, take the stairs down to the basement to find Doc Mixilpixil. Speak with Doc Mixilpixil and turn in The Touch of Zanzil.
- 115
Verner OsgoodRedridge Mountains~25.9, 47.3
- 129
DoReturn to Verner
Return to Lakeshire. Fly from Stormwind if you know the Lakeshire flight path; otherwise follow the road east through Elwynn Forest into Redridge. Carry the Crate of Horseshoes back to Verner Osgood.
- 130
Hand inReturn to Verner
Deliver the crate to Verner.
- 131
AcceptA Baying of Gnolls
Check Verner Osgood for A Baying of Gnolls.
- 132
AcceptUnderbelly Scales
Check Verner for Underbelly Scales after delivering the horseshoes.
- 129
Magistrate SolomonRedridge Mountains~24.9, 44.5
- 133
DoMessenger to Stormwind
Return to Magistrate Solomon in Lakeshire with the response.
- 134
Hand inMessenger to Stormwind
Give the General’s letter to Solomon.
- 133
Gnoll camps north of LakeshireRedridge Mountains~19.0, 37.3
- 135
DoA Baying of Gnolls
On the ridge north of Verner’s stable, kill ten Redridge Brutes and eight Redridge Mystics. Separate caster pulls and gather the stolen bridge supplies.
- 136
DoThe Everstill Bridge
Go into the hills behind Lakeshire. Kill Redridge gnolls and collect five Iron Pikes and five Iron Rivets while working the brute and mystic objective.
- 135
Southern drakesRedridge Mountains~22.9, 66.0
- 137
DoUnderbelly Scales
Kill Black Dragon Whelps south of Lakeshire and collect six Underbelly Whelp Scales. Watch for wandering whelps.
- 137
Lake Everstill murloc searchRedridge Mountains~42.2, 66.2
- 138
DoMurloc PoachersOptional
Kill murlocs along Lake Everstill and collect eight Murloc Fins. Keep a clear retreat to the shore.
- 138
Dockmaster BarenRedridge Mountains~22.6, 47.4
- 139
Hand inMurloc PoachersOptional
Return the fins to Dockmaster Baren.
- 139
Verner OsgoodRedridge Mountains~25.9, 47.3
- 140
Hand inA Baying of Gnolls
Return to Verner Osgood.
- 141
Hand inUnderbelly Scales
Bring the scales to Verner.
- 140
Foreman OslowRedridge Mountains~27.1, 48.6
- 142
Hand inThe Everstill Bridge
Bring the iron supplies to Foreman Oslow.
- 142
Class quests
Druid19 steps · choose your class above to show only yours- 143
Hand inCuring the Sick
DruidDendrite Starblaze · ~56.2, 30.6Cast Teleport: Moonglade and go upstairs in the Nighthaven building ahead of the arrival point. Turn in Curing the Sick to Dendrite Starblaze and take Power over Poison. The medicine pouch from this hand-in is not the Cure Poison spell.
Travel directions to Moonglade
- 144
AcceptPower over Poison
DruidDendrite Starblaze · ~56.2, 30.6 - 145
DoPower over Poison
DruidMathrengyl Bearwalker · ~35.4, 8.4Take Silva Fil’naveth’s Druid flight to Rut’theran Village, then the portal into Darnassus. In the Cenarion Enclave, follow the spiral ramp in the northwestern tree building to Mathrengyl Bearwalker on the balcony one level up and finish Power over Poison.
Travel directions to Darnassus
- 146
Hand inPower over Poison
DruidMathrengyl Bearwalker · ~35.4, 8.4Turn in Power over Poison to Mathrengyl Bearwalker and check Cure Poison in your spellbook. Stay with him for The Great Cat Spirit.
- 147
AcceptThe Great Cat Spirit
DruidOptionalMathrengyl Bearwalker · ~35.2, 8.0At level 20, speak with Mathrengyl Bearwalker on the balcony one level up the northwestern Cenarion Enclave tree and accept The Great Cat Spirit. Optional here: it needs level 20. If you are not 20 yet, carry on; the level-20 class detour offers it once you reach 20.
- 148
DoThe Great Cat Spirit
DruidOptionalDendrite Starblaze · ~56.2, 30.4At level 20, visit the named Druid trainer for the cat-form referral. Use Teleport: Moonglade and report to Dendrite upstairs in the Nighthaven building directly ahead of the teleport arrival.
Travel directions to Moonglade
- 149
Hand inThe Great Cat Spirit
DruidOptionalDendrite Starblaze · ~56.2, 30.4Dendrite Starblaze is upstairs in the Nighthaven building directly ahead of the Moonglade teleport arrival. Enter and take the stairs up. Speak with Dendrite Starblaze and turn in The Great Cat Spirit.
- 150
AcceptThe Great Windborne Cat Spirit
DruidOptionalDendrite Starblaze · ~56.2, 30.4 - 151
DoThe Great Windborne Cat Spirit
DruidOptionalAvatar of Saeyleenan · ~44.0, 73.4Meet the Avatar of Saeyleenan in southern Moonglade. Take the relic trial before entering the dens.
- 152
Hand inThe Great Windborne Cat Spirit
DruidOptionalAvatar of Saeyleenan · ~44.0, 73.4 - 153
AcceptThe Great Windborne Cat Spirit
DruidOptionalAvatar of Saeyleenan · ~44.0, 73.4 - 154
DoThe Great Windborne Cat Spirit
DruidOptionalStormrage Barrow Dens — find the trial entrance · ~68.0, 60.2Travel to the Stormrage Barrow Dens area east of the spirit. The marker shows the den area; find the trial’s entrance statue and use its temporary stealth blessing. Search inside for all three relics: Fang, Claw and Silent Shadow. Avoid the powerful spirits, and renew the blessing if needed. Return to the spirit only after all three relics are in your bags.
- 155
Hand inThe Great Windborne Cat Spirit
DruidOptionalAvatar of Saeyleenan · ~44.0, 73.4 - 156
AcceptBlessings of the Great Windborne Cat Spirit
DruidOptionalAvatar of Saeyleenan · ~44.0, 73.4 - 157
DoBlessings of the Great Windborne Cat Spirit
DruidOptionalDendrite Starblaze · ~56.2, 30.4Return to Dendrite upstairs in the Nighthaven building directly ahead of the teleport arrival with the spirit’s blessing. Accept his final city referral before leaving.
- 158
Hand inBlessings of the Great Windborne Cat Spirit
DruidOptionalDendrite Starblaze · ~56.2, 30.4Dendrite Starblaze is upstairs in the Nighthaven building directly ahead of the Moonglade teleport arrival. Enter and take the stairs up. Speak with Dendrite Starblaze and turn in Blessings of the Great Windborne Cat Spirit.
- 159
AcceptTo Darnassus
DruidOptionalDendrite Starblaze · ~56.2, 30.4 - 160
DoTo Darnassus
DruidOptionalMathrengyl Bearwalker · ~35.2, 8.0Take Silva Fil’naveth’s Druid flight to Rut’theran Village, then use the portal to Darnassus. In Darnassus’s Cenarion Enclave, enter the northwestern tree building and follow the spiral ramp to Mathrengyl Bearwalker on the balcony one level up. Turn in the final lesson and check Cat Form in your spellbook.
Travel directions to Darnassus
- 161
Hand inTo Darnassus
DruidOptionalMathrengyl Bearwalker · ~35.2, 8.0Find Mathrengyl Bearwalker on the balcony one level up the northwestern tree building in Darnassus’s Cenarion Enclave. Use the spiral ramp inside. Speak with Mathrengyl Bearwalker and turn in To Darnassus. The route continues in Auberdine; the next step offers your hearthstone if it is set there.
- 143
Gershala NightwhisperDarkshore~38.3, 43.0
- 162
DoThe Corruption Abroad
Return to Auberdine. Use your hearthstone if it is set there. Otherwise, from Lakeshire, fly to Stormwind if you know that flight path or follow the road west through Elwynn Forest, then take the Auberdine boat at Stormwind Harbor. Druids coming from their Darnassus lesson take the portal to Rut’theran Village and the Auberdine boat instead. In Auberdine, speak with Gershala Nightwhisper about the corruption. Keep any dungeon follow-up separate from the shared route.
Travel directions to Darkshore
- 163
Hand inThe Corruption Abroad
Report to Gershala Nightwhisper in Auberdine and claim the reward. Researching the Corruption is a separate optional dungeon quest; this delivery does not require entering Blackfathom Deeps.
- 162
Beached Sea CreatureDarkshore~31.3, 87.4
- 164
AcceptBeached Sea Creature
Inspect these remains on the southern Darkshore coast and accept Beached Sea Creature. Clear the nearby murlocs before approaching; collect the other coastal samples before the planned Auberdine return.
- 165
DoBeached Sea Creature
Inspect the coastal remains and keep the recovered sample for Gwennyth in Auberdine. Continue the same southern-coast outing before returning to town.
- 164
Beached Sea TurtleDarkshore~31.2, 85.6
- 166
AcceptBeached Sea Turtle
Inspect these remains on the southern Darkshore coast and accept Beached Sea Turtle. Clear the nearby murlocs before approaching; collect the other coastal samples before the planned Auberdine return.
- 167
DoBeached Sea Turtle
Inspect the coastal remains and keep the recovered sample for Gwennyth in Auberdine. Continue the same southern-coast outing before returning to town.
- 166
OnuDarkshore~43.5, 76.3
- 168
Hand inMathystra Relics
- 169
Hand inSwelling ForcesOptionalArbal · ~43.6, 76.4
Find Arbal in the Grove and hand in Swelling Forces during the same return as Mathystra Relics.
- 170
AcceptThe Sleeper Has AwakenedKerlonian Evershade · ~44.4, 76.4
Speak with Kerlonian Evershade and accept The Sleeper Has Awakened. Then open Kerlonian’s Chest beside him and take the Horn of Awakening. The escort has a 25-minute timer.
- 168
VolcorDarkshore~45.0, 85.3
- 171
DoA Lost Master
From Kerlonian, follow the road south and deliver Terenthis’s cloak to Volcor in his cave. Kerlonian follows you into the cave and through Volcor’s escape, so wake him with the Horn of Awakening whenever he falls asleep.
- 172
Hand inA Lost Master
- 173
AcceptEscape Through Stealth
After delivering the cloak, speak with Volcor and choose Escape Through Stealth. Do not take Escape Through Force as well. If the stealth offer is unavailable, defer this chain and continue south.
- 174
DoEscape Through Stealth
Speak with Volcor to begin the stealth escape and follow his instructions out of the cave. Wait for the native quest log to confirm success. If the event fails or stalls, defer it; no fixed timer is assumed. Continue south when finished and keep the report: the 20–30 guide hands it to Terenthis in Auberdine on its way to the Menethil boat.
- 171
Kerlonian’s bag, south DarkshoreDarkshore~41.8, 90.2
- 175
DoThe Sleeper Has Awakened
Kerlonian follows you once you have the horn. Lead him south along the Darkshore road to his bag near 41.8, 90.2, and use the Horn of Awakening whenever he falls asleep. The escort completes at the bag. Then follow the road south into Ashenvale and hand the quest in to Liladris Moonriver at Maestra’s Post. If he disappears or the attempt fails, defer it through Quest unavailable? and continue the route.
- 175
Liladris MoonriverAshenvale~27.3, 35.6
- 176
Hand inThe Sleeper Has Awakened
Return to Liladris Moonriver and claim the reward for The Sleeper Has Awakened.
- 176
Delgren the PurifierAshenvale~26.2, 38.7
- 177
DoThe Tower of Althalaxx
Carry Balthule's letter south into Ashenvale to Delgren the Purifier at Maestra's Post.
- 178
Hand inThe Tower of Althalaxx
- 179
AcceptThe Tower of Althalaxx
- 177
Dark Strand CultistAshenvale~30.8, 31.6
- 180
DoThe Tower of Althalaxx
Kill the Dark Strand cultists and collect the Glowing Soul Gem near Maestra’s Post and return to Delgren before continuing to Astranaar. Avoid the later named-warlock follow-up.
- 180
Delgren the PurifierAshenvale~26.2, 38.7
- 181
Hand inThe Tower of Althalaxx
- 181
- 182
GoReach level 20
Check your level before choosing the next journey. If you are below level 20, this step shows the XP you still need; finish any unfinished quests nearby.
- 182
Follow this chapter in game. Wisp shows your next quest step and nearby objectives beside you. Free, no account needed.
Continue with Alliance levelling: 20–45.
Pre-order the full Alliance 20–60 guide to get 20–45 now in Wisp. An online reader is included, and later bands to 60 are included when released. See the coverage and current purchase availability.
Explore the Alliance 20–60 guide ↗Already own it? Read your 20–45 guide ↗
Reading online? Open the paid reader, choose your race and class, then use “Continuing from the free 1–20 guide?” to find the handoff. Your reading position does not transfer. Review any unfinished quests; completed quests are not automatically skipped. Manual ticks in the paid reader last only for that page visit.
About this route
This route and its XP pacing are being optimised and refined. Your live quest log takes priority if WoW Forever differs at launch.
Route version and known limits
Written from route version 0.17.12, authored against client build 1.60.1.69913.
- This written guide matches prepared Wisp 1.8.0. A complete in-game playthrough, quest availability and measured XP pacing remain unverified.
- The chapter order and quest steps come from the release. A full playthrough and experience tuning for every class are still in progress.
- Class branches cover the tasks present in this release. They are not a complete inventory of every class quest or unlock.
- If an infiltration interaction, portal or quest offer is missing in your build, keep the relevant quest active and check its live requirements rather than treating the step as complete.
Game imagery © Blizzard Entertainment.
Report a confusing or changed step ↗A connected journeyQuests and turn-ins in a planned order.
Made for your characterYour class quests beside the shared route.
Keep your eyes on the gameFollow the route with Wisp beside you.
Take this route into the game.
Follow this Skyborne route with Wisp, our free leveling and quest addon. All eight starting routes towards level 20 are included. No account needed.
Starting another character?
Explore all 8 starting routes ↗Reached level 20?
Explore Alliance 20–60 · 20–45 released ↗