
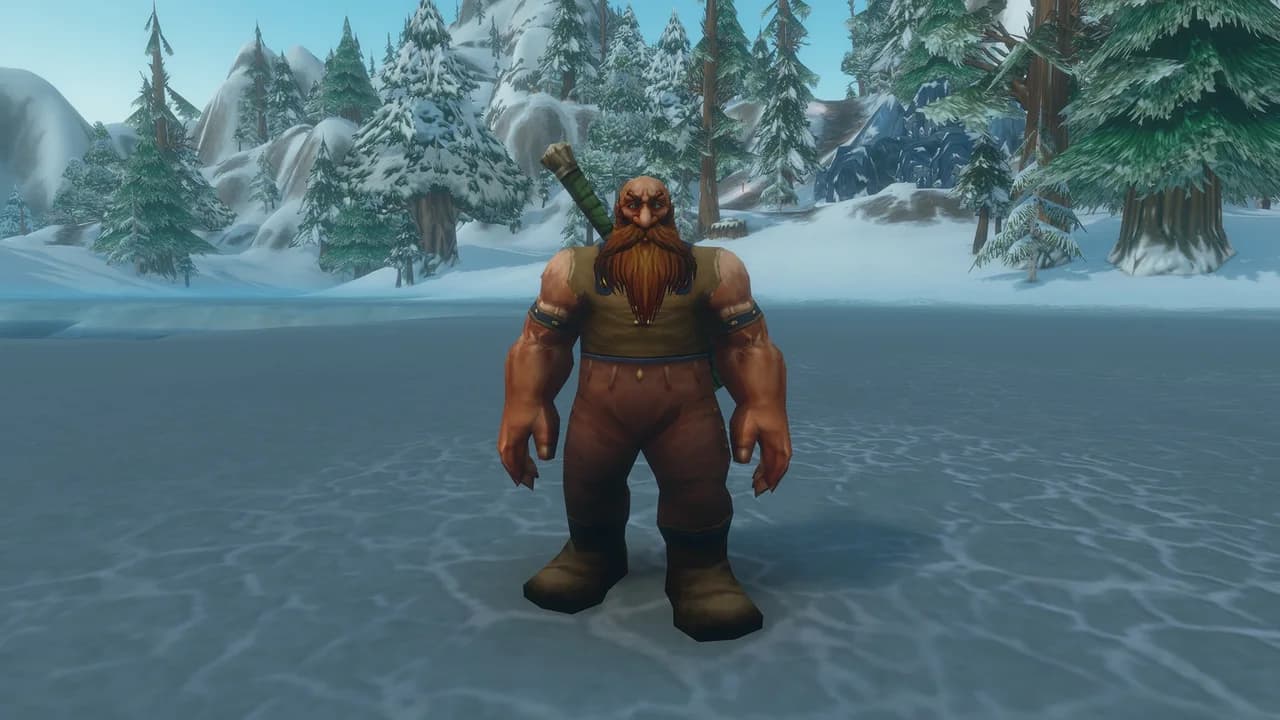
Dwarf and Gnome levelling guide
Levels 1–20
Dun Morogh → Elwynn Forest → Loch Modan → Westfall → Darkshore → Redridge Mountains
The revised route visits Dun Morogh, Loch Modan, Ironforge, Elwynn, Westfall, Darkshore and Redridge, and finishes at Maestra’s Post in Ashenvale. Dun Morogh now leads straight into a first Loch Modan visit, and the level-10 class lessons happen around Ironforge and Kharanos before the tram to Stormwind.
Free 1–20 route · No account needed · Also on CurseForge
· 8 chapters
World of Warcraft imagery © Blizzard Entertainment. Official preview; guide locations may differ. Image source ↗
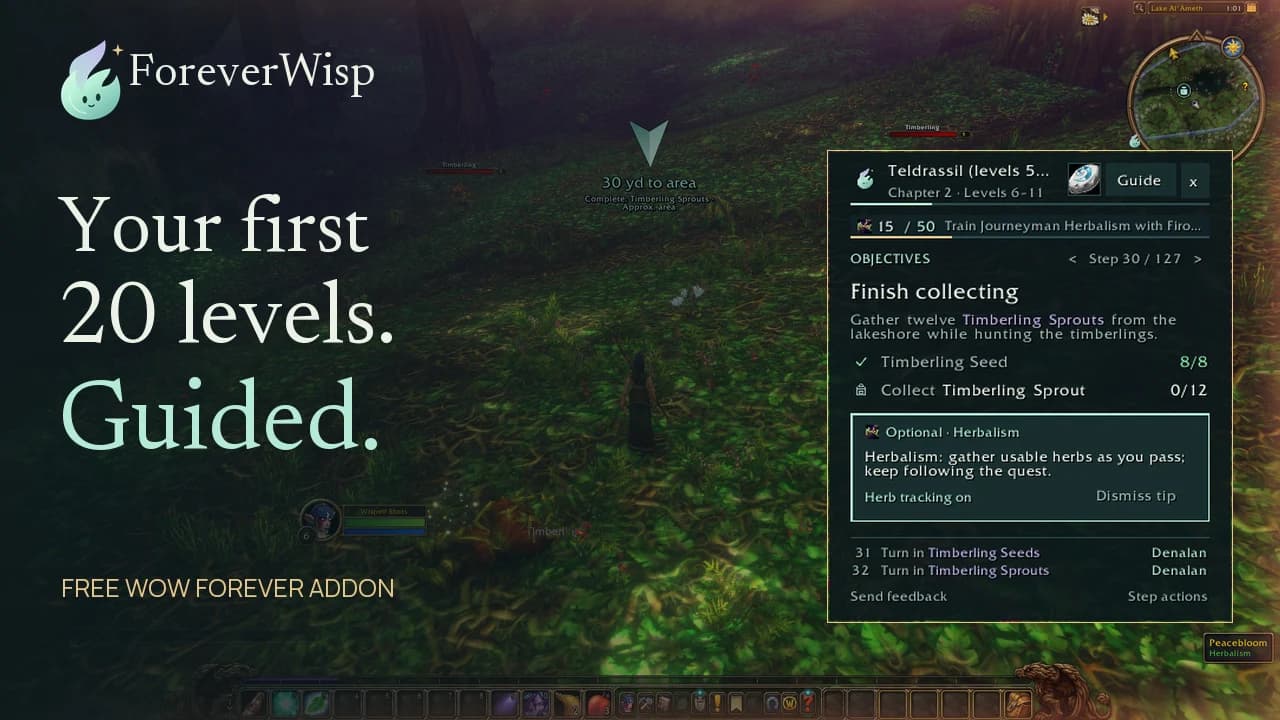
Quest guidance, dungeon trips, gathering and talents. 1:10 · Recorded 30–31 October 2026 · English captions.
Read the video transcript
Spend less time checking where to go and more time enjoying Azeroth. Meet ForeverWisp, your in-game levelling guide for WoW: Forever. Choose a suggested guide, hit start, and set off.
The arrow points you towards your next objective, while the guide keeps the details close by: who to speak to, what to collect, and what’s coming next. As you complete objectives, Wisp tracks your progress and moves the guide forward.
From Northshire to Teldrassil and across the Barrens, there’s a starting route for your character. And there’s room for a few detours. When a dungeon fits your journey, Wisp suggests the trip and helps you prepare. Add it to your route or keep questing.
Taking up a profession? Add gathering reminders along the way, with trainer stops to help you keep progressing. Choose a talent build and see where your next point goes. Travel suggestions help you make your way between stops. And with different themes, you can make the guide feel at home on your screen.
Eight starter routes. Your first 20 levels. All included free. Get ready for November 4th. Download Wisp at foreverwisp.com. Less looking up. More Azeroth.
Your journey,
one chapter at a time.
Choose your character, then start at the beginning or jump to a chapter.
Showing all races and all applicable class quests. Level ranges are approximate checkpoints, not guaranteed XP.
Before you set out
After Coldridge Valley and Kharanos, the route reaches Thelsamar, flies to Ironforge and takes the Deeprun Tram to Stormwind. A short eastern Elwynn circuit touches Lakeshire, then you return to Thelsamar for the main Loch Modan chapter. From there you travel through Ironforge and Stormwind to Westfall, sail from Stormwind Harbor to Auberdine for two Darkshore chapters, and finish with northern Darkshore, Redridge, the optional Defias chain and a return to southern Darkshore. Keep the delivery quests along the way, since several are handed in on a later visit.
Choose your race and class to see the relevant lessons alongside the shared quest route. Dwarf and Gnome characters share the journey, but their trainer introductions and some class quests differ. The level bands are planning checkpoints, so check each quest's requirement against your character before setting off.
This is a prepared route candidate. The level bands are recommendations, and normal solo XP sufficiency has not been measured. Finish accepted work and use your actual level. Optional group encounters and catch-up grinding are not assumed to fund the next chapter.
- Start with Dwarven Outfitters at Sten Stoutarm. Its turn-in leads into the mail delivery and trainer introductions used by the opening chapter.
- Select both your race and class before following the class steps. A Dwarf Priest and a Gnome Priest have different lessons even though both use the same shared route.
- Keep Shimmer Stout for Mountaineer Barleybrew by the Loch Modan tunnels and carry Stormpike’s Order to Furen Longbeard in Stormwind. Keep Grimand Elmore’s package for Stormpike’s Delivery through the Elwynn circuit, and keep Return to Brock until you are back in Thelsamar.
- Check individual pickup requirements rather than relying only on chapter headings. Level checks before class lessons show your actual XP and let you continue, but the quest itself still needs the stated level.
- If a quest is unavailable, check the preceding turn-in and your level. In Wisp, use Quest unavailable? to defer an absent chain instead of marking it complete.
Class quests and unlocks
Warrior: Both races have their own opening introduction. The route places Muren Stormpike and the Vejrek trial around the Kharanos and Ironforge visits from level 10. The selected defensive lesson is authored, but its live offer and reward still need confirmation.
Hunter: The Dwarf branch includes three Taming the Beast lessons from level 10, followed by Training the Beast during the Ironforge visit. Keep the correct rod for each lesson. If the game reports an active trial pet, dismiss that temporary pet before the next attempt.
Paladin: The Dwarf branch includes the Tome of Divinity sequence from level 12 in Ironforge at the end of the main Loch Modan chapter. Tiza Battleforge, John Turner and Muiredon Battleforge pass you along, and Narm Faulk at Helm’s Bed Lake needs the Symbol of Life before the Dark Iron Script. Keep ten Linen Cloth for John Turner. Optional equipment chains are not required by this written route.
Rogue: Both races have a level-16 lockpicking branch from Renzik in Stormwind that leads to Lucius and Alther’s Mill in Redridge. During the level-10 Ironforge visit, the optional Road to Salvation chain from Hogral Bakkan in Kharanos leads to Onin MacHammar outside Gnomeregan for a Rogue weapon reward. The level-20 sequence includes Mathias and the Defias, Klaven's Tower and The Touch of Zanzil. Follow the cure steps as well as the tower task.
Priest: Select your race as well as Priest. Both races can take the optional In Favor of the Light from Branstock in Anvilmar, then Garments of the Light from Maxan Anvol in the Kharanos inn. The Dwarf route includes Desperate Prayer and Chastise, while the Gnome route includes Confounding Flash and Contingency Plan. The latter lessons use the new Gnome quest records, but live eligibility and spell rewards remain under review.
Mage: The Gnome branch includes Glyphic Memorandum in Anvilmar, plus an optional Speak with Bink and Mage-tastic Gizmonitor chain from Kharanos for a Mage equipment reward. The local coverage review has not identified another mandatory quest reward through level 20 beyond trainer teaching. That is not a claim that every beta spell or optional equipment chain has been checked.
Warlock: The Gnome branch starts with Beginnings, adds the Voidwalker sequence around the level-10 city visit and places Devourer of Souls, Heartswood and The Binding at level 20. These are authored pet journeys, with live acceptance and rewards still awaiting confirmation.
Shaman: The Dwarf branch weaves Earth into Coldridge, takes Fire from Eldrun Stormbreaker during the Ironforge visit and completes it around Loch Modan and Bruegs Kindleborn’s cave, then places Water at level 20. Earth requires level 4, Fire level 10 and Water level 20 in the route data. Water is an optional journey through Loch Modan, the Wetlands, Darkshore, Ashenvale and Westfall. Shrine approaches and actual rewards still need a full live check.
CHAPTER 01 · LEVELS 1–5
Dun Morogh (levels 1–5)
Begin in Anvilmar with Sten Stoutarm’s Dwarven Outfitters, which leads into the Coldridge Valley mail delivery and your class introduction. Talin Keeneye’s boars and Balir Frosthammer’s optional threat come first, then Grelin Whitebeard sends you into the troll cave twice, the second time for Grik’nir the Cold. Nori Pridedrift’s mornbrew delivery and Grund Drokda fill the valley, and the chapter ends with Mountaineer Thalos at the tunnel, holding Senir’s report and Supplies to Tannok.
- The Boar Hunter needs twelve Small Crag Boars and The Troll Cave needs fourteen Frostmane Troll Whelps.
- Return to Grelin after the first cave visit. That hand-in unlocks The Stolen Journal, so a second trip to the rear chamber is needed.
- Dwarf Shamans need level 4 for Call of Earth. Gnome Warlocks collect three Feather Charms from Frostmane Novices for Beginnings during the cave visit.
Quest order 86 steps
Sten StoutarmDun Morogh~29.9, 71.2
- 01
AcceptDwarven Outfitters
- 01
Ragged Young WolfDun Morogh~32.3, 70.8
- 02
DoDwarven Outfitters
Kill Ragged Young Wolves and collect eight Tough Wolf Meat on the snowy ground around the Coldridge camp.
- 02
Sten StoutarmDun Morogh~29.9, 71.2
- 03
Hand inDwarven Outfitters
- 04
AcceptColdridge Valley Mail Delivery
- 03
Class quests
 Warrior
 Paladin
 Hunter
 Rogue
 Priest
 Mage
 Warlock
 Shaman11 steps · choose your class above to show only yours
- 05
AcceptSimple Rune
WarriorSten Stoutarm · ~29.9, 71.2 - 06
AcceptConsecrated Rune
PaladinSten Stoutarm · ~29.9, 71.2 - 07
AcceptEtched Rune
HunterSten Stoutarm · ~29.9, 71.2 - 08
AcceptEncrypted Rune
RogueSten Stoutarm · ~29.9, 71.2 - 09
AcceptHallowed Rune
PriestSten Stoutarm · ~29.9, 71.2 - 10
AcceptSimple Memorandum
WarriorSten Stoutarm · ~29.9, 71.2 - 11
AcceptEncrypted Memorandum
RogueSten Stoutarm · ~29.9, 71.2 - 12
AcceptGlyphic Memorandum
MageSten Stoutarm · ~29.9, 71.2 - 13
AcceptTainted Memorandum
WarlockSten Stoutarm · ~29.9, 71.2 - 14
AcceptHallowed Memorandum
PriestSten Stoutarm · ~29.9, 71.2 - 15
AcceptArchaic Rune
ShamanSten Stoutarm · ~29.9, 71.2
- 05
Balir FrosthammerDun Morogh~29.7, 71.3
- 16
AcceptA New Threat
- 16
Talin KeeneyeDun Morogh~22.6, 71.4
- 17
DoColdridge Valley Mail Delivery
Carry the letters to Talin Keeneye farther along the Coldridge path.
- 18
Hand inColdridge Valley Mail Delivery
- 19
AcceptThe Boar Hunter
- 20
AcceptColdridge Valley Mail Delivery
- 17
Rockjaw TroggDun Morogh~32.4, 74.5
- 21
DoA New Threat
Kill six Rockjaw Troggs and six Burly Rockjaw Troggs on the snowy slopes around Coldridge. Finish Boar Hunter on the same outing before returning to Balir and visiting Anvilmar.
- 21
Small Crag BoarDun Morogh~22.8, 71.0
- 22
DoThe Boar Hunter
Kill twelve Small Crag Boars while working on A New Threat. Finish both counts, then visit Balir and Anvilmar before returning west to Talin and continuing to Grelin.
- 22
Balir FrosthammerDun Morogh~29.7, 71.3
- 23
Hand inA New Threat
- 23
Class quests
WarriorPaladinHunterRoguePriestMageWarlockShaman25 steps · choose your class above to show only yours- 24
DoSimple Rune
WarriorThran Khorman · ~28.8, 67.2Read the introduction and speak to Thran Khorman at Anvilmar. Finish the native reward before returning to the shared errands.
- 25
Hand inSimple Rune
WarriorThran Khorman · ~28.8, 67.2Find Thran Khorman at Anvilmar and hand in Simple Rune. Continue the local errands after this introduction.
- 26
DoConsecrated Rune
PaladinBromos Grummner · ~28.8, 68.3Read the introduction and speak to Bromos Grummner at Anvilmar. Finish the native reward before returning to the shared errands.
- 27
Hand inConsecrated Rune
PaladinBromos Grummner · ~28.8, 68.3Find Bromos Grummner at Anvilmar and hand in Consecrated Rune. Continue the local errands after this introduction.
- 28
DoEtched Rune
HunterThorgas Grimson · ~29.2, 67.5Read the introduction and speak to Thorgas Grimson at Anvilmar. Finish the native reward before returning to the shared errands.
- 29
Hand inEtched Rune
HunterThorgas Grimson · ~29.2, 67.5Find Thorgas Grimson at Anvilmar and hand in Etched Rune. Continue the local errands after this introduction.
- 30
DoEncrypted Rune
RogueSolm Hargrin · ~28.4, 67.5Read the introduction and speak to Solm Hargrin at Anvilmar. Finish the native reward before returning to the shared errands.
- 31
Hand inEncrypted Rune
RogueSolm Hargrin · ~28.4, 67.5Find Solm Hargrin at Anvilmar and hand in Encrypted Rune. Continue the local errands after this introduction.
- 32
DoHallowed Rune
PriestBranstock Khalder · ~28.6, 66.4Read the introduction and speak to Branstock Khalder at Anvilmar. Finish the native reward before returning to the shared errands.
- 33
Hand inHallowed Rune
PriestBranstock Khalder · ~28.6, 66.4Find Branstock Khalder at Anvilmar and hand in Hallowed Rune. Continue the local errands after this introduction.
- 34
DoSimple Memorandum
WarriorThran Khorman · ~28.8, 67.2Read the introduction and speak to Thran Khorman at Anvilmar. Finish the native reward before returning to the shared errands.
- 35
Hand inSimple Memorandum
WarriorThran Khorman · ~28.8, 67.2Find Thran Khorman at Anvilmar and hand in Simple Memorandum. Continue the local errands after this introduction.
- 36
DoEncrypted Memorandum
RogueSolm Hargrin · ~28.4, 67.5Read the introduction and speak to Solm Hargrin at Anvilmar. Finish the native reward before returning to the shared errands.
- 37
Hand inEncrypted Memorandum
RogueSolm Hargrin · ~28.4, 67.5Find Solm Hargrin at Anvilmar and hand in Encrypted Memorandum. Continue the local errands after this introduction.
- 38
DoGlyphic Memorandum
MageMarryk Nurribit · ~28.7, 66.4Read the introduction and speak to Marryk Nurribit at Anvilmar. Finish the native reward before returning to the shared errands.
- 39
Hand inGlyphic Memorandum
MageMarryk Nurribit · ~28.7, 66.4Find Marryk Nurribit at Anvilmar and hand in Glyphic Memorandum. Continue the local errands after this introduction.
- 40
DoTainted Memorandum
WarlockAlamar Grimm · ~28.6, 66.1Read the introduction and speak to Alamar Grimm at Anvilmar. Finish the native reward before returning to the shared errands.
- 41
Hand inTainted Memorandum
WarlockAlamar Grimm · ~28.6, 66.1Find Alamar Grimm at Anvilmar and hand in Tainted Memorandum. Continue the local errands after this introduction.
- 42
AcceptBeginnings
WarlockAlamar Grimm · ~28.6, 66.1 - 43
DoHallowed Memorandum
PriestBranstock Khalder · ~28.6, 66.4Read the introduction and speak to Branstock Khalder at Anvilmar.
- 44
Hand inHallowed Memorandum
PriestBranstock Khalder · ~28.6, 66.4Find Branstock Khalder at Anvilmar and hand in Hallowed Memorandum. Continue the local errands after this introduction.
- 45
DoArchaic Rune
ShamanTeo Hammerstorm · ~28.8, 66.2Read the Archaic Rune and speak to Teo Hammerstorm inside Anvilmar during the Felix visit.
- 46
Hand inArchaic Rune
ShamanTeo Hammerstorm · ~28.8, 66.2Find Teo Hammerstorm inside Anvilmar and give him the Archaic Rune.
- 47
GoLevel 4 for Call of Earth
ShamanCall of Earth needs level 4. If you are lower, finish the accepted work nearby or gain the remaining XP before taking it; the route continues either way.
- 48
AcceptCall of Earth
ShamanLevel 4+Teo Hammerstorm · ~28.8, 66.2Before the troll-cave outing, visit Teo Hammerstorm inside Anvilmar and accept Call of Earth.
- 24
Felix WhindleboltDun Morogh~28.6, 67.6
- 49
AcceptA Refugee's QuandaryOptional
Accept A Refugee’s Quandary from Felix inside Anvilmar before leaving for the Coldridge camps.
- 49
Talin KeeneyeDun Morogh~22.6, 71.4
- 50
Hand inThe Boar Hunter
- 50
Grelin WhitebeardDun Morogh~25.1, 75.7
- 51
DoColdridge Valley Mail Delivery
Take Talin's remaining letter to Grelin Whitebeard near the troll caves.
- 52
Hand inColdridge Valley Mail Delivery
- 53
AcceptThe Troll Cave
- 51
Felix’s BoxDun Morogh~20.9, 76.1
- 54
DoA Refugee's QuandaryOptional
Recover Felix’s Box, Chest and Bucket of Bolts from the three troll camps southwest of Anvilmar. Work west to east toward the troll cave; collect all three before returning to Felix.
- 54
Frostmane Troll Whelps at the Coldridge caveDun Morogh~27.3, 79.6
- 55
DoThe Troll Cave
Kill fourteen Frostmane Troll Whelps near and inside the Coldridge troll cave. Finish any accepted cave class objectives before returning to Grelin. This return unlocks The Stolen Journal, so the later visit for Grik’nir is necessary.
- 55
Class quests
WarlockShaman2 steps · choose your class above to show only yours- 56
DoBeginnings
WarlockFrostmane Novice · ~29.0, 82.6Kill Frostmane Novices and collect three Feather Charms during the Coldridge troll-cave visit.
- 57
DoCall of Earth
ShamanFrostmane Troll Whelps at the Coldridge cave · ~27.3, 79.6Kill Frostmane Troll Whelps and collect two Iceclaw Bear Pendants during the Coldridge cave outing. The quest text calls these Frostmane Bear Pendants; follow the native item counter.
- 56
Grelin WhitebeardDun Morogh~25.1, 75.7
- 58
Hand inThe Troll Cave
- 59
AcceptThe Stolen Journal
- 58
Grik'nir the ColdDun Morogh~30.5, 80.2
- 60
DoThe Stolen Journal
Enter the Coldridge troll cave and continue to its rear chamber. Kill Grik’nir the Cold and recover Grelin's journal. Keep a clear path back to the entrance.
- 60
Grelin WhitebeardDun Morogh~25.1, 75.7
- 61
Hand inThe Stolen Journal
- 62
AcceptSenir's Observations
- 63
AcceptScalding Mornbrew DeliveryNori Pridedrift · ~25.0, 76.0
- 61
Durnan FurcutterDun Morogh~28.8, 66.4
- 64
DoScalding Mornbrew Delivery
Carry the hot Mornbrew straight into Anvilmar and give it to Durnan Furcutter within five minutes. Finish this delivery before taking the northwest bag trip.
- 65
Hand inScalding Mornbrew Delivery
- 66
AcceptBring Back the Mug
- 64
Class quests
WarlockShaman8 steps · choose your class above to show only yours- 67
Hand inBeginnings
WarlockAlamar Grimm · ~28.6, 66.1Return to Alamar Grimm in Anvilmar, deliver the materials and check Summon Imp in your spellbook.
- 68
Hand inCall of Earth
ShamanTeo Hammerstorm · ~28.8, 66.2Return to Teo in Anvilmar with both pendants. Take the Earth Sapta trial before leaving.
- 69
AcceptCall of Earth
ShamanTeo Hammerstorm · ~28.8, 66.2 - 70
DoCall of Earth
ShamanEarth Spirit Stone: drink Earth Sapta · ~25.0, 62.4Leave Anvilmar and find the mountain path at 25.8, 69.3. Follow it to the Spirit Stone, drink the Earth Sapta there and speak to the earth elemental.
- 71
Hand inCall of Earth
ShamanEarth Spirit Stone: drink Earth Sapta · ~25.0, 62.4Follow the mountain path from 25.8, 69.3 to the Spirit Stone. Drink the Earth Sapta, turn in Call of Earth to the manifestation and take its Rough Quartz delivery.
- 72
AcceptCall of Earth
ShamanEarth Spirit Stone: drink Earth Sapta · ~25.0, 62.4Speak with Minor Manifestation of Earth and accept Call of Earth.
- 73
DoCall of Earth
ShamanTeo Hammerstorm · ~28.8, 66.2Carry the Rough Quartz back down the path to Teo Hammerstorm in Anvilmar.
- 74
Hand inCall of Earth
ShamanTeo Hammerstorm · ~28.8, 66.2Return the Rough Quartz to Teo in Anvilmar. Keep your Earth Totem and check Stoneskin Totem in your spellbook before taking the tunnel road.
- 67
Felix WhindleboltDun Morogh~28.6, 67.6
- 75
Hand inA Refugee's QuandaryOptional
- 76
AcceptGrund and GozwinGrund Drokda · ~28.6, 67.4
- 75
Snow Leopard ProwlerDun Morogh~27.4, 63.6
- 77
DoGrund and Gozwin
Take the path northwest of Anvilmar up to Gozwin’s clearing. Recover his mechanic’s log and kill the Snow Leopard Prowler before returning to Grund. This short side trip awards a six-slot bag.
- 77
Nori PridedriftDun Morogh~25.0, 76.0
- 78
DoBring Back the Mug
Return the empty mug to Nori Pridedrift at Grelin’s camp before leaving for the tunnel.
- 79
Hand inBring Back the Mug
- 78
Grund DrokdaDun Morogh~28.6, 67.4
- 80
Hand inGrund and Gozwin
- 81
AcceptIn Favor of the Light
PriestLevel 5+Branstock Khalder · ~28.6, 66.4If Branstock offers In Favor of the Light before you leave Anvilmar, accept it for the Kharanos visit. Skip the referral if you are below level five.
- 80
Mountaineer ThalosDun Morogh~33.5, 71.8
- 82
DoSenir's Observations
Follow the Coldridge road to Mountaineer Thalos at the tunnel exit.
- 83
Hand inSenir's Observations
- 84
AcceptSenir's Observations
- 85
AcceptThe Adventurer
- 86
AcceptSupplies to TannokHands Springsprocket · ~33.9, 72.2
- 82
CHAPTER 02 · LEVELS 5–11
Dun Morogh (levels 5–11)
Kharanos is the hub for this chapter. Senir Whitebeard, Ragnar Thunderbrew and the Kharanos inn send you to the Grizzled Den, Brewnall Village, Shimmer Ridge, the leper gnomes near Gnomeregan and Frostmane Hold, with Father Gavin’s optional Misty Pine chain alongside. From Steelgrill’s Depot the eastern road leads to Gol’Bolar Quarry and Ironband’s Compound, then Shimmer Stout takes you into Loch Modan for Thelsamar and the northern guard tower. A gryphon returns you to Ironforge for the level-10 class lessons and the optional Hall of Thanes, and the chapter ends in Stormwind after the Deeprun Tram.
- The Grizzled Den needs eight Wendigo Manes. Frosthowl is an optional level 9 wendigo deeper in the same cave.
- Setting your hearthstone in Thelsamar is optional, but the route uses it to return for Brock after the Elwynn chapter.
- Deeprun Rat Roundup needs five captured rats, not kills. Use the Rat Catcher’s Flute and lead them back to Monty, then carry the carton to Nipsy in the Stormwind depot.
Quest order 224 steps
Eric BrighthammerDun Morogh~46.6, 53.8
- 01
DoThe Adventurer
Follow the road to Eric Brighthammer and deliver the message before continuing the regional journey.
- 02
Hand inThe Adventurer
- 01
- 03
GoSuggested level 5
Players are usually around level 5 by this point. If you are lower, finish the accepted work nearby before moving on; the route continues either way.
- 03
Eric BrighthammerDun Morogh~46.6, 53.8
- 04
AcceptThe Great Outdoors
- 05
DoThe Great Outdoors
At Eric Brighthammer’s campfire, use /sit and wait for Boosted Rest. If the sitting objective doesn’t update, type /sit again while you are already seated. Check both native objectives before handing in; no crafting materials or profession are required.
- 06
Hand inThe Great Outdoors
- 07
AcceptCamping 101: CookingOptional
Ask Eric Brighthammer for Camping 101: Cooking. Take it if offered, or skip the lesson and continue your route.
- 08
AcceptCamping 101: MiningOptional
Ask Eric Brighthammer for Camping 101: Mining. Take it if offered, or skip the lesson and continue your route.
- 09
AcceptCamping 101: HerbalismOptional
Ask Eric Brighthammer for Camping 101: Herbalism. Take it if offered, or skip the lesson and continue your route.
- 10
DoSenir's ObservationsSenir Whitebeard · ~46.7, 53.8
Pass through the tunnel and follow the road to Kharanos. Deliver the report to Senir Whitebeard.
- 11
Hand inSenir's ObservationsSenir Whitebeard · ~46.7, 53.8
- 12
AcceptSecure the MountainSenir Whitebeard · ~46.6, 53.8
- 13
AcceptBeer Basted Boar RibsRagnar Thunderbrew · ~46.8, 52.4
Inside the Kharanos inn, speak with Ragnar Thunderbrew and accept Beer Basted Boar Ribs. The Crag Boar Ribs drop from the crag boars around Kharanos; collect six later, while you hunt boars for Stocking Jetsteam.
- 04
Tannok FrosthammerDun Morogh~47.2, 52.2
- 14
DoSupplies to Tannok
Carry the inn supply crate to Tannok Frosthammer inside the Kharanos inn.
- 15
Hand inSupplies to Tannok
- 14
Class quests
Priest5 steps · choose your class above to show only yours- 16
DoIn Favor of the Light
PriestMaxan Anvol · ~47.2, 52.2Speak with Maxan Anvol inside the Kharanos inn when you reach town.
- 17
Hand inIn Favor of the Light
PriestMaxan Anvol · ~47.2, 52.2 - 18
AcceptGarments of the Light
PriestMaxan Anvol · ~47.2, 52.2Accept Garments of the Light from Maxan. Train Lesser Heal Rank 2 and Power Word: Fortitude before visiting Dolf.
- 19
DoGarments of the Light
PriestMountaineer Dolf · ~45.8, 54.4At Maxan, learn Lesser Heal (Rank 2) and Power Word: Fortitude if needed. Heal Mountaineer Dolf on the rise south of the inn, then apply Fortitude. Return to Maxan after the quest records success.
- 20
Hand inGarments of the Light
PriestMaxan Anvol · ~47.2, 52.2
- 16
Maxan AnvolDun Morogh~47.2, 52.2
- 21
AcceptDawn in the Mountains
- 22
DoCamping 101: CookingOptionalGremlock Pilsnor · ~47.6, 52.4
Visit Gremlock Pilsnor in Dun Morogh. Check the price and learn Cooking through the trainer window. You can skip this lesson and keep questing.
- 23
Hand inCamping 101: CookingOptionalGremlock Pilsnor · ~47.6, 52.4
Speak with Gremlock Pilsnor and turn in Camping 101: Cooking when the quest is ready.
- 21
Yarr HammerstoneDun Morogh~50.0, 50.4
- 24
DoCamping 101: MiningOptional
Build Mining to 20 while following your quests. Finish this lesson with Yarr Hammerstone when your route brings you nearby. You can leave it pending and keep questing.
- 25
Hand inCamping 101: MiningOptional
Speak with Yarr Hammerstone and turn in Camping 101: Mining when the quest is ready.
- 24
Tharek BlackstoneDun Morogh~46.0, 51.7
- 26
AcceptTools for Steelgrill
- 27
AcceptFlintfire's ShipmentTognus Flintfire · ~45.2, 52.0
- 26
Pilot BellowfizDun Morogh~49.4, 48.4
- 28
AcceptStocking Jetsteam
- 29
AcceptThe Grizzled DenPilot Stonegear · ~49.6, 48.6
- 30
DoTools for SteelgrillBeldin Steelgrill · ~50.4, 49.1
Deliver Steelgrill's Tools to Beldin Steelgrill at Steelgrill's Depot northeast of Kharanos.
- 31
Hand inTools for SteelgrillBeldin Steelgrill · ~50.4, 49.1
- 32
AcceptAmmo for RumbleshotLoslor Rudge · ~50.1, 49.4
- 28
Mountaineer GretchenDun Morogh~44.0, 57.0
- 33
DoSecure the Mountain
Meet Mountaineer Gretchen west of Kharanos on the way to the Grizzled Den.
- 34
Hand inSecure the Mountain
- 35
AcceptSecure the Mountain
- 36
DoAmmo for RumbleshotAmmo Crate · ~44.1, 57.0
Recover the ammunition crate near the Grizzled Den and bring it to Hegnar Rumbleshot beside the road south of Kharanos.
- 33
WendigoDun Morogh~43.6, 49.6
- 37
DoThe Grizzled Den
Collect eight Wendigo Manes from the Grizzled Den southwest of Kharanos. Work from the entrance inward and retrace your cleared path.
- 38
DoFlintfire's ShipmentGrizzled Den — Flintfire shipments · ~43.6, 49.6
Recover eight Flintfire Shipments inside the Grizzled Den while searching for Cornelius and collecting wendigo manes. Bring them to Tongus in Kharanos on the same return.
- 39
DoSecure the MountainGrizzled Den — search for Cornelius · ~43.6, 49.6
Search the Grizzled Den for Mountaineer Cornelius while collecting wendigo manes. Check the cave interior; the marker shows the den approach.
- 37
Large Crag BoarDun Morogh~48.5, 47.3
- 40
DoStocking Jetsteam
Collect four Chunks of Boar Meat and two Thick Bear Furs near Kharanos and Steelgrill's Depot.
- 40
Pilot StonegearDun Morogh~49.6, 48.6
- 41
Hand inThe Grizzled Den
- 42
Hand inStocking JetsteamPilot Bellowfiz · ~49.4, 48.4
- 43
AcceptEvershinePilot Bellowfiz · ~49.4, 48.4
- 41
Tognus FlintfireDun Morogh~45.2, 52.0
- 44
Hand inFlintfire's Shipment
- 44
Mountaineer GretchenDun Morogh~44.0, 57.0
- 45
Hand inSecure the Mountain
- 46
AcceptSecure the Mountain
- 45
Hegnar RumbleshotDun Morogh~40.7, 65.1
- 47
Hand inAmmo for Rumbleshot
- 47
Tundra MacGrannDun Morogh~34.6, 51.6
- 48
AcceptTundra MacGrann's Stolen StashLevel 7+
On the way north-west to Brewnall Village, stop at Tundra MacGrann’s camp beside the road around 34.6,51.7. Accept Tundra MacGrann’s Stolen Stash. You raid his meat locker on the walk back from Brewnall.
- 48
Rejold BarleybrewDun Morogh~30.2, 45.7
- 49
DoEvershine
Follow the western road to Brewnall Village and speak with Rejold Barleybrew about Evershine.
- 50
Hand inEvershine
- 51
AcceptA Favor for Evershine
- 52
AcceptThe Perfect Stout
- 53
AcceptBitter RivalsMarleth Barleybrew · ~30.2, 45.5
In Brewnall Village, speak with Marleth Barleybrew beside Rejold and accept Bitter Rivals. Keep the Barrel of Barleybrew Scalder in your bags for the distillery visit in Kharanos.
- 49
Gretta GanterDun Morogh~31.5, 44.6
- 54
AcceptFrosthowlOptional
In Brewnall Village, around 31.5,44.6, speak with Gretta Ganter and accept Frosthowl. You will hunt him on a later walk back from Kharanos.
- 54
Ice Claw BearDun Morogh~28.3, 47.5
- 55
DoA Favor for Evershine
Around western Dun Morogh, kill six Ice Claw Bears, eight Elder Crag Boars and eight Snow Leopards. Finish the three counts before returning to Rejold.
- 55
Rejold BarleybrewDun Morogh~30.2, 45.7
- 56
Hand inA Favor for Evershine
- 57
AcceptReturn to Bellowfiz
- 56
MacGrann’s Meat LockerDun Morogh~38.5, 53.9
- 58
DoTundra MacGrann's Stolen Stash
On the road back east, pass Tundra’s camp and go on to Old Icebeard’s cave in the hills around 38.5,53.9. Old Icebeard, a level-11 elite yeti, walks from the cave up the slope to the north and back. Wait out of his sight until he heads north, then go in, open MacGrann’s Meat Locker and take the dried meats. You don’t need to fight him.
- 58
Tundra MacGrannDun Morogh~34.6, 51.6
- 59
Hand inTundra MacGrann's Stolen Stash
Walk back west to Tundra MacGrann’s camp and turn in Tundra MacGrann’s Stolen Stash.
- 59
Senir WhitebeardDun Morogh~46.6, 53.8
- 60
DoSecure the Mountain
From Tundra MacGrann’s camp, follow the road east back to Kharanos and carry Gretchen’s report to Senir Whitebeard.
- 61
Hand inSecure the Mountain
- 62
AcceptFrostmane Hold
- 60
Razzle SprysprocketDun Morogh~45.9, 49.4
- 63
AcceptOperation Recombobulation
Just north of Kharanos, around 45.9,49.4, speak with Razzle Sprysprocket and accept Operation Recombobulation. Its leper gnomes are on the later Brewnall leg.
- 63
Innkeeper BelmDun Morogh~47.4, 52.5
- 64
DoBeer Basted Boar Ribs
Before going down to the distillery basement, buy one Rhapsody Malt from Innkeeper Belm inside the Kharanos inn. If you still need Crag Boar Ribs, first hunt the crag boars just outside Kharanos until you have six.
- 65
GoSet your hearthstone in Thunderbrew DistilleryOptional
Speak with Innkeeper Belm and make Thunderbrew Distillery your home. Innkeeper Belm sells the Rhapsody Malt for Beer Basted Boar Ribs in the Kharanos inn. The hearthstone brings you back here from Frostmane Hold at the end of the western loop.
- 66
DoBitter RivalsGuarded Thunder Ale Barrel · ~47.7, 52.7
In Kharanos, take the stairs behind the kitchen table down to the Thunderbrew Distillery basement. Click the Guarded Thunder Ale Barrel, then buy a Thunder Ale from Innkeeper Belm upstairs and give it to Jarven Thunderbrew. While he drinks, use the Unguarded Thunder Ale Barrel. The guide does not track the two short helper quests this adds.
- 67
Hand inBitter RivalsUnguarded Thunder Ale Barrel · ~47.7, 52.7
In the Kharanos distillery basement, down the stairs behind the kitchen table, click the Guarded Thunder Ale Barrel. Buy a Thunder Ale from Innkeeper Belm upstairs and give it to Jarven Thunderbrew. While he drinks, use the Unguarded Thunder Ale Barrel to hand in Bitter Rivals. If he is back on guard first, give him another Thunder Ale.
- 68
AcceptReturn to MarlethUnguarded Thunder Ale Barrel · ~47.7, 52.7
Right after handing in Bitter Rivals, use the Unguarded Thunder Ale Barrel again and accept Return to Marleth.
- 69
Hand inBeer Basted Boar RibsRagnar Thunderbrew · ~46.8, 52.4
Back upstairs in the Kharanos inn, speak with Ragnar Thunderbrew and turn in Beer Basted Boar Ribs.
- 64
FrosthowlDun Morogh~39.6, 48.6
- 70
DoFrosthowlOptional
On the road back to Brewnall, enter the Grizzled Den, around 43.6,49.6, and work toward the back of the cave. Kill Frosthowl, a level 9 wendigo near 39.6,48.6 (approximate), and loot the Sack of Fish. Clear the wendigos on the way so you fight him alone. If he is too strong for you, skip him and keep going.
- 70
Frostmane SeerDun Morogh~40.3, 42.9
- 71
DoThe Perfect Stout
East of Iceflow Lake, find the bear cave and take the uphill trail beside its entrance to Shimmer Ridge. Gather six Shimmerweeds from the Frostmane Seers and baskets in the camps above.
- 71
Leper GnomeDun Morogh~27.3, 43.0
- 72
DoOperation Recombobulation
From Shimmer Ridge, go west past Brewnall Village toward the Gnomeregan entrance. Kill the leper gnomes around 27.2,43.0 and collect eight Restabilization Cogs and eight Gyromechanic Gears. Remain outside the dungeon.
- 72
Rejold BarleybrewDun Morogh~30.2, 45.7
- 73
Hand inThe Perfect Stout
Return east to Brewnall Village. Speak with Rejold Barleybrew and turn in The Perfect Stout.
- 74
AcceptShimmer StoutLevel 8+
- 75
DoReturn to MarlethMarleth Barleybrew · ~30.2, 45.5
Carry the Barrel of Thunder Ale back to Marleth Barleybrew in Brewnall Village. Accepting the quest puts the barrel in your bags. Do not search for another one.
- 76
Hand inReturn to MarlethMarleth Barleybrew · ~30.2, 45.5
In Brewnall Village, give Marleth Barleybrew the Barrel of Thunder Ale.
- 73
Gretta GanterDun Morogh~31.5, 44.6
- 77
Hand inFrosthowlOptional
In Brewnall Village, give Gretta Ganter the Sack of Fish.
- 77
Frostmane HeadhunterDun Morogh~25.5, 50.9
- 78
DoFrostmane Hold
From Brewnall Village, head south-west to Frostmane Hold. Enter the cave, kill five Frostmane Headhunters and continue until the exploration objective also completes. Leave by the cleared entrance.
- 78
Razzle SprysprocketDun Morogh~45.9, 49.4
- 79
Hand inOperation Recombobulation
With Frostmane Hold cleared, use your hearthstone to return to the Kharanos inn. If it is not ready, follow the road east back toward Kharanos. Just north of the town, speak with Razzle Sprysprocket and turn in Operation Recombobulation.
- 79
Senir WhitebeardDun Morogh~46.7, 53.8
- 80
Hand inFrostmane Hold
In Kharanos, speak with Senir Whitebeard and turn in Frostmane Hold.
- 81
AcceptThe Reports
- 80
Pilot BellowfizDun Morogh~49.4, 48.4
- 82
DoReturn to Bellowfiz
Carry the Evershine back to Pilot Bellowfiz at Steelgrill's Depot.
- 83
Hand inReturn to Bellowfiz
- 82
Class quests
Hunter11 steps · choose your class above to show only yours- 84
GoLevel 10 for Taming the Beast
HunterTaming the Beast needs level 10. If you are lower, finish the accepted work nearby or gain the remaining XP before taking it; the route continues either way.
- 85
AcceptTaming the Beast
HunterLevel 10+Grif Wildheart · ~45.8, 53.0Walk back through Kharanos to its southern end. Grif Wildheart stands on the small hill across the road from the Kharanos inn. Accept Taming the Beast from him.
- 86
DoTaming the Beast
HunterLarge Crag Boar · ~45.2, 45.3Use this lesson’s Taming Rod on a Large Crag Boar at the marked Dun Morogh area (45.2, 45.3). Keep the correct rod for the current quest and wait for the taming objective to complete. If the game reports an active trial pet, dismiss that temporary pet before trying the next rod.
- 87
Hand inTaming the Beast
HunterGrif Wildheart · ~45.8, 53.0Grif Wildheart stands on the small hill across the road from the Kharanos inn, at the southern end of town. Return to Grif Wildheart in Kharanos with the lesson’s rod. Turn in Taming the Beast and accept the next lesson before leaving.
- 88
AcceptTaming the Beast
HunterGrif Wildheart · ~45.8, 53.0Accept Taming the Beast from Grif Wildheart in Kharanos.
- 89
DoTaming the Beast
HunterSnow Leopard · ~48.5, 59.1Use this lesson’s Taming Rod on a Snow Leopard at the marked Dun Morogh area (48.5, 59.1). Keep the correct rod for the current quest and wait for the taming objective to complete. If the game reports an active trial pet, dismiss that temporary pet before trying the next rod.
- 90
Hand inTaming the Beast
HunterGrif Wildheart · ~45.8, 53.0Grif Wildheart stands on the small hill across the road from the Kharanos inn, at the southern end of town. Return to Grif Wildheart in Kharanos with the lesson’s rod. Turn in Taming the Beast and accept the next lesson before leaving.
- 91
AcceptTaming the Beast
HunterGrif Wildheart · ~45.8, 53.0Accept Taming the Beast from Grif Wildheart in Kharanos.
- 92
DoTaming the Beast
HunterIce Claw Bear · ~46.4, 63.4Use this lesson’s Taming Rod on a Ice Claw Bear at the marked Dun Morogh area (46.4, 63.4). Keep the correct rod for the current quest and wait for the taming objective to complete. If the game reports an active trial pet, dismiss that temporary pet before trying the next rod.
- 93
Hand inTaming the Beast
HunterGrif Wildheart · ~45.8, 53.0Grif Wildheart stands on the small hill across the road from the Kharanos inn, at the southern end of town. Return to Grif Wildheart in Kharanos and turn in the final taming lesson. Accept Training the Beast during this visit. Its hand-in is included in the upcoming city stop.
- 94
AcceptTraining the Beast
HunterGrif Wildheart · ~45.8, 53.0Accept Training the Beast from Grif Wildheart in Kharanos.
- 84
- 95
GoLevel 9 for A Visitor to Dun Morogh
A Visitor to Dun Morogh needs level 9. If you are lower, finish the accepted work nearby or gain the remaining XP before taking it; the route continues either way.
- 95
Beldin SteelgrillDun Morogh~50.4, 49.0
- 96
AcceptA Visitor to Dun Morogh
- 96
Father GavinDun Morogh~57.6, 44.8
- 97
DoDawn in the Mountains
Head north-east from Steelgrill’s Depot to Misty Pine Refuge and give Maxan’s candles to Father Gavin.
- 98
Hand inDawn in the Mountains
- 99
AcceptFinding WarmthOptional
- 97
Firewood around fallen white trunksDun Morogh~56.0, 53.0
- 100
DoFinding WarmthOptional
Search the fallen white trunks south of Misty Pine Refuge for fourteen Mostly Dry Firewood. Finish the collection before returning to Gavin; each trunk can contain more than one piece.
- 100
Father GavinDun Morogh~57.6, 44.8
- 101
Hand inFinding WarmthOptional
- 102
AcceptRime's WrathOptional
- 103
AcceptTreacherous ColdOptional
- 101
Minor Ice ElementalDun Morogh~53.8, 45.5
- 104
DoRime's WrathOptional
Kill ten Minor Ice Elementals along the frozen river west of Misty Pine Refuge. Return to Gavin to learn which larger elemental is causing the disturbance.
- 104
Coalbeard’s fallen treeDun Morogh~52.1, 44.1
- 105
DoTreacherous ColdOptional
Recover the three rifles: Coalbeard by the fallen tree over the western frozen river, Stoneanvil beside a cart south of Gavin, and Sunhammer on the path toward Vagash’s cave. Finish the ice-elemental patrol and rifle circuit before returning.
- 105
Father GavinDun Morogh~57.6, 44.8
- 106
Hand inRime's WrathOptional
- 107
Hand inTreacherous ColdOptional
- 108
AcceptRime's WrathOptional
- 106
AvalaDun Morogh~57.6, 42.4
- 109
DoRime's WrathOptional
Kill Avala north of Misty Pine Refuge and collect its core. Loot the core before returning to Father Gavin.
- 109
Father GavinDun Morogh~57.6, 44.8
- 110
Hand inRime's WrathOptional
- 110
Rudra AmberstillDun Morogh~63.0, 49.8
- 111
AcceptNever Saddle on QualityOptional
- 111
Earthseer FarsenDun Morogh~64.8, 58.4
- 112
DoA Visitor to Dun Morogh
From Steelgrill’s Depot, follow the eastern road toward Gol’Bolar Quarry. Climb to Farsen’s campsite overlooking the quarry before continuing east.
- 113
Hand inA Visitor to Dun Morogh
- 114
AcceptFarsen's Watch
- 115
DoFarsen's Watch
Speak to Farsen and choose his farsight conversation. Let the vision finish and confirm the native objective.
- 116
Hand inFarsen's Watch
- 117
AcceptNip 'Em in the Bud
- 112
Senator Mehr StonehallowDun Morogh~68.7, 56.0
- 118
AcceptThe Public Servant
- 119
AcceptThose Blasted Troggs!Foreman Stonebrow · ~69.1, 56.3
- 120
DoThose Blasted Troggs!Rockjaw Skullthumper · ~69.7, 57.1
Kill six Rockjaw Skullthumpers at Gol'Bolar Quarry.
- 118
Rockjaw BonesnapperDun Morogh~70.6, 55.3
- 121
DoThe Public Servant
Kill ten Rockjaw Bonesnappers at Gol'Bolar Quarry. Finish both quarry counts before returning to the camp.
- 121
- 122
AcceptStolen Blasting PowderOptional
Read the Empty Powder Keg in your bags to start Stolen Blasting Powder. It is a chance drop from the quarry troggs, so do not hunt for it.
- 122
Senator Mehr StonehallowDun Morogh~68.7, 56.0
- 123
Hand inThe Public Servant
- 124
Hand inThose Blasted Troggs!Foreman Stonebrow · ~69.1, 56.3
- 125
DoStolen Blasting PowderOptionalQuarrymaster Thesten · ~69.2, 54.8
Give the Empty Powder Keg to Quarrymaster Thesten at the quarry camp.
- 126
Hand inStolen Blasting PowderOptionalQuarrymaster Thesten · ~69.2, 54.8
- 127
AcceptStolen Blasting PowderOptionalQuarrymaster Thesten · ~69.2, 54.8
- 123
Dark Iron SpyDun Morogh~77.8, 62.4
- 128
DoNip 'Em in the Bud
Continue east to Ironband’s Compound and kill ten Dark Iron Spies. Finish the compound before returning to Farsen, then resume the Loch Modan journey.
- 128
Elder Snow LeopardDun Morogh~76.4, 61.4
- 129
DoNever Saddle on QualityOptional
Kill Elder Snow Leopards and collect six Pristine Leopard Pelts while working east of the quarry and near the Dark Iron spy camp. Finish the pelts before returning through Farsen and Amberstill Ranch.
- 129
Earthseer FarsenDun Morogh~64.8, 58.4
- 130
Hand inNip 'Em in the Bud
- 130
- 131
AcceptUnderground MapOptional
After handing in Nip ’Em in the Bud, read Dark Iron Map if a spy dropped it to accept Underground Map. Do not stop to farm this drop.
- 131
Earthseer FarsenDun Morogh~64.8, 58.4
- 132
DoUnderground MapOptional
If a Dark Iron Spy dropped the map during Ironband’s Compound, show it to Farsen on the same return, right after Nip ’Em in the Bud. The Hall of Thanes dungeon continuation is not required here.
- 133
Hand inUnderground MapOptional
- 132
Rudra AmberstillDun Morogh~63.0, 49.8
- 134
Hand inNever Saddle on QualityOptional
- 134
Rockjaw AmbusherDun Morogh~72.1, 55.0
- 135
DoStolen Blasting PowderOptional
After showing the Empty Powder Keg to Thesten, recover sixteen Stolen Blasting Powder from the Rockjaw Ambushers above ground on the hill east of Gol’Bolar Quarry. Finish before the eastern departure; this follow-up is conditional on finding the keg.
- 135
Quarrymaster ThestenDun Morogh~69.2, 54.8
- 136
Hand inStolen Blasting PowderOptional
- 136
Mountaineer BarleybrewDun Morogh~86.3, 48.8
- 137
DoShimmer Stout
Carry the Barrel of Shimmer Stout east to Mountaineer Barleybrew by the Loch Modan tunnels.
- 138
Hand inShimmer Stout
- 139
AcceptStout to Kadrell
- 137
- 140
GoLevel 10 for In Defense of the King's Lands
In Defense of the King's Lands needs level 10. If you are lower, finish the accepted work nearby or gain the remaining XP before taking it; the route continues either way.
- 140
Mountaineer CobbleflintLoch Modan~22.1, 73.1
- 141
AcceptIn Defense of the King's Lands
Go through the South Gate Pass beside Mountaineer Barleybrew into Loch Modan. Beyond the pass, speak with Mountaineer Cobbleflint and accept In Defense of the King’s Lands.
- 142
AcceptThe Trogg ThreatCaptain Rugelfuss · ~23.2, 73.7
Enter the southern guard tower in the Valley of Kings and climb the stairs to Captain Rugelfuss on the third floor. Speak with Captain Rugelfuss and accept The Trogg Threat.
- 141
Thorgrum Borrelson at ThelsamarLoch Modan~33.9, 50.8
- 143
GoLearn the Thelsamar flight pathOptional
Follow the road north-east from the Valley of Kings to Thelsamar. On the way into town, speak with Thorgrum Borrelson at the gryphon roost and learn this flight path if needed.
- 143
Vidra HearthstoveLoch Modan~34.8, 49.3
- 144
AcceptThelsamar Blood Sausages
If you are not in Thelsamar yet, follow the road north-east from the Valley of Kings. In the Thelsamar inn, speak with Vidra Hearthstove and accept Thelsamar Blood Sausages.
- 145
GoSet your hearthstone in ThelsamarOptionalInnkeeper Hearthstove · ~35.5, 48.4
Speak with Innkeeper Hearthstove and make Thelsamar your home. Innkeeper Hearthstove is beside Vidra in the Thelsamar inn.
- 144
Mountaineer KadrellLoch Modan~34.2, 47.8
- 146
DoStout to Kadrell
Deliver the cask to Mountaineer Kadrell, who stands in Thelsamar near the inn.
- 147
Hand inStout to Kadrell
- 148
AcceptRat Catching
- 149
AcceptMountaineer Stormpike's Task
- 146
Brock StoneseekerLoch Modan~37.0, 47.8
- 150
AcceptHonor Students
Speak with Brock Stoneseeker, the mining trainer in Thelsamar, and accept Honor Students.
- 150
Mountaineer StormpikeLoch Modan~24.8, 18.4
- 151
DoMountaineer Stormpike's Task
Follow the road north from Thelsamar to Mountaineer Stormpike at the northern guard tower.
- 152
Hand inMountaineer Stormpike's Task
- 153
AcceptStormpike's Order
- 154
AcceptFilthy Paws
- 151
Pilot HammerfootDun Morogh~83.9, 39.2
- 155
AcceptThe Lost Pilot
From Algaz Station, take the North Gate Pass west back into Dun Morogh to Pilot Hammerfoot. Speak with him and accept The Lost Pilot.
- 155
A Dwarven CorpseDun Morogh~79.7, 36.2
- 156
DoThe Lost Pilot
Near Pilot Hammerfoot, leave the main road on the side path heading northwest into the hills. Look for Hildelve’s corpse at the end of that path.
- 157
Hand inThe Lost Pilot
Return to A Dwarven Corpse and turn in The Lost Pilot.
- 158
AcceptA Pilot's Revenge
Inspect A Dwarven Corpse and accept A Pilot's Revenge.
- 156
MangeclawDun Morogh~78.3, 37.8
- 159
DoA Pilot's Revenge
Search beyond Hildelve’s corpse for Mangeclaw, kill him and take the claw and journal back to Pilot Hammerfoot.
- 159
Pilot HammerfootDun Morogh~83.9, 39.2
- 160
Hand inA Pilot's Revenge
- 160
Thorgrum BorrelsonLoch Modan~33.9, 51.0
- 161
DoHonor Students
From Pilot Hammerfoot, take the North Gate Pass east back into Loch Modan and follow the road south past Algaz Station to Thelsamar. Take Brock’s list to Thorgrum Borrelson at the gryphon roost.
- 162
Hand inHonor Students
Speak with Thorgrum Borrelson at the Thelsamar gryphon roost and turn in Honor Students.
- 163
AcceptRide to Ironforge
Speak with Thorgrum Borrelson again and accept Ride to Ironforge.
- 161
Golnir BouldertoeIronforge~51.5, 26.3
- 164
DoRide to Ironforge
Buy a gryphon flight from Thorgrum to Ironforge, then bring Brock’s list to Golnir Bouldertoe in the Deep Mountain Mining Guild. If Ironforge is not on your flight map, follow the road west through Dun Morogh instead.
- 165
Hand inRide to Ironforge
Buy a gryphon flight to Ironforge from Thorgrum Borrelson at the Thelsamar roost. If Ironforge is not on your flight map, follow the road west through Dun Morogh instead. In Ironforge, bring Brock’s list to Golnir Bouldertoe in the Deep Mountain Mining Guild and turn in Ride to Ironforge.
- 166
AcceptGryth Thurden
Speak with Golnir Bouldertoe again and accept Gryth Thurden.
- 164
Senator Barin RedstoneIronforge~39.5, 57.5
- 167
DoThe Reports
Take Senir's report to Senator Barin Redstone in Ironforge during the city visit.
- 168
Hand inThe Reports
- 167
Class quests
PriestMageRogueWarlockShamanHunter12 steps · choose your class above to show only yours- 169
AcceptDesperate Prayer
PriestMaxan Anvol · ~47.2, 52.2Leave Ironforge by the main gate and follow the road down to Kharanos. Speak with Maxan Anvol in the Kharanos inn and accept Desperate Prayer.
- 170
AcceptSpeak with Bink
MageOptionalMagis Sparkmantle · ~47.4, 52.0Optional: from Ironforge, ride out to Kharanos, speak with Magis Sparkmantle and accept Speak with Bink, then return to Ironforge. The chain also sends you west to Gnomeregan and back for a Mage equipment reward; skip it to stay on the route.
- 171
AcceptRoad to Salvation
RogueOptionalHogral Bakkan · ~47.6, 52.4Optional: from Ironforge, ride out to Kharanos, speak with Hogral Bakkan and accept Road to Salvation, then return to Ironforge. The chain also sends you west to Gnomeregan and back for a Rogue weapon reward; skip it to stay on the route.
- 172
AcceptConfounding Flash
PriestHigh Priestess Mims · ~24.8, 10.0 - 173
DoConfounding Flash
PriestHigh Priestess Mims · ~24.8, 10.0Speak with the named Priest trainer and complete the offered lesson. Check the spellbook after the reward before returning to shared quests.
- 174
Hand inConfounding Flash
PriestHigh Priestess Mims · ~24.8, 10.0 - 175
DoDesperate Prayer
PriestHigh Priest Rohan · ~24.7, 8.2Follow the road back up to Ironforge. Speak with High Priest Rohan in the Hall of Mysteries. Complete his lesson, then check your spellbook.
- 176
Hand inDesperate Prayer
PriestHigh Priest Rohan · ~24.7, 8.2Turn in Desperate Prayer to High Priest Rohan in the Hall of Mysteries in Ironforge.
- 177
AcceptThe Slaughtered Lamb
WarlockLago Blackwrench · ~47.6, 9.3 - 178
AcceptCall of Fire
ShamanEldrun Stormbreaker · ~46.2, 13.0During the Ironforge report, visit shaman trainer Eldrun Stormbreaker in the Forlorn Cavern and accept Call of Fire.
- 179
DoTraining the Beast
HunterBelia Thundergranite · ~70.9, 85.8In Ironforge, go to the Military Ward and speak with Belia Thundergranite for the pet-training lesson.
- 180
Hand inTraining the Beast
HunterBelia Thundergranite · ~70.9, 85.8Turn in Training the Beast to Belia Thundergranite in the Military Ward of Ironforge. Check your pet-training abilities before continuing.
- 169
Gryth Thurden at IronforgeIronforge~55.9, 47.9
- 181
GoLearn the Ironforge flight pathOptional
Speak with Gryth Thurden at the Ironforge gryphon roost. If you walked in, learn the Ironforge flight path before handing him the honorary picks.
- 181
Reyna StonebranchIronforge~55.6, 58.8
- 182
DoCamping 101: HerbalismOptional
Build Herbalism to 20 while following your quests. Finish this lesson with Reyna Stonebranch when your route brings you nearby. You can leave it pending and keep questing.
- 183
Hand inCamping 101: HerbalismOptional
Speak with Reyna Stonebranch and turn in Camping 101: Herbalism when the quest is ready.
- 182
Gryth ThurdenIronforge~55.5, 47.7
- 184
DoGryth Thurden
Bring the honorary picks to Gryth Thurden at the Ironforge gryphon roost.
- 185
Hand inGryth Thurden
Speak with Gryth Thurden and turn in Gryth Thurden. He offers Return to Brock next.
- 186
AcceptReturn to Brock
Speak with Gryth Thurden again and accept Return to Brock. Keep it in your quest log: Brock waits until you return to Thelsamar from Redridge.
- 184
Class quests
MageRogue13 steps · choose your class above to show only yours- 187
DoSpeak with Bink
MageOptionalBink · ~27.0, 8.2Speak with Bink in the Hall of Mysteries in Ironforge.
- 188
Hand inSpeak with Bink
MageOptionalBink · ~27.0, 8.2 - 189
AcceptMage-tastic Gizmonitor
MageOptionalBink · ~27.0, 8.2 - 190
DoMage-tastic Gizmonitor
MageOptionalBink’s Toolbox · ~27.7, 36.4Optional: leave Ironforge and travel west through Dun Morogh to the huts outside Gnomeregan. Take the Mage-tastic Gizmonitor from Bink’s chest; leper gnomes guard the area. The pin is a reference position that has not been checked in Forever.
- 191
Hand inMage-tastic Gizmonitor
MageOptionalBink · ~27.0, 8.2Return to Bink in Ironforge and turn in Mage-tastic Gizmonitor. Check the reward in the native quest window, then continue the route from Ironforge.
- 192
DoRoad to Salvation
RogueOptionalHulfdan Blackbeard · ~51.6, 14.8In Ironforge’s Forlorn Cavern, enter the southern building through its eastern doorway to find Hulfdan Blackbeard. Speak with him about Road to Salvation.
- 193
Hand inRoad to Salvation
RogueOptionalHulfdan Blackbeard · ~51.6, 14.8In Ironforge’s Forlorn Cavern, enter the southern building through its eastern doorway to reach Hulfdan Blackbeard. Speak with Hulfdan Blackbeard and turn in Road to Salvation.
- 194
AcceptSimple Subterfugin'
RogueOptionalHulfdan Blackbeard · ~51.6, 14.8In Ironforge’s Forlorn Cavern, enter the southern building through its eastern doorway to reach Hulfdan Blackbeard. Speak with Hulfdan Blackbeard and accept Simple Subterfugin'.
- 195
DoSimple Subterfugin'
RogueOptionalOnin MacHammar · ~25.2, 44.4Optional: leave Ironforge and follow the road west through Dun Morogh. Find Onin MacHammar outside Gnomeregan and speak with him.
- 196
Hand inSimple Subterfugin'
RogueOptionalOnin MacHammar · ~25.2, 44.4 - 197
AcceptOnin's Report
RogueOptionalOnin MacHammar · ~25.2, 44.4 - 198
DoOnin's Report
RogueOptionalHulfdan Blackbeard · ~51.6, 14.8In Ironforge’s Forlorn Cavern, enter the southern building through its eastern doorway to find Hulfdan Blackbeard. Take Onin’s Report back to Hulfdan Blackbeard in Ironforge.
- 199
Hand inOnin's Report
RogueOptionalHulfdan Blackbeard · ~51.6, 14.8In Ironforge’s Forlorn Cavern, enter the southern building through its eastern doorway to reach Hulfdan Blackbeard. Speak with Hulfdan Blackbeard and turn in Onin’s Report. Check the reward in the native quest window, then continue the route from Ironforge.
- 187
- 200
AcceptDeeprun Rat Roundup
Before taking the tram from Ironforge, enter the depot through Tinker Town and find Monty on the platform. Accept Deeprun Rat Roundup. If Monty or his offer is absent, use Quest unavailable? to defer the rat-and-delivery chain and continue to Stormwind.
- 200
- 201
DoDeeprun Rat Roundup
Stay on the Ironforge side of the depot. Target an unclaimed Deeprun Rat, move close and use the supplied Rat Catcher’s Flute. Capture five rats and lead them back to Monty. Use the native quest counter; do not kill the rats. If captures remain unavailable after one check of the platform, defer the chain and take the tram.
- 201
- 202
Hand inDeeprun Rat Roundup
Bring the five captured rats to Monty and turn in Deeprun Rat Roundup. Pick up Me Brother, Nipsy before boarding for Stormwind.
- 202
- 203
AcceptMe Brother, Nipsy
Before leaving Monty, accept Me Brother, Nipsy and keep the supplied Carton of Mystery Meat.
- 203
- 204
DoMe Brother, Nipsy
Board the tram to Stormwind with the carton. Leave the tram at the Stormwind depot and find Nipsy on its central platform before exiting into the city.
- 204
- 205
Hand inMe Brother, Nipsy
Deliver the Carton of Mystery Meat to Nipsy inside the Stormwind tram depot, then leave for the Dwarven District.
- 205
Grimand Elmore in the Dwarven District weapon shopStormwind City~59.7, 33.8
- 206
AcceptStormpike's DeliveryOptional
After leaving the Stormwind tram depot, visit Grimand Elmore in the Dwarven District weapon shop and accept Stormpike’s Delivery. Keep the supplied package through the Elwynn circuit for the planned northern Loch Modan visit.
- 206
Furen LongbeardStormwind City~64.6, 37.2
- 207
DoStormpike's Order
Keep Stormpike’s Request through the Loch outing. After taking the Deeprun Tram from Ironforge, deliver it to Furen Longbeard in Stormwind’s Dwarven District before leaving the city for Elwynn Forest.
- 208
Hand inStormpike's Order
- 207
Class quests
WarriorWarlock15 steps · choose your class above to show only yours- 209
AcceptA Warrior's Training
WarriorIlsa Corbin · ~80.4, 59.8From Furen Longbeard, walk south-east into Old Town. Ilsa Corbin, the Warrior trainer, stands at 80.4,59.8. Accept A Warrior’s Training. This Stormwind chain teaches Defensive Stance in place of Muren Stormpike’s chain in Ironforge.
- 210
DoA Warrior's Training
WarriorHarry Burlguard · ~77.1, 53.3Walk north through Old Town to the Pig and Whistle tavern and find Harry Burlguard inside.
- 211
Hand inA Warrior's Training
WarriorHarry Burlguard · ~77.1, 53.3Speak with Harry Burlguard and turn in A Warrior’s Training.
- 212
AcceptBartleby the Drunk
WarriorHarry Burlguard · ~77.1, 53.3Speak with Harry Burlguard again and accept Bartleby the Drunk.
- 213
DoBartleby the Drunk
WarriorBartleby · ~76.8, 52.5Speak with Bartleby at the other end of the Pig and Whistle bar.
- 214
Hand inBartleby the Drunk
WarriorBartleby · ~76.8, 52.5 - 215
AcceptBeat Bartleby
WarriorBartleby · ~76.8, 52.5Speak with Bartleby again and accept Beat Bartleby.
- 216
DoBeat Bartleby
WarriorBartleby · ~76.8, 52.5Fight Bartleby until he yields, then speak with him again. Don’t leave after the fight alone.
- 217
Hand inBeat Bartleby
WarriorBartleby · ~76.8, 52.5 - 218
AcceptBartleby's Mug
WarriorBartleby · ~76.8, 52.5Accept Bartleby’s Mug from Bartleby.
- 219
DoBartleby's Mug
WarriorHarry Burlguard · ~77.1, 53.3Take Bartleby’s Mug across the room to Harry Burlguard.
- 220
Hand inBartleby's Mug
WarriorHarry Burlguard · ~77.1, 53.3Give Harry Burlguard the mug and turn in Bartleby’s Mug. Check that Defensive Stance is in your spellbook before you leave the city.
- 221
DoThe Slaughtered Lamb
WarlockGakin the Darkbinder · ~39.2, 85.2After arriving in Stormwind, find Gakin the Darkbinder beneath the Slaughtered Lamb in the Mage Quarter and take the next lesson.
- 222
Hand inThe Slaughtered Lamb
WarlockGakin the Darkbinder · ~39.2, 85.2 - 223
AcceptSurena Caledon
WarlockGakin the Darkbinder · ~39.2, 85.2
- 209
Dungar Longdrink at StormwindStormwind City~71.6, 72.3
- 224
GoLearn the Stormwind flight pathOptional
Speak with Dungar Longdrink while you are in Stormwind. Learn this flight path if needed, then continue the nearby quests.
- 224
CHAPTER 03 · LEVELS 10–12
Elwynn Forest (levels 10–12)
Leave Stormwind by the main gate for Goldshire, where Remy Two Times and Marshal Dughan send you east to Guard Thomas at the eastern Elwynn bridge. Work through Eastvale Logging Camp, the river and Stone Cairn Lake for Thomas, Ormin Pelford and Supervisor Raelen, and visit Brackwell Pumpkin Patch for Princess. Thomas then points you down the road into Redridge to meet Guard Parker and Deputy Feldon at Lakeshire. When the circuit is done, return to Thelsamar for Brock.
- Protect the Frontier needs eight Prowlers and five Young Forest Bears. Gather Raelen’s eight Bundles of Wood on the same northern loop.
- Keep Princess’s collar and Thomas’ report. Both are handed in when the route passes Goldshire on the way to Westfall.
- Learn the Lakeshire flight path from Ariena Stormfeather while you are there. Gnome Warlocks find Surena Caledon in the house at Brackwell Pumpkin Patch.
Quest order 45 steps
- 01
GoSuggested level 10
Players are usually around level 10 by this point. If you are lower, finish the accepted work nearby before moving on; the route continues either way.
- 01
Remy Two TimesElwynn Forest~42.1, 67.3
- 02
AcceptA Fishy Peril
After finishing the tram delivery and collecting Stormpike’s package in Stormwind, leave through the main gate and follow the road south to Goldshire. Speak with Remy Two Times and accept A Fishy Peril.
- 03
DoA Fishy PerilMarshal Dughan · ~42.1, 65.9
Walk over to Marshal Dughan in Goldshire.
- 04
Hand inA Fishy PerilMarshal Dughan · ~42.1, 65.9
Discuss the murloc threat with Marshal Dughan.
- 05
AcceptFurther ConcernsMarshal Dughan · ~42.1, 65.9
Check Marshal Dughan for Further Concerns after discussing the murlocs.
- 02
Ma StonefieldElwynn Forest~34.7, 84.5
- 06
AcceptPrincess Must Die!
- 06
Class quests
Warlock3 steps · choose your class above to show only yours- 07
AcceptWanted: “Hogger”
WarlockOptionalWanted poster beside Deputy Rainer, Westbrook Garrison · ~24.5, 74.7Warlocks: from Stonefield Farm, ride west to Westbrook Garrison and read the Wanted poster beside Deputy Rainer to accept Wanted: “Hogger”. Hogger is elite; take him only with your Voidwalker out, or skip this.
- 08
AcceptThe Collector
WarlockOptionalIf Gold Pickup Schedule drops while you hunt in the Riverpaw woods, read it to accept The Collector. Do not stop to farm it.
- 09
DoWanted: “Hogger”
WarlockOptionalHogger’s roaming area south of the Riverpaw camp · ~26.0, 89.9Ride south from Westbrook to the Riverpaw woods and find Hogger. Send in your Voidwalker, defeat him and take his Huge Gnoll Claw. Leave if the fight turns against you, then head east for Guard Thomas.
- 07
Guard ThomasElwynn Forest~74.0, 72.2
- 10
DoFurther Concerns
Take the road east to the eastern Elwynn bridge. Find Guard Thomas stationed there.
- 11
Hand inFurther Concerns
Speak with Guard Thomas.
- 12
AcceptFind the Lost Guards
Accept Find the Lost Guards from Guard Thomas at the eastern bridge.
- 13
AcceptProtect the Frontier
Accept Protect the Frontier from Guard Thomas at the bridge.
- 10
Ormin PelfordElwynn Forest~76.4, 72.0
- 14
AcceptDownstream
Speak with Ormin Pelford east of Guard Thomas's bridge and accept Downstream.
- 14
Remains of MalakaiElwynn Forest~72.7, 60.3
- 15
DoFind the Lost Guards
Follow the river north, searching for Malakai’s remains and the next clue near Stone Cairn Lake.
- 16
Hand inFind the Lost Guards
Interact with the remains indicated by your native quest marker and finish this search.
- 17
AcceptDiscover Rolf's Fate
Accept Discover Rolf’s Fate from the clue at the first guard’s remains.
- 15
Supervisor RaelenElwynn Forest~81.4, 66.1
- 18
AcceptA Bundle of Trouble
Check Raelen at Eastvale Logging Camp for A Bundle of Trouble.
- 18
Sara TimberlainElwynn Forest~79.5, 68.8
- 19
AcceptRed Linen GoodsOptional
Accept Red Linen Goods from Sara Timberlain at Eastvale Logging Camp.
- 19
Remains of RolfElwynn Forest~79.8, 55.6
- 20
DoDiscover Rolf's Fate
Follow the shore east toward the murloc village at Stone Cairn Lake. Search for Rolf’s remains without pulling the whole camp.
- 21
Hand inDiscover Rolf's Fate
Interact with Rolf’s remains to complete the search.
- 22
AcceptReport to Thomas
Accept Report to Thomas from the final guard clue. Keep both medallions.
- 20
East ForestElwynn Forest~81.0, 61.0
- 23
DoA Bundle of Trouble
Search north of the logging camp for eight Bundles of Wood. Work on the wolf and bear objectives as you collect them.
- 24
DoProtect the Frontier
Kill eight Prowlers and five Young Forest Bears around Eastvale. Gather Raelen’s wood on the same northern loop.
- 23
Waterlogged Saw, river south of the bridgeElwynn Forest~74.3, 76.4
- 25
DoDownstream
After the Eastvale woods, follow the river south from Guard Thomas’s bridge and recover the Waterlogged Saw, Axe and Toolbox for Ormin. Watch for murlocs on the banks. Keep the tools for Ormin Pelford beside the bridge; you report to Guard Thomas first.
- 25
BrackwellElwynn Forest~70.0, 79.0
- 26
DoRed Linen GoodsOptional
Kill Defias in their Elwynn camps and collect six Red Linen Bandanas. Use the native target marker to locate the nearby camp before committing to a pull.
- 27
DoPrincess Must Die!Princess · ~69.8, 79.2
At Brackwell Pumpkin Patch, kill Princess and collect her collar. Clear nearby enemies first; if the pull is unsafe, use Quest unavailable? to defer the hunt. Keep the collar until the route passes Stonefield Farm on the way to Westbrook.
- 26
Surena CaledonElwynn Forest~71.0, 80.8
- 28
DoSurena Caledon
WarlockFind Surena Caledon inside the house at Brackwell Pumpkin Patch in southeastern Elwynn. Check the other enemies in the room before pulling. Kill her and collect Surena’s Choker, then return to Gakin.
- 28
Supervisor RaelenElwynn Forest~81.4, 66.1
- 29
Hand inA Bundle of Trouble
Bring the wood to Raelen at Eastvale.
- 29
Sara TimberlainElwynn Forest~79.5, 68.8
- 30
Hand inRed Linen GoodsOptional
Return the bandanas to Sara Timberlain at Eastvale.
- 30
Guard ThomasElwynn Forest~74.0, 72.2
- 31
Hand inProtect the Frontier
Return to Guard Thomas at the eastern bridge.
- 32
DoReport to Thomas
Give Thomas Rolf and Malakai’s medallions.
- 33
Hand inReport to Thomas
Give Thomas Rolf and Malakai’s medallions.
- 34
AcceptDeliver Thomas' Report
Check Guard Thomas for Deliver Thomas’ Report after returning the medallions.
- 35
AcceptReport to Gryan Stoutmantle
Guard Thomas also offers Report to Gryan Stoutmantle. If he does not, Marshal Dughan in Goldshire or Deputy Rainer at Westbrook Garrison, on the road to Westfall, can give it.
- 31
Ormin PelfordElwynn Forest~76.4, 72.0
- 36
Hand inDownstream
Return the three tools to Ormin Pelford east of Guard Thomas's bridge.
- 36
Guard ParkerRedridge Mountains~10.2, 71.5
- 37
AcceptEncroaching GnollsLevel 11+
From Guard Thomas's bridge, follow the road east into Redridge. Meet Guard Parker, who patrols the road by the Three Corners, and accept Encroaching Gnolls.
- 37
Deputy FeldonRedridge Mountains~25.6, 60.0
- 38
DoEncroaching Gnolls
Continue to Lakeshire and look for Deputy Feldon south of its bridge.
- 39
Hand inEncroaching Gnolls
Continue along the road toward Lakeshire. Find Deputy Feldon at the south end of the bridge over Lake Everstill and turn in Encroaching Gnolls.
- 40
GoLearn the Lakeshire flight pathOptionalAriena Stormfeather at Lakeshire · ~25.3, 59.0
Speak with Ariena Stormfeather while you are in Lakeshire. Learn this flight path if needed, then continue the nearby quests.
- 38
Class quests
Warlock4 steps · choose your class above to show only yours- 41
Hand inSurena Caledon
WarlockGakin the Darkbinder · ~39.2, 85.2From Deputy Feldon, cross into Lakeshire. If Ariena Stormfeather can fly you to Stormwind, learn the Lakeshire flight path and fly; otherwise follow the road west through Elwynn. Turn in Surena Caledon to Gakin beneath the Slaughtered Lamb.
- 42
AcceptThe Binding
WarlockGakin the Darkbinder · ~39.2, 85.2 - 43
DoThe Binding
WarlockSummoning circle approach: Gakin the Darkbinder · ~39.2, 85.2Descend to the summoning circle beneath the Slaughtered Lamb. Use the Bloodstone Choker there and subdue the Voidwalker before returning upstairs to Gakin.
- 44
Hand inThe Binding
WarlockGakin the Darkbinder · ~39.2, 85.2Turn in The Binding to Gakin the Darkbinder and check Summon Voidwalker in your spellbook.
- 41
Brock StoneseekerLoch Modan~37.0, 47.8
- 45
DoReturn to Brock
Use your hearthstone to return to Thelsamar; Warlocks use it in Stormwind after Gakin. If it is not ready, follow the road west through Elwynn Forest to Stormwind, ride the Deeprun Tram to Ironforge, then fly to Thelsamar if Gryth Thurden offers it or take the road east through Dun Morogh into Loch Modan. Bring the honorary picks to Brock Stoneseeker, the mining trainer.
- 45
CHAPTER 04 · LEVELS 11–13
Loch Modan and Ironforge (levels 11–13)
Back in Thelsamar, hand Brock his reply and take Snowbound from Grenhild Darktalon before the trogg assignments in the Valley of Kings. Silver Stream Mine and the northern guard tower follow, where Stormpike’s Delivery reaches Mountaineer Stormpike, then Norric Lochthane receives the snow on the northwest shore. The optional shore and excavation work around Farstrider Lodge and Ironband’s camp comes before Jern’s report in Ironforge. Take the tram to Stormwind, report to Marshal Dughan in Goldshire and continue into Westfall for the first Sentinel Hill pickups.
- Snowbound uses the Ceramic Jar on the snow beside the South Gate tunnel, on the Loch Modan side. Carry the Jar of Snow to Norric outside his house.
- A Hunter’s Boast and A Hunter’s Challenge are timed hunts near Farstrider Lodge. Start each only when you can finish it straight away.
- The last In Defense of the King’s Lands from Captain Rugelfuss is optional and pits you against Grawmug, Gnasher and Brawler together. Bring help if you take it.
Quest order 121 steps
Brock StoneseekerLoch Modan~37.0, 47.8
- 01
Hand inReturn to Brock
Speak with Brock Stoneseeker in Thelsamar and turn in Return to Brock.
- 01
- 02
GoSuggested level 11
Players are usually around level 11 by this point. If you are lower, finish the accepted work nearby before moving on; the route continues either way.
- 02
Grenhild DarktalonLoch Modan~36.4, 48.2
- 03
AcceptSnowbound
Speak with Grenhild Darktalon in Thelsamar and accept Snowbound. Keep the Ceramic Jar empty until the Valley of Kings work is done: the snow can melt about ten minutes after it goes in the jar.
- 03
Class quests
Shaman3 steps · choose your class above to show only yours- 04
DoCall of Fire
ShamanBruegs Kindleborn · ~87.6, 43.6From Thelsamar, follow the road south-west to the South Gate tunnel and go through into Dun Morogh. Keep the Ceramic Jar empty for now; you fill it here after the Valley of Kings work. Climb the path behind the farm at 86.7, 47.0 to Bruegs’s cave on the mountain.
- 05
Hand inCall of Fire
ShamanBruegs Kindleborn · ~87.6, 43.6Speak with Bruegs Kindleborn in the cave and turn in Call of Fire.
- 06
AcceptCall of Fire
ShamanBruegs Kindleborn · ~87.6, 43.6
- 04
Stonesplinter TroggLoch Modan~29.6, 72.5
- 07
DoIn Defense of the King's Lands
From the southern guard tower, kill ten Stonesplinter Troggs and ten Scouts around the valley entrance.
- 08
DoThe Trogg ThreatStonesplinter Scout · ~29.6, 72.9
Kill troggs in the Stonesplinter camps and collect eight Trogg Stone Teeth.
- 07
Class quests
Shaman3 steps · choose your class above to show only yours- 09
DoCall of Fire
ShamanBraldir Ashmantle · ~32.0, 66.0Carry the dormant torch through the southern tunnel into Loch Modan. Beyond the Valley of Kings, follow the stone-marked path up to Braldir Ashmantle.
- 10
Hand inCall of Fire
ShamanBraldir Ashmantle · ~32.0, 66.0Reach Braldir above the Valley of Kings, deliver the dormant torch and accept the request for Fire Tar and a Reagent Pouch before continuing.
- 11
AcceptCall of Fire
ShamanBraldir Ashmantle · ~32.0, 66.0Take Braldir’s request for one Reagent Pouch and one Fire Tar. The pouch drops from the Stonesplinter Seers you kill next for Mountaineer Gravelgaw. The Fire Tar drops only from Tunnel Rat Geomancers inside Silver Stream Mine, later on the northern loop. Bring both back to Braldir on your way out of Loch Modan.
- 09
Captain RugelfussLoch Modan~23.2, 73.7
- 12
Hand inThe Trogg Threat
Enter the southern guard tower in the Valley of Kings and climb the stairs to Captain Rugelfuss on the third floor. Speak with Captain Rugelfuss and turn in The Trogg Threat.
- 13
Hand inIn Defense of the King's LandsMountaineer Cobbleflint · ~22.1, 73.1
- 12
Mountaineer GravelgawLoch Modan~23.5, 76.4
- 14
AcceptIn Defense of the King's Lands
- 14
Stonesplinter SkullthumperLoch Modan~28.0, 81.2
- 15
DoIn Defense of the King's Lands
Kill ten Skullthumpers and ten Seers in the Stonesplinter camps. Check both counts before returning to the tower.
- 15
Mountaineer GravelgawLoch Modan~23.5, 76.4
- 16
Hand inIn Defense of the King's Lands
- 16
Mountaineer WallbangLoch Modan~23.5, 74.5
- 17
AcceptIn Defense of the King's LandsOptional
Optional and harder than the earlier camps: these Stonesplinter Shamans and Bonesnappers are level 15–16, and the follow-up’s Grawmug is level 17 with two level-16 guards. Skip both below level 14. Speak with Mountaineer Wallbang and accept In Defense of the King’s Lands.
- 17
Stonesplinter ShamanLoch Modan~37.5, 86.2
- 18
DoIn Defense of the King's LandsOptional
Kill ten Stonesplinter Shaman and ten Bonesnappers in the southern camps before leaving for the eastern shore. Pull carefully around casters and return to Mountaineer Wallbang with both counts complete.
- 18
Mountaineer WallbangLoch Modan~23.5, 74.5
- 19
Hand inIn Defense of the King's LandsOptional
- 20
AcceptIn Defense of the King's LandsOptionalCaptain Rugelfuss · ~23.2, 73.7
Enter the southern guard tower in the Valley of Kings and climb the stairs to Captain Rugelfuss on the third floor. Speak with Captain Rugelfuss and accept In Defense of the King's Lands.
- 19
GrawmugLoch Modan~34.8, 90.5
- 21
DoIn Defense of the King's LandsOptional
If you choose this harder encounter, kill Grawmug, Gnasher and Brawler together in the central chamber of the Stonesplinter Valley cave. Clear the approach and bring help if needed.
- 21
Captain RugelfussLoch Modan~23.2, 73.7
- 22
Hand inIn Defense of the King's LandsOptional
Enter the southern guard tower in the Valley of Kings and climb the stairs to Captain Rugelfuss on the third floor. Speak with Captain Rugelfuss and turn in In Defense of the King's Lands.
- 22
Snow beside the South Gate tunnelLoch Modan~19.9, 62.6
- 23
DoSnowbound
From the Valley of Kings tower, walk north-west to the South Gate tunnel. Use the Ceramic Jar on the snow beside the tunnel, on the Loch Modan side. The Jar of Snow can melt after about ten minutes, so carry it straight north past Thelsamar to Norric Lochthane outside his house on the northwest shore. Leave the mine and the kobolds until after Norric.
- 23
Norric LochthaneLoch Modan~41.8, 19.0
- 24
Hand inSnowbound
Hand the Jar of Snow to Norric Lochthane outside his house on the northwest shore, then head west to Silver Stream Mine. If the jar melted on the way, abandon Snowbound and accept it again from Grenhild in Thelsamar.
- 24
Miners' League CratesLoch Modan~35.5, 19.9
- 25
DoFilthy Paws
Enter Silver Stream Mine and recover four loads of Miners' Gear. Look for the supply containers while clearing your route through the mine.
- 25
Tunnel Rat GeomancerLoch Modan~35.7, 24.0
- 26
DoCall of Fire
ShamanWhile you are in Silver Stream Mine, kill Tunnel Rat Geomancers until one drops Fire Tar. You should already have the Reagent Pouch from the Valley of Kings Seers. If not, kill the Stonesplinter Seers by the Stonewrought Dam, east of Norric’s house. Keep both for Braldir.
- 26
Mountaineer StormpikeLoch Modan~24.8, 18.4
- 27
Hand inFilthy Paws
- 28
DoStormpike's DeliveryOptional
Give the Package for Stormpike to Mountaineer Stormpike at the northern guard tower while you are there for Filthy Paws.
- 29
Hand inStormpike's DeliveryOptional
Speak with Mountaineer Stormpike and turn in Stormpike’s Delivery.
- 27
Tunnel Rat VerminLoch Modan~28.3, 44.8
- 30
DoRat Catching
Kill Tunnel Rat kobolds for twelve Tunnel Rat Ears. They drop in and around Silver Stream Mine, so you may already have most of them; finish the count at the kobolds near the road on the way south from the northern guard tower to Thelsamar.
- 30
Mountaineer KadrellLoch Modan~34.2, 47.8
- 31
Hand inRat Catching
- 31
Bears, boars and spiders in the woods north of ThelsamarLoch Modan~35.5, 33.0
- 32
DoThelsamar Blood Sausages
Collect three Bear Meat, three Boar Intestines and three Spider Ichor in the woodland around Thelsamar.
- 32
Vidra HearthstoveLoch Modan~34.8, 49.3
- 33
Hand inThelsamar Blood Sausages
- 33
Jern HornhelmLoch Modan~37.2, 47.4
- 34
AcceptIronband's ExcavationOptionalLevel 13+
Optional east Loch Modan loop: its quests are level 15–20 and its boars, buzzards and crocolisks level 14–17. Skip the whole loop if you are below level 14. Speak with Jern Hornhelm and accept Ironband’s Excavation.
- 34
Discarded Fishing ToolboxLoch Modan~45.8, 43.3
- 35
AcceptSilver of the WavesOptional
Optional dive on the way out of Thelsamar: check the debris underwater near 45.8,43.3 for the Discarded Fishing Toolbox and accept Silver of the Waves. Watch your breath and nearby level 19–20 threshadons. If the toolbox is absent, the offer is unavailable or the approach is unsafe, choose Do this quest later and continue east to Bingles. Do not search the whole lake. Keep the hair clip for Khara Deepwater on the western shore.
- 35
Khara DeepwaterLoch Modan~39.5, 39.2
- 36
DoSilver of the WavesOptional
Accepting the toolbox quest gives you the Monogrammed Silver Hair Clip; do not search for another one. Swim back to the western shore and take it to Khara Deepwater at the fishing hut around 39.5,39.2.
- 37
Hand inSilver of the WavesOptional
At the fishing hut near 39.5,39.2, give the Monogrammed Silver Hair Clip to Khara Deepwater. Then follow the shore east to Bingles Blastenheimer.
- 36
Bingles BlastenheimerLoch Modan~63.6, 47.9
- 38
AcceptBingles' Missing SuppliesOptional
- 38
Marek IronheartLoch Modan~81.8, 61.7
- 39
AcceptCrocolisk HuntingOptional
Enter Farstrider Lodge and find Marek Ironheart in the right-hand hall. Speak with Marek Ironheart and accept Crocolisk Hunting.
- 40
AcceptTwisting the KnifeOptional
While at Farstrider Lodge for Crocolisk Hunting, ask Marek Ironheart for Twisting the Knife if you want the extra named-crocolisk hunt.
- 39
Daryl the YounglingLoch Modan~83.5, 65.5
- 41
AcceptA Hunter's BoastOptional
Find Daryl the Youngling in the left-hand hall inside Farstrider Lodge. Speak with Daryl the Youngling and accept A Hunter's Boast.
- 41
Mountain BuzzardLoch Modan~79.3, 66.9
- 42
DoA Hunter's BoastOptional
Once ready for a timed hunt, kill six Mountain Buzzards near Farstrider Lodge and return to Daryl within fifteen minutes. Do not start another outing during the timer.
- 42
Daryl the YounglingLoch Modan~83.5, 65.5
- 43
Hand inA Hunter's BoastOptional
Find Daryl the Youngling in the left-hand hall inside Farstrider Lodge. Speak with Daryl the Youngling and turn in A Hunter's Boast.
- 44
AcceptA Hunter's ChallengeOptional
Speak with Daryl the Youngling again and accept A Hunter’s Challenge when you are ready to hunt straight away: it gives you twelve minutes.
- 43
Elder Mountain BoarLoch Modan~75.7, 46.6
- 45
DoA Hunter's ChallengeOptional
Go north-west from the lodge to the Elder Mountain Boars (level 16–17) on the slopes around 75–77,42–51. Kill five and return to Daryl within twelve minutes. If those boars are taken, the main herd grazes further west around 61–70,34–42.
- 45
Daryl the YounglingLoch Modan~83.5, 65.5
- 46
Hand inA Hunter's ChallengeOptional
Back in the left-hand hall of Farstrider Lodge, speak with Daryl the Youngling and turn in A Hunter’s Challenge.
- 46
Excavation ToolsLoch Modan~67.0, 67.6
- 47
AcceptExcavation ToolsOptional
Before you leave the dig site, look for Excavation Tools lying on the ground, for example near 67.0,67.6 (approximate), and click them. If an Excavation Tools item appears in your bags instead of a quest window, use it to accept Excavation Tools.
- 47
Prospector IronbandLoch Modan~65.9, 65.6
- 48
DoExcavation ToolsOptional
Bring six Excavation Tools to Prospector Ironband at the excavation camp. Accepting the quest should put all six in your bags. If any are missing, loot more of the tools lying around the dig site east of the camp.
- 49
Hand inExcavation ToolsOptional
Give the six Excavation Tools to Prospector Ironband at the excavation camp. If Ironband does not take them, try Magmar Fellhew beside him, whom the quest text names.
- 50
DoIronband's ExcavationOptionalMagmar Fellhew · ~64.9, 66.7
Visit Explorer Fellhew at Ironband’s Excavation in southeastern Loch Modan. Stay with the dwarves at the camp and keep out of the dig; its troggs are several levels higher.
- 51
Hand inIronband's ExcavationOptionalMagmar Fellhew · ~64.9, 66.7
- 52
AcceptExcavation Progress ReportOptional
- 48
Loch CrocoliskLoch Modan~62.4, 51.5
- 53
DoCrocolisk HuntingOptional
Collect five Crocolisk Meat and six Crocolisk Skins from ordinary Loch Crocolisks (level 14–15) along the shore north of the excavation. Avoid the Large Loch Crocolisk. Finish them on the shore trip to Bingles’ supplies; Marek takes them at the lodge afterwards.
- 54
DoTwisting the KnifeOptionalDaggerfang · ~62.8, 51.4
During the Bingles and crocolisk shore outing, check the eastern lakeshore around 62.8, 51.4 for Daggerfang. If you find him and can manage the fight, defeat him and loot Marek’s Croc-Hunting Knife. Make one pass while doing the other shore work. If he is absent or the fight is too difficult, choose Do this quest later and continue to the planned returns.
- 53
Toolbucket with Bingles’ WrenchLoch Modan~48.7, 30.1
- 55
DoBingles' Missing SuppliesOptional
Search the northern islands and shoreline for Bingles’ Wrench, Screwdriver, Hammer and Blastencapper. Collect all four while finishing accepted crocolisk work. Pull the island troggs carefully, keep a retreat clear and avoid the Large Loch Crocolisk. Then return to Bingles.
- 55
Bingles BlastenheimerLoch Modan~63.6, 47.9
- 56
Hand inBingles' Missing SuppliesOptional
- 56
Marek IronheartLoch Modan~81.8, 61.7
- 57
Hand inCrocolisk HuntingOptional
Enter Farstrider Lodge and find Marek Ironheart in the right-hand hall. Speak with Marek Ironheart and turn in Crocolisk Hunting.
- 58
Hand inTwisting the KnifeOptional
On the lodge return, give Marek his Croc-Hunting Knife in the right-hand hall. If you have not found it, leave the optional quest pending and continue the route.
- 57
Jern HornhelmLoch Modan~37.2, 47.4
- 59
DoExcavation Progress ReportOptional
Carry Ironband's Progress Report back to Jern Hornhelm in Thelsamar.
- 60
Hand inExcavation Progress ReportOptional
- 61
AcceptReport to IronforgeOptional
- 59
Class quests
Shaman7 steps · choose your class above to show only yours- 62
Hand inCall of Fire
ShamanBraldir Ashmantle · ~32.0, 66.0Before leaving Loch Modan, take the road south-west from Thelsamar and climb the stone-marked path above the Valley of Kings to Braldir Ashmantle. Bring him one Fire Tar and one Reagent Pouch, then take the Fire Sapta trial.
- 63
AcceptCall of Fire
ShamanBraldir Ashmantle · ~32.0, 66.0 - 64
DoCall of Fire
ShamanBrazier of the Dormant Flame · ~31.9, 64.5Drink the Fire Sapta at the shrine and climb to its summit. Kill the visible Minor Manifestation of Fire, loot its Glowing Ember and place it in the brazier.
- 65
Hand inCall of Fire
ShamanBrazier of the Dormant Flame · ~31.9, 64.5At the summit brazier, complete the ember offering and take the burning-torch delivery before descending.
- 66
AcceptCall of Fire
ShamanBrazier of the Dormant Flame · ~31.9, 64.5Inspect Brazier of the Dormant Flame and accept Call of Fire.
- 67
DoCall of Fire
ShamanBruegs Kindleborn · ~87.6, 43.6Keep the burning torch. Return through the southern tunnel into Dun Morogh and take the farm path back to Bruegs’s cave.
- 68
Hand inCall of Fire
ShamanBruegs Kindleborn · ~87.6, 43.6Return through the southern tunnel and up the farm path to Bruegs. Deliver the burning torch, keep the Fire Totem and check Searing Totem, then follow the road west through Dun Morogh to Ironforge.
- 62
Prospector StormpikeIronforge~74.6, 11.7
- 69
DoReport to IronforgeOptional
Keep Ironband’s Progress Report while finishing the remaining Loch outing. Before taking the Deeprun Tram, enter the Hall of Explorers’ library in Ironforge and deliver it to Prospector Stormpike.
- 70
Hand inReport to IronforgeOptional
Enter the Hall of Explorers’ library in Ironforge to find Prospector Stormpike. Speak with Prospector Stormpike and turn in Report to Ironforge.
- 69
Class quests
Paladin27 steps · choose your class above to show only yours- 71
AcceptThe Tome of Divinity
PaladinTiza Battleforge · ~27.4, 12.0Fly from Thelsamar to Ironforge with Thorgrum Borrelson; walk west through Dun Morogh only if Ironforge is not on your flight map. Speak with Tiza Battleforge in the Hall of Mysteries and accept The Tome of Divinity. A later step needs ten Linen Cloth, so keep any you find. It needs level 12.
- 72
DoThe Tome of Divinity
PaladinTiza Battleforge · ~27.4, 12.0Speak with the Paladin trainer and collect the Tome of Divinity. Keep the book for the next task.
- 73
Hand inThe Tome of Divinity
PaladinTiza Battleforge · ~27.4, 12.0 - 74
AcceptThe Tome of Divinity
PaladinRead the Tome of Divinity in your bags and accept its quest.
- 75
DoThe Tome of Divinity
PaladinTiza Battleforge · ~27.4, 12.0Read the Tome of Divinity in your bags, accept its quest and speak with the trainer again.
- 76
Hand inThe Tome of Divinity
PaladinTiza Battleforge · ~27.4, 12.0 - 77
AcceptThe Tome of Divinity
PaladinTiza Battleforge · ~27.4, 12.0 - 78
DoThe Tome of Divinity
PaladinJohn Turner · ~27.8, 70.0Find John Turner on Ironforge's outer ring. He walks the western and southern parts of the ring, so use the pin as a starting point.
- 79
Hand inThe Tome of Divinity
PaladinJohn Turner · ~27.8, 70.0 - 80
AcceptThe Tome of Divinity
PaladinJohn Turner · ~27.8, 70.0 - 81
DoThe Tome of Divinity
PaladinJohn Turner · ~27.8, 70.0Bring ten Linen Cloth to John. Keep cloth from normal questing, or buy it through trade if you are short.
- 82
Hand inThe Tome of Divinity
PaladinJohn Turner · ~27.8, 70.0 - 83
AcceptThe Tome of Divinity
PaladinJohn Turner · ~27.8, 70.0 - 84
DoThe Tome of Divinity
PaladinTiza Battleforge · ~27.4, 12.0Return to Tiza Battleforge in the Hall of Mysteries.
- 85
Hand inThe Tome of Divinity
PaladinTiza Battleforge · ~27.4, 12.0 - 86
AcceptThe Tome of Divinity
PaladinTiza Battleforge · ~27.4, 12.0 - 87
DoThe Tome of Divinity
PaladinMuiredon Battleforge · ~23.6, 8.6Speak with Muiredon Battleforge in the Hall of Mysteries. Keep the Symbol of Life for the resurrection trial.
- 88
Hand inThe Tome of Divinity
PaladinMuiredon Battleforge · ~23.6, 8.6 - 89
AcceptThe Tome of Divinity
PaladinMuiredon Battleforge · ~23.6, 8.6 - 90
DoThe Tome of Divinity
PaladinNarm Faulk · ~78.2, 58.0Look for Narm Faulk on the hill at the southern end of Helm’s Bed Lake in eastern Dun Morogh. Target the fallen NPC and use the Symbol of Life, then speak with him. If the symbol is lost, return to the Paladin trainer for a replacement.
- 91
Hand inThe Tome of Divinity
PaladinNarm Faulk · ~78.2, 58.0 - 92
AcceptThe Tome of Divinity
PaladinNarm Faulk · ~78.2, 58.0 - 93
DoThe Tome of Divinity
PaladinDark Iron Spy · ~77.0, 60.9Kill the Dark Iron dwarves and collect a Dark Iron Script near Helm's Bed. Finish this nearby work before returning to the named city trainer.
- 94
Hand inThe Tome of Divinity
PaladinMuiredon Battleforge · ~23.6, 8.6Follow the road north-west back to Ironforge. Speak with Muiredon Battleforge and turn in The Tome of Divinity.
- 95
AcceptThe Tome of Divinity
PaladinMuiredon Battleforge · ~23.6, 8.6 - 96
DoThe Tome of Divinity
PaladinTiza Battleforge · ~27.4, 12.0Speak with Tiza Battleforge to finish the lesson. Check Redemption in the spellbook before resuming the route.
- 97
Hand inThe Tome of Divinity
PaladinTiza Battleforge · ~27.4, 12.0Speak with Tiza Battleforge and turn in The Tome of Divinity. Check Redemption in your spellbook before taking the Deeprun Tram to Stormwind.
- 71
Marshal DughanElwynn Forest~42.1, 65.9
- 98
DoDeliver Thomas' Report
Leave Loch Modan for Elwynn Forest. Fly or walk to Ironforge if you are not already there and take the Deeprun Tram to Stormwind. Leave the city by the main gate and follow the road south to Goldshire. Report to Marshal Dughan.
- 99
Hand inDeliver Thomas' Report
Report the lost guards and the murloc threat to Marshal Dughan.
- 98
Class quests
Warlock3 steps · choose your class above to show only yours- 100
Hand inWanted: “Hogger”
WarlockOptionalMarshal Dughan · ~42.1, 65.9Speak with Marshal Dughan in Goldshire and turn in Wanted: “Hogger”.
- 101
DoThe Collector
WarlockOptionalMarshal Dughan · ~42.1, 65.9If you have The Collector, carry the schedule to Marshal Dughan on this Goldshire visit.
- 102
Hand inThe Collector
WarlockOptionalMarshal Dughan · ~42.1, 65.9
- 100
Ma StonefieldElwynn Forest~34.7, 84.5
- 103
Hand inPrincess Must Die!
- 103
- 104
AcceptFurlbrow's DeedOptional
If Westfall Deed is in your bags, read it to accept Furlbrow’s Deed. Do not return to Elwynn to farm it.
- 104
Farmer FurlbrowWestfall~60.0, 19.4
- 105
DoFurlbrow's DeedOptional
If a Westfall Deed dropped during the Elwynn Defias work, read it and deliver it to Farmer Furlbrow at the broken wagon when entering Westfall. Continue without it if it did not drop.
- 106
Hand inFurlbrow's DeedOptional
Give the quest item to Farmer Furlbrow during this visit.
- 107
AcceptThe Forgotten Heirloom
Check Farmer Furlbrow at the broken wagon for The Forgotten Heirloom.
- 108
AcceptPoor Old BlanchyVerna Furlbrow · ~59.9, 19.4
Check Verna Furlbrow for Poor Old Blanchy before leaving the wagon.
- 109
AcceptWestfall StewVerna Furlbrow · ~59.9, 19.4
Check Verna Furlbrow by the broken wagon on entering Westfall for Westfall Stew.
- 105
Farmer SaldeanWestfall~56.0, 31.2
- 110
AcceptThe Killing Fields
Accept The Killing Fields from Farmer Saldean at his farm. Ozwin Ironsprocket in the barn just west offers an optional quest for parts from the same Harvest Watchers.
- 110
Ozwin IronsprocketWestfall~51.6, 32.2
- 111
AcceptHarvesting the HarvestersOptional
Optional: in the barn just west of Saldean’s farm, speak with Ozwin Ironsprocket and accept Harvesting the Harvesters. Its parts drop from the Harvest Watchers you kill for The Killing Fields, but slowly.
- 111
Salma SaldeanWestfall~56.4, 30.5
- 112
DoWestfall Stew
Carry her recipe to Salma Saldean at the farm beyond the fork in the road.
- 113
Hand inWestfall Stew
Give the recipe to Salma Saldean.
- 114
AcceptWestfall Stew
Check Salma for the ingredient quest Westfall Stew after delivering Verna’s recipe.
- 115
AcceptGoretusk Liver Pie
Accept Goretusk Liver Pie from Salma Saldean.
- 112
Gryan StoutmantleWestfall~56.3, 47.5
- 116
DoReport to Gryan Stoutmantle
Continue west into Westfall, then follow the road to Sentinel Hill in the middle of the zone.
- 117
Hand inReport to Gryan Stoutmantle
Continue west across the bridge into Westfall, then follow the road south to Sentinel Hill. Find Gryan Stoutmantle by the stone tower and turn in Report to Gryan Stoutmantle.
- 118
AcceptThe People's Militia
Accept The People’s Militia from Gryan Stoutmantle at Sentinel Hill.
- 119
AcceptPatrolling WestfallCaptain Danuvin · ~56.4, 47.6
Check Captain Danuvin at Sentinel Hill for Patrolling Westfall.
- 116
Scout GaliaanWestfall~54.0, 53.0
- 120
AcceptRed Leather Bandanas
Check Scout Galiaan at Sentinel Hill for Red Leather Bandanas.
- 120
Thor at Sentinel HillWestfall~56.5, 52.5
- 121
GoLearn the Sentinel Hill flight pathOptional
Speak with Thor at Sentinel Hill and learn the flight path. The later trip to Stormwind for the Auberdine boat can then fly from here.
- 121
CHAPTER 05 · LEVELS 13–15
Westfall (levels 13–15)
Base yourself at Sentinel Hill and work the northern farms for Farmer Furlbrow, Verna Furlbrow, Farmer Saldean and Salma Saldean, alongside Ozwin Ironsprocket’s harvester parts and Alba Fairmoon’s wells. Gryan Stoutmantle’s militia, Captain Danuvin’s gnoll paws and Scout Galiaan’s bandanas complete the Sentinel Hill set. Take The Defias Brotherhood from Gryan, then finish Westfall Stew at Saldean’s Farm before heading north towards Stormwind.
- The Killing Fields needs twenty Harvest Watchers. The People’s Militia asks for fifteen Defias Trappers and fifteen Smugglers, then fifteen Pillagers and fifteen Looters.
- The Defias Brotherhood needs level 14. Keep Gryan’s message for Wiley the Black in Lakeshire.
- Captain Sander’s map and the Precessive Autocognition Assembly are chance drops. Follow their optional quests only if they appear.
Quest order 44 steps
- 01
GoSuggested level 13
Players are usually around level 13 by this point. If you are lower, finish the accepted work nearby before moving on; the route continues either way.
- 01
Alba FairmoonWestfall~52.4, 53.0
- 02
AcceptTesting the Wells
At Sentinel Hill, speak with Alba Fairmoon and accept Testing the Wells.
- 03
AcceptMurloc Gills
Alba Fairmoon offers Murloc Gills beside Testing the Wells. Accept both.
- 02
Furlbrow fieldsWestfall~52.0, 31.0
- 04
DoPoor Old Blanchy
Collect eight Handfuls of Oats around the farms. Gather them while clearing the northern Defias; keep clear of dangerous harvest machines.
- 04
Furlbrow farmhouseWestfall~49.0, 19.0
- 05
DoThe Forgotten Heirloom
Go west to the pumpkin farm. Search the wardrobe inside Furlbrow’s farmhouse for his pocket watch; clear the doorway before entering.
- 05
North coast murlocsWestfall~54.5, 9.5
- 06
DoMurloc Gills
From Furlbrow’s farmhouse, go north to the beach at 53–56,8–11 and kill Murloc Raiders and Coastrunners for seven Longshore Murloc Gills. Take three Murloc Eyes for Westfall Stew while you are there, then head south to the Jansen Stead well.
- 06
Farmer FurlbrowWestfall~60.0, 19.4
- 07
Hand inThe Forgotten Heirloom
Return the watch to Farmer Furlbrow by the broken wagon.
- 08
Hand inPoor Old BlanchyVerna Furlbrow · ~59.9, 19.4
Return the oats to Verna at the wagon.
- 07
Harvest WatcherWestfall~54.2, 30.8
- 09
DoHarvesting the HarvestersOptional
Collect fourteen Golem Isosprings and five Harvester Gyrostabilizers from Harvest Watchers while you work on The Killing Fields. If they have not all dropped by then, keep the quest for later and continue the route.
- 09
Saldean fieldsWestfall~56.0, 32.0
- 10
DoThe Killing Fields
Kill twenty Harvest Watchers in Saldean’s and neighbouring fields. Clear toward the northern farm work instead of pulling deep into a crowded field.
- 11
Hand inThe Killing FieldsFarmer Saldean · ~56.0, 31.2
Return to Farmer Saldean.
- 10
Ozwin IronsprocketWestfall~51.6, 32.2
- 12
Hand inHarvesting the HarvestersOptional
- 12
Goretusks south of Saldean’s farmWestfall~55.5, 42.8
- 13
DoGoretusk Liver Pie
Kill goretusks for eight Goretusk Livers. Young Goretusks roam the northern farms, and the nearest big group grazes in the fields south of Saldean’s farm, towards Sentinel Hill.
- 13
Salma SaldeanWestfall~56.4, 30.5
- 14
Hand inGoretusk Liver Pie
Return the livers to Salma Saldean.
- 14
- 15
AcceptHarvesting the HarvestersOptional
If Precessive Autocognition Assembly is already in your bags, read it to start this optional delivery. Continue the route if it has not dropped.
- 15
Ozwin IronsprocketWestfall~51.6, 32.2
- 16
DoHarvesting the HarvestersOptional
Keep any Precessive Autocognition Assembly found during the harvest-golem work. Bring it to Ozwin with the other harvester parts on the Saldean Farm return; do not keep farming for this optional drop.
- 17
Hand inHarvesting the HarvestersOptional
- 16
Northern Defias farmsWestfall~48.0, 35.0
- 18
DoThe People's Militia
Kill fifteen Defias Trappers and fifteen Defias Smugglers around Jangolode Mine, Molsen Farm and Furlbrow’s pumpkin farm. Combine this with the watch and oat collection.
- 18
Defias Trappers and Smugglers, northern farmsWestfall~46.3, 38.3
- 19
DoRed Leather Bandanas
Red Leather Bandanas drop from the same Defias Trappers and Smugglers the militia asks for, around the northern farms. Collect fifteen while you finish that count, then take them to Scout Galiaan at Sentinel Hill.
- 20
DoTesting the WellsMolsen Farm well · ~46.2, 38.3
Use the Well Water Sample Kit at Molsen Farm’s well (46.2, 38.3). The Jansen Stead sample (56.7, 18.7) is taken on the northern farm trip; if it is missing, go back for it before returning to Alba at Sentinel Hill.
- 19
Gryan StoutmantleWestfall~56.3, 47.5
- 21
Hand inThe People's Militia
Report back to Gryan at Sentinel Hill.
- 22
AcceptThe People's Militia
Accept the next The People’s Militia from Gryan after the northern Defias report.
- 21
Scout GaliaanWestfall~54.0, 53.0
- 23
Hand inRed Leather Bandanas
Return the bandanas to Scout Galiaan.
- 23
Alba FairmoonWestfall~52.4, 53.0
- 24
Hand inTesting the Wells
- 25
Hand inMurloc Gills
Turn in Murloc Gills to Alba Fairmoon with Testing the Wells.
- 24
Alexston Farmstead and Gold Coast QuarryWestfall~34.0, 52.0
- 26
DoThe People's Militia
Work through the Gold Coast Quarry and Alexston Farmstead west of Sentinel Hill. Kill fifteen Defias Pillagers and fifteen Defias Looters. Break up caster pulls and retreat along cleared ground.
- 26
Riverpaw gnolls at Gold Coast QuarryWestfall~30.2, 49.6
- 27
DoPatrolling Westfall
At Gold Coast Quarry, kill the Riverpaw Mongrels, Miners and Herbalists for eight Gnoll Paws while you clear the Defias for the militia. Keep the paws for Captain Danuvin at Sentinel Hill.
- 27
- 28
AcceptCaptain Sander's Hidden TreasureOptional
If a murloc dropped Captain Sander’s Treasure Map, read it to accept Captain Sander’s Hidden Treasure. Do not stop to farm this drop.
- 28
Captain's FootlockerWestfall~25.9, 47.8
- 29
DoCaptain Sander's Hidden TreasureOptional
If a murloc dropped Captain Sander’s map, go on from the Gold Coast Quarry to the western beach and inspect the Captain’s Footlocker.
- 30
Hand inCaptain Sander's Hidden TreasureOptional
Return to Captain's Footlocker and turn in Captain Sander's Hidden Treasure.
- 31
AcceptCaptain Sander's Hidden TreasureOptional
Inspect Captain's Footlocker and accept Captain Sander's Hidden Treasure.
- 29
Broken BarrelWestfall~40.5, 47.8
- 32
DoCaptain Sander's Hidden TreasureOptional
Follow the clue inland to the broken barrel beside the ruined chimney. Inspect it and take the next clue.
- 33
Hand inCaptain Sander's Hidden TreasureOptional
Return to Broken Barrel and turn in Captain Sander's Hidden Treasure.
- 34
AcceptCaptain Sander's Hidden TreasureOptional
Inspect Broken Barrel and accept Captain Sander's Hidden Treasure.
- 32
Old JugWestfall~40.6, 17.0
- 35
DoCaptain Sander's Hidden TreasureOptional
Follow the next clue north to the old jug beside the windmill. Stay on the cleared farm tracks.
- 36
Hand inCaptain Sander's Hidden TreasureOptional
Return to Old Jug and turn in Captain Sander's Hidden Treasure.
- 37
AcceptCaptain Sander's Hidden TreasureOptional
Inspect Old Jug and accept Captain Sander's Hidden Treasure.
- 35
Locked ChestWestfall~26.0, 16.9
- 38
DoCaptain Sander's Hidden TreasureOptional
From the northern windmill, head northwest to the small coastal island and open the locked chest for the treasure. This completes the map branch; do not farm additional maps.
- 39
Hand inCaptain Sander's Hidden TreasureOptional
Return to Locked Chest and turn in Captain Sander's Hidden Treasure.
- 38
Captain DanuvinWestfall~56.4, 47.6
- 40
Hand inPatrolling Westfall
Bring the paws to Captain Danuvin.
- 41
Hand inThe People's MilitiaGryan Stoutmantle · ~56.3, 47.5
Report back to Gryan at Sentinel Hill.
- 42
AcceptThe Defias BrotherhoodLevel 14+Gryan Stoutmantle · ~56.3, 47.5
Speak with Gryan Stoutmantle again and accept The Defias Brotherhood. Keep it for the Redridge visit; you deliver it in Lakeshire.
- 40
Fields between Sentinel Hill and Saldean’s FarmWestfall~55.0, 42.0
- 43
DoWestfall Stew
On the road north from Sentinel Hill to Saldean’s Farm, finish any stew ingredients still missing: Stringy Vulture Meat from the vultures and Goretusk Snouts from the goretusks in these fields. The Murloc Eyes come from the north-coast murlocs you hunted for Murloc Gills, and the Okra drops from the Harvest Watchers in the farm fields. Use the native target hints for any remaining ingredient.
- 43
Salma SaldeanWestfall~56.4, 30.5
- 44
Hand inWestfall Stew
Before leaving Westfall, follow the road north from Sentinel Hill to Saldean’s Farm and give the stew ingredients to Salma Saldean. Then continue north along the road toward Stormwind.
- 44
CHAPTER 06 · LEVELS 14–15
Darkshore (levels 14–15)
Fly or ride from Westfall to Stormwind, train and repair, then board the Auberdine boat at the southernmost dock in Stormwind Harbor. Gwennyth Bly’Leggonde, Wizbang Cranktoggle, Tharnariun Treetender, Terenthis, Glynda Nal’Shea, Barithras Moonshade and Thundris Windweaver give the opening Auberdine quests. The first outing heads to Bashal’Aran for Asterion’s chain, then along the shore for Buzzbox 827 before the Auberdine hand-ins.
- Setting your hearthstone in Auberdine is optional, but the route uses it for the northern circuit and the trip back from Redridge.
- Bashal’Aran needs eight Grell Earrings, then the Ancient Moonstone Seal. Keep the final Bashal’Aran quest for the ancient flame at Ameth’Aran.
- Plagued Lands needs a living Rabid Thistle Bear caught in the trap. Ask Tharnariun for another trap if you lose it.
Quest order 38 steps
- 01
GoSuggested level 14
Players are usually around level 14 by this point. If you are lower, finish the accepted work nearby before moving on; the route continues either way.
- 01
Gwennyth Bly'LeggondeDarkshore~36.6, 45.6
- 02
AcceptWashed Ashore
From Westfall, fly to Stormwind if Thor at Sentinel Hill offers it; otherwise follow the road north-east through Elwynn Forest to the city. Train and repair in the city, then go to Stormwind Harbor and board the Auberdine boat at the southernmost dock. Confirm its destination and stay aboard until it docks in Darkshore. In Auberdine, walk up from the pier to Gwennyth Bly’Leggonde beside the flight master and accept Washed Ashore.
Travel directions to Darkshore
- 03
GoLearn the Auberdine flight pathOptionalCaylais Moonfeather at Auberdine · ~36.4, 45.6
Speak with Caylais Moonfeather beside Gwennyth. Learn this flight path if needed, then continue the nearby quests.
- 02
Wizbang CranktoggleDarkshore~37.0, 44.1
- 04
AcceptBuzzbox 827
Climb to the top floor of the Auberdine inn and accept Buzzbox 827 from Wizbang Cranktoggle.
- 05
AcceptWANTED: Jai'vhanelWANTED: Murkdeep! · ~37.2, 44.2
Inspect WANTED: Murkdeep! and accept WANTED: Jai'vhanel.
- 06
GoSet your hearthstone in AuberdineOptionalInnkeeper Shaussiy · ~37.0, 44.1
Speak with Innkeeper Shaussiy and make Auberdine your home. Auberdine is the return point for the northern Darkshore circuit and for the trip back from Redridge.
- 07
AcceptCave MushroomsBarithras Moonshade · ~37.3, 43.6
- 08
AcceptThe Red CrystalSentinel Glynda Nal'Shea · ~37.7, 43.4
- 04
Tharnariun TreetenderDarkshore~38.8, 43.4
- 09
AcceptPlagued Lands
- 10
AcceptHow Big a Threat?Terenthis · ~39.4, 43.5
- 09
Thundris WindweaverDarkshore~37.4, 40.1
- 11
AcceptTools of the Highborne
Go around Auberdine’s northern building to the rear terrace for Thundris Windweaver. Speak with Thundris Windweaver and accept Tools of the Highborne.
- 12
AcceptBashal'Aran
Go around Auberdine’s northern building to the rear terrace for Thundris Windweaver. Speak with Thundris Windweaver and accept Bashal'Aran.
- 11
Darkshore~44.3, 36.4
- 13
DoBashal'Aran
Leave Auberdine on the road north-east and follow it to the ruins of Bashal’Aran. Investigate the blue aura and speak with Asterion in the ruins.
- 14
Hand inBashal'AranAsterion · ~44.2, 36.3
- 15
AcceptBashal'AranAsterion · ~44.2, 36.3
- 16
DoBashal'AranVile Sprite · ~44.6, 36.6
Kill the grell and collect eight Grell Earrings around Asterion.
- 17
Hand inBashal'AranAsterion · ~44.2, 36.3
- 18
AcceptBashal'AranAsterion · ~44.2, 36.3
- 19
DoBashal'AranDeth'ryll Satyr · ~45.5, 36.5
Kill the enemies and collect the Ancient Moonstone Seal at Bashal'Aran and return to Asterion.
- 20
Hand inBashal'AranAsterion · ~44.2, 36.3
- 21
AcceptBashal'AranAsterion · ~44.2, 36.3
- 13
Darkshore~47.2, 48.7
- 22
DoThe Red Crystal
From Bashal’Aran, head south along the eastern hills. Locate the large red crystal on a raised ledge above the moonkin area against the eastern mountain wall, east of Auberdine.
- 22
Corrupt furbolg campDarkshore~39.3, 53.5
- 23
DoHow Big a Threat?
From the Red Crystal, head south-west to the corrupt furbolg camp south of Auberdine and investigate it.
- 24
DoPlagued LandsRabid Thistle Bear · ~38.2, 52.6
Use the trap on a living Rabid Thistle Bear near the furbolg camp. The captured bear follows you; bring it to Tharnariun with the Auberdine hand-ins. If the trap is lost, ask him for another.
- 23
Beached Sea CreatureDarkshore~36.4, 50.9
- 25
DoWashed Ashore
Go west to the shore and inspect the beached sea creature south of Auberdine to recover its bones.
- 25
Pygmy Tide Crawlers on the shore south of AuberdineDarkshore~35.7, 48.7
- 26
DoBuzzbox 827
Follow the shore north toward Auberdine and collect six Crawler Legs from the pygmy tide crawlers, then place them in Buzzbox 827.
- 26
Buzzbox 827Darkshore~36.6, 46.3
- 27
Hand inBuzzbox 827
At the south edge of Auberdine, return to Buzzbox 827 and turn in Buzzbox 827.
- 28
AcceptBuzzbox 411
Inspect Buzzbox 827 and accept Buzzbox 411.
- 29
Hand inWashed AshoreGwennyth Bly'Leggonde · ~36.6, 45.6
- 30
AcceptWashed AshoreGwennyth Bly'Leggonde · ~36.6, 45.6
- 27
Cerellean WhiteclawDarkshore~35.7, 43.7
- 31
AcceptFor Love Eternal
- 31
Sentinel Glynda Nal'SheaDarkshore~37.7, 43.4
- 32
Hand inThe Red Crystal
- 33
AcceptAs Water Cascades
- 34
Hand inPlagued LandsTharnariun Treetender · ~38.8, 43.4
- 35
AcceptCleansing of the InfectedTharnariun Treetender · ~38.8, 43.4
- 32
TerenthisDarkshore~39.4, 43.5
- 36
Hand inHow Big a Threat?
- 37
AcceptHow Big a Threat?
- 36
Blackwood PathfinderDarkshore~39.3, 52.2
- 38
DoHow Big a Threat?
Kill eight Blackwood Pathfinders and five Windtalkers at the furbolg camps.
- 38
CHAPTER 07 · LEVELS 15–16
Darkshore (levels 15–16)
This chapter runs between Auberdine and the ruins. Terenthis sends you to Thundris Windweaver for The Cliffspring River, and Glynda’s red crystal leads to The Fragments Within. Ameth’Aran covers Sentinel Tysha Moonblade’s tablets, Cerellean Whiteclaw’s pendant and Jai’vhanel. Back in Auberdine, take The Tower of Althalaxx, A Lost Master and Deep Ocean, Vast Sea, then carry the Thresher Eyes north to Buzzbox 411.
- Cleansing of the Infected needs twenty Rabid Thistle Bears, so finish the count on your other forest outings.
- Keep the cloak from A Lost Master. Volcor receives it at the very end of the route.
- Fill the Cleansing Bowl at the Auberdine moonwell before heading north for Buzzbox 323. You need it later for The Blackwood Corrupted.
Quest order 39 steps
Rabid Thistle BearDarkshore~38.2, 52.6
- 01
DoCleansing of the Infected
Kill twenty Rabid Thistle Bears during your other forest outings. Finish the count before returning to Tharnariun.
- 01
- 02
GoSuggested level 15
Players are usually around level 15 by this point. If you are lower, finish the accepted work nearby before moving on; the route continues either way.
- 02
TerenthisDarkshore~39.4, 43.5
- 03
AcceptThundris Windweaver
- 04
Hand inHow Big a Threat?
- 05
Hand inCleansing of the InfectedTharnariun Treetender · ~38.8, 43.4
- 06
AcceptTharnariun's HopeTharnariun Treetender · ~38.8, 43.4
- 03
Thundris WindweaverDarkshore~37.4, 40.1
- 07
DoThundris Windweaver
Go around Auberdine’s northern building to the rear terrace for Thundris Windweaver. Speak with Thundris Windweaver in Auberdine about the corrupt furbolgs.
- 08
Hand inThundris Windweaver
Go around Auberdine’s northern building to the rear terrace for Thundris Windweaver. Speak with Thundris Windweaver and turn in Thundris Windweaver.
- 09
AcceptThe Cliffspring River
Go around Auberdine’s northern building to the rear terrace for Thundris Windweaver. Speak with Thundris Windweaver and accept The Cliffspring River.
- 10
AcceptExpanding Horizons
Ask Thundris Windweaver for Expanding Horizons too. Keep his letter for Baros Alexston in Stormwind; the route sails there after the northern Darkshore loop.
- 07
Darkshore ThresherDarkshore~32.3, 43.2
- 11
DoBuzzbox 411
In the same water west of Auberdine, collect three Thresher Eyes. Keep them for Buzzbox 411 on the later trip to the northern wrecks. Surface between fights.
- 11
Skeletal Sea TurtleDarkshore~31.8, 46.3
- 12
DoWashed Ashore
From Auberdine, go to the water west of town. Recover the remains from the skeletal sea turtle; surface before running out of breath.
- 12
Gwennyth Bly'LeggondeDarkshore~36.6, 45.6
- 13
Hand inWashed Ashore
Return to Gwennyth Bly’Leggonde in Auberdine and turn in Washed Ashore.
- 13
Mysterious Red CrystalDarkshore~47.3, 48.7
- 14
DoAs Water Cascades
Fill the water container at the Auberdine moonwell, carry it to the red crystal on the raised ledge above the moonkin area against the eastern mountain wall and use it there.
- 15
Hand inAs Water Cascades
Return to Mysterious Red Crystal and turn in As Water Cascades.
- 16
AcceptThe Fragments Within
Inspect Mysterious Red Crystal and accept The Fragments Within.
- 14
Sentinel Tysha MoonbladeDarkshore~40.3, 59.7
- 17
AcceptThe Fall of Ameth'Aran
- 17
The Lay of Ameth'AranDarkshore~43.3, 58.7
- 18
DoThe Fall of Ameth'Aran
Read both historical tablets in Ameth'Aran and return to Sentinel Tysha Moonblade nearby.
- 18
Jai'vhanelDarkshore~45.0, 58.2
- 19
DoWANTED: Jai'vhanel
While approaching Ameth’Aran, look for Jai’vhanel by the mountain base north of the ruins. Recover her feather and finish the nearby ruins before returning to Glynda.
- 19
Cursed HighborneDarkshore~41.9, 57.3
- 20
DoTools of the Highborne
Collect seven Highborne Relics at Ameth'Aran while reading the tablets.
- 20
Anaya DawnrunnerDarkshore~41.8, 60.7
- 21
DoFor Love Eternal
Find Anaya Dawnrunner in Ameth'Aran, kill her spirit and recover her pendant.
- 22
DoBashal'AranAncient Flame · ~42.4, 61.8
Use the ancient flame at Ameth'Aran to destroy the seal. Complete the other ruins work before returning north to Asterion.
- 21
Sentinel Tysha MoonbladeDarkshore~40.3, 59.7
- 23
Hand inThe Fall of Ameth'Aran
- 23
Beached Sea TurtleDarkshore~37.1, 62.2
- 24
AcceptBeached Sea Turtle
Inspect the beached remains at the marked coast and accept Beached Sea Turtle. Keep the sample for the next Auberdine return.
- 25
DoBeached Sea Turtle
Keep the recovered remains for Gwennyth in Auberdine. Finish the other work on this outing before returning to the docks.
- 24
Gwennyth Bly'LeggondeDarkshore~36.6, 45.6
- 26
Hand inBeached Sea Turtle
- 27
AcceptFruit of the SeaLevel 15+Gubber Blump · ~36.1, 44.9
- 26
Cerellean WhiteclawDarkshore~35.7, 43.7
- 28
Hand inFor Love Eternal
- 28
Sentinel Glynda Nal'SheaDarkshore~37.6, 43.4
- 29
Hand inWANTED: Jai'vhanel
- 30
DoThe Fragments Within
Bring the crystal fragments back to Sentinel Glynda Nal'Shea in Auberdine.
- 31
Hand inThe Fragments Within
- 32
AcceptThe Tower of AlthalaxxSentinel Elissa Starbreeze · ~39.0, 43.5
Find Sentinel Elissa Starbreeze on the second floor of Auberdine’s eastern building. Speak with Sentinel Elissa Starbreeze and accept The Tower of Althalaxx.
- 29
TerenthisDarkshore~39.4, 43.5
- 33
AcceptA Lost Master
- 33
Gorbold SteelhandDarkshore~38.1, 41.2
- 34
AcceptDeep Ocean, Vast Sea
- 35
Hand inTools of the HighborneThundris Windweaver · ~37.4, 40.1
Go around Auberdine’s northern building to the rear terrace for Thundris Windweaver. Speak with Thundris Windweaver and turn in Tools of the Highborne.
- 34
Buzzbox 411Darkshore~42.0, 28.6
- 36
Hand inBuzzbox 411
On the shore just east of the wrecks, find Buzzbox 411 and turn in Buzzbox 411.
- 37
AcceptBuzzbox 323
Inspect Buzzbox 411 and accept Buzzbox 323.
- 36
Silver Dawning's LockboxDarkshore~38.2, 28.8
- 38
DoDeep Ocean, Vast Sea
Recover the Silver Dawning’s Lockbox and Mist Veil’s Lockbox from the two wrecks north of Auberdine. Surface between wrecks and before breath runs low; clear nearby murlocs before entering and keep the exit in sight. No water-breathing spell or potion is assumed.
- 38
Moonstalker RuntDarkshore~43.6, 28.9
- 39
DoBuzzbox 323
Follow the coast north and collect six Moonstalker Fangs from the moonstalker runts on the way to Buzzbox 323. Fill the Cleansing Bowl for The Blackwood Corrupted at the Auberdine moonwell before you set off.
- 39
CHAPTER 08 · LEVELS 16–20
Darkshore and Redridge Mountains (levels 16–20)
The final chapter starts on the northern Darkshore coast with Gorbold Steelhand’s wrecks, the Cliffspring cave, Onu at the Grove of the Ancients and the Master’s Glaive, then Gelkak Gyromast, the Tower of Althalaxx and Mathystra. Take the direct boat to Stormwind for Philmor’s Favor and Elaine Trias, then work Lakeshire for Deputy Feldon, Verner Osgood, Foreman Oslow and Marshal Marris, with errands to General Marcus Jonathan in Stormwind and Smith Argus in Goldshire. The optional Defias Brotherhood chain and Deadmines run through Westfall and Stormwind before the level-20 class journeys. Return to Auberdine for Gershala Nightwhisper and the southern coast, deliver the cloak to Volcor and finish with Delgren the Purifier at Maestra’s Post in Ashenvale.
- Gyromast’s Revenge, Remtravel’s escort and the Deadmines are optional group work. Skip them when playing solo.
- Murloc Poachers needs level 20. Skip it if you are lower, since the 20–30 guide offers it again in Redridge.
- Blackrock Menace and Blackrock Blockade need level 18. Collect ten Battleworn Axes, ten Stolen Supplies and eight Stolen Weapons in the south-eastern camps and keep away from Stonewatch Keep.
Quest order 249 steps
Reef CrawlerDarkshore~44.8, 21.8
- 01
DoFruit of the Sea
Kill the crabs and collect six Fine Crab Chunks along the northern Darkshore coast.
- 01
- 02
GoSuggested level 16
Players are usually around level 16 by this point. If you are lower, finish the accepted work nearby before moving on; the route continues either way.
- 02
Beached Sea TurtleDarkshore~44.2, 20.6
- 03
AcceptBeached Sea Turtle
Inspect the beached remains at the marked coast and accept Beached Sea Turtle. Keep the sample for the next Auberdine return.
- 04
DoBeached Sea Turtle
Keep the recovered remains for Gwennyth in Auberdine. Finish the other work on this outing before returning to the docks.
- 03
AsterionDarkshore~44.2, 36.3
- 05
Hand inBashal'Aran
From the beached turtle on the north coast, head south to Bashal’Aran. Speak with Asterion and turn in Bashal’Aran.
- 05
Beached Sea CreatureDarkshore~41.9, 31.5
- 06
AcceptBeached Sea Creature
Inspect the beached remains at the marked coast and accept Beached Sea Creature. Keep the sample for the next Auberdine return.
- 07
DoBeached Sea Creature
Keep the recovered remains for Gwennyth in Auberdine. Finish the other work on this outing before returning to the docks.
- 06
Cliffspring River WaterfallDarkshore~50.8, 25.6
- 08
DoThe Cliffspring River
Follow the Cliffspring River to its first waterfall and draw a water sample from the pool there.
- 08
Scaber StalkDarkshore~55.0, 36.8
- 09
DoCave Mushrooms
Follow the north bank of Cliffspring River uphill to the cave behind the waterfall. Gather five Scaber Stalks and one Death Cap inside. Search the upper passage on the right and its far end for a Death Cap. Keep a clear route back to the entrance.
- 09
Thundris WindweaverDarkshore~37.4, 40.1
- 10
Hand inThe Cliffspring River
Go around Auberdine’s northern building to the rear terrace for Thundris Windweaver. Speak with Thundris Windweaver and turn in The Cliffspring River.
- 11
AcceptThe Blackwood Corrupted
Go around Auberdine’s northern building to the rear terrace for Thundris Windweaver. Speak with Thundris Windweaver and accept The Blackwood Corrupted.
- 12
Hand inDeep Ocean, Vast SeaGorbold Steelhand · ~38.1, 41.2
- 10
Archaeologist HolleeDarkshore~37.4, 41.8
- 13
AcceptThe Absent Minded Prospector
- 13
Barithras MoonshadeDarkshore~37.3, 43.6
- 14
Hand inCave Mushrooms
- 15
AcceptOnu
- 16
AcceptWANTED: Murkdeep!WANTED: Murkdeep! · ~37.2, 44.2
Read the wanted notice in Auberdine and accept the Murkdeep bounty.
- 14
Gubber BlumpDarkshore~36.1, 44.9
- 17
Hand inFruit of the Sea
Gubber Blump stands on the Auberdine dock beside Gwennyth Bly’Leggonde. Speak with him and turn in Fruit of the Sea.
- 18
Hand inBeached Sea CreatureGwennyth Bly'Leggonde · ~36.6, 45.6
- 19
Hand inBeached Sea TurtleGwennyth Bly'Leggonde · ~36.6, 45.6
- 17
OnuDarkshore~43.5, 76.3
- 20
DoOnu
From Auberdine, follow the road south to the Grove of the Ancients and speak with Onu.
- 21
Hand inOnu
- 22
AcceptThe Master's Glaive
- 20
Darkshore~38.5, 86.5
- 23
DoThe Master's Glaive
Investigate the Master's Glaive. Use the Phial of Scrying to create the bowl and speak with Onu through it.
- 24
Hand inThe Master's GlaiveMaster's Glaive: Scrying Bowl (use the Phial of Scrying) · ~38.5, 86.5
Use the Scrying Bowl you just created at the Master's Glaive and turn in the investigation to Onu.
- 25
AcceptThe Twilight CampMaster's Glaive: Scrying Bowl (use the Phial of Scrying) · ~38.5, 86.5
Use your Scrying Bowl at the Master's Glaive and accept The Twilight Camp from Onu.
- 26
DoThe Twilight CampTwilight Tome · ~38.5, 86.0
Look for the written clue in the Twilight camp at the Master's Glaive.
- 27
Hand inThe Twilight CampTwilight Tome · ~38.5, 86.0
Return to Twilight Tome and turn in The Twilight Camp.
- 28
AcceptReturn to OnuTwilight Tome · ~38.5, 86.0
Inspect Twilight Tome and accept Return to Onu.
- 29
AcceptIt's All Fun and Games Until...Twilight Tome · ~38.5, 86.0
After taking Return to Onu, inspect the same Twilight Tome at the Master’s Glaive for It’s All Fun and Games Until... Accept the task before leaving. If the offer is absent, use Quest unavailable? to set it aside and continue to Onu.
- 30
DoIt's All Fun and Games Until...Twilight Disciple · ~38.2, 86.3
Before leaving the Master’s Glaive, loot a Peerless Eye from the nearby Twilight Disciples or Twilight Thugs. Take isolated enemies and watch for disciple healing. Check only the enemies on your approach and exit. If no eye drops, use Quest unavailable? to defer this quest and continue to Onu. Keep any eye for Thundris Windweaver on the planned Auberdine return.
- 31
AcceptTherylune's EscapeTherylune · ~38.6, 87.3
Therylune is held in the Master’s Glaive camp where you are. Accept Therylune’s Escape only when you can start the escort at once. If she is absent or the camp is unsafe, defer it and carry on with the route.
- 23
Therylune escape endpointDarkshore~40.5, 87.1
- 32
DoTherylune's Escape
Escort Therylune out of the Master’s Glaive immediately after accepting. Stay with her until the native quest log confirms the escape. Carry the completed report to Therysil on the later Ashenvale coast visit.
- 32
OnuDarkshore~43.5, 76.3
- 33
DoReturn to Onu
Carry the Insane Scribbles to Onu at the Grove of the Ancients.
- 34
Hand inReturn to Onu
- 35
AcceptMathystra Relics
- 36
AcceptSwelling ForcesOptionalArbal · ~43.6, 76.4
Find Arbal in the Grove for the optional Swelling Forces hunt. Its 26 naga kills can be combined with Mathystra Relics, but some enemies reach level 21.
- 33
Beached Sea TurtleDarkshore~31.7, 83.7
- 37
AcceptBeached Sea Turtle
Inspect these remains on the southern Darkshore coast and accept Beached Sea Turtle. Clear the nearby murlocs before approaching; collect the other coastal samples before the planned Auberdine return.
- 38
DoBeached Sea Turtle
Inspect the coastal remains and keep the recovered sample for Gwennyth in Auberdine. Continue the same southern-coast outing before returning to town.
- 37
Beached Sea TurtleDarkshore~31.2, 85.6
- 39
AcceptBeached Sea Turtle
Inspect these remains on the southern Darkshore coast and accept Beached Sea Turtle. Clear the nearby murlocs before approaching; collect the other coastal samples before the planned Auberdine return.
- 40
DoBeached Sea Turtle
Inspect the coastal remains and keep the recovered sample for Gwennyth in Auberdine. Continue the same southern-coast outing before returning to town.
- 39
Beached Sea CreatureDarkshore~31.3, 87.4
- 41
AcceptBeached Sea Creature
Inspect these remains on the southern Darkshore coast and accept Beached Sea Creature. Clear the nearby murlocs before approaching; collect the other coastal samples before the planned Auberdine return.
- 42
DoBeached Sea Creature
Inspect the coastal remains and keep the recovered sample for Gwennyth in Auberdine. Continue the same southern-coast outing before returning to town.
- 41
Beached Sea CreatureDarkshore~32.7, 80.8
- 43
AcceptBeached Sea Creature
Inspect these remains on the southern Darkshore coast and accept Beached Sea Creature. Clear the nearby murlocs before approaching; collect the other coastal samples before the planned Auberdine return.
- 44
DoBeached Sea Creature
Inspect the coastal remains and keep the recovered sample for Gwennyth in Auberdine. Continue the same southern-coast outing before returning to town.
- 43
Murkdeep’s coastal campDarkshore~36.4, 76.5
- 45
DoWANTED: Murkdeep!
Continue south along the shore to Murkdeep’s camp. Clear the shore carefully and approach the campfire to start the encounter. Defeat the waves and Murkdeep. Retreat and defer if you cannot control the adds; this is not a single isolated pull.
- 45
Beached Sea CreatureDarkshore~36.0, 70.9
- 46
AcceptBeached Sea Creature
Inspect these remains on the southern Darkshore coast and accept Beached Sea Creature. Clear the nearby murlocs before approaching; collect the other coastal samples before the planned Auberdine return.
- 47
DoBeached Sea Creature
Inspect the coastal remains and keep the recovered sample for Gwennyth in Auberdine. Continue the same southern-coast outing before returning to town.
- 46
Gwennyth Bly'LeggondeDarkshore~36.6, 45.6
- 48
Hand inBeached Sea Creature
- 49
Hand inBeached Sea Turtle
Speak with Gwennyth Bly’Leggonde and turn in Beached Sea Turtle.
- 50
Hand inBeached Sea Creature
Speak with Gwennyth Bly’Leggonde and turn in Beached Sea Creature.
- 51
Hand inBeached Sea Creature
- 52
Hand inBeached Sea Turtle
- 48
Sentinel Glynda Nal'SheaDarkshore~37.7, 43.4
- 53
Hand inWANTED: Murkdeep!
Return to Sentinel Glynda Nal'Shea and claim the reward for WANTED: Murkdeep!.
- 53
Thundris WindweaverDarkshore~37.4, 40.1
- 54
Hand inIt's All Fun and Games Until...
On the Auberdine return, deliver the Peerless Eye to Thundris Windweaver. If the eye did not drop, keep the quest for later and continue the town hand-ins.
- 54
Buzzbox 323Darkshore~51.3, 24.6
- 55
Hand inBuzzbox 323
Find Buzzbox 323 on the northern coast and turn in Buzzbox 323.
- 56
AcceptBuzzbox 525
Inspect Buzzbox 323 and accept Buzzbox 525.
- 55
Beached Sea TurtleDarkshore~53.1, 18.1
- 57
AcceptBeached Sea Turtle
Inspect the beached remains at the marked coast and accept Beached Sea Turtle. Keep the sample for the next Auberdine return.
- 58
DoBeached Sea Turtle
Keep the recovered remains for Gwennyth in Auberdine. Finish the other work on this outing before returning to the docks.
- 57
Gelkak GyromastDarkshore~56.7, 13.5
- 59
AcceptGyromast's Retrieval
Look for Gelkak Gyromast on the small rocky rise at the shoreline north of Mathystra Ruins. Speak with Gelkak Gyromast and accept Gyromast's Retrieval.
- 59
Giant ForeststriderDarkshore~61.2, 14.9
- 60
DoGyromast's Retrieval
Kill reef crawlers, foreststriders and Greymist murlocs on the northern coast and collect the three pieces of Gelkak’s key after speaking with him. Finish any missing pieces during the final beach work and check all three counters before returning. The subsequent mechanical encounter is not part of this quest.
- 60
Moonstalker SireDarkshore~61.9, 8.6
- 61
DoA Lost Master
Finish A Lost Master in the hills just north of the Giant Foreststriders: kill Moonstalker Sires and Matriarchs until you hold five Fine Moonstalker Pelts, counting any you took in the south. Each Matriarch arrives with a Runt, and Sires strike hard from behind, so pull them one at a time. Keep the pelts for Terenthis in Auberdine.
- 61
Gelkak GyromastDarkshore~56.7, 13.5
- 62
Hand inGyromast's Retrieval
Look for Gelkak Gyromast on the small rocky rise at the shoreline north of Mathystra Ruins. Speak with Gelkak Gyromast and turn in Gyromast's Retrieval.
- 63
AcceptGyromast's RevengeOptional
Optional group quest: Gyromast’s Revenge ends with a level-20 elite robot. Accept it from Gelkak Gyromast only if you have help; nothing else on the route needs it.
- 62
The Threshwackonator 4100Darkshore~55.8, 18.3
- 64
DoGyromast's RevengeOptional
Optional group encounter: use Gyromast’s key to activate the Threshwackonator, lead it back and defeat it when it turns hostile. Bring help; do not treat the robot as a normal solo target.
- 64
Gelkak GyromastDarkshore~56.7, 13.5
- 65
Hand inGyromast's RevengeOptional
Return to Gelkak Gyromast and claim the reward for Gyromast's Revenge.
- 65
Balthule ShadowstrikeDarkshore~55.0, 24.9
- 66
DoThe Tower of Althalaxx
From Gyromast’s rise, go south to Balthule Shadowstrike near the Tower of Althalaxx.
- 67
Hand inThe Tower of Althalaxx
- 68
AcceptThe Tower of Althalaxx
- 69
DoThe Tower of AlthalaxxDark Strand Fanatic · ~56.1, 25.4
Kill the cultists and collect four Worn Parchments around the tower. Remain outside the tower interior.
- 70
Hand inThe Tower of Althalaxx
- 71
AcceptThe Tower of Althalaxx
- 66
Mathystra RelicDarkshore~58.0, 25.9
- 72
DoMathystra Relics
Collect six Mathystra Relics from the ground in the northern ruins. Naga here range up to level 21. Check their levels and use clear approaches to the relics. Bring help or defer this quest if the pulls are too difficult. Keep the relics for the next southern-road visit to Onu.
- 73
DoSwelling ForcesOptionalStormscale naga in Mathystra Ruins · ~58.0, 25.9
Optional hunt: kill 12 Myrmidons, 8 Sorceresses and 6 Warriors in Mathystra Ruins while collecting the relics. Enemies reach level 21. Bring help or skip this hunt if the fights are too difficult.
- 72
Blackwood Furbolg North BonfireDarkshore~52.4, 33.4
- 74
DoThe Blackwood Corrupted
From Mathystra, go south-west to the northern Blackwood camps. Gather fruit, nuts and grain there, mix the Cleansing Bowl you filled at the Auberdine moonwell and place it by their bonfire near the river. This summons Xabraxxis, a level-19 corruptor. Check your readiness before summoning and bring help or return later if needed. Kill him and recover his talisman.
- 74
Den MotherDarkshore~51.5, 38.3
- 75
DoTharnariun's Hope
From the Blackwood bonfire, go south to the Den Mother’s cave. Enter it and kill her. Clear nearby bears first and bring help if the fight is too difficult.
- 75
Thundris WindweaverDarkshore~37.4, 40.1
- 76
Hand inThe Blackwood Corrupted
Go around Auberdine’s northern building to the rear terrace for Thundris Windweaver. Speak with Thundris Windweaver and turn in The Blackwood Corrupted.
- 76
Tharnariun TreetenderDarkshore~38.8, 43.4
- 77
Hand inTharnariun's Hope
- 78
Hand inA Lost MasterTerenthis · ~39.4, 43.5
- 79
AcceptA Lost MasterTerenthis · ~39.4, 43.5
- 77
Gwennyth Bly'LeggondeDarkshore~36.6, 45.6
- 80
Hand inBeached Sea Turtle
- 80
Manifest Clerk PhilmorStormwind City~30.5, 28.8
- 81
AcceptPhilmor’s Favor
If still in Auberdine, board the direct Stormwind boat from the western pier, confirm its destination and remain aboard until Stormwind Harbor. At the harbor, find Manifest Clerk Philmor and accept Philmor’s Favor. Keep the shipment for Elaine during the city circuit before leaving for Redridge. If the offer is absent, defer this chain and continue the planned city errands.
Travel directions to Stormwind City
- 81
Elaine TriasStormwind City~66.6, 73.4
- 82
DoPhilmor’s Favor
Carry Philmor’s shipment to Elaine Trias in the Trade District cheese shop. Stay in the city for her follow-up before leaving for Redridge.
- 82
Baros AlexstonStormwind City~57.7, 47.9
- 83
DoExpanding Horizons
From the harbor, walk east to Cathedral Square and find Baros Alexston near the cathedral steps.
- 84
Hand inExpanding Horizons
Give Thundris’s letter to Baros Alexston and turn in Expanding Horizons.
- 85
AcceptMaking Do
Accept Making Do from Baros Alexston. Keep his reply for Thundris when you are back in Auberdine.
- 83
Renzik "The Shiv"Stormwind City~78.3, 71.0
- 86
AcceptRedridge Rendezvous
RogueLevel 16+Speak with Renzik "The Shiv" and accept Redridge Rendezvous. Before you leave Stormwind, train Lockpicking with a Rogue trainer: Lucius’s lockbox task at Alther’s Mill needs it.
- 86
Elaine TriasStormwind City~66.6, 73.4
- 87
Hand inPhilmor’s Favor
Give Philmor’s shipment to Elaine Trias and claim the reward. Accept Gatehouse Goods before leaving her.
- 88
AcceptGatehouse Goods
After Philmor’s Favor, accept Gatehouse Goods from Elaine Trias in the cheese shop.
- 89
DoGatehouse GoodsTrias shop: Gatehouse Door upstairs · ~66.6, 73.4
Take the shipment upstairs in the Trias shop and use it by the stockroom entrance. Check the native quest counter, then return downstairs. This is a delivery event; do not look for an enemy to kill.
- 90
Hand inGatehouse Goods
Return downstairs to Elaine Trias and claim the Gatehouse Goods reward before continuing through Stormwind.
- 87
Deputy FeldonRedridge Mountains~25.6, 60.0
- 91
AcceptAssessing the Threat
Leave Stormwind by the main gate, go south to Goldshire and follow the road east through Elwynn Forest into Redridge to the Lakeshire bridge. If you already learned the Lakeshire flight path, fly there from Dungar Longdrink instead. Accept Assessing the Threat from Deputy Feldon.
- 92
AcceptShow of Force
Speak to Deputy Feldon and accept Show of Force.
- 91
ShawnRedridge Mountains~24.2, 53.6
- 93
AcceptHilary's Necklace
Check the children fishing beside Lake Everstill for Hilary’s Necklace.
- 93
Class quests
Rogue3 steps · choose your class above to show only yours- 94
DoRedridge Rendezvous
RogueLucius · ~23.1, 52.2Find Lucius on the L-shaped dock west of Lakeshire’s bridge and speak with him and take the next lesson before leaving. Keep your current shared quests. Return to the saved mainland route after the lockpicking trial.
- 95
Hand inRedridge Rendezvous
RogueLucius · ~23.1, 52.2Find Lucius on the L-shaped dock west of Lakeshire’s bridge. Speak with Lucius and turn in Redridge Rendezvous.
- 96
AcceptAlther's Mill
RogueLucius · ~23.1, 52.2
- 94
Dockmaster BarenRedridge Mountains~22.6, 47.4
- 97
AcceptSelling Fish
Speak to Dockmaster Baren and accept Selling Fish.
- 98
AcceptMurloc PoachersOptionalLevel 20+
Check Dockmaster Baren in Lakeshire for Murloc Poachers. Optional: it needs level 20. Skip it if you are below 20; the 20–30 guide offers it again in Redridge.
- 97
Chef BreannaRedridge Mountains~17.6, 43.8
- 99
AcceptRedridge Goulash
Check Chef Breanna in Lakeshire for Redridge Goulash.
- 99
Wiley the BlackRedridge Mountains~21.4, 45.2
- 100
DoThe Defias Brotherhood
Carry Gryan’s message to Redridge. Enter the Lakeshire inn and climb the stairs to Wiley the Black on the upper floor.
- 101
Hand inThe Defias Brotherhood
Enter the Lakeshire inn and climb the stairs to Wiley the Black on the upper floor. Turn in The Defias Brotherhood to Wiley the Black.
- 102
AcceptThe Defias BrotherhoodOptional
Enter Lakeshire’s inn and take the stairs to Wiley the Black on the upper floor. Accept The Defias Brotherhood from Wiley the Black. Keep Wiley’s Note. You hand it to Gryan on the later Westfall return.
- 103
AcceptA Free LunchDarcy · ~21.5, 44.3
Check Darcy at the Lakeshire inn for A Free Lunch.
- 100
Magistrate SolomonRedridge Mountains~24.9, 44.5
- 104
AcceptMessenger to Stormwind
Check Magistrate Solomon in Lakeshire for Messenger to Stormwind before the city return.
- 104
Verner OsgoodRedridge Mountains~25.9, 47.3
- 105
AcceptThe Price of Shoes
Check Verner Osgood in Lakeshire for The Price of Shoes. Keep his note for Smith Argus on the later pass through Goldshire.
- 105
Foreman OslowRedridge Mountains~27.1, 48.6
- 106
AcceptThe Lost Tools
Check Foreman Oslow by the Lakeshire bridge for The Lost Tools.
- 107
AcceptBlackrock MenaceMarshal Marris · ~28.4, 49.0
Speak to Marshal Marris and accept Blackrock Menace.
- 108
AcceptBlackrock BlockadeMarshal Marris · ~28.4, 49.0
Speak to Marshal Marris and accept Blackrock Blockade.
- 106
Lake Everstill shallowsRedridge Mountains~34.9, 54.0
- 109
DoHilary's Necklace
Wade into Lake Everstill east of the bridge and search underwater for Hilary’s necklace, combining the swim with the toolbox search where the markers allow. Surface between searches.
- 110
DoThe Lost ToolsLake Everstill wreck · ~35.9, 54.0
Search the bottom of Lake Everstill for Oslow’s toolbox. Use the quest marker, surface before running out of breath and avoid swimming through hostile packs.
- 109
Foreman OslowRedridge Mountains~27.1, 48.6
- 111
Hand inThe Lost Tools
Swim back to Lakeshire and return the toolbox to Foreman Oslow by the bridge.
- 112
AcceptThe Everstill Bridge
Check Foreman Oslow for The Everstill Bridge.
- 111
General Marcus JonathanStormwind City~69.2, 82.7
- 113
DoMessenger to Stormwind
If you are still in Lakeshire, fly to Stormwind if Ariena Stormfeather offers it; otherwise follow the road west through Elwynn Forest to Stormwind. Carry Solomon’s report to General Marcus Jonathan at the city entrance.
- 114
Hand inMessenger to Stormwind
Deliver the report to the General.
- 115
AcceptMessenger to Stormwind
Take the General’s response for Messenger to Stormwind. Keep it for the return to Lakeshire.
- 113
Argos NightwhisperStormwind City~36.2, 67.6
- 116
AcceptThe Corruption Abroad
During this Stormwind visit, find Argos Nightwhisper and accept The Corruption Abroad. Keep his message for Gershala on the Auberdine return after Redridge. Argos offers it only from level 18. If he has nothing for you yet, continue with the city errands; if you come back through Stormwind for the Auberdine boat after Redridge, call on him then.
- 116
Smith ArgusElwynn Forest~41.7, 65.5
- 117
DoThe Price of Shoes
From Stormwind, leave by the main gate and follow the road south to Goldshire. Carry Verner’s note to Smith Argus.
- 118
Hand inThe Price of Shoes
Give the note to Smith Argus.
- 119
AcceptReturn to Verner
Take Return to Verner from Smith Argus.
- 117
Verner OsgoodRedridge Mountains~25.9, 47.3
- 120
DoReturn to Verner
Follow the road east through Elwynn Forest back to Lakeshire and carry the Crate of Horseshoes to Verner Osgood.
- 121
Hand inReturn to Verner
Deliver the crate to Verner.
- 122
AcceptA Baying of Gnolls
Check Verner Osgood for A Baying of Gnolls.
- 123
AcceptUnderbelly Scales
Check Verner for Underbelly Scales after delivering the horseshoes.
- 120
Magistrate SolomonRedridge Mountains~24.9, 44.5
- 124
DoMessenger to Stormwind
Return to Magistrate Solomon in Lakeshire with the response.
- 125
Hand inMessenger to Stormwind
Give the General’s letter to Solomon.
- 124
Gnoll camps north of LakeshireRedridge Mountains~19.0, 37.3
- 126
DoA Baying of Gnolls
On the ridge north of Verner’s stable, kill ten Redridge Brutes and eight Redridge Mystics. Separate caster pulls and gather the stolen bridge supplies.
- 127
DoThe Everstill Bridge
Go into the hills behind Lakeshire. Kill Redridge gnolls and collect five Iron Pikes and five Iron Rivets while working the brute and mystic objective.
- 126
Guard ParkerRedridge Mountains~10.2, 71.5
- 128
DoA Free Lunch
From the hills, head south-west to the road leading toward Duskwood and carry the lunch to Guard Parker. Stay on the road; there is no need to enter Duskwood for this delivery.
- 129
Hand inA Free Lunch
Give the lunch to Guard Parker.
- 130
AcceptVisit the Herbalist
Accept Visit the Herbalist from Guard Parker after the lunch delivery.
- 128
Redridge ThrasherRedridge Mountains~8.5, 67.8
- 131
DoShow of Force
Kill the gnoll thrashers and collect five Spiked Collars west of the Redridge road while completing the nearby gnoll outing. Check the native counter before leaving; these are not the northern Brute and Mystic targets.
- 131
Redridge Mongrel and Poacher camps south of the roadRedridge Mountains~26.2, 81.1
- 132
DoAssessing the Threat
Follow the road east from Guard Parker, then clear the gnoll camps south of the road. Kill ten Redridge Mongrels and six Redridge Poachers.
- 132
Southern Redridge wildlifeRedridge Mountains~31.9, 65.0
- 133
DoRedridge Goulash
While scouting southern Redridge, gather five Tough Condor Meat, five Great Goretusk Snouts and five Crisp Spider Meat from the matching animals.
- 133
Lake Everstill murloc searchRedridge Mountains~42.2, 66.2
- 134
DoMurloc PoachersOptional
Kill murlocs along Lake Everstill and collect eight Murloc Fins. Keep a clear retreat to the shore.
- 134
Southern Lake Everstill murlocsRedridge Mountains~43.7, 72.2
- 135
DoSelling Fish
Kill murlocs along the southern bank of Lake Everstill and collect ten Spotted Sunfish. Pull onto land and avoid the deep-water creatures. Fishing is not required.
- 135
Lucius's LockboxRedridge Mountains~47.0, 44.7
- 136
DoAlther's Mill
RogueTrain Lockpicking and keep your Thieves’ Tools. Cross to Alther’s Mill on the north shore of the lake and practise on the training boxes. Keep going until Lockpicking is 70 (80 is safer): Lucius’s box needs 25, but the Duskwood Chest in Klaven’s Tower, your next Rogue quest, needs 70, and these boxes are the only practice on the route. Then open Lucius’s Lockbox for the Token of Thievery; you hand it to Lucius on the return to Lakeshire. Then continue east to the Blackrock camps.
- 136
Southeastern Blackrock campRedridge Mountains~65.6, 78.7
- 137
DoBlackrock Menace
Follow the south-bank road east to the Blackrock camps in southeastern Redridge. Kill ordinary Blackrock Grunts and Outrunners and collect ten Battleworn Axes. Keep away from Stonewatch Keep and the high-level cave camps.
- 137
Southeastern Blackrock camp suppliesRedridge Mountains~66.1, 73.6
- 138
DoBlackrock Blockade
At the Blackrock camps south of Stonewatch Keep, loot ten Stolen Supplies from water barrels, grain sacks and meat haunches and eight Stolen Weapons from weapon racks while collecting Battleworn Axes.
- 138
Southern drakesRedridge Mountains~22.9, 66.0
- 139
DoUnderbelly Scales
Kill Black Dragon Whelps south of Lakeshire and collect six Underbelly Whelp Scales. Watch for wandering whelps while collecting the remaining goulash ingredients.
- 139
Deputy FeldonRedridge Mountains~25.6, 60.0
- 140
Hand inAssessing the Threat
Follow the road west back to Lakeshire. Report your count to Deputy Feldon at the south end of the bridge.
- 141
Hand inShow of Force
Turn in Show of Force to Deputy Feldon.
- 140
HilaryRedridge Mountains~24.1, 53.6
- 142
Hand inHilary's Necklace
Bring the necklace to Hilary in Lakeshire.
- 142
LuciusRedridge Mountains~23.1, 52.2
- 143
Hand inAlther's Mill
RogueFind Lucius on the L-shaped dock west of Lakeshire’s bridge. Speak with Lucius and turn in Alther's Mill.
- 143
Marshal MarrisRedridge Mountains~28.4, 49.0
- 144
Hand inBlackrock Menace
Turn in Blackrock Menace to Marshal Marris.
- 145
Hand inBlackrock Blockade
Turn in Blackrock Blockade to Marshal Marris.
- 146
Hand inThe Everstill BridgeForeman Oslow · ~27.1, 48.6
Bring the iron supplies to Foreman Oslow.
- 144
Verner OsgoodRedridge Mountains~25.9, 47.3
- 147
Hand inA Baying of Gnolls
Return to Verner Osgood.
- 148
Hand inUnderbelly Scales
Bring the scales to Verner.
- 147
Dockmaster BarenRedridge Mountains~22.6, 47.4
- 149
Hand inSelling Fish
Turn in Selling Fish to Dockmaster Baren.
- 150
Hand inMurloc PoachersOptional
Return the fins to Dockmaster Baren.
- 149
Martie JainroseRedridge Mountains~16.8, 46.3
- 151
DoVisit the Herbalist
Find Martie Jainrose at the west end of Lakeshire.
- 152
Hand inVisit the Herbalist
Speak with Martie.
- 153
AcceptDelivering Daffodils
Accept Delivering Daffodils from Martie.
- 151
Chef BreannaRedridge Mountains~17.6, 43.8
- 154
Hand inRedridge Goulash
Return the ingredients to Chef Breanna.
- 154
DarcyRedridge Mountains~21.5, 44.3
- 155
DoDelivering Daffodils
Bring the bouquet back to Darcy at the inn.
- 156
Hand inDelivering Daffodils
Give Darcy the daffodils.
- 155
Gryan StoutmantleWestfall~56.3, 47.5
- 157
DoThe Defias BrotherhoodOptional
From Lakeshire, fly to Sentinel Hill if Ariena Stormfeather offers it; otherwise follow the road west through Elwynn Forest past Goldshire and Westbrook Garrison into Westfall. Give Wiley’s note to Gryan Stoutmantle at Sentinel Hill.
- 158
Hand inThe Defias BrotherhoodOptional
Turn in The Defias Brotherhood to Gryan Stoutmantle. If you are doing the Deadmines, take his next task, a delivery to Mathias Shaw in Stormwind.
- 159
AcceptThe People's MilitiaOptional
Take the final militia assignment before leaving Sentinel Hill. Keep it for the later Dagger Hills outing; finish the northern and eastern route work first.
- 157
Defias camps in the Dagger Hills, south of MoonbrookWestfall~45.5, 79.0
- 160
DoThe People's MilitiaOptional
Go to the Dagger Hills in southern Westfall. Kill fifteen Defias Highwaymen, five Pathstalkers and five Knuckledusters. Keep the three live counters visible.
- 160
Gryan StoutmantleWestfall~56.3, 47.5
- 161
Hand inThe People's MilitiaOptional
Return to Gryan at Sentinel Hill.
- 161
Class quests
WarlockRoguePriestShaman63 steps · choose your class above to show only yours- 162
AcceptDevourer of Souls
WarlockOptionalGakin the Darkbinder · ~39.3, 85.1If you are still in Lakeshire, fly to Stormwind if Ariena Stormfeather offers it; otherwise follow the road west through Elwynn Forest. Beneath the Slaughtered Lamb in Stormwind, speak with Gakin the Darkbinder and accept Devourer of Souls. Optional here: it needs level 20. If you are not 20 yet, carry on; the level-20 class detour offers it once you reach 20.
- 163
AcceptMathias and the Defias
RogueOptionalMaster Mathias Shaw · ~78.3, 70.7If you are still in Lakeshire, fly to Stormwind if Ariena Stormfeather offers it; otherwise follow the road west through Elwynn Forest. Enter SI:7 in Stormwind’s Old Town, climb one flight of stairs and turn left to Mathias Shaw’s room. Speak with Master Mathias Shaw and accept Mathias and the Defias. Optional here: it needs level 20. If you are not 20 yet, carry on; the level-20 class detour offers it once you reach 20.
- 164
DoMathias and the Defias
RogueOptionalAgent Kearnen · ~68.4, 70.0Leave Stormwind through the main gate and follow the road west through Elwynn Forest into Westfall, or fly if Dungar Longdrink offers Sentinel Hill. Visit Agent Kearnen beside the southeastern Westfall tower. Carry Thieves' Tools and prepare Lockpicking before starting the tower work.
- 165
Hand inMathias and the Defias
RogueOptionalAgent Kearnen · ~68.4, 70.0 - 166
AcceptKlaven's Tower
RogueOptionalAgent Kearnen · ~68.4, 70.0 - 167
DoKlaven's Tower
RogueOptionalDuskwood Chest · ~70.4, 73.9Read Kearnen's Journal. Pickpocket the Defias Tower Key from a Malformed Defias Drone without killing it first. Sneak into the tower and follow the internal stairs to the top floor. Open the Duskwood Chest near Klaven for the journal and leave. Return both required items to Mathias Shaw. The tower contains stronger enemies, so use stealth and retreat if necessary.
- 168
Hand inKlaven's Tower
RogueOptionalMaster Mathias Shaw · ~78.3, 70.7Enter SI:7 in Stormwind’s Old Town, climb one flight of stairs and turn left to Mathias Shaw’s room. Speak with Master Mathias Shaw and turn in Klaven's Tower.
- 169
AcceptThe Touch of Zanzil
RogueOptionalMaster Mathias Shaw · ~78.3, 70.7 - 170
DoThe Touch of Zanzil
RogueOptionalDoc Mixilpixil · ~80.0, 70.1Inside SI:7, take the stairs down to the basement and speak with Doc Mixilpixil for treatment of the tower poison.
- 171
Hand inThe Touch of Zanzil
RogueOptionalDoc Mixilpixil · ~80.0, 70.1Enter SI:7 and take the stairs down to Doc Mixilpixil in the basement. Speak with Doc Mixilpixil and turn in The Touch of Zanzil.
- 172
AcceptThe Touch of Zanzil
RogueOptionalDoc Mixilpixil · ~80.0, 70.1 - 173
DoThe Touch of Zanzil
RogueOptionalDoc Mixilpixil · ~80.0, 70.1Target Doc Mixilpixil and use /lay. Stay nearby until the examination objective completes, then turn it in.
- 174
Hand inThe Touch of Zanzil
RogueOptionalDoc Mixilpixil · ~80.0, 70.1 - 175
AcceptThe Touch of Zanzil
RogueOptionalDoc Mixilpixil · ~80.0, 70.1 - 176
DoThe Touch of Zanzil
RogueOptionalFelicia Gump · ~69.3, 71.3If you still need the cure, buy Simple Wildflowers at Fragrant Flowers and a Leaded Vial from a general or alchemy supplier. Loot the thread from the floor of The Finest Thread shop by Cathedral Square. Obtain a Bronze Tube from Billibub in the Dwarven District if stocked, or through trade. Bring one of each to Doc Mixilpixil and use the cure. Do not wait indefinitely for vendor stock or change professions.
- 177
Hand inThe Touch of Zanzil
RogueOptionalDoc Mixilpixil · ~80.0, 70.1Go down the stairs inside SI:7 to the basement. Speak with Doc Mixilpixil and turn in The Touch of Zanzil.
- 178
GoLearn the Menethil Harbor flight path
WarlockOptionalShellei Brondir at Menethil Harbor · ~9.5, 59.7While passing through Menethil Harbor, speak with Shellei Brondir and learn this flight path if needed. Continue your planned journey afterward.
- 179
GoLearn the Theramore flight path
WarlockOptionalBaldruc at Theramore · ~67.5, 51.2While passing through Theramore, speak with Baldruc and learn this flight path if needed. Continue your planned journey afterward.
Travel directions to Dustwallow Marsh
- 180
DoDevourer of Souls
WarlockOptionalTakar the Seer · ~49.2, 57.0From Stormwind’s Dwarven District take the Deeprun Tram to Ironforge. Follow the road east through Dun Morogh, enter Loch Modan through the southern tunnel, then go north through Dun Algaz into the Wetlands and follow the road west to Menethil Harbor. Use Menethil’s southern pier for the Theramore boat. Stay aboard until it docks at Theramore in Dustwallow Marsh, then disembark. Follow the roads west through Dustwallow into the southern Barrens to Takar the Seer north-east of Camp Taurajo. Avoid enemy settlements and difficult wildlife.
- 181
Hand inDevourer of Souls
WarlockOptionalTakar the Seer · ~49.2, 57.0 - 182
AcceptHeartswood
WarlockOptionalTakar the Seer · ~49.2, 57.0 - 183
DoHeartswood
WarlockOptionalHeartswood · ~31.5, 31.5Follow the Barrens road north into Ashenvale. Obtain Heartswood from the fallen tree by the ruins west of Astranaar. Once you have it, follow the road north past Maestra’s Post through Darkshore to Auberdine. At Auberdine, use the western pier for the direct Stormwind boat. Confirm Stormwind before boarding, stay aboard until it docks, then disembark at Stormwind Harbor. If the direct boat is unavailable, take the Menethil Harbor boat, then follow the Wetlands road east to Dun Algaz, south through Loch Modan and west into Dun Morogh; continue to Ironforge and take the Deeprun Tram to Stormwind. Avoid enemy towns.
- 184
GoLearn the Auberdine flight path
WarlockOptionalCaylais Moonfeather at Auberdine · ~36.4, 45.6While passing through Auberdine, speak with Caylais Moonfeather and learn this flight path if needed. Continue your planned journey afterward.
- 185
Hand inHeartswood
WarlockOptionalGakin the Darkbinder · ~39.3, 85.1With the Heartswood, return to Gakin the Darkbinder in Stormwind. If still in Ashenvale, follow the road north through Darkshore to Auberdine. At Auberdine, use the western pier for the direct Stormwind boat. Confirm Stormwind before boarding, stay aboard until it docks, then disembark at Stormwind Harbor. If the direct boat is unavailable, take the Menethil Harbor boat, then follow the Wetlands road east to Dun Algaz, south through Loch Modan and west into Dun Morogh; continue to Ironforge and take the Deeprun Tram to Stormwind. Find Gakin in the Slaughtered Lamb in the Mage Quarter and turn in Heartswood.
Travel directions to Stormwind City
- 186
AcceptThe Binding
WarlockOptionalGakin the Darkbinder · ~39.3, 85.1 - 187
DoThe Binding
WarlockOptionalSummoned Succubus · ~39.2, 84.3Descend into the Slaughtered Lamb's summoning chamber. Use the Heartswood Core on the summoning circle and defeat the summoned succubus. Return to Gakin for the spell.
- 188
Hand inThe Binding
WarlockOptionalGakin the Darkbinder · ~39.3, 85.1 - 189
AcceptContingency Plan
PriestOptionalHigh Priestess Mims · ~24.8, 10.0If you are still in Lakeshire, fly to Stormwind if Ariena Stormfeather offers it; otherwise follow the road west through Elwynn Forest to Stormwind. Ride the Deeprun Tram from Stormwind’s Dwarven District to Ironforge. In the Mystic Ward, speak with High Priestess Mims and accept Contingency Plan. Optional here: it needs level 20. If you are not 20 yet, carry on; the level-20 class detour offers it once you reach 20.
- 190
DoContingency Plan
PriestOptionalHigh Priestess Mims · ~24.8, 10.0Speak with High Priestess Mims in Ironforge for Contingency Plan. Finish the offered lesson and check the spellbook before rejoining the route.
- 191
Hand inContingency Plan
PriestOptionalHigh Priestess Mims · ~24.8, 10.0 - 192
AcceptChastise
PriestOptionalHigh Priest Rohan · ~24.7, 8.2If you are still in Lakeshire, fly to Stormwind if Ariena Stormfeather offers it; otherwise follow the road west through Elwynn Forest to Stormwind. Ride the Deeprun Tram from Stormwind’s Dwarven District to Ironforge. In the Mystic Ward, speak with High Priest Rohan and accept Chastise. Optional here: it needs level 20. If you are not 20 yet, carry on; the level-20 class detour offers it once you reach 20.
- 193
DoChastise
PriestOptionalHigh Priest Rohan · ~24.7, 8.2Speak with the named Priest trainer and complete the offered lesson. Check the spellbook after the reward before returning to shared quests.
- 194
Hand inChastise
PriestOptionalHigh Priest Rohan · ~24.7, 8.2 - 195
AcceptCall of Water
ShamanOptionalEldrun Stormbreaker · ~47.4, 13.6If you are still in Lakeshire, fly to Stormwind if Ariena Stormfeather offers it; otherwise follow the road west through Elwynn Forest to Stormwind, then ride the Deeprun Tram to Ironforge. Speak with shaman trainer Eldrun Stormbreaker in Ironforge’s Forlorn Cavern and accept Call of Water. This long chain returns several times to Norric in Loch Modan and Hervdana in the Wetlands. If you can, bind your hearthstone in Thelsamar, and use any flight paths you already know for the longer legs. Optional here: it needs level 20. If you are not 20 yet, carry on; the level-20 class detour offers it once you reach 20.
- 196
DoCall of Water
ShamanOptionalNorric Lochthane · ~41.8, 19.0At level 20, visit Eldrun Stormbreaker in Ironforge and take the Water Totem referral. Follow the Dun Morogh road to Loch Modan, then find Norric on the northwestern shore below Stonewrought Dam.
- 197
Hand inCall of Water
ShamanOptionalNorric Lochthane · ~41.8, 19.0At level 20, visit Eldrun Stormbreaker in Ironforge and take the Water Totem referral. Follow the Dun Morogh road to Loch Modan, then find Norric on the northwestern shore below Stonewrought Dam.
- 198
AcceptCall of Water
ShamanOptionalNorric Lochthane · ~41.8, 19.0 - 199
DoCall of Water
ShamanOptionalHervdana Saegrund · ~65.8, 76.4Follow the road through Dun Algaz into the Wetlands. Reach Hervdana’s cave behind the southern waterfall by the winding path and jump from its ledge into the cave.
- 200
Hand inCall of Water
ShamanOptionalHervdana Saegrund · ~65.8, 76.4From Norric, follow the road north through Dun Algaz into the Wetlands. Find Hervdana in the cave beneath the southern waterfalls.
- 201
AcceptCall of Water
ShamanOptionalHervdana Saegrund · ~65.8, 76.4 - 202
DoCall of Water
ShamanOptionalWater outside Hervdana’s cave — fill Brown Waterskin · ~65.0, 74.9Exit Hervdana’s cave and drop into the water outside. Fill the Brown Waterskin near 65.0, 74.9; check that the filled skin is in your bags before returning.
- 203
Hand inCall of Water
ShamanOptionalHervdana Saegrund · ~65.8, 76.4Return the filled waterskin to Hervdana in her Wetlands cave and turn in Call of Water.
- 204
AcceptCall of Water
ShamanOptionalHervdana Saegrund · ~65.8, 76.4 - 205
DoCall of Water
ShamanOptionalStonewatch Falls — fill Red Waterskin in the water · ~73.7, 61.6Enter the water near the Nightcrawler Murlocs at Stonewatch Falls, 73.7, 61.6. Fill the Red Waterskin, then return to Hervdana in the Wetlands.
- 206
Hand inCall of Water
ShamanOptionalHervdana Saegrund · ~65.8, 76.4Return the filled waterskin to Hervdana in her Wetlands cave and turn in Call of Water.
- 207
AcceptCall of Water
ShamanOptionalHervdana Saegrund · ~65.8, 76.4 - 208
GoLearn the Menethil Harbor flight path
ShamanOptionalShellei Brondir at Menethil Harbor · ~9.5, 59.7While passing through Menethil Harbor, speak with Shellei Brondir and learn this flight path if needed. Continue your planned journey afterward.
- 209
GoLearn the Auberdine flight path
ShamanOptionalCaylais Moonfeather at Auberdine · ~36.4, 45.6While passing through Auberdine, speak with Caylais Moonfeather and learn this flight path if needed. Continue your planned journey afterward.
Travel directions to Darkshore
- 210
GoLearn the Astranaar flight path
ShamanOptionalDaelyshia at Astranaar · ~34.5, 48.0While passing through Astranaar, speak with Daelyshia and learn this flight path if needed. Continue your planned journey afterward.
- 211
DoCall of Water
ShamanOptionalAstranaar lake — fill Blue Waterskin in the water · ~37.0, 51.6At Menethil Harbor in the Wetlands, use the northern pier for the Auberdine boat. Stay aboard at Southshore and get off only when the boat docks at Auberdine in Darkshore. Follow the road south through Darkshore to Astranaar in Ashenvale. Fill the Blue Waterskin in its lake near 37.0, 51.6. Watch your breath and return to the surface if needed.
- 212
Hand inCall of Water
ShamanOptionalHervdana Saegrund · ~65.8, 76.4With the filled waterskin, follow the road north through Darkshore to Auberdine. At Auberdine, board the boat bound for Menethil Harbor in the Wetlands. Confirm the destination before boarding and remain aboard until it docks at Menethil. Follow the road into the Wetlands to Hervdana’s cave and turn in Call of Water.
Travel directions to Wetlands
- 213
AcceptCall of Water
ShamanOptionalHervdana Saegrund · ~65.8, 76.4 - 214
DoCall of Water
ShamanOptionalNorric Lochthane · ~41.8, 19.0From the Wetlands, follow the road east through Dun Algaz into Loch Modan. Carry the Vial of Purest Water to Norric on the north-west shore, turn it in and keep the Water Sapta for the Westfall ritual.
- 215
Hand inCall of Water
ShamanOptionalNorric Lochthane · ~41.8, 19.0Carry the Vial of Purest Water through Dun Algaz to Norric on the northwest shore of Loch Modan. Turn in the vial, then keep the Water Sapta for the Westfall ritual.
- 216
AcceptCall of Water
ShamanOptionalNorric Lochthane · ~41.8, 19.0 - 217
DoCall of Water
ShamanOptionalStendel’s Pond bank — shrine and corrupt spirits · ~45.6, 59.8Fly to Sentinel Hill if Thorgrum Borrelson in Thelsamar offers it; otherwise go north-west through Dun Morogh to Ironforge, ride the tram to Stormwind and follow the road through Elwynn Forest into Westfall. At Stendel’s Pond, drink Water Sapta, kill the corrupt manifestation and collect its bracers. Find the shrine stone on the bank and make the offering there.
- 218
Hand inCall of Water
ShamanOptionalStendel’s Pond bank — shrine and corrupt spirits · ~45.6, 59.8Place the bracers and remaining pure water on the shrine beside Stendel’s Pond in Westfall to turn in Call of Water.
- 219
AcceptCall of Water
ShamanOptionalStendel’s Pond bank — shrine and corrupt spirits · ~45.6, 59.8Inspect Water shrine beside Stendel’s Pond in Westfall and accept Call of Water.
- 220
DoCall of Water
ShamanOptionalStendel’s Pond bank — swim towards the cleansed spirit · ~45.7, 59.6After accepting the shrine’s follow-up at Stendel’s Pond in Westfall, wait for the water to glow and the friendly spirit to appear. Swim from the marked bank to it.
- 221
Hand inCall of Water
ShamanOptionalStendel’s Pond bank — swim towards the cleansed spirit · ~45.7, 59.6Speak with the cleansed Minor Manifestation of Water in Stendel’s Pond, Westfall. Turn in Call of Water and collect its final delivery before leaving.
- 222
AcceptCall of Water
ShamanOptionalStendel’s Pond bank — swim towards the cleansed spirit · ~45.7, 59.6Accept the Shard of Water delivery from the cleansed spirit in Stendel’s Pond, Westfall.
- 223
DoCall of Water
ShamanOptionalNorric Lochthane · ~41.8, 19.0Take the Shard of Water from the cleansed spirit back to Norric in Loch Modan. Claim the Water Totem and Healing Stream Totem lesson.
- 224
Hand inCall of Water
ShamanOptionalNorric Lochthane · ~41.8, 19.0Take the Shard of Water from the cleansed spirit back to Norric in Loch Modan. Claim the Water Totem and Healing Stream Totem lesson.
- 162
Gershala NightwhisperDarkshore~38.3, 43.0
- 225
DoThe Corruption Abroad
Return to Auberdine. If The Corruption Abroad is not in your log yet and you are now level 18, go through Stormwind instead of using your hearthstone: Argos Nightwhisper in the park offers it, and the Auberdine boat leaves from the harbor. Otherwise use your hearthstone if it is set there. If not, fly from Lakeshire to Stormwind if you know that flight path, or follow the road west through Elwynn Forest, then board the Auberdine boat at Stormwind Harbor’s southernmost dock and stay aboard until Darkshore. In Auberdine, speak with Gershala Nightwhisper about the corruption. Keep any dungeon follow-up separate from the shared route.
Travel directions to Darkshore
- 226
Hand inThe Corruption Abroad
Report to Gershala Nightwhisper in Auberdine and claim the reward. Researching the Corruption is a separate optional dungeon quest; this delivery does not require entering Blackfathom Deeps.
- 225
Thundris WindweaverDarkshore~37.4, 40.1
- 227
DoMaking Do
Thundris Windweaver stands on the rear terrace of Auberdine’s northern building, a short walk north of Gershala. Give him Alexston’s reply.
- 228
Hand inMaking Do
- 227
Prospector RemtravelDarkshore~35.7, 83.7
- 229
DoThe Absent Minded Prospector
Find Prospector Remtravel at the southern Darkshore excavation while completing the nearby southern-coast quests.
- 230
Hand inThe Absent Minded Prospector
Return to Prospector Remtravel and claim the reward for The Absent Minded Prospector.
- 231
AcceptThe Absent Minded Prospector
- 232
DoThe Absent Minded Prospector
Stay with Remtravel while he searches the excavation and protect him until the quest log confirms success. Fight off the attackers that come for him. If he dies, abandon the quest and accept it again from him.
- 229
Grizzled Thistle Bears by Buzzbox 525Darkshore~39.6, 81.0
- 233
DoBuzzbox 525
Kill Grizzled Thistle Bears and collect four Grizzled Scalps south of Auberdine and deliver them to Buzzbox 525.
- 233
Buzzbox 525Darkshore~41.4, 80.6
- 234
Hand inBuzzbox 525
Return to Buzzbox 525 and turn in Buzzbox 525.
- 234
OnuDarkshore~43.5, 76.3
- 235
Hand inMathystra Relics
- 236
Hand inSwelling ForcesOptionalArbal · ~43.6, 76.4
Find Arbal in the Grove and hand in Swelling Forces during the same return as Mathystra Relics.
- 237
AcceptThe Sleeper Has AwakenedKerlonian Evershade · ~44.4, 76.4
Speak with Kerlonian Evershade and accept The Sleeper Has Awakened. Then open Kerlonian’s Chest beside him and take the Horn of Awakening. The escort has a 25-minute timer.
- 235
VolcorDarkshore~45.0, 85.3
- 238
DoA Lost Master
From Kerlonian, follow the road south and deliver Terenthis’s cloak to Volcor in his cave. Kerlonian follows you into the cave and through Volcor’s escape, so wake him with the Horn of Awakening whenever he falls asleep.
- 239
Hand inA Lost Master
- 240
AcceptEscape Through Stealth
After delivering the cloak, speak with Volcor and choose Escape Through Stealth. Do not take Escape Through Force as well. If the stealth offer is unavailable, defer this chain and continue south.
- 241
DoEscape Through Stealth
Speak with Volcor to begin the stealth escape and follow his instructions out of the cave. Wait for the native quest log to confirm success. If the event fails or stalls, defer it; no fixed timer is assumed. Continue south when finished and keep the report: the 20–30 guide hands it to Terenthis in Auberdine on its way to the Menethil boat.
- 238
Kerlonian’s bag, south DarkshoreDarkshore~41.8, 90.2
- 242
DoThe Sleeper Has Awakened
Kerlonian follows you once you have the horn. Lead him south along the Darkshore road to his bag near 41.8, 90.2, and use the Horn of Awakening whenever he falls asleep. The escort completes at the bag. Then follow the road south into Ashenvale and hand the quest in to Liladris Moonriver at Maestra’s Post. If he disappears or the attempt fails, defer it through Quest unavailable? and continue the route.
- 242
Liladris MoonriverAshenvale~27.3, 35.6
- 243
Hand inThe Sleeper Has Awakened
Return to Liladris Moonriver and claim the reward for The Sleeper Has Awakened.
- 243
Delgren the PurifierAshenvale~26.2, 38.7
- 244
DoThe Tower of Althalaxx
Carry Balthule's letter south into Ashenvale to Delgren the Purifier at Maestra's Post.
- 245
Hand inThe Tower of Althalaxx
- 246
AcceptThe Tower of Althalaxx
- 244
Dark Strand CultistAshenvale~30.8, 31.6
- 247
DoThe Tower of Althalaxx
Kill the Dark Strand cultists and collect the Glowing Soul Gem near Maestra’s Post and return to Delgren before continuing to Astranaar. Avoid the later named-warlock follow-up.
- 247
Delgren the PurifierAshenvale~26.2, 38.7
- 248
Hand inThe Tower of Althalaxx
- 248
- 249
GoReach level 20
Check your level before choosing the next journey. If you are below level 20, this step shows the XP you still need; finish any unfinished quests nearby.
- 249
Follow this chapter in game. Wisp shows your next quest step and nearby objectives beside you. Free, no account needed.
Continue with Alliance levelling: 20–45.
Pre-order the full Alliance 20–60 guide to get 20–45 now in Wisp. An online reader is included, and later bands to 60 are included when released. See the coverage and current purchase availability.
Explore the Alliance 20–60 guide ↗Already own it? Read your 20–45 guide ↗
Reading online? Open the paid reader, choose your race and class, then use “Continuing from the free 1–20 guide?” to find the handoff. Your reading position does not transfer. Review any unfinished quests; completed quests are not automatically skipped. Manual ticks in the paid reader last only for that page visit.
About this route
This route and its XP pacing are being optimised and refined. Your live quest log takes priority if WoW Forever differs at launch.
Route version and known limits
Written from route version 0.17.12, authored against client build 1.60.1.69913.
- This written guide matches prepared Wisp 1.8.0. A complete in-game playthrough, quest availability and measured XP pacing remain unverified.
- Some class steps require a higher level than the shared chapter heading. Use the requirement on the individual quest and return to the lesson when eligible.
- The independent class inventory remains incomplete. Authored lessons are not proof that every current beta class quest, offer restriction or spell reward has been verified.
- Several coordinates and pickup requirements come from older source data and are approximate. Check your quest log and the named contact if the current beta differs.
- The route does not promise that its quest list alone will take every character to level 20.
Game imagery © Blizzard Entertainment.
Report a confusing or changed step ↗A connected journeyQuests and turn-ins in a planned order.
Made for your characterYour class quests beside the shared route.
Keep your eyes on the gameFollow the route with Wisp beside you.
Take this route into the game.
Follow this Dwarf and Gnome route with Wisp, our free leveling and quest addon. All eight starting routes towards level 20 are included. No account needed.
Starting another character?
Explore all 8 starting routes ↗Reached level 20?
Explore Alliance 20–60 · 20–45 released ↗