
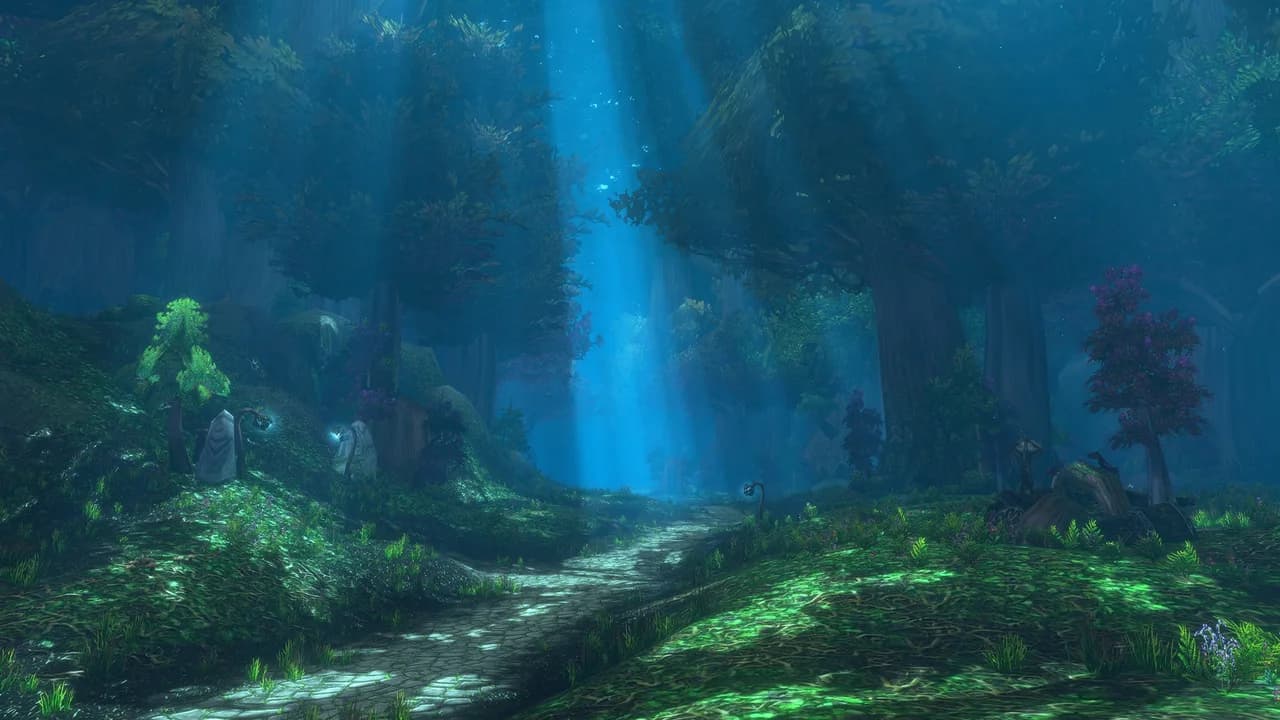
Night Elf levelling guide
Levels 1–20
Teldrassil → Darkshore → Loch Modan → Redridge Mountains → Moonglade
Begin in Shadowglen and work across Teldrassil to Darnassus, then cross to Auberdine for the first Darkshore loops. The direct Stormwind boat and the Deeprun Tram lead to an early Loch Modan visit, and a later trip through Stormwind adds Redridge. The route then returns to Darkshore for its southern work and finishes at Maestra's Post in Ashenvale. Keep unfinished quests through each crossing.
Free 1–20 route · No account needed · Also on CurseForge
· 6 chapters
World of Warcraft imagery © Blizzard Entertainment. Official preview; guide locations may differ. Image source ↗
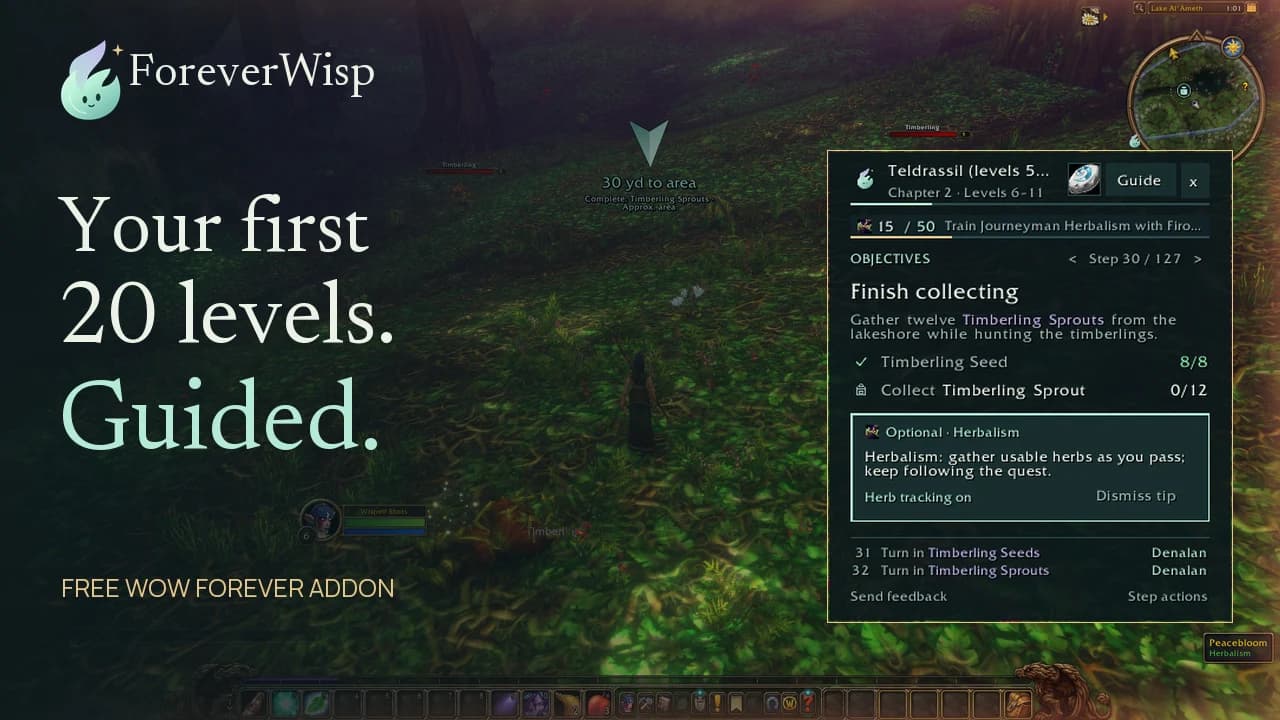
Quest guidance, dungeon trips, gathering and talents. 1:10 · Recorded 30–31 October 2026 · English captions.
Read the video transcript
Spend less time checking where to go and more time enjoying Azeroth. Meet ForeverWisp, your in-game levelling guide for WoW: Forever. Choose a suggested guide, hit start, and set off.
The arrow points you towards your next objective, while the guide keeps the details close by: who to speak to, what to collect, and what’s coming next. As you complete objectives, Wisp tracks your progress and moves the guide forward.
From Northshire to Teldrassil and across the Barrens, there’s a starting route for your character. And there’s room for a few detours. When a dungeon fits your journey, Wisp suggests the trip and helps you prepare. Add it to your route or keep questing.
Taking up a profession? Add gathering reminders along the way, with trainer stops to help you keep progressing. Choose a talent build and see where your next point goes. Travel suggestions help you make your way between stops. And with different themes, you can make the guide feel at home on your screen.
Eight starter routes. Your first 20 levels. All included free. Get ready for November 4th. Download Wisp at foreverwisp.com. Less looking up. More Azeroth.
Your journey,
one chapter at a time.
Choose your character, then start at the beginning or jump to a chapter.
Showing Night Elf and all applicable class quests. Level ranges are approximate checkpoints, not guaranteed XP.
Before you set out
The first chapter stays in Shadowglen until Dolanaar Delivery sends you down the road. The second covers Dolanaar, Starbreeze Village, Lake Al'Ameth, Ban'ethil Barrow Den, the Oracle Glade and two Darnassus visits before the Rut'theran Village handoff. The third opens in Auberdine, travels through Stormwind and Ironforge to Thelsamar and Ironband's Excavation, then comes back the same way for the northern Darkshore outing. The fourth works the southern coast, the Grove of the Ancients and the far north around Mathystra. The fifth is spent in Redridge with a short trip to Goldshire and Stormwind, and the last brings you back to Auberdine for the southern road into Ashenvale.
Choose your class to include its lessons alongside the shared quest route. Some lessons involve separate journeys, particularly the Druid trips to Moonglade and the Rogue training in Redridge, Stormwind and Westfall. The level bands are planning checkpoints, not a promise that every character will reach the next level at the same point.
This is a prepared route candidate. The level bands are recommendations, and normal solo XP sufficiency has not been measured. Finish accepted work and use your actual level. Optional group encounters and catch-up grinding are not assumed to fund the next chapter.
- Select your class before following the ordered steps. The current route contains branches for Warrior, Hunter, Rogue, Priest and Druid, with beta availability still being checked.
- Keep quest vessels and delivery items until the named hand-in. Several Darkshore collections are deliberately carried through the rest of an outing before the return to Auberdine.
- Plan the mainland handoff through Darnassus, the portal to Rut'theran Village and the Auberdine boat. The shared journey does not assume a learned flight path or a ready hearthstone.
- For Darkshore's underwater objectives, surface between trips and keep your exit in sight. The route does not assume a water-breathing spell or potion.
- If a pickup is unavailable, check its earlier reward and your level before moving on. Do not count an unavailable quest as completed. Level checks show your actual XP and let you continue, so finish nearby accepted work if you are short.
Class quests and unlocks
Warrior: Simple Sigil introduces Alyissia in Shadowglen. Around the final Teldrassil town visits, Kyra Windblade's optional Elanaria referral leads to the authored Vorlus Vilehoof combat lesson. If you take it, defeat Vorlus west of Dolanaar and return his horn to Elanaria in Darnassus before departing. Optional equipment chains are not part of the required route, and current beta offers and rewards still need in-game confirmation.
Hunter: Etched Sigil leads to Ayanna Everstride. At level 10, the route places Dazalar's Webwood Lurker, Nightsaber Stalker and Strigid Screecher lessons before the Darnassus visit. Use the rod for the current lesson, finish each reward and dismiss a temporary trial pet if the game blocks the next attempt. Collect Training the Beast for Jocaste in Darnassus. The full chain's beta acceptance remains under review.
Rogue: Encrypted Sigil introduces Frahun Shadewhisper. On the Stormwind visit before Redridge, Renzik in Old Town gives Redridge Rendezvous for Lucius on the dock west of the Lakeshire bridge. His Alther's Mill lesson suggests level 20, so keep the quest and come back later if you arrive early rather than pushing through higher-level spiders. The optional poison chain starts with Mathias Shaw in SI:7 at level 20 and visits Agent Kearnen and Klaven's Tower in Westfall. Keep Thieves' Tools, prepare Lockpicking and pickpocket the Defias Tower Key before killing its carrier. The cure includes a Bronze Tube from Billibub's stock or trade, so do not wait indefinitely or change professions. Current beta offers and rewards remain unverified.
Priest: Hallowed Sigil leads to Shanda. Laurna's optional Garments of the Moon in Dolanaar asks you to heal Sentinel Shaya south of the village with Lesser Heal Rank 2, then cast Power Word: Fortitude. The route also includes Stars of Elune around the level-10 city visit and Elune's Grace at level 20. Follow the named trainer's offered lesson and check your spellbook after its reward. Their inclusion is not a claim that every current beta Priest quest or reward has been verified.
Druid: Verdant Sigil leads to Mardant Strongoak. The Moonglade referral in Darnassus leads to the Great Bear Spirit, then Body and Heart sends you to the moonkin stone east of Auberdine. Defeat Lunaclaw and speak to the spirit it leaves behind. Lessons Anew starts the Cure Poison chain after the Stormwind errands, with The Principal Source at the Cliffspring Falls cave mouth and five Earthroot needed for Gathering the Cure. At level 16, Trial of the Lake leads to Trial of the Sea Lion. Collect the Darkshore pendant half off the north coast and keep it, because the Westfall half belongs to the 20–30 route. The optional Great Cat Spirit chain at level 20 uses a temporary stealth blessing in the Stormrage Barrow Dens. Native offers, spell rewards and these travel sequences still need a full beta playthrough.
CHAPTER 01 · LEVELS 1–5
Teldrassil (levels 1–5)
Shadowglen opens with Conservator Ilthalaine's wildlife hunts, Melithar Staghelm's referral to Tarindrella and Dirania Silvershine's worry about Iverron outside the northern spider cave. After the first return, take your class sigil to its trainer in Aldrassil, then combine Webwood Venom, Iverron's Antidote and Tarindrella's grell work in one outing. Once the Webwood Egg is back with Gilshalan Windwalker, Tenaron's Summons and the first Crown of the Earth vessel lead to Porthannius and Dolanaar Delivery.
- Check Shanda upstairs in Aldrassil after turning in the first Balance of Nature. The Goddess Provides asks you to use Elune's Light and Shadowmeld near her before the hand-in.
- Accept the timed Iverron's Antidote only after the other Shadowglen hand-ins. It has a five-minute limit, so take it straight to Iverron before entering Webwood Cave for the egg.
- Inspect the journal on the table behind Tenaron before leaving the top of Aldrassil. It starts The Adventurer for Lyreena Duskblade beside Dolanaar.
Quest order 64 steps
Conservator IlthalaineTeldrassil~58.7, 44.3
- 01
AcceptThe Balance of Nature
- 01
Melithar StaghelmTeldrassil~59.9, 42.5
- 02
AcceptThe Woodland Protector
- 02
Young NightsaberTeldrassil~63.4, 42.1
- 03
DoThe Balance of Nature
Kill seven Young Nightsabers and four Young Thistle Boars around the Shadowglen clearing.
- 03
Dirania SilvershineTeldrassil~60.9, 42.0
- 04
AcceptA Good FriendLevel 2+
- 04
IverronTeldrassil~54.6, 33.0
- 05
DoA Good Friend
Find Iverron outside the northern spider cave and check on him.
- 06
Hand inA Good Friend
- 07
AcceptA Friend in Need
- 05
TarindrellaTeldrassil~57.8, 45.2
- 08
DoThe Woodland Protector
Speak with Tarindrella at the edge of Shadowglen.
- 09
Hand inThe Woodland Protector
- 10
AcceptThe Woodland Protector
- 11
AcceptNature's Call
- 12
Hand inThe Balance of NatureConservator Ilthalaine · ~58.7, 44.3
- 13
AcceptThe Balance of NatureConservator Ilthalaine · ~58.7, 44.3
- 08
Class quests
 Warrior
 Hunter
 Rogue
 Priest
 Druid5 steps · choose your class above to show only yours
- 14
AcceptSimple Sigil
WarriorConservator Ilthalaine · ~58.7, 44.3 - 15
AcceptEtched Sigil
HunterConservator Ilthalaine · ~58.7, 44.3 - 16
AcceptEncrypted Sigil
RogueConservator Ilthalaine · ~58.7, 44.3 - 17
AcceptHallowed Sigil
PriestConservator Ilthalaine · ~58.7, 44.3 - 18
AcceptVerdant Sigil
DruidConservator Ilthalaine · ~58.7, 44.3
- 14
ShandaTeldrassil~59.2, 40.4
- 19
AcceptThe Goddess Provides
After turning in the first Balance of Nature, follow Aldrassil's interior ramps to Shanda on the third level. Accept The Goddess Provides. If she still has no offer, use Quest unavailable? to defer it and continue Webwood Venom, then check again on your next Aldrassil return.
- 20
DoThe Goddess Provides
Near Shanda in Aldrassil, use Elune’s Light and Shadowmeld. Wait for both native objectives to register before returning to her.
- 21
Hand inThe Goddess Provides
Shanda is upstairs inside Aldrassil's main building. Enter at ground level and follow the interior ramps up to the third level. Speak with Shanda and turn in The Goddess Provides.
- 19
Class quests
WarriorHunterRoguePriestDruid10 steps · choose your class above to show only yours- 22
DoSimple Sigil
WarriorAlyissia · ~59.6, 38.4Read the introduction and enter Aldrassil’s main building in Shadowglen. Find Alyissia in the northeastern room and speak with her. Finish the native reward before returning to the shared errands.
- 23
DoEtched Sigil
HunterAyanna Everstride · ~58.7, 40.5Read the Etched Sigil. Ayanna Everstride is above ground in Aldrassil, the great tree in Shadowglen. Follow the ramp on the western side up to the first landing and enter the room there. Speak with Ayanna Everstride to finish the introduction.
- 24
DoEncrypted Sigil
RogueFrahun Shadewhisper · ~59.6, 38.7Read the introduction and enter Aldrassil’s main building in Shadowglen. Find Frahun Shadewhisper in the northeastern room and speak with him. Finish the native reward before returning to the shared errands.
- 25
DoHallowed Sigil
PriestShanda · ~59.2, 40.4Read the Hallowed Sigil. Shanda is upstairs inside Aldrassil's main building. Enter at ground level and follow the interior ramps up to the third level. Speak with Shanda to finish the introduction.
- 26
DoVerdant Sigil
DruidMardant Strongoak · ~58.6, 40.3Read the Verdant Sigil. Mardant Strongoak is above ground in Aldrassil, the great tree in Shadowglen. Follow the ramp on the western side up to the first landing and enter the room there. Speak with Mardant Strongoak to finish the introduction.
- 27
Hand inSimple Sigil
WarriorAlyissia · ~59.6, 38.4Enter Aldrassil’s main building in Shadowglen and find Alyissia in its northeastern room. Find Alyissia at Shadowglen and hand in Simple Sigil. Continue the local errands after this introduction.
- 28
Hand inEncrypted Sigil
RogueFrahun Shadewhisper · ~59.6, 38.7Enter Aldrassil’s main building in Shadowglen and find Frahun Shadewhisper in its northeastern room. Find Frahun Shadewhisper at Shadowglen and hand in Encrypted Sigil. Continue the local errands after this introduction.
- 29
Hand inHallowed Sigil
PriestShanda · ~59.2, 40.4Shanda is upstairs inside Aldrassil's main building. Enter at ground level and follow the interior ramps up to the third level. Hand in Hallowed Sigil, then return to the local errands.
- 30
Hand inEtched Sigil
HunterAyanna Everstride · ~58.7, 40.5Ayanna Everstride is above ground in Aldrassil, the great tree in Shadowglen. Follow the ramp on the western side up to the first landing and enter the room there. Hand in Etched Sigil, then return to the local errands.
- 31
Hand inVerdant Sigil
DruidMardant Strongoak · ~58.6, 40.3Mardant Strongoak is above ground in Aldrassil, the great tree in Shadowglen. Follow the ramp on the western side up to the first landing and enter the room there. Hand in Verdant Sigil, then return to the local errands.
- 22
Dirania SilvershineTeldrassil~60.9, 42.0
- 32
DoA Friend in Need
Tell Dirania Silvershine in Shadowglen about Iverron before starting the next collection outing.
- 33
Hand inA Friend in Need
- 34
AcceptIverron's Antidote
- 32
- 35
GoLevel 3 for Webwood Venom
Webwood Venom needs level 3. If you are lower, finish the accepted work nearby or gain the remaining XP before taking it; the route continues either way.
- 35
Gilshalan WindwalkerTeldrassil~57.8, 41.6
- 36
AcceptWebwood VenomLevel 3+
- 36
Webwood SpiderTeldrassil~57.7, 27.4
- 37
DoWebwood Venom
Kill spiders and collect ten Webwood Venom Sacs near Webwood Cave.
- 37
Moonpetal Lilies by the poolsTeldrassil~57.8, 37.5
- 38
DoIverron's Antidote
Collect seven Hyacinth Mushrooms beneath trees or by killing grell, and four Moonpetal Lilies beside the pools. Kill spiders and collect one Webwood Ichor. Combine this with the grell and Webwood Venom work; finish all three ingredients before returning to Dirania.
- 38
GrellTeldrassil~55.9, 45.1
- 39
DoThe Woodland Protector
Kill the grell and collect eight Fel Moss near Tarindrella. Finish any remaining nearby wildlife before returning.
- 40
DoNature's CallWestern Shadowglen huts: search for Gnarlpine Totems · ~55.9, 45.1
Gather four Gnarlpine Totems around the abandoned huts on the western edge of Shadowglen while doing the grell outing. Finish this collection and the moss before returning to Tarindrella.
- 39
TarindrellaTeldrassil~57.8, 45.2
- 41
Hand inThe Woodland Protector
- 42
Hand inNature's Call
- 41
Dirania SilvershineTeldrassil~60.9, 42.0
- 43
Hand inIverron's Antidote
- 44
AcceptIverron's Antidote
Finish the nearby hand-ins, then accept Iverron’s Antidote from Dirania only when ready to run straight to Iverron.
- 43
Gilshalan WindwalkerTeldrassil~57.8, 41.6
- 45
Hand inWebwood Venom
- 46
AcceptWebwood Egg
- 45
IverronTeldrassil~54.6, 33.0
- 47
DoIverron's Antidote
Take the antidote directly to Iverron outside the northern cave within five minutes. Finish the other Shadowglen hand-ins before accepting; do not stop for the Webwood Egg until Iverron has the antidote.
- 48
Hand inIverron's Antidote
- 47
Webwood EggsTeldrassil~57.0, 26.5
- 49
DoWebwood Egg
Enter Webwood Cave and follow the central passage towards the back. Turn left and climb around to the raised egg ledge to recover a Webwood Egg. Watch for Githyiss guarding the eggs, then follow your cleared passage back out.
- 49
- 50
AcceptFang of GithyissOptional
If you found Fang of Githyiss during the nearby outing, read it to accept Fang of Githyiss. Do not stop to farm this drop.
- 50
Gilshalan WindwalkerTeldrassil~57.8, 41.6
- 51
DoFang of GithyissOptional
If Githyiss drops its fang during the Webwood cave visit, read it and carry it to Gilshalan in Aldrassil on the egg return.
- 52
Hand inFang of GithyissOptional
- 53
Hand inWebwood Egg
- 54
AcceptTenaron's Summons
- 51
Tenaron StormgripTeldrassil~59.1, 39.5
- 55
DoTenaron's Summons
Climb Aldrassil by its ramps and speak with Tenaron Stormgrip at the top.
- 56
Hand inTenaron's Summons
- 57
AcceptCrown of the Earth
- 55
Mangy NightsaberTeldrassil~60.0, 36.0
- 58
DoThe Balance of Nature
Kill seven Mangy Nightsabers and seven Thistle Boars farther into Shadowglen.
- 58
Shadowglen MoonwellTeldrassil~60.0, 33.0
- 59
DoCrown of the Earth
Fill the Crystal Phial at the Shadowglen moonwell and return to Tenaron at the top of Aldrassil.
- 59
Tenaron StormgripTeldrassil~59.1, 39.5
- 60
Hand inCrown of the Earth
- 61
AcceptCrown of the Earth
- 62
AcceptThe AdventurerLevel 4+Top of Aldrassil: journal behind Tenaron · ~59.1, 39.5
At the top of Aldrassil, inspect the journal on the table behind Tenaron before descending the tree.
- 60
Conservator IlthalaineTeldrassil~58.7, 44.3
- 63
Hand inThe Balance of Nature
- 63
PorthanniusTeldrassil~61.2, 47.6
- 64
AcceptDolanaar Delivery
- 64
CHAPTER 02 · LEVELS 5–11
Teldrassil and Darnassus (levels 5–11)
This long chapter makes Dolanaar your base. Collect the town quests from Syral Bladeleaf, Athridas Bearmantle, Tallonkai Swiftroot and Sentinel Kyra Starsong, then visit Starbreeze Village and Denalan at Lake Al'Ameth. Corithras Moonrage's vessels send you to the Starbreeze, Pools of Arlithrien and Oracle Glade moonwells, while Ban'ethil Barrow Den, Fel Rock, Ursal's camp and the Oracle Tree fill the outings between. Two Darnassus visits follow, and the chapter ends at Rut'theran Village, where Nessa Shadowsong and Vesprystus hand you Flight to Auberdine.
- Inside Ban'ethil, take The Sleeping Druid from Oben Rageclaw's spirit, use the Shaman Voodoo Charm on his body for Druid of the Claw and check all four Relics of Wakening before leaving the den.
- Keep the Inscribed Bark from the Oracle Tree for Fandral Staghelm in Darnassus. He also offers Grove of the Ancients, so carry his message on to Onu in Darkshore.
- Ursal the Mauler is a level-12 named bear. Clear the nearby furbolg first and skip him if he is too strong. Zenn's Bidding, Escaping Ban'ethil and the Lady Sathrah quests are optional.
Quest order 200 steps
Zenn FoulhoofTeldrassil~60.5, 56.3
- 01
AcceptZenn's Bidding
On the road from Shadowglen, stop at Zenn Foulhoof east of Dolanaar and accept Zenn’s Bidding before continuing west into town.
- 01
Lyreena DuskbladeTeldrassil~57.6, 56.6
- 02
DoThe Adventurer
Carry the journal down from Aldrassil to Lyreena’s camp beside Dolanaar on the normal departure road.
- 03
Hand inThe Adventurer
- 02
- 04
GoSuggested level 5
Players are usually around level 5 by this point. If you are lower, finish the accepted work nearby before moving on; the route continues either way.
- 04
Lyreena DuskbladeTeldrassil~57.6, 56.6
- 05
AcceptThe Great Outdoors
- 06
DoThe Great Outdoors
Sit at Lyreena’s campfire using /sit until Boosted Rest registers. If the sitting objective doesn’t update, type /sit again while you are already seated. Hand in here before continuing into Dolanaar.
- 07
Hand inThe Great Outdoors
- 08
AcceptCamping 101: CookingOptional
Ask Lyreena Duskblade for Camping 101: Cooking. Take it if offered, or skip the lesson and continue your route.
- 09
AcceptCamping 101: HerbalismOptional
Ask Lyreena Duskblade for Camping 101: Herbalism. Take it if offered, or skip the lesson and continue your route.
- 10
AcceptCamping 101: MiningOptional
Ask Lyreena Duskblade for Camping 101: Mining. Take it if offered, or skip the lesson and continue your route.
- 05
Syral BladeleafTeldrassil~56.1, 57.7
- 11
AcceptDenalan's Earth
- 12
AcceptA Troubling BreezeAthridas Bearmantle · ~56.0, 57.3
- 13
AcceptSoft Saber PeltsAldia · ~55.5, 57.1
During the Dolanaar pickups, speak with Aldia, the general supplies trader, and accept Soft Saber Pelts. Collect the pelts during the same Nightsaber hunt as Zenn’s Bidding.
- 14
AcceptTwisted HatredTallonkai Swiftroot · ~55.6, 57.0
Go upstairs in the Dolanaar tree building north of the road, opposite the inn, to Tallonkai Swiftroot. Speak with Tallonkai Swiftroot and accept Twisted Hatred.
- 15
AcceptGarments of the Moon
PriestOptionalLevel 5+Laurna Morninglight · ~55.6, 56.8For the optional robe lesson, find Laurna on the bottom floor of the Dolanaar building north of the road and accept Garments of the Moon. Check that you know Lesser Heal Rank 2 and Power Word: Fortitude before leaving.
- 16
AcceptThe Emerald DreamcatcherTallonkai Swiftroot · ~55.6, 57.0
Enter the tree building north of Dolanaar’s road, opposite the inn, and go upstairs to Tallonkai Swiftroot. Speak with Tallonkai Swiftroot and accept The Emerald Dreamcatcher.
- 11
Sentinel Kyra StarsongTeldrassil~56.0, 59.4
- 17
AcceptThe Lost Runner
- 18
DoDolanaar DeliveryInnkeeper Keldamyr · ~55.6, 59.8
Deliver the package to Innkeeper Keldamyr in Dolanaar.
- 19
Hand inDolanaar DeliveryInnkeeper Keldamyr · ~55.6, 59.8
- 20
GoSet your hearthstone in DolanaarOptionalInnkeeper Keldamyr · ~55.6, 59.8
Speak with Innkeeper Keldamyr and make Dolanaar your home. Dolanaar is the return point after the first Darnassus visit.
- 17
Corithras MoonrageTeldrassil~56.1, 61.7
- 21
DoCrown of the Earth
Follow the road out of Shadowglen to Dolanaar and give the vessel to Corithras Moonrage.
- 22
Hand inCrown of the Earth
- 23
AcceptCrown of the Earth
- 21
Sentinel Shaya south of DolanaarTeldrassil~57.0, 63.0
- 24
DoGarments of the Moon
PriestOptionalFind injured Sentinel Shaya south of Dolanaar near the lake. Cast Lesser Heal (Rank 2) on her, then Power Word: Fortitude. Wait for quest credit, then carry on east to Starbreeze Village. Collect the robe from Laurna Morninglight when you are next in Dolanaar.
- 24
Tallonkai's DresserTeldrassil~68.0, 59.6
- 25
DoThe Emerald Dreamcatcher
Recover the Emerald Dreamcatcher from Tallonkai’s Dresser inside Starbreeze Village’s small southeastern house while visiting Gaerolas.
- 25
Gaerolas TalvethrenTeldrassil~66.3, 58.5
- 26
DoA Troubling Breeze
Follow the path east from Dolanaar to Starbreeze Village. Enter the southwestern building and go upstairs to Gaerolas Talvethren.
- 27
Hand inA Troubling Breeze
Find Gaerolas Talvethren upstairs in Starbreeze Village’s southwestern building. Speak with Gaerolas Talvethren and turn in A Troubling Breeze.
- 28
AcceptGnarlpine Corruption
Find Gaerolas Talvethren upstairs in Starbreeze Village’s southwestern building. Speak with Gaerolas Talvethren and accept Gnarlpine Corruption.
- 26
Starbreeze Village MoonwellTeldrassil~63.4, 58.1
- 29
DoCrown of the Earth
Fill the Jade Phial at the Starbreeze moonwell and bring it back to Corithras in Dolanaar.
- 29
DenalanTeldrassil~60.9, 68.5
- 30
DoDenalan's Earth
From Starbreeze Village, head south-west to Lake Al’Ameth and carry the Rare Earth to Denalan.
- 31
Hand inDenalan's Earth
- 32
AcceptTimberling Seeds
- 33
AcceptTimberling Sprouts
- 34
DoTimberling SeedsTimberling · ~61.5, 69.3
Kill timberlings and collect eight Timberling Seeds around Lake Al'Ameth.
- 35
DoTimberling SproutsTimberling Sprout · ~61.6, 68.9
Gather twelve Timberling Sprouts from the lakeshore while hunting the timberlings.
- 36
Hand inTimberling Seeds
- 37
Hand inTimberling Sprouts
- 38
AcceptRellian Greenspyre
- 30
Athridas BearmantleTeldrassil~56.0, 57.3
- 39
DoGnarlpine Corruption
Bring the news from Starbreeze Village back to Athridas Bearmantle in Dolanaar.
- 40
Hand inGnarlpine Corruption
- 41
AcceptThe Relics of Wakening
- 42
Hand inThe Emerald DreamcatcherTallonkai Swiftroot · ~55.6, 57.0
Enter the tree building north of Dolanaar’s road, opposite the inn, and go upstairs to Tallonkai Swiftroot. Speak with Tallonkai Swiftroot and turn in The Emerald Dreamcatcher.
- 43
AcceptFerocitas the Dream EaterTallonkai Swiftroot · ~55.6, 57.0
Go upstairs in the Dolanaar tree building north of the road, opposite the inn, to Tallonkai Swiftroot. Speak with Tallonkai Swiftroot and accept Ferocitas the Dream Eater.
- 39
Moon Priestess AmaraTeldrassil~54.6, 58.5
- 44
AcceptThe Road to Darnassus
- 44
Corithras MoonrageTeldrassil~56.1, 61.7
- 45
Hand inCrown of the Earth
- 46
AcceptCrown of the Earth
- 45
Gnarlpine MysticTeldrassil~68.3, 52.2
- 47
DoFerocitas the Dream Eater
Kill seven Gnarlpine Mystics and recover the missing jewel from Ferocitas northeast of Starbreeze Village.
- 47
Tallonkai SwiftrootTeldrassil~55.6, 57.0
- 48
Hand inFerocitas the Dream Eater
Go upstairs in the Dolanaar tree building north of the road, opposite the inn, to Tallonkai Swiftroot. Speak with Tallonkai Swiftroot and turn in Ferocitas the Dream Eater.
- 48
Pools of Arlithrien MoonwellTeldrassil~42.4, 67.1
- 49
DoCrown of the Earth
Fill the Tourmaline Phial at the Pools of Arlithrien moonwell southwest of Dolanaar. Return to Corithras before the Oracle Glade outing.
- 49
Oben RageclawTeldrassil~44.9, 61.6
- 50
AcceptThe Sleeping Druid
Enter Ban’ethil Barrow Den and find Oben Rageclaw’s friendly spirit in a side room across a bridge. Accept The Sleeping Druid before clearing the relic circuit. Collect any reachable relics on the approach, then hunt shamans for the charm while finding the remaining relics.
- 51
DoThe Relics of WakeningChest of the Black Feather · ~43.7, 61.2
Recover the four Relics of Wakening inside Ban’ethil Barrow Den. Check the first chamber’s bridge rooms for the Quill and Rune, then Greenpaw’s deeper room for the Sapphire and the balcony reached by the inner bridges for the Talisman. Collect a Shaman Voodoo Charm from Gnarlpine shamans during the same circuit. Stay in the den for Oben’s follow-up before leaving.
- 52
DoThe Sleeping DruidGnarlpine Shaman · ~44.4, 61.2
Kill Gnarlpine shamans inside Ban’ethil Barrow Den and collect one Shaman Voodoo Charm while recovering the relics. Check the charm in your quest log, then return to Oben’s friendly spirit inside the den.
- 53
Hand inThe Sleeping Druid
Return to Oben Rageclaw’s friendly spirit in the bridge-side room inside Ban’ethil. Turn in The Sleeping Druid and take Druid of the Claw before leaving him.
- 54
AcceptDruid of the Claw
Find Oben Rageclaw’s friendly spirit in a side room across a bridge inside Ban’ethil Barrow Den. Speak with Oben Rageclaw and accept Druid of the Claw.
- 50
RageclawTeldrassil~45.5, 58.6
- 55
DoDruid of the Claw
Find Oben Rageclaw's soulless body patrolling the lower circular chamber of Ban’ethil Barrow Den. Kill it and use the Voodoo Charm, then return to Oben’s friendly spirit in the side room across a bridge before leaving the den.
- 55
Oben RageclawTeldrassil~44.9, 61.6
- 56
Hand inDruid of the Claw
Return to Oben Rageclaw’s friendly spirit in the bridge-side room and turn in Druid of the Claw. Check that all four relics are collected, then retrace the cleared route out of Ban’ethil.
- 56
Sentinel Lynessa DuskblossomTeldrassil~44.6, 58.8
- 57
AcceptEscaping Ban'ethilOptional
Inside Ban'ethil Barrow, find Sentinel Lynessa Duskblossom and accept Escaping Ban'ethil. Start the escort only when you are ready to clear the way out.
- 58
DoEscaping Ban'ethilOptional
Escort Lynessa out of Ban'ethil Barrow, fighting off anything that attacks her. Stay close so the escort does not fail.
- 57
Strange Fruited PlantTeldrassil~42.6, 76.2
- 59
AcceptThe Glowing Fruit
Inspect Strange Fruited Plant and accept The Glowing Fruit.
- 59
Corithras MoonrageTeldrassil~56.1, 61.7
- 60
Hand inCrown of the Earth
- 61
AcceptCrown of the Earth
- 60
Sentinel Kyra StarsongTeldrassil~56.0, 59.5
- 62
Hand inEscaping Ban'ethilOptional
In Dolanaar, speak with Sentinel Kyra Starsong and turn in Escaping Ban'ethil.
- 62
Athridas BearmantleTeldrassil~56.0, 57.3
- 63
Hand inThe Relics of Wakening
- 63
ZarrinTeldrassil~57.0, 61.2
- 64
DoCamping 101: CookingOptional
Visit Zarrin in Teldrassil. Check the price and learn Cooking through the trainer window. You can skip this lesson and keep questing.
- 65
Hand inCamping 101: CookingOptional
Speak with Zarrin and turn in Camping 101: Cooking when the quest is ready.
- 66
AcceptRecipe of the KaldoreiOptional
If you learned Cooking from Zarrin, also accept Recipe of the Kaldorei from him. Keep any Small Spider Legs from the spiders you fight on the way; do not hunt them separately.
- 67
DoCamping 101: HerbalismOptionalMalorne Bladeleaf · ~57.6, 60.6
Build Herbalism to 20 while following your quests. Finish this lesson with Malorne Bladeleaf when your route brings you nearby. You can leave it pending and keep questing.
- 68
Hand inCamping 101: HerbalismOptionalMalorne Bladeleaf · ~57.6, 60.6
Speak with Malorne Bladeleaf and turn in Camping 101: Herbalism when the quest is ready.
- 64
Lord MelenasTeldrassil~52.8, 50.2
- 69
DoTwisted Hatred
Enter Fel Rock north of Dolanaar and search both the raised ledges and the lower area near the pond for Lord Melenas. Use the connecting passages to check each level. Kill him, collect his head and keep a clear route back to the cave entrance.
- 69
Gnarlpine AmbusherTeldrassil~48.5, 54.1
- 70
DoThe Road to Darnassus
Kill six Gnarlpine Ambushers along the road west of Dolanaar.
- 70
Sentinel Eralya LeafshadowTeldrassil~37.6, 36.8
- 71
DoThe Lost Runner
From the Gnarlpine ambushers on the Darnassus road, take the road north-west toward the Oracle Glade and find Sentinel Eralya Leafshadow beside it, around 37.6, 36.8.
- 72
Hand inThe Lost Runner
- 73
AcceptNot Dead Yet
- 71
Sentinel Arynia CloudsbreakTeldrassil~38.3, 34.4
- 74
AcceptThe Enchanted GladeLevel 6+
- 74
Bloodfeather RogueTeldrassil~35.5, 35.0
- 75
DoThe Enchanted Glade
Kill harpies and collect six Bloodfeather Belts near the Oracle Glade.
- 75
Oracle Glade MoonwellTeldrassil~38.4, 34.1
- 76
DoCrown of the Earth
Fill the Amethyst Phial at the Oracle Glade moonwell. Bring it back to Corithras in Dolanaar before the final city visit.
- 76
Strange Fronded PlantTeldrassil~34.6, 28.8
- 77
AcceptThe Shimmering Frond
Inspect Strange Fronded Plant and accept The Shimmering Frond.
- 77
MistTeldrassil~31.5, 31.6
- 78
AcceptMistLevel 7+
- 78
Sentinel Arynia CloudsbreakTeldrassil~38.3, 34.4
- 79
DoMist
Escort Mist east to Arynia at the Oracle Glade moonwell. Stay close and protect her. If she is absent, continue the glade quests; do not wait for a spawn.
- 80
Hand inMist
Return to Sentinel Arynia Cloudsbreak and claim the reward for Mist.
- 81
Hand inThe Enchanted Glade
- 79
- 82
AcceptThe Moss-twined HeartOptional
If you found Moss-twined Heart during the nearby outing, read it to accept The Moss-twined Heart. Do not stop to farm this drop.
- 82
Rellian GreenspyreDarnassus~38.2, 21.6
- 83
DoRellian Greenspyre
Deliver a Timberling Seed to Rellian Greenspyre in Darnassus on the western road.
- 84
Hand inRellian Greenspyre
- 85
AcceptTumors
- 83
Sentinel Dalia SunbladeDarnassus~39.6, 89.5
- 86
AcceptEyes of the Sentinels
In the Temple of the Moon, speak with Sentinel Dalia Sunblade and accept Eyes of the Sentinels. Keep the Lunar Pendant: you place the four owls on your next Darnassus visit. If the offer is absent, use Quest unavailable? to defer the task and continue.
- 86
Priestess A'mooraDarnassus~36.6, 85.9
- 87
AcceptTears of the MoonOptional
- 87
ByancieTeldrassil~55.2, 56.8
- 88
DoNot Dead Yet
On the return to Dolanaar, speak to Byancie about Eralya’s injuries before leaving for Lake Al’Ameth.
- 89
Hand inNot Dead Yet
- 90
AcceptThe Great Tree Provides
- 91
Hand inTwisted HatredTallonkai Swiftroot · ~55.6, 57.0
Enter the tree building north of Dolanaar’s road, opposite the inn, and go upstairs to Tallonkai Swiftroot. Speak with Tallonkai Swiftroot and turn in Twisted Hatred.
- 88
Moon Priestess AmaraTeldrassil~54.6, 58.5
- 92
Hand inThe Road to Darnassus
- 92
NightsaberTeldrassil~58.7, 58.3
- 93
DoSoft Saber Pelts
Loot six Soft Nightsaber Pelts from the ordinary level 5–6 Nightsabers just east of Dolanaar, not Nightsaber Stalkers. Pelts from the Nightsabers around Starbreeze count too. If drops are slow, use Quest unavailable? to defer this quest and continue rather than staying to farm. Keep the pelts for Aldia in Dolanaar.
- 94
DoZenn's Bidding
Collect three Nightsaber Fangs, three Strigid Owl Feathers and three Webwood Spider Silk near Dolanaar.
- 93
Zenn FoulhoofTeldrassil~60.5, 56.3
- 95
Hand inZenn's Bidding
- 95
Syral BladeleafTeldrassil~56.1, 57.7
- 96
AcceptSeek Redemption!
- 96
Fel ConeTeldrassil~58.1, 55.4
- 97
DoSeek Redemption!
Collect three Fel Cones beneath the nearby trees and bring them to Zenn Foulhoof.
- 97
Zenn FoulhoofTeldrassil~60.5, 56.3
- 98
Hand inSeek Redemption!
- 98
Corithras MoonrageTeldrassil~56.1, 61.7
- 99
Hand inCrown of the Earth
- 100
AcceptCrown of the Earth
- 101
DoRecipe of the KaldoreiOptionalZarrin · ~57.0, 61.2
Collect seven Small Spider Legs from Webwood spiders you meet while questing. If you are short when you reach Dolanaar again, skip it rather than hunting.
- 102
Hand inRecipe of the KaldoreiOptionalZarrin · ~57.0, 61.2
In Dolanaar, give Zarrin the seven Small Spider Legs and turn in Recipe of the Kaldorei.
- 99
DenalanTeldrassil~60.9, 68.5
- 103
DoThe Shimmering Frond
Follow the road south-east from Dolanaar to Denalan at Lake Al’Ameth and give him the Shimmering Frond you took north-west of the Oracle Glade, together with the glowing fruit.
- 104
Hand inThe Shimmering Frond
- 105
DoThe Glowing Fruit
While you are with Denalan, give him the glowing fruit you took from the strange plant south of Ban’ethil.
- 106
Hand inThe Glowing Fruit
- 107
DoThe Moss-twined HeartOptional
If Blackmoss the Fetid drops a Moss-twined Heart during the northern forest outing, read it. Carry it to Denalan with the two plant samples; do not wait or farm for the rare spawn.
- 108
Hand inThe Moss-twined HeartOptional
- 109
AcceptPlanting the HeartOptionalLevel 9+
- 110
DoPlanting the HeartOptionalDenalan's Planter · ~60.8, 68.6
After delivering the heart, plant the supplied Tainted Heart in Denalan’s planter beside him. Finish this here before leaving the lake.
- 111
Hand inPlanting the HeartOptionalDenalan's Planter · ~60.8, 68.6
Return to Denalan's Planter and turn in Planting the Heart.
- 112
AcceptThe Sprouted FrondsOptionalSprouted Frond beside Denalan · ~60.8, 68.5
If Denalan’s Sprouted Frond is present and offers The Sprouted Fronds, accept the optional harvest. Otherwise continue without waiting for growth.
- 113
DoThe Sprouted FrondsOptionalSprouted Frond beside Denalan · ~60.8, 68.5
Inspect the Sprouted Frond beside Denalan and complete its offered harvest. If it has not appeared or has no quest, skip this optional stop and continue without waiting.
- 114
Hand inThe Sprouted FrondsOptionalSprouted Frond beside Denalan · ~60.8, 68.5
Claim the harvest from the same Sprouted Frond beside Denalan. Continue the planned lake hand-ins.
- 103
Lasher SproutlingTeldrassil~59.0, 64.0
- 115
DoThe Great Tree Provides
Buy one Empty Vial and one Refreshing Spring Water in Dolanaar. Kill lashers and collect six Dewy Lasher Fronds around Lake Al’Ameth during the lake outing. Keep all three ingredients for Byancie; no Alchemy skill is needed.
- 115
ByancieTeldrassil~55.2, 56.8
- 116
Hand inThe Great Tree Provides
- 117
AcceptEasing Suffering
- 118
Hand inGarments of the Moon
PriestOptionalLaurna Morninglight · ~55.6, 56.8Find Laurna on the bottom floor of the Dolanaar building north of the road. Return to Laurna in Dolanaar and claim the robe after Shaya’s healing objective registers.
- 119
Hand inSoft Saber PeltsAldia · ~55.5, 57.1
During the Dolanaar return, give six Soft Nightsaber Pelts to Aldia for Soft Saber Pelts. If you are still short, kill a few more ordinary Nightsabers just east of town, or use Quest unavailable? to defer it. The route does not come back to Aldia.
- 120
AcceptUrsal the MaulerAthridas Bearmantle · ~56.0, 57.3
- 116
Ursal the MaulerTeldrassil~38.8, 79.8
- 121
DoUrsal the Mauler
Kill Ursal the Mauler at the Gnarlpine camp in southern Teldrassil. Clear the nearby furbolg before engaging him. Ursal is a level-12 named bear and hits hard; if he is too strong for you, use Quest unavailable? to skip him and continue.
- 121
Athridas BearmantleTeldrassil~56.0, 57.3
- 122
Hand inUrsal the Mauler
- 122
Class quests
RogueHunterWarrior14 steps · choose your class above to show only yours- 123
AcceptThe Apple Falls
RogueOptionalLevel 10+Jannok Breezesong · ~56.4, 60.1Optional Rogue quest. Jannok Breezesong, the Rogue trainer, is in Dolanaar. From level 10 he offers The Apple Falls, which leads to Destiny Calls in Darnassus and one walk back out to the north of the Oracle Glade. Accept it if you want that chain.
- 124
GoLevel 10 for Taming the Beast
HunterTaming the Beast needs level 10, and Dazalar teaches it only here in Dolanaar. The route does not come back, so take the pet lessons now. If you are still below 10, hunt the Nightsaber Stalkers south of Dolanaar and the Strigid Screechers to the south-east (levels 7 to 8, the beasts the next two lessons ask you to tame) until you reach it, then speak with Dazalar. Each is worth about 60 to 85 XP at levels 8 and 9, and this step shows how much XP you still need.
- 125
AcceptTaming the Beast
HunterDazalar · ~56.7, 59.5Accept Taming the Beast from Dazalar in Dolanaar.
- 126
DoTaming the Beast
HunterWebwood Lurker · ~59.5, 58.6Use this lesson’s Taming Rod on a Webwood Lurker at the marked Teldrassil area (59.5, 58.6). Keep the correct rod for the current quest and wait for the taming objective to complete. If the game reports an active trial pet, dismiss that temporary pet before trying the next rod.
- 127
Hand inTaming the Beast
HunterDazalar · ~56.7, 59.5Return to Dazalar in Dolanaar with the lesson’s rod. Turn in Taming the Beast and accept the next lesson before leaving.
- 128
AcceptTaming the Beast
HunterDazalar · ~56.7, 59.5Accept Taming the Beast from Dazalar in Dolanaar.
- 129
DoTaming the Beast
HunterNightsaber Stalker · ~55.5, 72.6Use this lesson’s Taming Rod on a Nightsaber Stalker at the marked Teldrassil area (55.5, 72.6). Keep the correct rod for the current quest and wait for the taming objective to complete. If the game reports an active trial pet, dismiss that temporary pet before trying the next rod.
- 130
Hand inTaming the Beast
HunterDazalar · ~56.7, 59.5Return to Dazalar in Dolanaar with the lesson’s rod. Turn in Taming the Beast and accept the next lesson before leaving.
- 131
AcceptTaming the Beast
HunterDazalar · ~56.7, 59.5Accept Taming the Beast from Dazalar in Dolanaar.
- 132
DoTaming the Beast
HunterStrigid Screecher · ~64.5, 67.1Use this lesson’s Taming Rod on a Strigid Screecher at the marked Teldrassil area (64.5, 67.1). Keep the correct rod for the current quest and wait for the taming objective to complete. If the game reports an active trial pet, dismiss that temporary pet before trying the next rod.
- 133
Hand inTaming the Beast
HunterDazalar · ~56.7, 59.5Return to Dazalar in Dolanaar and turn in the final taming lesson. Accept Training the Beast during this visit; its hand-in is included in the upcoming city stop.
- 134
AcceptTraining the Beast
HunterDazalar · ~56.7, 59.5Accept Training the Beast from Dazalar in Dolanaar.
- 135
GoLevel 10 for Elanaria
WarriorElanaria needs level 10, and it leads to Vorlus Vilehoof, your Defensive Stance lesson. This is your last Dolanaar stop. If you are still below 10, hunt the Nightsaber Stalkers south of Dolanaar and the Strigid Screechers to the south-east until you reach it, then speak with Kyra Windblade. This step shows how much XP you still need.
- 136
AcceptElanaria
WarriorKyra Windblade · ~56.2, 59.2Speak with Kyra Windblade and accept Elanaria. Moon Priestess Amara, on the road west of Dolanaar, offers it too. It needs level 10.
- 123
Timberling Trampler · Wellspring LakeTeldrassil~41.8, 37.9
- 137
DoTumors
Collect five Mossy Tumors from Timberling Tramplers around Wellspring Lake (41.8, 37.9). Work north along the lake and river, killing Timberling Mire Beasts and Elder Timberlings as you go toward Lady Sathrah for Tears of the Moon. If the shore is cleared, continue along the river rather than waiting at one spawn. Keep the tumors for Rellian in Darnassus; continue to Easing Suffering on the planned Oracle Glade visit.
- 137
Lady SathrahTeldrassil~47.5, 26.0
- 138
DoTears of the MoonOptional
Defeat Lady Sathrah on the northern ridge and take her Silvery Spinnerets. Search the two ridge clearings; avoid pulling surrounding spiders together.
- 138
Sentinel Arynia CloudsbreakTeldrassil~38.3, 34.4
- 139
AcceptDarkness in the Glade
After turning in The Enchanted Glade, accept Darkness in the Glade from Sentinel Arynia Cloudsbreak at the Oracle Glade.
- 139
Sentinel Eralya LeafshadowTeldrassil~37.6, 36.8
- 140
DoEasing Suffering
Give Byancie’s Lashwater Salve to Sentinel Eralya Leafshadow beside the road just south of the Oracle Glade.
- 141
Hand inEasing Suffering
- 140
HatescreechTeldrassil~35.0, 39.2
- 142
DoDarkness in the Glade
Collect one amulet from each Bloodfeather leader: Hatescreech near 35.0,39.2, Windmistress Gaedress near 33.6,35.6, and Witchmother Arysa near 34.2,28.0. Clear nearby harpies before each fight and seek help if the leaders are too strong. Check all three quest counters before returning to Arynia.
- 142
Sentinel Arynia CloudsbreakTeldrassil~38.3, 34.4
- 143
Hand inDarkness in the Glade
Return all three amulets to Sentinel Arynia Cloudsbreak, then accept The Oracle Tree before leaving.
- 144
AcceptThe Oracle Tree
After returning the three amulets, accept The Oracle Tree from Sentinel Arynia Cloudsbreak.
- 145
DoThe Oracle TreeOracle Tree Bark · ~37.0, 34.1
Find the Oracle Tree Bark beside the tree near 37.0,34.1 in the Oracle Glade. Interact with it to receive the message, then take Teldrassil before leaving.
- 146
Hand inThe Oracle TreeOracle Tree Bark · ~37.0, 34.1
Inspect the Oracle Tree Bark near 37.0,34.1 and turn in The Oracle Tree. Accept Teldrassil from the bark before leaving.
- 147
AcceptTeldrassilOracle Tree Bark · ~37.0, 34.1
Inspect the Oracle Tree Bark near 37.0,34.1 after The Oracle Tree and accept Teldrassil. Keep the Inscribed Bark for Fandral in Darnassus. If Teldrassil is already in your log, continue its delivery.
- 143
MydrannulDarnassus~70.7, 45.4
- 148
AcceptNessa Shadowsong
Leave the Oracle Glade and follow the path south into Darnassus. Speak with Mydrannul and accept Nessa Shadowsong.
- 148
Class quests
Warrior5 steps · choose your class above to show only yours- 149
DoElanaria
WarriorElanaria · ~57.3, 34.6Find Elanaria on the lower northwestern platform of Warrior’s Terrace in Darnassus. Speak to Elanaria in the Warrior’s Terrace of Darnassus for your combat trial.
- 150
Hand inElanaria
WarriorElanaria · ~57.3, 34.6Find Elanaria on the lower northwestern platform of Warrior’s Terrace in Darnassus. Speak with Elanaria and turn in Elanaria.
- 151
AcceptVorlus Vilehoof
WarriorElanaria · ~57.3, 34.6Find Elanaria on the lower northwestern platform of Warrior’s Terrace in Darnassus. Speak with Elanaria and accept Vorlus Vilehoof.
- 152
DoVorlus Vilehoof
WarriorVorlus Vilehoof · ~47.3, 63.6Kill Vorlus Vilehoof west of Dolanaar and collect his horn. Return to Elanaria in Darnassus before departing Teldrassil.
- 153
Hand inVorlus Vilehoof
WarriorElanaria · ~57.3, 34.6Find Elanaria on the lower northwestern platform of Warrior’s Terrace in Darnassus. Return to Elanaria, turn in Vorlus Vilehoof and check the abilities awarded in the native reward window. Rejoin the shared route after this lesson. Elanaria’s later warrior quests, such as The Shade of Elura, are optional and this route does not guide them.
- 149
Rellian GreenspyreDarnassus~38.2, 21.6
- 154
Hand inTumors
- 154
Class quests
Rogue5 steps · choose your class above to show only yours- 155
DoThe Apple Falls
RogueOptionalSyurna · ~37.0, 21.9In Darnassus, find Syurna, the Rogue trainer, a few steps from Rellian Greenspyre. Give her Jannok’s Rose.
- 156
Hand inThe Apple Falls
RogueOptionalSyurna · ~37.0, 21.9 - 157
AcceptDestiny Calls
RogueOptionalSyurna · ~37.0, 21.9Accept Destiny Calls from Syurna.
- 158
DoDestiny Calls
RogueOptionalSethir the Ancient · ~37.1, 22.8Leave Darnassus by the path you took in from the Oracle Glade. Walk north past the glade’s moonwell and on for about 400 yards to Sethir the Ancient, a level-12 hostile ancient who walks back and forth around 37.3,23.5. Approach him in Stealth and use Pick Pocket to take Sethir’s Journal; players report that the journal comes only from Pick Pocket.
- 159
Hand inDestiny Calls
RogueOptionalSyurna · ~37.0, 21.9Walk back south into Darnassus and give Sethir’s Journal to Syurna. Turn in Destiny Calls and choose your reward.
- 155
Cenarion Hold entranceDarnassus~33.4, 16.8
- 160
DoEyes of the Sentinels
Use the supplied Lunar Pendant at the Cenarion Hold entrance, Darnassus Bank, Craftsman’s Terrace Inn and City Gate. Watch the quest log for each owl placement before moving on. Follow the city paths between the four landmarks, then return to Dalia in the Temple of the Moon.
- 160
Arch Druid Fandral StaghelmDarnassus~34.8, 9.3
- 161
DoTeldrassil
In Darnassus’s Cenarion Enclave, enter the northwestern tree building and climb the spiral ramp past the trainers, then the outer ramp to Fandral Staghelm at the top. Carry the Oracle Tree's report to Fandral Staghelm in Darnassus.
- 162
Hand inTeldrassil
In Darnassus’s Cenarion Enclave, enter the northwestern tree building and climb the spiral ramp past the trainers, then the outer ramp to Fandral Staghelm at the top. Speak with Arch Druid Fandral Staghelm and turn in Teldrassil.
- 163
AcceptGrove of the Ancients
In Darnassus’s Cenarion Enclave, enter the northwestern tree building and climb the spiral ramp past the trainers, then the outer ramp to Fandral Staghelm at the top. Ask Fandral for Grove of the Ancients before leaving. Keep his message for the planned visit to Onu.
- 164
DoCrown of the Earth
In Darnassus’s Cenarion Enclave, cross into the northwestern tree building. Follow the spiral ramp past the druid trainers, then continue up the outer ramp to Fandral Staghelm at the top. Take the filled vessel to Arch Druid Fandral Staghelm in Darnassus.
- 165
Hand inCrown of the Earth
In Darnassus’s Cenarion Enclave, enter the northwestern tree building and climb the spiral ramp past the trainers, then the outer ramp to Fandral Staghelm at the top. Speak with Arch Druid Fandral Staghelm and turn in Crown of the Earth.
- 166
AcceptCrown of the Earth
Fandral Staghelm may offer another Crown of the Earth now that the last one is handed in. Accept it if he does. If he has no offer, use Quest unavailable? to defer it and continue.
- 161
Class quests
HunterDruid3 steps · choose your class above to show only yours- 167
DoTraining the Beast
HunterJocaste · ~40.4, 8.6Follow Teldrassil’s west road into Darnassus and go to the Cenarion Enclave. Use the ramp beside the nightsabers at Cenarion Enclave’s eastern tree to reach Jocaste on the first raised platform. Speak with her for your pet-training lesson.
- 168
Hand inTraining the Beast
HunterJocaste · ~40.4, 8.6Use the ramp beside the nightsabers at Cenarion Enclave’s eastern tree in Darnassus to reach Jocaste on the first raised platform. Turn in Training the Beast to her and check your pet-training abilities before continuing.
- 169
AcceptMoonglade
DruidMathrengyl Bearwalker · ~35.4, 8.4In Darnassus’s Cenarion Enclave, enter the northwestern tree building and follow the spiral ramp to Mathrengyl Bearwalker on the balcony one level up. Speak with Mathrengyl Bearwalker and accept Moonglade.
- 167
LariiaDarnassus~40.0, 87.4
- 170
DoCrown of the Earth
Carry the Drained Vessel south through Darnassus to Lariia in the Temple of the Moon.
- 171
Hand inCrown of the Earth
- 172
AcceptCrown of the Earth
- 170
Tyrande WhisperwindDarnassus~39.0, 81.2
- 173
DoCrown of the Earth
Take the Moonwell Remnants upstairs to Tyrande before leaving the Temple of the Moon.
- 174
Hand inCrown of the Earth
- 173
Class quests
Priest3 steps · choose your class above to show only yours- 175
AcceptStars of Elune
PriestPriestess Alathea · ~39.2, 81.0Priestess Alathea is in the Temple of the Moon, beside Tyrande. Speak with her and accept Stars of Elune. If another priest trainer has already sent you to her with Returning Home, hand that in instead: it teaches the same spell, and these steps complete on their own.
- 176
DoStars of Elune
PriestPriestess Alathea · ~39.2, 81.0The public quest page lists no separate task for Stars of Elune. Stay with Priestess Alathea; this step should complete once the quest is in your log.
- 177
Hand inStars of Elune
PriestPriestess Alathea · ~39.2, 81.0Turn in Stars of Elune to Priestess Alathea, then check your spellbook for Starshards before rejoining the shared route.
- 175
Priestess A'mooraDarnassus~36.6, 85.9
- 178
Hand inTears of the MoonOptional
Return to Priestess A'moora and claim the reward for Tears of the Moon.
- 179
AcceptSathrah's SacrificeOptional
- 180
DoSathrah's SacrificeOptionalTemple of the Moon — fountain inside · ~36.6, 85.9
Use Sathrah’s Sacrifice at the fountain inside the Temple of the Moon. Wait for the quest log to confirm the offering before returning to A’moora.
- 181
Hand inSathrah's SacrificeOptional
Return to Priestess A'moora and claim the reward for Sathrah's Sacrifice.
- 178
Sentinel Dalia SunbladeDarnassus~39.6, 89.5
- 182
Hand inEyes of the Sentinels
Return to Sentinel Dalia Sunblade in the Temple of the Moon after all four owl placements and turn in Eyes of the Sentinels. Continue the remaining class visits before travelling to Rut’theran.
- 182
Class quests
Druid11 steps · choose your class above to show only yours- 183
DoMoonglade
DruidDendrite Starblaze · ~56.2, 30.6Check the newly offered Teleport: Moonglade spell, cast it and meet Dendrite upstairs in Nighthaven. If the spell is absent, return to the trainer before attempting overland travel.
Travel directions to Moonglade
- 184
Hand inMoonglade
DruidDendrite Starblaze · ~56.2, 30.6 - 185
AcceptGreat Bear Spirit
DruidDendrite Starblaze · ~56.2, 30.6 - 186
DoGreat Bear Spirit
DruidGreat Bear Spirit · ~39.1, 27.5Speak with the Great Bear Spirit in northwestern Moonglade. Finish its dialogue, then return to Dendrite in Nighthaven.
- 187
Hand inGreat Bear Spirit
DruidDendrite Starblaze · ~56.2, 30.6 - 188
AcceptBack to Darnassus
DruidDendrite Starblaze · ~56.2, 30.6 - 189
DoBack to Darnassus
DruidMathrengyl Bearwalker · ~35.4, 8.4Use Silva Fil’naveth’s druid flight to Rut’theran Village, then the Darnassus portal. In Darnassus’s Cenarion Enclave, enter the northwestern tree building and follow the spiral ramp to Mathrengyl Bearwalker on the balcony one level up. Return to Mathrengyl Bearwalker for the final bear trial.
Travel directions to Darnassus
- 190
Hand inBack to Darnassus
DruidMathrengyl Bearwalker · ~35.4, 8.4Find Mathrengyl Bearwalker on the balcony one level up the northwestern tree building in Darnassus’s Cenarion Enclave. Use the spiral ramp inside. Speak with Mathrengyl Bearwalker and turn in Back to Darnassus.
- 191
AcceptBody and Heart
DruidMathrengyl Bearwalker · ~35.4, 8.4Find Mathrengyl Bearwalker on the balcony one level up the northwestern tree building in Darnassus’s Cenarion Enclave. Use the spiral ramp inside. Speak with Mathrengyl Bearwalker and accept Body and Heart.
- 192
DoBody and Heart
DruidMoonkin Stone · ~43.5, 46.0Leave Darnassus through the portal to Rut’theran Village and board the Auberdine boat and get off only when it docks at Auberdine in Darkshore. The small moonkin cave is east of Auberdine: use the supplied Cenarion dust at the stone, kill Lunaclaw, then speak with the spirit it leaves behind. The kill alone does not finish the trial.
Travel directions to Darkshore
- 193
Hand inBody and Heart
DruidMathrengyl Bearwalker · ~35.4, 8.4Take the boat from Auberdine back to Rut’theran Village and the portal up to Darnassus. In Darnassus’s Cenarion Enclave, enter the northwestern tree building and follow the spiral ramp to Mathrengyl Bearwalker on the balcony one level up. Return to Mathrengyl Bearwalker, hand in the trial and check Bear Form before continuing the shared route.
Travel directions to Darnassus
- 183
Vesprystus at Rut'theran VillageTeldrassil~58.4, 93.9
- 194
GoLearn the Rut'theran Village flight pathOptional
While passing through Rut'theran Village, speak with Vesprystus and learn this flight path if needed. Continue your planned journey afterward.
- 194
Nessa ShadowsongTeldrassil~56.3, 92.4
- 195
DoNessa Shadowsong
Take the Darnassus portal to Rut’theran Village and speak with Nessa Shadowsong.
- 196
Hand inNessa Shadowsong
Return to Nessa Shadowsong and claim the reward for Nessa Shadowsong.
- 197
AcceptThe Bounty of Teldrassil
Speak with Nessa Shadowsong and accept The Bounty of Teldrassil. Optional later harbour errand: while already with Nessa, check her stock for one Shiny Bauble and three Nightcrawlers. Buy only missing quantities if affordable after travel and training costs, with room for both item stacks. Keep them for Gilbert in Stormwind; do not use the bait. If unavailable or too costly, leave without them and skip Fishin’ Time. No fishing training is needed.
- 195
VesprystusTeldrassil~58.4, 94.0
- 198
DoThe Bounty of Teldrassil
Carry Nessa’s Collection to Vesprystus, the hippogryph master at Rut’theran Village.
- 199
Hand inThe Bounty of Teldrassil
Return to Vesprystus and claim the reward for The Bounty of Teldrassil.
- 200
AcceptFlight to Auberdine
- 198
CHAPTER 03 · LEVELS 10–15
Darkshore and Loch Modan (levels 10–15)
Deliver Flight to Auberdine to Laird, then work the shore, the furbolg camp, Bashal'Aran and Ameth'Aran for Auberdine's quest givers. Thundris Windweaver's Expanding Horizons and Philmor's Favor then take you on the direct boat to Stormwind and the Deeprun Tram to Ironforge, where Monty's rat roundup comes before the road to Loch Modan. Thelsamar, Silver Stream Mine, Farstrider Lodge, Ironband's Excavation and the Valley of Kings follow. Report to Ironforge, finish the Stormwind errands with Baros Alexston and Elaine Trias, and return to Auberdine for the red crystal, the northern wrecks and Cliffspring Falls.
- Fill the Empty Water Tube for As Water Cascades at the Auberdine moonwell before you leave, and keep it through the Loch Modan trip for the Mysterious Red Crystal.
- Gathering Idols needs eight Carved Stone Idols from the excavation troggs. Check their levels and take single pulls. Mercenaries, Twisting the Knife and the last two In Defense of the King's Lands steps are optional.
- Keep Me Brother, Nipsy and Stormpike's Order if you take them. Both are delivered on the later Stormwind visit before Redridge.
Quest order 206 steps
- 01
GoLevel 11 for Washed Ashore
Washed Ashore needs level 11. If you are lower, finish the accepted work nearby or gain the remaining XP before taking it; the route continues either way.
- 01
Gwennyth Bly'LeggondeDarkshore~36.6, 45.6
- 02
AcceptWashed AshoreLevel 11+
Fly to Auberdine if Vesprystus offers it; otherwise take the boat from Rut’theran Village’s pier to Auberdine. Speak with Gwennyth Bly'Leggonde and accept Washed Ashore.
Travel directions to Darkshore
- 03
DoFlight to AuberdineLaird · ~36.8, 44.3
Deliver the parcel to Laird in Auberdine. Use the available hippogryph or boat; reaching the dock alone is not a quest reward.
- 04
Hand inFlight to AuberdineLaird · ~36.8, 44.3
Return to Laird and claim the reward for Flight to Auberdine.
- 05
AcceptReturn to Nessa
DruidLaird · ~36.8, 44.3Laird has a reply for Nessa Shadowsong. Accept Return to Nessa and keep it for your next Druid lesson: the boat to Darnassus lands beside Nessa on the Rut’theran dock.
- 02
Wizbang CranktoggleDarkshore~37.0, 44.1
- 06
AcceptBuzzbox 827
If still on Teldrassil, use Darnassus’s portal to Rut’theran Village. Speak with Vesprystus to learn the flight path if needed while passing through, then take the Auberdine boat. Stay aboard until it docks at Auberdine in Darkshore and disembark. The boat works without a learned flight path. Enter Auberdine’s inn and climb to the top floor for Wizbang Cranktoggle. Accept Buzzbox 827.
- 07
GoSet your hearthstone in AuberdineOptionalInnkeeper Shaussiy · ~37.0, 44.1
Speak with Innkeeper Shaussiy and make Auberdine your home. Auberdine is the return point for the Darkshore circuits and for the trips back from Ironforge and Redridge.
- 06
Caylais Moonfeather at AuberdineDarkshore~36.4, 45.6
- 08
GoLearn the Auberdine flight pathOptional
Speak with Caylais Moonfeather while you are in Auberdine. Learn this flight path if needed, then continue the nearby quests.
- 08
Kurdram StonehammerDarkshore~38.2, 41.0
- 09
DoCamping 101: MiningOptional
Build Mining to 20 while following your quests. Finish this lesson with Kurdram Stonehammer when your route brings you nearby. You can leave it pending and keep questing.
- 10
Hand inCamping 101: MiningOptional
Speak with Kurdram Stonehammer and turn in Camping 101: Mining when the quest is ready.
- 09
Tharnariun TreetenderDarkshore~38.8, 43.4
- 11
AcceptPlagued Lands
- 12
AcceptHow Big a Threat?Terenthis · ~39.4, 43.5
- 11
WANTED: Murkdeep!Darkshore~37.2, 44.2
- 13
AcceptWANTED: Jai'vhanel
Inspect WANTED: Murkdeep! and accept WANTED: Jai'vhanel.
- 13
Beached Sea CreatureDarkshore~36.4, 50.9
- 14
DoWashed Ashore
Inspect the beached sea creature just south of Auberdine and recover its bones.
- 14
Pygmy Tide CrawlerDarkshore~36.2, 44.5
- 15
DoBuzzbox 827
Collect six Crawler Legs along the shore south of Auberdine and place them in Buzzbox 827.
- 15
Rabid Thistle BearDarkshore~38.2, 52.6
- 16
DoPlagued Lands
Use the trap on a living Rabid Thistle Bear and bring the captured bear to Tharnariun in Auberdine. If the trap is lost, ask him for another.
- 17
DoHow Big a Threat?Corrupt furbolg camp · ~39.3, 53.5
Investigate the corrupt furbolg camp south of Auberdine, then report to Terenthis.
- 16
Buzzbox 827Darkshore~36.6, 46.3
- 18
Hand inBuzzbox 827
Return to Buzzbox 827 and turn in Buzzbox 827.
- 19
AcceptBuzzbox 411
Inspect Buzzbox 827 and accept Buzzbox 411.
- 20
Hand inWashed AshoreGwennyth Bly'Leggonde · ~36.6, 45.6
- 21
AcceptWashed AshoreGwennyth Bly'Leggonde · ~36.6, 45.6
- 18
Cerellean WhiteclawDarkshore~35.7, 43.7
- 22
AcceptFor Love Eternal
- 22
Darkshore ThresherDarkshore~32.3, 43.2
- 23
DoBuzzbox 411
Collect three Thresher Eyes from the water west of Auberdine. Keep them for the later Buzzbox 411 visit on the northern coast. Surface between fights.
- 23
Skeletal Sea TurtleDarkshore~31.8, 46.3
- 24
DoWashed Ashore
Recover the remains from the skeletal sea turtle in the water west of Auberdine. Surface before running out of breath.
- 24
Gwennyth Bly'LeggondeDarkshore~36.6, 45.6
- 25
Hand inWashed Ashore
- 25
- 26
GoLevel 12 for Cave Mushrooms
Cave Mushrooms needs level 12. If you are lower, finish the accepted work nearby or gain the remaining XP before taking it; the route continues either way.
- 26
Barithras MoonshadeDarkshore~37.3, 43.6
- 27
AcceptCave MushroomsLevel 12+
While in Auberdine, speak with Barithras Moonshade and accept Cave Mushrooms. Keep it for the planned Cliffspring Falls outing.
- 28
AcceptThe Red CrystalSentinel Glynda Nal'Shea · ~37.7, 43.4
- 27
Tharnariun TreetenderDarkshore~38.8, 43.4
- 29
Hand inPlagued Lands
- 30
AcceptCleansing of the Infected
- 31
Hand inHow Big a Threat?Terenthis · ~39.4, 43.5
- 32
AcceptHow Big a Threat?Terenthis · ~39.4, 43.5
- 33
AcceptThundris WindweaverTerenthis · ~39.4, 43.5
- 29
Thundris WindweaverDarkshore~37.4, 40.1
- 34
AcceptTools of the Highborne
Go around Auberdine’s northern building to the rear terrace for Thundris Windweaver. Speak with Thundris Windweaver and accept Tools of the Highborne.
- 35
AcceptBashal'Aran
Go around Auberdine’s northern building to the rear terrace for Thundris Windweaver. Speak with Thundris Windweaver and accept Bashal'Aran.
- 36
DoThundris Windweaver
Go around Auberdine’s northern building to the rear terrace for Thundris Windweaver. Speak with Thundris Windweaver in Auberdine about the corrupt furbolgs.
- 37
Hand inThundris Windweaver
Go around Auberdine’s northern building to the rear terrace for Thundris Windweaver. Speak with Thundris Windweaver and turn in Thundris Windweaver.
- 38
AcceptThe Cliffspring River
Go around Auberdine’s northern building to the rear terrace for Thundris Windweaver. Speak with Thundris Windweaver and accept The Cliffspring River.
- 34
Buzzbox 411Darkshore~42.0, 28.6
- 39
Hand inBuzzbox 411
Return to Buzzbox 411 and turn in Buzzbox 411.
- 40
AcceptBuzzbox 323
Inspect Buzzbox 411 and accept Buzzbox 323. Keep it for now: the route collects the Moonstalker Fangs beside the Cliffspring River on the later northern outing, at about level 15.
- 39
Darkshore~44.3, 36.4
- 41
DoBashal'Aran
Investigate the blue aura at Bashal'Aran and speak with Asterion in the ruins.
- 42
Hand inBashal'AranAsterion · ~44.2, 36.3
- 43
AcceptBashal'AranAsterion · ~44.2, 36.3
- 44
DoBashal'AranVile Sprite · ~44.6, 36.6
Kill the grell and collect eight Grell Earrings around Asterion.
- 45
Hand inBashal'AranAsterion · ~44.2, 36.3
- 46
AcceptBashal'AranAsterion · ~44.2, 36.3
- 47
DoBashal'AranDeth'ryll Satyr · ~45.5, 36.5
Kill the enemies and collect the Ancient Moonstone Seal at Bashal'Aran and return to Asterion.
- 48
Hand inBashal'AranAsterion · ~44.2, 36.3
- 49
AcceptBashal'AranAsterion · ~44.2, 36.3
- 41
Darkshore~47.2, 48.7
- 50
DoThe Red Crystal
Locate the large red crystal on a raised ledge above the moonkin area against the eastern mountain wall, east of Auberdine. Keep the report for Sentinel Glynda Nal’Shea and continue south-west to Ameth’Aran; you report it on the next Auberdine return.
- 50
Cursed HighborneDarkshore~41.9, 57.3
- 51
DoTools of the Highborne
From the Red Crystal, head south-west to Ameth’Aran. Collect seven Highborne Relics in the ruins while reading the tablets.
- 51
Sentinel Tysha MoonbladeDarkshore~40.3, 59.7
- 52
AcceptThe Fall of Ameth'Aran
- 52
Ancient FlameDarkshore~42.4, 61.8
- 53
DoBashal'Aran
Use the ancient flame at Ameth'Aran to destroy the seal. Complete the other ruins work before returning north to Asterion.
- 53
The Lay of Ameth'AranDarkshore~43.3, 58.7
- 54
DoThe Fall of Ameth'Aran
Read both historical tablets in Ameth'Aran and return to Sentinel Tysha Moonblade nearby.
- 54
Jai'vhanelDarkshore~45.0, 58.2
- 55
DoWANTED: Jai'vhanel
While approaching Ameth’Aran, look for Jai’vhanel by the mountain base north of the ruins. Recover her feather and finish the nearby ruins before returning to Glynda.
- 55
Sentinel Tysha MoonbladeDarkshore~40.3, 59.7
- 56
Hand inThe Fall of Ameth'Aran
- 56
Beached Sea TurtleDarkshore~37.1, 62.2
- 57
AcceptBeached Sea Turtle
Inspect the beached remains at the marked coast and accept Beached Sea Turtle. Keep the sample for the next Auberdine return.
- 58
DoBeached Sea Turtle
Keep the recovered remains for Gwennyth in Auberdine. Finish the other work on this outing before returning to the docks.
- 57
Blackwood PathfinderDarkshore~39.3, 52.2
- 59
DoHow Big a Threat?
Kill eight Blackwood Pathfinders and five Windtalkers at the furbolg camps.
- 59
Sentinel Glynda Nal'SheaDarkshore~37.7, 43.4
- 60
Hand inThe Red Crystal
- 61
Hand inWANTED: Jai'vhanel
- 62
AcceptAs Water Cascades
- 60
Gwennyth Bly'LeggondeDarkshore~36.6, 45.6
- 63
Hand inBeached Sea Turtle
- 63
Auberdine moonwell: fill the Empty Water TubeDarkshore~37.8, 44.0
- 64
DoAs Water Cascades
Fill the Empty Water Tube at the Auberdine moonwell before leaving town. Keep the filled tube through the Loch Modan trip for the next northern Darkshore outing.
- 64
TerenthisDarkshore~39.4, 43.5
- 65
Hand inHow Big a Threat?
- 66
AcceptA Lost Master
- 67
AcceptThe Tower of AlthalaxxLevel 13+Sentinel Elissa Starbreeze · ~39.0, 43.5
Find Sentinel Elissa Starbreeze on the second floor of Auberdine’s eastern building. Speak with Sentinel Elissa Starbreeze and accept The Tower of Althalaxx.
- 65
Gorbold SteelhandDarkshore~38.1, 41.2
- 68
AcceptDeep Ocean, Vast Sea
- 69
Hand inTools of the HighborneThundris Windweaver · ~37.4, 40.1
Go around Auberdine’s northern building to the rear terrace for Thundris Windweaver. Speak with Thundris Windweaver and turn in Tools of the Highborne.
- 70
AcceptExpanding HorizonsThundris Windweaver · ~37.4, 40.1
During the Auberdine departure visit, ask Thundris Windweaver for Expanding Horizons. Keep his letter for Baros Alexston in Stormwind. Bashal’Aran and As Water Cascades wait for the northern Darkshore outing, after Loch Modan and the Stormwind errands.
- 68
Gilbert Gray at Stormwind harbourStormwind City~26.1, 47.0
- 71
AcceptFishin’ TimeOptional
If still in Auberdine, take the direct Stormwind boat from the western pier, confirming its destination and remaining aboard until Stormwind Harbor. At the harbor, find Gilbert Gray. If you retained one Shiny Bauble and three Nightcrawlers, accept Fishin’ Time. If supplies or the offer are missing, skip this optional errand and continue the city visit; do not make another vendor trip.
Travel directions to Stormwind City
- 72
DoFishin’ TimeOptional
At Gilbert, check that you hold one Shiny Bauble and three Nightcrawlers and that the native quest shows the supplies ready. Do not use the bait. If supplies are missing, defer this optional errand and continue the city visit.
- 73
Hand inFishin’ TimeOptional
Give Gilbert the retained Shiny Bauble and three Nightcrawlers and claim the reward. Continue to the Deeprun Tram for Loch Modan; the Stormwind errands come after the Ironforge report.
- 71
Manifest Clerk PhilmorStormwind City~30.5, 28.8
- 74
AcceptPhilmor’s Favor
If still in Auberdine, board the direct Stormwind boat from the western pier, confirm its destination and remain aboard until Stormwind Harbor. At the harbor, find Manifest Clerk Philmor and accept Philmor’s Favor. Keep the shipment for Elaine Trias; you deliver it on the Stormwind errands after Loch Modan. If the quest shows a timer, deliver it to Elaine in the Trade District now, before taking the tram. If the offer is absent, defer this chain and continue to the tram.
- 74
Dungar Longdrink at StormwindStormwind City~71.6, 72.3
- 75
GoLearn the Stormwind flight pathOptional
Speak with Dungar Longdrink while you are in Stormwind. Learn this flight path if needed, then continue the nearby quests.
- 75
- 76
AcceptDeeprun Rat Roundup
From Stormwind Harbor, walk through the city to the Dwarven District, enter the Deeprun Tram and ride to Ironforge. Find Monty on the Ironforge platform and accept Deeprun Rat Roundup. If his offer is absent, defer the chain and continue through Ironforge toward Loch Modan.
- 76
- 77
DoDeeprun Rat Roundup
Stay on the Ironforge side of the depot. Target an unclaimed Deeprun Rat, move close and use the supplied Rat Catcher’s Flute. Capture five rats and lead them back to Monty. Use the native counter; do not kill them. If captures remain unavailable after one platform check, defer the chain and continue toward Loch Modan.
- 77
- 78
Hand inDeeprun Rat Roundup
Bring the five captured rats to Monty and claim Deeprun Rat Roundup’s reward. If you want the optional delivery, collect Me Brother, Nipsy now and keep it for the next planned Stormwind visit.
- 78
Gryth Thurden at IronforgeIronforge~55.9, 47.9
- 79
GoLearn the Ironforge flight pathOptional
Speak with Gryth Thurden while you are in Ironforge. Learn this flight path if needed, then continue the nearby quests.
- 79
- 80
AcceptMe Brother, NipsyOptional
Optional: accept Me Brother, Nipsy from Monty and keep the supplied Carton of Mystery Meat for the next planned Stormwind visit before Redridge. Continue toward Loch Modan; this delivery does not require an immediate return tram ride.
- 80
Mountaineer CobbleflintLoch Modan~22.1, 73.1
- 81
AcceptIn Defense of the King's Lands
Leave the Ironforge tram depot through Tinker Town, then leave the city by its main gate. Follow the Dun Morogh road east and use the South Gate tunnel into Loch Modan. At the Valley of Kings, accept In Defense of the King’s Lands from Mountaineer Cobbleflint. You hunt the troggs on the way out of Loch Modan.
- 82
AcceptThe Trogg ThreatCaptain Rugelfuss · ~23.2, 73.7
Enter the Valley of Kings guard tower and climb the stairs to Captain Rugelfuss on the third floor. Speak with Captain Rugelfuss and accept The Trogg Threat.
- 81
Vidra HearthstoveLoch Modan~34.8, 49.3
- 83
AcceptThelsamar Blood Sausages
From the Valley of Kings, follow the road north to Thelsamar and accept Thelsamar Blood Sausages from Vidra Hearthstove. Collect the other town requests before leaving.
- 83
Thorgrum Borrelson at ThelsamarLoch Modan~33.9, 50.8
- 84
GoLearn the Thelsamar flight pathOptional
Speak with Thorgrum Borrelson while you are in Thelsamar. Learn this flight path if needed, then continue the nearby quests.
- 84
Mountaineer KadrellLoch Modan~34.2, 47.8
- 85
AcceptRat Catching
- 86
AcceptMountaineer Stormpike's Task
- 85
Grenhild DarktalonLoch Modan~36.4, 48.2
- 87
AcceptSnowboundOptional
Accept Snowbound from Grenhild Darktalon in Thelsamar. This is an optional detour: the snow is beside the South Gate tunnel, south-west of Thelsamar, and the jar must go straight to Norric Lochthane on the northwest shore. Fill it only when you are ready to make that trip.
- 87
Snow beside the South Gate tunnelLoch Modan~19.9, 62.6
- 88
DoSnowboundOptional
Optional detour: go south-west from Thelsamar to the snow beside the South Gate tunnel, on the Loch Modan side, and use the Ceramic Jar on it. Then carry the Jar of Snow straight to Norric Lochthane outside his house on the northwest shore.
- 88
Mountaineer StormpikeLoch Modan~24.8, 18.4
- 89
DoMountaineer Stormpike's Task
Follow the road north from Thelsamar to Mountaineer Stormpike at the northern guard tower.
- 90
Hand inMountaineer Stormpike's Task
- 91
AcceptStormpike's OrderOptional
Optional: accept Stormpike’s Order from Mountaineer Stormpike and retain his request for the next planned Stormwind visit before Redridge. Finish the Loch circuit first.
- 92
AcceptFilthy Paws
- 89
Norric LochthaneLoch Modan~41.8, 19.0
- 93
Hand inSnowboundOptional
Hand the Jar of Snow to Norric Lochthane outside his house on the northwest shore, then head west to Silver Stream Mine.
- 93
Miners' League CratesLoch Modan~35.5, 19.9
- 94
DoFilthy Paws
Enter Silver Stream Mine and recover four loads of Miners' Gear. Look for the supply containers while clearing your route through the mine.
- 94
Mountaineer StormpikeLoch Modan~24.8, 18.4
- 95
Hand inFilthy Paws
- 95
Tunnel Rat kobolds by the road southLoch Modan~24.9, 30.3
- 96
DoRat Catching
Kill Tunnel Rat kobolds for twelve Tunnel Rat Ears, in Silver Stream Mine and at the small kobold camps beside the road south from Stormpike to Thelsamar. If you accepted Call of Fire, collect and keep Fire Tar from the Tunnel Rat Geomancers in the mine.
- 96
Mountaineer KadrellLoch Modan~34.2, 47.8
- 97
Hand inRat Catching
- 97
Bears, boars and spiders in the woods north of ThelsamarLoch Modan~35.5, 33.0
- 98
DoThelsamar Blood Sausages
Collect three Bear Meat, three Boar Intestines and three Spider Ichor in the woodland around Thelsamar.
- 98
Vidra HearthstoveLoch Modan~34.8, 49.3
- 99
Hand inThelsamar Blood Sausages
- 99
Jern HornhelmLoch Modan~37.2, 47.4
- 100
AcceptIronband's Excavation
- 100
Bingles BlastenheimerLoch Modan~63.6, 47.9
- 101
AcceptBingles' Missing SuppliesOptional
- 101
Magmar FellhewLoch Modan~64.9, 66.7
- 102
DoIronband's Excavation
Visit Explorer Fellhew at Ironband's Excavation in southeastern Loch Modan.
- 103
Hand inIronband's Excavation
- 104
AcceptGathering IdolsOptional
Optional. Magmar Fellhew offers Gathering Idols, but its troggs are level 17 to 20. Accept it only if you are level 17 or higher or in a group. The route does not come back to the excavation.
- 105
AcceptExcavation Progress ReportProspector Ironband · ~65.9, 65.6
- 102
Stonesplinter DiggerLoch Modan~68.0, 66.0
- 106
DoGathering IdolsOptional
Optional. Kill Stonesplinter Diggers and Geomancers around Ironband’s Excavation and collect eight Carved Stone Idols. They are level 17 to 19, and the Berserk Troggs and Magosh deeper in are higher. Skip this unless you are level 17 or higher or in a group, because the route does not return here. Pull one trogg at a time.
- 106
Magmar FellhewLoch Modan~64.9, 66.7
- 107
Hand inGathering IdolsOptional
- 107
Daryl the YounglingLoch Modan~83.5, 65.5
- 108
AcceptA Hunter's Boast
Inside Farstrider Lodge, find Daryl the Youngling in the left-hand hall. Speak with Daryl the Youngling and accept A Hunter's Boast.
- 108
Mountain BuzzardLoch Modan~79.3, 66.9
- 109
DoA Hunter's Boast
Once ready for a timed hunt, kill six Mountain Buzzards near Farstrider Lodge and return to Daryl within fifteen minutes. Do not start another outing during the timer.
- 109
Daryl the YounglingLoch Modan~83.5, 65.5
- 110
Hand inA Hunter's Boast
- 110
Marek IronheartLoch Modan~81.8, 61.7
- 111
AcceptCrocolisk Hunting
At Farstrider Lodge, enter the building and find Marek Ironheart in the right-hand hall. Speak with Marek Ironheart and accept Crocolisk Hunting.
- 112
AcceptTwisting the KnifeOptional
While at Farstrider Lodge for Crocolisk Hunting, ask Marek Ironheart for Twisting the Knife if you want the extra named-crocolisk hunt.
- 111
DaggerfangLoch Modan~62.8, 51.4
- 113
DoTwisting the KnifeOptional
During the Bingles and crocolisk shore outing, check the eastern lakeshore around 62.8, 51.4 for Daggerfang. If you find him and can manage the fight, defeat him and loot Marek’s Croc-Hunting Knife. Make one pass while doing the other shore work. If he is absent or the fight is too difficult, choose Do this quest later and continue to the planned returns.
- 114
DoCrocolisk HuntingLoch Crocolisk · ~62.4, 51.5
Collect five Crocolisk Meat and six Crocolisk Skins from ordinary Loch Crocolisks along the shore. Avoid the Large Loch Crocolisk. Finish the collection on the same outing as Bingles’ supplies, then turn it in at Farstrider Lodge.
- 113
Bingles's ToolbucketLoch Modan~48.7, 30.1
- 115
DoBingles' Missing SuppliesOptional
Search the northern islands and shoreline for Bingles’ Wrench, Screwdriver, Hammer and Blastencapper. Collect all four while finishing accepted crocolisk work. Pull the island troggs carefully, keep a retreat clear and avoid the Large Loch Crocolisk. Return to Bingles on the way back to Farstrider Lodge.
- 115
Discarded Fishing ToolboxLoch Modan~45.8, 43.3
- 116
AcceptSilver of the WavesOptional
Optional dive after gathering Bingles’ supplies: check the debris underwater near 45.8,43.3 for the Discarded Fishing Toolbox and accept Silver of the Waves. Watch your breath and nearby level 19–20 threshadons. If the toolbox is absent, the offer is unavailable or the approach is unsafe, choose Do this quest later and continue Crocolisk Hunting. Do not search the whole lake. Keep the hair clip for the western-shore return.
- 116
Bingles BlastenheimerLoch Modan~63.6, 47.9
- 117
Hand inBingles' Missing SuppliesOptional
- 117
Marek IronheartLoch Modan~81.8, 61.7
- 118
Hand inCrocolisk Hunting
- 119
Hand inTwisting the KnifeOptional
On the lodge return, give Marek his Croc-Hunting Knife in the right-hand hall. If you have not found it, leave the optional quest pending and continue the route.
- 118
Daryl the YounglingLoch Modan~83.5, 65.5
- 120
AcceptA Hunter's Challenge
- 120
Elder Mountain BoarLoch Modan~63.1, 38.9
- 121
DoA Hunter's Challenge
Kill five Elder Mountain Boars near Farstrider Lodge and return to Daryl within twelve minutes. Start only when ready to complete the hunt immediately.
- 121
Daryl the YounglingLoch Modan~83.5, 65.5
- 122
Hand inA Hunter's Challenge
- 122
Jern HornhelmLoch Modan~37.2, 47.4
- 123
DoExcavation Progress Report
Carry Ironband's Progress Report back to Jern Hornhelm in Thelsamar.
- 124
Hand inExcavation Progress Report
- 125
AcceptReport to Ironforge
Speak to Jern Hornhelm and accept Report to Ironforge.
- 123
Khara DeepwaterLoch Modan~39.5, 39.2
- 126
DoSilver of the WavesOptional
Keep the Monogrammed Silver Hair Clip while finishing the Loch outing. After reporting the excavation progress to Jern in Thelsamar, take the clip to Khara Deepwater at the fishing hut by the western shore, around 39.5,39.2. The toolbox quest supplies the clip. Do not search for another one.
- 127
Hand inSilver of the WavesOptional
At the fishing hut near 39.5,39.2, give the Monogrammed Silver Hair Clip to Khara Deepwater. Then return to the planned Loch work or departure.
- 126
Magistrate BluntnoseLoch Modan~34.6, 44.5
- 128
AcceptMercenariesOptionalLevel 15+
- 128
Mo'grosh OgreLoch Modan~67.1, 33.9
- 129
DoMercenariesOptional
If you choose the ogre camp outing, kill four Mo'grosh Ogres, four Brutes and four Enforcers in northeastern Loch Modan. The camp is dense, so pull carefully.
- 129
Magistrate BluntnoseLoch Modan~34.6, 44.5
- 130
Hand inMercenariesOptional
Return to Magistrate Bluntnose in Thelsamar and turn in Mercenaries.
- 130
Stonesplinter TroggLoch Modan~29.6, 72.5
- 131
DoIn Defense of the King's Lands
Follow the road south from Thelsamar back to the Valley of Kings. Around the valley entrance near the southern guard tower, kill ten Stonesplinter Troggs and ten Scouts.
- 132
DoThe Trogg ThreatStonesplinter Scout · ~29.6, 72.9
Kill troggs in the Stonesplinter camps and collect eight Trogg Stone Teeth.
- 131
Captain RugelfussLoch Modan~23.2, 73.7
- 133
Hand inThe Trogg Threat
Enter the Valley of Kings guard tower and climb the stairs to Captain Rugelfuss on the third floor. Speak with Captain Rugelfuss and turn in The Trogg Threat.
- 134
Hand inIn Defense of the King's LandsMountaineer Cobbleflint · ~22.1, 73.1
- 133
Mountaineer GravelgawLoch Modan~23.5, 76.4
- 135
AcceptIn Defense of the King's Lands
- 135
Stonesplinter SkullthumperLoch Modan~28.0, 81.2
- 136
DoIn Defense of the King's Lands
Kill ten Skullthumpers and ten Seers in the Stonesplinter camps. Check both counts before returning to the tower.
- 136
Mountaineer GravelgawLoch Modan~23.5, 76.4
- 137
Hand inIn Defense of the King's Lands
- 137
Mountaineer WallbangLoch Modan~23.5, 74.5
- 138
AcceptIn Defense of the King's LandsOptional
- 138
Stonesplinter ShamanLoch Modan~37.5, 86.2
- 139
DoIn Defense of the King's LandsOptional
Kill ten Stonesplinter Shaman and ten Bonesnappers in the southern camps before leaving for Ironforge. Pull carefully around casters and return to Mountaineer Wallbang with both counts complete.
- 139
Mountaineer WallbangLoch Modan~23.5, 74.5
- 140
Hand inIn Defense of the King's LandsOptional
- 141
AcceptIn Defense of the King's LandsOptionalCaptain Rugelfuss · ~23.2, 73.7
Enter the Valley of Kings guard tower and climb the stairs to Captain Rugelfuss on the third floor. Speak with Captain Rugelfuss and accept In Defense of the King's Lands.
- 140
GrawmugLoch Modan~34.8, 90.5
- 142
DoIn Defense of the King's LandsOptional
If you choose this harder encounter, kill Grawmug, Gnasher and Brawler together in the central chamber of the Stonesplinter Valley cave. Clear the approach and bring help if needed.
- 142
Captain RugelfussLoch Modan~23.2, 73.7
- 143
Hand inIn Defense of the King's LandsOptional
Enter the Valley of Kings guard tower and climb the stairs to Captain Rugelfuss on the third floor. Speak with Captain Rugelfuss and turn in In Defense of the King's Lands.
- 143
Prospector StormpikeIronforge~74.6, 11.7
- 144
DoReport to Ironforge
From the Valley of Kings, take the South Gate tunnel west and follow the Dun Morogh road to Ironforge. Deliver Jern’s report to Prospector Stormpike in the Hall of Explorers. Then ride the Deeprun Tram back to Stormwind for the city errands before the Darkshore return.
- 145
Hand inReport to Ironforge
Turn in Report to Ironforge to Prospector Stormpike.
- 144
Baros AlexstonStormwind City~57.7, 47.9
- 146
DoExpanding Horizons
Ride the Deeprun Tram back to Stormwind. Deliver Thundris’s letter to Baros Alexston in Cathedral Square.
- 147
Hand inExpanding Horizons
Give Thundris’s letter to Baros Alexston and claim the reward. Accept Making Do before leaving.
- 148
AcceptMaking Do
After delivering Thundris’s letter, accept Making Do from Baros Alexston. Keep the reply for Thundris on the Auberdine return.
- 146
Elaine TriasStormwind City~66.6, 73.4
- 149
DoPhilmor’s Favor
Carry Philmor’s shipment to Elaine Trias in the Trade District cheese shop. Stay for her follow-up before leaving the city.
- 150
Hand inPhilmor’s Favor
Give Philmor’s shipment to Elaine Trias and claim the reward. Accept Gatehouse Goods before leaving her.
- 151
AcceptGatehouse Goods
After Philmor’s Favor, accept Gatehouse Goods from Elaine Trias in the cheese shop.
- 152
DoGatehouse GoodsTrias shop: Gatehouse Door upstairs · ~66.6, 73.4
Take the shipment upstairs in the Trias shop and use it by the stockroom entrance. Check the native quest counter, then return downstairs. This is a delivery event; do not look for an enemy to kill.
- 153
Hand inGatehouse Goods
Return downstairs to Elaine Trias and claim the Gatehouse Goods reward before continuing through Stormwind.
- 149
Gubber BlumpDarkshore~36.1, 44.9
- 154
AcceptFruit of the Sea
Return to Auberdine after the Stormwind errands. If your hearthstone is actually bound to Auberdine and ready, you may use it. Otherwise go to Stormwind Harbor and board the Auberdine boat at the southernmost dock; remain aboard until Darkshore. At Auberdine, speak with Gubber Blump and accept Fruit of the Sea. Gubber offers it only from level 15: if he has nothing for you yet, take Alexston’s reply to Thundris first (the next step) and call back at Gubber before heading up the coast. If you are still below 15 then, use Quest unavailable? and continue. Keep any unfinished work for its local outing.
Travel directions to Darkshore
- 154
Thundris WindweaverDarkshore~37.4, 40.1
- 155
DoMaking Do
On the planned Auberdine return, take Alexston’s reply to Thundris Windweaver on the northern building’s rear terrace.
- 156
Hand inMaking Do
Give Alexston’s reply to Thundris Windweaver and claim the reward. Continue the northern Darkshore outing. Druids make the Moonglade lesson trip first and hand in Bashal’Aran and As Water Cascades when they return.
- 155
Class quests
Druid6 steps · choose your class above to show only yours- 157
DoReturn to Nessa
DruidNessa Shadowsong · ~56.3, 92.4Fly from Auberdine to Rut’theran Village with Caylais Moonfeather, or take the boat. Nessa Shadowsong stands on the dock; give her Laird’s reply. Bashal’Aran and As Water Cascades wait for the northern Darkshore outing after Moonglade.
Travel directions to Teldrassil
- 158
Hand inReturn to Nessa
DruidNessa Shadowsong · ~56.3, 92.4 - 159
AcceptLessons Anew
DruidMathrengyl Bearwalker · ~35.4, 8.4From Nessa on the dock, take the portal up to Darnassus. In Darnassus’s Cenarion Enclave, enter the northwestern tree building and follow the spiral ramp to Mathrengyl Bearwalker on the balcony one level up. Speak with Mathrengyl Bearwalker and accept Lessons Anew. Gathering the Cure will need five Earthroot. If you do not gather herbs, look for some on the auction house while you are in Darnassus. It needs level 14.
- 160
DoLessons Anew
DruidDendrite Starblaze · ~56.2, 30.6After receiving the lesson, use Teleport: Moonglade and report to Dendrite in Nighthaven.
Travel directions to Moonglade
- 161
Hand inLessons Anew
DruidDendrite Starblaze · ~56.2, 30.6 - 162
AcceptThe Principal Source
DruidDendrite Starblaze · ~56.2, 30.6Speak with Dendrite Starblaze and accept The Principal Source. Then return to Darkshore: take Silva Fil’naveth’s druid flight to Rut’theran Village, then fly on to Auberdine with Vesprystus, or board the Auberdine boat and get off when it docks at Auberdine.
- 157
Mysterious Red CrystalDarkshore~47.2, 48.7
- 163
Hand inAs Water Cascades
On the northern Darkshore outing, take the filled tube to the Mysterious Red Crystal on the ledge east of Auberdine. Complete As Water Cascades at the crystal and take The Fragments Within before leaving.
Travel directions to Darkshore
- 164
AcceptThe Fragments Within
At the Mysterious Red Crystal, accept The Fragments Within after rewarding As Water Cascades. Keep the fragments for the planned Auberdine return.
- 163
AsterionDarkshore~44.2, 36.3
- 165
Hand inBashal'Aran
From the Mysterious Red Crystal, head north-west to Bashal’Aran. Speak with Asterion and turn in Bashal’Aran.
- 165
Silver Dawning's LockboxDarkshore~38.2, 28.8
- 166
DoDeep Ocean, Vast Sea
Recover the Silver Dawning’s Lockbox and Mist Veil’s Lockbox from the two wrecks north of Auberdine. Surface between wrecks and before breath runs low; clear nearby murlocs before entering and keep the exit in sight. No water-breathing spell or potion is assumed.
- 166
Beached Sea CreatureDarkshore~41.9, 31.5
- 167
AcceptBeached Sea Creature
Inspect the beached remains at the marked coast and accept Beached Sea Creature. Keep the sample for the next Auberdine return.
- 168
DoBeached Sea Creature
Keep the recovered remains for Gwennyth in Auberdine. Finish the other work on this outing before returning to the docks.
- 167
Beached Sea TurtleDarkshore~44.2, 20.6
- 169
AcceptBeached Sea Turtle
Inspect the beached remains at the marked coast and accept Beached Sea Turtle. Keep the sample for the next Auberdine return.
- 170
DoBeached Sea Turtle
Keep the recovered remains for Gwennyth in Auberdine. Finish the other work on this outing before returning to the docks.
- 171
DoFruit of the SeaReef Crawler · ~44.8, 21.8
Kill the crabs and collect six Fine Crab Chunks along the northern Darkshore coast.
- 169
Cliffspring River WaterfallDarkshore~50.8, 25.6
- 172
DoThe Cliffspring River
Follow the Cliffspring River to its first waterfall and draw a water sample from the pool there.
- 173
DoBuzzbox 323Moonstalkers by the Cliffspring River · ~50.5, 27.0
Moonstalkers (level 14 to 15) prowl the slopes around the Cliffspring River pool, from about 49,26 to 52,26. Kill them for six Moonstalker Fangs, then take the fangs to Buzzbox 323 at the river mouth just to the north-east.
- 174
Hand inBuzzbox 323Buzzbox 323 · ~51.3, 24.6
Return to Buzzbox 323 and turn in Buzzbox 323.
- 175
AcceptBuzzbox 525Buzzbox 323 · ~51.3, 24.6
Inspect Buzzbox 323 and accept Buzzbox 525.
- 172
Cliffspring Falls cave mouthDarkshore~54.9, 33.3
- 176
DoThe Principal Source
DruidFrom Auberdine, follow the north bank of Cliffspring River uphill to the waterfall cave mouth. Fill the Empty Cliffspring Falls Sampler at the cave entrance, not at the foot of the falls. Keep a retreat path clear of naga and gather the accepted cave mushrooms before returning to town.
- 176
Scaber StalkDarkshore~55.0, 36.8
- 177
DoCave Mushrooms
Follow the north bank of Cliffspring River uphill to the cave behind the waterfall. Gather five Scaber Stalks and one Death Cap inside. Search the upper passage on the right and its far end for a Death Cap. Keep a clear route back to the entrance.
- 177
Class quests
Druid2 steps · choose your class above to show only yours- 178
Hand inThe Principal Source
DruidAlanndarian Nightsong · ~37.7, 40.7 - 179
AcceptGathering the Cure
DruidAlanndarian Nightsong · ~37.7, 40.7
- 178
Thundris WindweaverDarkshore~37.4, 40.1
- 180
Hand inThe Cliffspring River
Go around Auberdine’s northern building to the rear terrace for Thundris Windweaver. Speak with Thundris Windweaver and turn in The Cliffspring River.
- 181
Hand inDeep Ocean, Vast SeaGorbold Steelhand · ~38.1, 41.2
- 180
Class quests
Druid4 steps · choose your class above to show only yours- 182
DoGathering the Cure
DruidLunar Fungal Bloom · ~43.4, 46.0Gather twelve Lunar Funguses from the Lunar Fungal Blooms in the moonkin caves east of Auberdine. Also obtain five Earthroot from gathering or trade; do not change professions for this quest. If you have no Earthroot yet, choose Do this quest later and carry on. Once you have five, restore the chain from Browse guide and hand it in to Alanndarian in Auberdine before the level-16 Aquatic Form trip, which also passes Moonglade and Darnassus.
- 183
Hand inGathering the Cure
DruidAlanndarian Nightsong · ~37.7, 40.7 - 184
AcceptCuring the Sick
DruidAlanndarian Nightsong · ~37.7, 40.7 - 185
DoCuring the Sick
DruidSickly Deer east of Auberdine · ~44.5, 43.0Use the Curative Animal Salve on ten Sickly Deer in the Darkshore woods. Heal them with the quest item rather than killing them. Keep the finished quest: Dendrite takes it on the level-16 lesson trip after the beached-creature turn-ins.
- 182
Thundris WindweaverDarkshore~37.4, 40.1
- 186
AcceptThe Blackwood Corrupted
Go around Auberdine’s northern building to the rear terrace for Thundris Windweaver. Speak with Thundris Windweaver and accept The Blackwood Corrupted.
- 186
Sentinel Glynda Nal'SheaDarkshore~37.7, 43.4
- 187
DoThe Fragments Within
Bring the crystal fragments back to Sentinel Glynda Nal'Shea in Auberdine.
- 188
Hand inThe Fragments Within
- 189
Hand inCave MushroomsBarithras Moonshade · ~37.3, 43.6
- 190
AcceptOnuBarithras Moonshade · ~37.3, 43.6
- 191
AcceptWANTED: Murkdeep!WANTED: Murkdeep! · ~37.2, 44.2
Read the wanted notice in Auberdine and accept the Murkdeep bounty.
- 187
Gubber BlumpDarkshore~36.1, 44.9
- 192
Hand inFruit of the Sea
- 193
Hand inBeached Sea CreatureGwennyth Bly'Leggonde · ~36.6, 45.6
- 194
Hand inBeached Sea TurtleGwennyth Bly'Leggonde · ~36.6, 45.6
- 192
Class quests
Druid12 steps · choose your class above to show only yours- 195
GoXP checkpoint: level 16
DruidWoods south of Auberdine · ~39.9, 54.8Your next Druid lesson, A Lesson to Learn from Mathrengyl, needs level 16. Curing the Sick and Power over Poison, handed in on the way, give 1,725 XP. If this step shows more than about 1,700 XP to go, fight in the woods south of Auberdine around 39.9,54.7 until it shows 1,700 or less, then cast Teleport: Moonglade. Otherwise the Darnassus visit ends without the lesson.
- 196
Hand inCuring the Sick
DruidDendrite Starblaze · ~56.2, 30.6Cast Teleport: Moonglade from Auberdine. In Nighthaven, go upstairs to Dendrite Starblaze and turn in Curing the Sick.
Travel directions to Moonglade
- 197
AcceptPower over Poison
DruidDendrite Starblaze · ~56.2, 30.6 - 198
DoPower over Poison
DruidMathrengyl Bearwalker · ~35.4, 8.4Use Silva Fil’naveth’s druid flight to Rut’theran Village, then the Darnassus portal. In Darnassus’s Cenarion Enclave, enter the northwestern tree building and follow the spiral ramp to Mathrengyl Bearwalker on the balcony one level up. Return to Mathrengyl Bearwalker to finish the poison lesson.
Travel directions to Darnassus
- 199
Hand inPower over Poison
DruidMathrengyl Bearwalker · ~35.4, 8.4Hand in Power over Poison to Mathrengyl Bearwalker and check the reward window. Stay with him for your level-16 lesson.
- 200
AcceptA Lesson to Learn
DruidLevel 16+Mathrengyl Bearwalker · ~35.4, 8.4Speak with Mathrengyl Bearwalker again and accept A Lesson to Learn.
- 201
DoA Lesson to Learn
DruidDendrite Starblaze · ~56.2, 30.6Take the level-sixteen lesson from your city trainer, then teleport to Moonglade and speak with Dendrite.
Travel directions to Moonglade
- 202
Hand inA Lesson to Learn
DruidDendrite Starblaze · ~56.2, 30.6 - 203
AcceptTrial of the Lake
DruidDendrite Starblaze · ~56.2, 30.6 - 204
DoTrial of the Lake
DruidBauble Container · ~54.3, 55.7Dive into Lake Elune’ara and retrieve a Shrine Bauble from a Bauble Container. Return to the Shrine of Remulos beside Tajarri and use the bauble before its native timer expires. If it expires, obtain another bauble; an expired attempt is not completion. At the shrine, use the bauble beside Keeper Remulos; do not dive again while carrying it.
- 205
Hand inTrial of the Lake
DruidTajarri · ~36.5, 40.1 - 206
AcceptTrial of the Sea Lion
DruidTajarri · ~36.5, 40.1Speak with Tajarri and accept Trial of the Sea Lion. Keep it in your log: one pendant half is off the Darkshore coast and the other is reached from Westfall in the 20–30 route. Return to Auberdine with your hearthstone if it is bound there; otherwise take Silva Fil’naveth’s druid flight to Rut’theran Village and the Auberdine boat.
- 195
CHAPTER 04 · LEVELS 15–17
Darkshore (levels 15–17)
From Auberdine, follow the southern shore past the beached remains to Murkdeep's camp, then turn inland to the Grove of the Ancients. Give Fandral's message to Onu, investigate the Master's Glaive and return the Insane Scribbles for Mathystra Relics, stopping at Ameth'Aran for Anaya's pendant on the way back to town. Fill the Cleansing Bowl at the moonwell before the northern loop to Gelkak Gyromast, Mathystra Ruins, the Tower of Althalaxx and the Blackwood bonfire. The chapter ends on the direct boat to Stormwind for the retained city deliveries.
- Use the Phial of Scrying at the Master's Glaive to create the bowl that lets you speak with Onu. Loot a Peerless Eye from the nearby Twilight Disciples or Thugs before leaving.
- Keep the Mathystra Relics and Terenthis's next A Lost Master delivery. Both are handed in on the southern road in the final chapter.
- Gyromast's Revenge, Tharnariun's Hope and Swelling Forces are optional. Mathystra naga reach level 21, so bring help or skip the harder fights.
Quest order 63 steps
Archaeologist HolleeDarkshore~37.4, 41.8
- 01
AcceptThe Absent Minded Prospector
Travel directions to Darkshore
- 01
Beached Sea CreatureDarkshore~36.0, 70.9
- 02
AcceptBeached Sea Creature
From Auberdine, follow the shoreline south to these remains and accept Beached Sea Creature. Clear the nearby murlocs before approaching; the other coastal samples lie further south on the same outing.
- 03
DoBeached Sea Creature
Inspect the coastal remains and keep the recovered sample for Gwennyth in Auberdine. Continue the same southern-coast outing before returning to town.
- 02
- 04
GoCheck level 18 before Murkdeep’s waves
Murkdeep is level 19, and his camp sends waves of level 16–17 Greymist murlocs before he comes. Check level 18 before you approach the campfire, and bring help if you can. If you are below 18, continue past this check and choose Do this quest later on the Murkdeep step. Keep the bounty: the route’s last southern Darkshore leg passes his camp again at about level 18 to 19, and the 20–30 guide hands the bounty to Sentinel Glynda Nal’Shea at its Auberdine stop.
- 04
Murkdeep’s coastal campDarkshore~36.4, 76.5
- 05
DoWANTED: Murkdeep!
Continue south along the shore to Murkdeep’s camp. Clear the shore carefully and approach the campfire to start the encounter. Defeat the waves and Murkdeep. Retreat and defer if you cannot control the adds; this is not a single isolated pull.
- 05
Beached Sea CreatureDarkshore~32.7, 80.8
- 06
AcceptBeached Sea Creature
Continue down the shore to these remains. Clear the nearby murlocs before approaching, then inspect the remains and accept Beached Sea Creature.
- 07
DoBeached Sea Creature
Inspect the coastal remains and keep the recovered sample for Gwennyth in Auberdine. The three remains further south lie among level 18–20 murlocs; the route takes them on its last southern Darkshore leg.
- 06
OnuDarkshore~43.5, 76.3
- 08
DoGrove of the Ancients
Keep Fandral’s Message for the planned Grove of the Ancients visit. Deliver it to Onu when you arrive for the planned report.
- 09
Hand inGrove of the Ancients
- 10
DoOnu
From the southern coast, head inland to the east and follow the road to the Grove of the Ancients. Speak with Onu.
- 11
Hand inOnu
- 12
AcceptThe Master's Glaive
- 08
Darkshore~38.5, 86.5
- 13
DoThe Master's Glaive
Investigate the Master's Glaive. Use the Phial of Scrying to create the bowl and speak with Onu through it.
- 14
Hand inThe Master's GlaiveMaster's Glaive: Scrying Bowl (use the Phial of Scrying) · ~38.5, 86.5
Use the Scrying Bowl you just created at the Master's Glaive and turn in the investigation to Onu.
- 15
AcceptThe Twilight CampMaster's Glaive: Scrying Bowl (use the Phial of Scrying) · ~38.5, 86.5
Use your Scrying Bowl at the Master's Glaive and accept The Twilight Camp from Onu.
- 16
DoThe Twilight CampTwilight Tome · ~38.5, 86.0
Look for the written clue in the Twilight camp at the Master's Glaive.
- 17
Hand inThe Twilight CampTwilight Tome · ~38.5, 86.0
Return to Twilight Tome and turn in The Twilight Camp.
- 18
AcceptReturn to OnuTwilight Tome · ~38.5, 86.0
Inspect Twilight Tome and accept Return to Onu.
- 19
AcceptIt's All Fun and Games Until...Twilight Tome · ~38.5, 86.0
After taking Return to Onu, inspect the same Twilight Tome at the Master’s Glaive for It’s All Fun and Games Until... Accept the task before leaving. If the offer is absent, use Quest unavailable? to set it aside and continue to Onu.
- 20
DoIt's All Fun and Games Until...Twilight Disciple · ~38.2, 86.3
Before leaving the Master’s Glaive, loot a Peerless Eye from the nearby Twilight Disciples or Twilight Thugs. Take isolated enemies and watch for disciple healing. Check only the enemies on your approach and exit. If no eye drops, use Quest unavailable? to defer this quest and continue to Onu. Keep any eye for Thundris Windweaver on the planned Auberdine return.
- 13
OnuDarkshore~43.5, 76.3
- 21
DoReturn to Onu
Carry the Insane Scribbles to Onu at the Grove of the Ancients.
- 22
Hand inReturn to Onu
- 23
AcceptMathystra Relics
- 24
AcceptSwelling ForcesOptionalArbal · ~43.6, 76.4
Find Arbal in the Grove for the optional Swelling Forces hunt. Its 26 naga kills can be combined with Mathystra Relics, but some enemies reach level 21.
- 21
Anaya DawnrunnerDarkshore~41.8, 60.7
- 25
DoFor Love Eternal
On the way back north from the Grove of the Ancients, stop at Ameth’Aran. Find Anaya Dawnrunner, kill her spirit and recover her pendant.
- 25
Rabid Thistle BearDarkshore~38.2, 52.6
- 26
DoCleansing of the Infected
Kill twenty Rabid Thistle Bears during your other forest outings. Finish the count before returning to Tharnariun.
- 26
Cerellean WhiteclawDarkshore~35.7, 43.7
- 27
Hand inFor Love Eternal
- 27
Gwennyth Bly'LeggondeDarkshore~36.6, 45.6
- 28
Hand inBeached Sea Creature
- 29
Hand inBeached Sea Creature
- 28
Sentinel Glynda Nal'SheaDarkshore~37.7, 43.4
- 30
Hand inWANTED: Murkdeep!
Return to Sentinel Glynda Nal'Shea and claim the reward for WANTED: Murkdeep!.
- 30
Thundris WindweaverDarkshore~37.4, 40.1
- 31
Hand inIt's All Fun and Games Until...
On the Auberdine return, deliver the Peerless Eye to Thundris Windweaver. If the eye did not drop, keep the quest for later and continue the town hand-ins.
- 31
Tharnariun TreetenderDarkshore~38.8, 43.4
- 32
Hand inCleansing of the Infected
- 33
AcceptTharnariun's HopeOptional
- 32
Gelkak GyromastDarkshore~56.7, 13.5
- 34
AcceptGyromast's Retrieval
Before leaving Auberdine, fill the Cleansing Bowl at the town moonwell; you place it at the Blackwood bonfire at the end of this loop. Then follow the road north-east to the northern tip of Darkshore, past the Tower of Althalaxx and Mathystra Ruins (you work both on the way back). Find Gelkak Gyromast on the rocky shoreline north of Mathystra Ruins and accept Gyromast’s Retrieval before collecting the key pieces.
- 34
Giant ForeststriderDarkshore~61.2, 14.9
- 35
DoGyromast's Retrieval
Collect the three key pieces from Giant Foreststriders, Greymist murlocs and Encrusted Tide Crawlers along the northern coast. Check actual levels and use individual pulls; the selected references reach level 20. Avoid Raging Reef Crawlers, crowded murloc camps and the later mechanical encounter. Report all three pieces to Gelkak, then take the beached-turtle sample on the southbound return. Defer an unsafe hunt rather than moving to a stronger target.
- 35
Moonstalker SireDarkshore~61.9, 8.6
- 36
DoA Lost Master
Finish A Lost Master in the hills just north of the Giant Foreststriders: kill Moonstalker Sires and Matriarchs until you hold five Fine Moonstalker Pelts, counting any you took in the south. Each Matriarch arrives with a Runt, and Sires strike hard from behind, so pull them one at a time. Keep the pelts for Terenthis in Auberdine.
- 36
Gelkak GyromastDarkshore~56.7, 13.5
- 37
Hand inGyromast's Retrieval
Look for Gelkak Gyromast on the small rocky rise at the shoreline north of Mathystra Ruins. Speak with Gelkak Gyromast and turn in Gyromast's Retrieval.
- 38
AcceptGyromast's RevengeOptional
- 37
Beached Sea TurtleDarkshore~53.1, 18.1
- 39
AcceptBeached Sea Turtle
Inspect the beached remains at the marked coast and accept Beached Sea Turtle. Keep the sample for the next Auberdine return.
- 40
DoBeached Sea Turtle
Keep the recovered remains for Gwennyth in Auberdine. Finish the other work on this outing before returning to the docks.
- 39
Strange LockboxDarkshore~48.9, 11.3
- 41
GoCollect the Darkshore pendant half
DruidOptionalIf Trial of the Sea Lion is in your log, swim out from the north coast to the Strange Lockbox and loot the Half Pendant of Aquatic Agility. Keep it for the Westfall half in the 20–30 route.
- 41
The Threshwackonator 4100Darkshore~55.8, 18.3
- 42
DoGyromast's RevengeOptional
Optional group encounter: use Gyromast’s key to activate the Threshwackonator, lead it back and defeat it when it turns hostile. Bring help; do not treat the robot as a normal solo target.
- 42
Gelkak GyromastDarkshore~56.7, 13.5
- 43
Hand inGyromast's RevengeOptional
Return to Gelkak Gyromast and claim the reward for Gyromast's Revenge.
- 43
Mathystra RelicDarkshore~58.0, 25.9
- 44
DoMathystra Relics
Collect six Mathystra Relics from the ground in the northern ruins. Naga here range up to level 21. Check their levels and use clear approaches to the relics. Bring help or defer this quest if the pulls are too difficult. Keep the relics through the Redridge trip for the next southern-road visit to Onu.
- 45
DoSwelling ForcesOptionalStormscale naga in Mathystra Ruins · ~58.0, 25.9
Optional hunt: kill 12 Myrmidons, 8 Sorceresses and 6 Warriors in Mathystra Ruins while collecting the relics. Enemies reach level 21. Bring help or skip this hunt if the fights are too difficult.
- 44
Balthule ShadowstrikeDarkshore~55.0, 24.9
- 46
DoThe Tower of Althalaxx
From Mathystra Ruins, go west to Balthule Shadowstrike near the Tower of Althalaxx.
- 47
Hand inThe Tower of Althalaxx
- 48
AcceptThe Tower of Althalaxx
- 49
DoThe Tower of AlthalaxxDark Strand Fanatic · ~56.1, 25.4
Kill the cultists and collect four Worn Parchments around the tower. Remain outside the tower interior.
- 50
Hand inThe Tower of Althalaxx
- 51
AcceptThe Tower of Althalaxx
- 46
Blackwood Furbolg North BonfireDarkshore~52.4, 33.4
- 52
DoThe Blackwood Corrupted
Use the Cleansing Bowl you filled at the Auberdine moonwell. Head south from Buzzbox 323 to the northern Blackwood camps, gather fruit, nuts and grain, mix the bowl and place it by their bonfire near the river. This summons Xabraxxis, a level-19 corruptor. Check your readiness before summoning and bring help or return later if needed. Kill him and recover his talisman.
- 52
Den MotherDarkshore~51.5, 38.3
- 53
DoTharnariun's HopeOptional
Enter the Den Mother's cave and kill her. Clear nearby bears first and bring help if the fight is too difficult.
- 53
Gwennyth Bly'LeggondeDarkshore~36.6, 45.6
- 54
Hand inBeached Sea Turtle
Walk west back to Auberdine. Speak with Gwennyth Bly’Leggonde and turn in Beached Sea Turtle.
- 54
Thundris WindweaverDarkshore~37.4, 40.1
- 55
Hand inThe Blackwood Corrupted
Go around Auberdine’s northern building to the rear terrace for Thundris Windweaver. Speak with Thundris Windweaver and turn in The Blackwood Corrupted.
- 55
Tharnariun TreetenderDarkshore~38.8, 43.4
- 56
Hand inTharnariun's HopeOptional
- 57
Hand inA Lost MasterTerenthis · ~39.4, 43.5
- 58
AcceptA Lost MasterTerenthis · ~39.4, 43.5
- 56
- 59
DoMe Brother, NipsyOptional
On the planned visit before Redridge, take the direct boat from Auberdine’s western pier to Stormwind if still in Darkshore. In Stormwind, enter the tram depot from the Dwarven District and find Nipsy on the Stormwind platform. Keep the carton until he accepts it; do not ride back to Ironforge for this delivery.
- 59
- 60
Hand inMe Brother, NipsyOptional
Give the retained Carton of Mystery Meat to Nipsy on the Stormwind platform and claim the reward. Leave the depot for the remaining city errands and the Redridge road.
- 60
Furen LongbeardStormwind City~64.6, 37.2
- 61
DoStormpike's OrderOptional
If still in Darkshore, take the direct Stormwind boat from Auberdine’s western pier and remain aboard until Stormwind Harbor. During this planned city visit before Redridge, bring Stormpike’s retained request to Furen Longbeard in the Dwarven District. Finish nearby city errands before taking the Elwynn road.
Travel directions to Stormwind City
- 62
Hand inStormpike's OrderOptional
Deliver Mountaineer Stormpike’s request to Furen Longbeard and claim the reward during the city visit.
- 61
Renzik "The Shiv"Stormwind City~78.3, 71.0
- 63
AcceptRedridge Rendezvous
RogueDuring this Stormwind visit, speak with Renzik in Old Town and accept Redridge Rendezvous. Carry the referral while travelling east with the shared route; finish the lockpicking lesson during the Redridge visit. Train Lockpicking before leaving the city.
- 63
CHAPTER 05 · LEVELS 17–18
Redridge Mountains (levels 17–18)
Take the Elwynn road from Stormwind to Redridge, where Guard Parker's Encroaching Gnolls leads to Deputy Feldon at the Lakeshire bridge. Collect the town quests from Foreman Oslow, Verner Osgood, Magistrate Solomon, Darcy, Dockmaster Baren, Chef Breanna and the children fishing beside Lake Everstill, then combine the lake, gnoll and southern wildlife work. The Price of Shoes and Messenger to Stormwind send you back through Goldshire to Stormwind, where Argos Nightwhisper gives The Corruption Abroad. Return to Lakeshire for the northern gnolls, the Everstill Bridge and Underbelly Scales, then head back to Auberdine.
- Blackrock Menace and Blackrock Blockade need level 18 and are optional. Skip them if you are below 18.
- Redridge Goulash needs five Tough Condor Meat, five Great Goretusk Snouts and five Crisp Spider Meat. Check all three counters before returning to Chef Breanna.
- Keep Smith Argus's crate for Verner and General Marcus Jonathan's reply for Solomon. Both are handed in after the Stormwind visit.
Quest order 83 steps
- 01
GoSuggested level 17
Players are usually around level 17 by this point. If you are lower, finish the accepted work nearby before moving on; the route continues either way.
- 01
Guard ParkerRedridge Mountains~10.2, 71.5
- 02
AcceptEncroaching Gnolls
If still in Darkshore, take the direct Stormwind boat from Auberdine’s western pier and disembark at Stormwind Harbor. Finish any retained city deliveries during this visit. From Stormwind, follow the road through Elwynn Forest east into Redridge and accept Encroaching Gnolls from Guard Parker at the western approach.
- 02
Deputy FeldonRedridge Mountains~25.6, 60.0
- 03
DoEncroaching Gnolls
Continue to Lakeshire and look for Deputy Feldon south of its bridge.
- 04
Hand inEncroaching Gnolls
Continue along the road toward Lakeshire. Find Deputy Feldon at the south end of the bridge over Lake Everstill and turn in Encroaching Gnolls; take his follow-up before crossing into town.
- 05
AcceptAssessing the Threat
Accept Assessing the Threat from Deputy Feldon.
- 06
AcceptShow of Force
Speak to Deputy Feldon and accept Show of Force.
- 07
GoLearn the Lakeshire flight pathOptionalAriena Stormfeather at Lakeshire · ~25.3, 59.0
Speak with Ariena Stormfeather while you are in Lakeshire. Learn this flight path if needed, then continue the nearby quests.
- 03
Marshal MarrisRedridge Mountains~28.4, 49.0
- 08
AcceptBlackrock MenaceOptionalLevel 18+
Speak to Marshal Marris and accept Blackrock Menace. Optional: it needs level 18. Skip it if you are below 18; the 20–30 guide offers it again in Redridge.
- 09
AcceptBlackrock BlockadeOptional
Speak to Marshal Marris and accept Blackrock Blockade. Optional: it needs level 18. Skip it if you are below 18; the 20–30 guide offers it again in Redridge.
- 10
AcceptThe Lost ToolsForeman Oslow · ~27.1, 48.6
Check Foreman Oslow by the Lakeshire bridge for The Lost Tools.
- 08
Verner OsgoodRedridge Mountains~25.9, 47.3
- 11
AcceptThe Price of Shoes
Check Verner Osgood in Lakeshire for The Price of Shoes before leaving for Goldshire.
- 11
Magistrate SolomonRedridge Mountains~24.9, 44.5
- 12
AcceptMessenger to Stormwind
Check Magistrate Solomon in Lakeshire for Messenger to Stormwind before the city return.
- 12
DarcyRedridge Mountains~21.5, 44.3
- 13
AcceptA Free Lunch
Check Darcy at the Lakeshire inn for A Free Lunch.
- 13
Dockmaster BarenRedridge Mountains~22.6, 47.4
- 14
AcceptSelling Fish
Speak to Dockmaster Baren and accept Selling Fish.
- 14
Chef BreannaRedridge Mountains~17.6, 43.8
- 15
AcceptRedridge Goulash
Check Chef Breanna in Lakeshire for Redridge Goulash.
- 15
ShawnRedridge Mountains~24.2, 53.6
- 16
AcceptHilary's Necklace
Check the children fishing beside Lake Everstill for Hilary’s Necklace.
- 16
Lake Everstill shallowsRedridge Mountains~34.9, 54.0
- 17
DoHilary's Necklace
Search underwater for Hilary’s necklace, combining the swim with the toolbox search where the markers allow. Surface between searches.
- 18
DoThe Lost ToolsLake Everstill wreck · ~35.9, 54.0
Search the bottom of Lake Everstill for Oslow’s toolbox. Use the quest marker, surface before running out of breath and avoid swimming through hostile packs.
- 17
Southeastern Blackrock campRedridge Mountains~65.6, 78.7
- 19
DoBlackrock MenaceOptional
Follow the south-bank road east to the Blackrock camps in southeastern Redridge. Kill ordinary Blackrock Grunts and Outrunners and collect ten Battleworn Axes. Keep away from Stonewatch Keep and the high-level cave camps.
- 19
Southeastern Blackrock camp suppliesRedridge Mountains~66.1, 73.6
- 20
DoBlackrock BlockadeOptional
At the Blackrock camps south of Stonewatch Keep, loot ten Stolen Supplies from water barrels, grain sacks and meat haunches and eight Stolen Weapons from weapon racks while collecting Battleworn Axes.
- 20
Southern Lake Everstill murlocsRedridge Mountains~43.7, 72.2
- 21
DoSelling Fish
Kill murlocs along the southern bank of Lake Everstill and collect ten Spotted Sunfish. Pull onto land and avoid the deep-water creatures. Fishing is not required.
- 21
Southern Redridge wildlifeRedridge Mountains~31.9, 65.0
- 22
DoRedridge Goulash
Gather five Tough Condor Meat, five Great Goretusk Snouts and five Crisp Spider Meat from ordinary wildlife along the southern Redridge roads as you sweep west from the lake toward the gnoll camps. Avoid named enemies and crowded camps.
- 22
Redridge Mongrel and Poacher camps south of the roadRedridge Mountains~26.2, 81.1
- 23
DoAssessing the Threat
Continue west to the gnoll camps south of the road. Kill ten Redridge Mongrels and six Redridge Poachers.
- 23
Redridge ThrasherRedridge Mountains~8.5, 67.8
- 24
DoShow of Force
Kill the gnoll thrashers and collect five Spiked Collars west of the Redridge road while completing the nearby gnoll outing. Check the native counter before leaving; these are not the northern Brute and Mystic targets.
- 24
Guard ParkerRedridge Mountains~10.2, 71.5
- 25
DoA Free Lunch
Carry the lunch to Guard Parker on the road leading toward Duskwood. Stay on the road; there is no need to enter Duskwood for this delivery.
- 26
Hand inA Free Lunch
Give the lunch to Guard Parker.
- 27
AcceptVisit the Herbalist
Accept Visit the Herbalist from Guard Parker after the lunch delivery.
- 25
Marshal MarrisRedridge Mountains~28.4, 49.0
- 28
Hand inBlackrock MenaceOptional
Turn in Blackrock Menace to Marshal Marris.
- 29
Hand inBlackrock BlockadeOptional
Turn in Blackrock Blockade to Marshal Marris.
- 30
Hand inThe Lost ToolsForeman Oslow · ~27.1, 48.6
Return the toolbox to Foreman Oslow.
- 31
AcceptThe Everstill BridgeForeman Oslow · ~27.1, 48.6
Check Foreman Oslow for The Everstill Bridge.
- 28
Dockmaster BarenRedridge Mountains~22.6, 47.4
- 32
Hand inSelling Fish
Turn in Selling Fish to Dockmaster Baren.
- 32
Chef BreannaRedridge Mountains~17.6, 43.8
- 33
Hand inRedridge Goulash
Return the ingredients to Chef Breanna.
- 33
Martie JainroseRedridge Mountains~16.8, 46.3
- 34
DoVisit the Herbalist
Return to Lakeshire and find Martie Jainrose at the west end of town.
- 35
Hand inVisit the Herbalist
Speak with Martie.
- 36
AcceptDelivering Daffodils
Accept Delivering Daffodils from Martie.
- 34
DarcyRedridge Mountains~21.5, 44.3
- 37
DoDelivering Daffodils
Bring the bouquet back to Darcy at the inn.
- 38
Hand inDelivering Daffodils
Give Darcy the daffodils.
- 37
HilaryRedridge Mountains~24.1, 53.6
- 39
Hand inHilary's Necklace
Bring the necklace to Hilary in Lakeshire.
- 39
Deputy FeldonRedridge Mountains~25.6, 60.0
- 40
Hand inAssessing the Threat
Report your count to Deputy Feldon near the Lakeshire bridge.
- 41
Hand inShow of Force
Turn in Show of Force to Deputy Feldon.
- 40
Class quests
Rogue6 steps · choose your class above to show only yours- 42
DoRedridge Rendezvous
RogueLucius · ~23.1, 52.2Follow the road east from Stormwind through Elwynn Forest into Redridge. Stay on the road to Lakeshire and find Lucius on the L-shaped dock west of the bridge. This level-20 trip continues to the poison lesson after the lockpicking trial.
- 43
Hand inRedridge Rendezvous
RogueLucius · ~23.1, 52.2Find Lucius on the L-shaped dock west of Lakeshire’s bridge. Speak with Lucius and turn in Redridge Rendezvous.
- 44
AcceptAlther's Mill
RogueLucius · ~23.1, 52.2Find Lucius on the L-shaped dock west of Lakeshire’s bridge. Speak with Lucius and accept Alther's Mill.
- 45
GoSuggested level 20
RogueRecommended level 20 before approaching Alther’s Mill. If you arrived early, keep the quest and return to your unfinished Kalimdor route through All steps, or bring help. Do not push through higher-level spiders. Continue route only when you are ready for the approach.
- 46
DoAlther's Mill
RogueLucius's Lockbox · ~47.0, 44.7From Lakeshire follow the road east, then take the branch toward Alther's Mill. Approach the sawmill near 47,45 without cutting across spider spawns. Scout in stealth and avoid higher-level spiders, packs and the rare Chatter. If the entrance is unsafe, retreat and return with help. Keep Thieves' Tools and practise on the training boxes until Lockpicking is 70 (80 is safer), then open Lucius's Lockbox and loot the Token of Thievery. The Duskwood Chest in Klaven’s Tower, your next Rogue quest, needs 70, and these boxes are the only practice on the route. Return the token to Lucius.
- 47
Hand inAlther's Mill
RogueLucius · ~23.1, 52.2Return to Lucius on the L-shaped dock west of Lakeshire’s bridge and turn in Alther’s Mill for the Certificate of Thievery. Keep Thieves’ Tools. Return west along the road through Elwynn to Stormwind for Mathias and the Defias at level 20. Stay in the Eastern Kingdoms for the poison lesson.
- 42
Smith ArgusElwynn Forest~41.7, 65.5
- 48
DoThe Price of Shoes
Carry Verner’s note along the main road to Smith Argus in Goldshire.
- 49
Hand inThe Price of Shoes
Give the note to Smith Argus.
- 50
AcceptReturn to Verner
Accept Return to Verner from Smith Argus. Keep the crate while completing the planned Stormwind message delivery, then take it back to Lakeshire.
- 48
General Marcus JonathanStormwind City~69.2, 82.7
- 51
DoMessenger to Stormwind
Follow the road north from Goldshire to Stormwind. Carry Solomon’s report to General Marcus Jonathan at the city entrance.
- 52
Hand inMessenger to Stormwind
Deliver Solomon’s report to General Marcus Jonathan at Stormwind’s entrance. Take his reply, then finish the available city work before the return to Lakeshire.
- 51
Argos NightwhisperStormwind City~36.2, 67.6
- 53
AcceptThe Corruption Abroad
During this Stormwind visit, find Argos Nightwhisper and accept The Corruption Abroad. Keep his message for Gershala on the Auberdine return after Redridge. Argos offers it only from level 18. If he has nothing for you yet, continue with the city errands; if you come back through Stormwind for the Auberdine boat after Redridge, call on him then.
- 53
Class quests
Rogue16 steps · choose your class above to show only yours- 54
AcceptMathias and the Defias
RogueOptionalLevel 20+Master Mathias Shaw · ~78.3, 70.7After the Lakeshire lockpicking visit, continue in Stormwind at level 20. Enter SI:7 in Old Town, climb one flight of stairs and turn left to Mathias Shaw’s room. Speak with Master Mathias Shaw and accept Mathias and the Defias. Keep Thieves’ Tools and prepare Lockpicking before travelling to the Westfall tower. Optional here: it needs level 20. If you are not 20 yet, carry on; the level-20 class detour offers it once you reach 20.
- 55
GoLearn the Sentinel Hill flight path
RogueOptionalThor at Sentinel Hill · ~56.5, 52.5Speak with Thor at Sentinel Hill on the way to Agent Kearnen. Learn this flight path if needed for the return to Stormwind.
- 56
DoMathias and the Defias
RogueOptionalAgent Kearnen · ~68.4, 70.0Leave Stormwind through the main gate and follow the road west through Elwynn Forest into Westfall. Learn the Sentinel Hill flight path as you pass, then continue southeast to Agent Kearnen beside the southeastern Westfall tower. Carry Thieves’ Tools and prepare Lockpicking before starting the tower work.
- 57
Hand inMathias and the Defias
RogueOptionalAgent Kearnen · ~68.4, 70.0 - 58
AcceptKlaven's Tower
RogueOptionalAgent Kearnen · ~68.4, 70.0 - 59
DoKlaven's Tower
RogueOptionalDuskwood Chest · ~70.4, 73.9Read Kearnen's Journal. Pickpocket the Defias Tower Key from a Malformed Defias Drone without killing it first. Sneak into the tower and climb its stairs to the top floor. Open the Duskwood Chest beside Klaven for the journal and leave. Return both required items to Mathias Shaw. The tower contains stronger enemies, so use stealth and retreat if necessary.
- 60
Hand inKlaven's Tower
RogueOptionalMaster Mathias Shaw · ~78.3, 70.7Return to Stormwind: fly from Sentinel Hill if you learned that flight path, otherwise follow the road back east through Elwynn Forest. Enter SI:7 in Stormwind’s Old Town, climb one flight of stairs and turn left to Mathias Shaw’s room. Speak with Master Mathias Shaw and turn in Klaven's Tower.
- 61
AcceptThe Touch of Zanzil
RogueOptionalMaster Mathias Shaw · ~78.3, 70.7Enter SI:7 in Stormwind’s Old Town, climb one flight of stairs and turn left to Mathias Shaw’s room. Speak with Master Mathias Shaw and accept The Touch of Zanzil.
- 62
DoThe Touch of Zanzil
RogueOptionalDoc Mixilpixil · ~80.0, 70.1Inside SI:7 in Stormwind’s Old Town, take the stairs down to the basement to find Doc Mixilpixil. Speak with him for treatment of the tower poison.
- 63
Hand inThe Touch of Zanzil
RogueOptionalDoc Mixilpixil · ~80.0, 70.1Inside SI:7 in Stormwind’s Old Town, take the stairs down to the basement to Doc Mixilpixil. Speak with Doc Mixilpixil and turn in The Touch of Zanzil.
- 64
AcceptThe Touch of Zanzil
RogueOptionalDoc Mixilpixil · ~80.0, 70.1 - 65
DoThe Touch of Zanzil
RogueOptionalDoc Mixilpixil · ~80.0, 70.1Target Doc Mixilpixil and use /lay. Stay nearby until the examination objective completes, then turn it in.
- 66
Hand inThe Touch of Zanzil
RogueOptionalDoc Mixilpixil · ~80.0, 70.1 - 67
AcceptThe Touch of Zanzil
RogueOptionalDoc Mixilpixil · ~80.0, 70.1 - 68
DoThe Touch of Zanzil
RogueOptionalFelicia Gump · ~69.3, 71.3If you still need the cure, buy Simple Wildflowers at Fragrant Flowers and a Leaded Vial from a general or alchemy supplier. Loot the thread from the floor of The Finest Thread shop by Cathedral Square. Obtain a Bronze Tube from Billibub in the Dwarven District if stocked, or through trade. Bring one of each to Doc Mixilpixil and use the cure. Do not wait indefinitely for vendor stock or change professions.
- 69
Hand inThe Touch of Zanzil
RogueOptionalDoc Mixilpixil · ~80.0, 70.1Inside SI:7 in Stormwind’s Old Town, take the stairs down to the basement to find Doc Mixilpixil. Speak with Doc Mixilpixil and turn in The Touch of Zanzil.
- 54
General Marcus JonathanStormwind City~69.2, 82.7
- 70
AcceptMessenger to Stormwind
Take the General’s response for Messenger to Stormwind. Keep it for the return to Lakeshire.
- 70
Verner OsgoodRedridge Mountains~25.9, 47.3
- 71
DoReturn to Verner
Return to Lakeshire. Fly from Stormwind if you know the Lakeshire flight path; otherwise follow the road east through Elwynn Forest into Redridge. Carry the Crate of Horseshoes back to Verner Osgood.
- 72
Hand inReturn to Verner
Deliver the crate to Verner.
- 73
AcceptA Baying of Gnolls
Check Verner Osgood for A Baying of Gnolls.
- 74
AcceptUnderbelly Scales
Check Verner for Underbelly Scales after delivering the horseshoes.
- 71
Magistrate SolomonRedridge Mountains~24.9, 44.5
- 75
DoMessenger to Stormwind
Return to Magistrate Solomon in Lakeshire with the response.
- 76
Hand inMessenger to Stormwind
Return General Marcus Jonathan’s reply to Magistrate Solomon at the Lakeshire town hall. The Westfall and Darkshire messenger branches are outside this excursion.
- 75
Gnoll camps north of LakeshireRedridge Mountains~19.0, 37.3
- 77
DoA Baying of Gnolls
On the ridge north of Verner’s stable, kill ten Redridge Brutes and eight Redridge Mystics. Separate caster pulls and gather the stolen bridge supplies.
- 78
DoThe Everstill Bridge
Go into the hills behind Lakeshire. Kill Redridge gnolls and collect five Iron Pikes and five Iron Rivets while working the brute and mystic objective.
- 77
Southern drakesRedridge Mountains~22.9, 66.0
- 79
DoUnderbelly Scales
Kill Black Dragon Whelps south of Lakeshire and collect six Underbelly Whelp Scales. Watch for wandering whelps.
- 79
Verner OsgoodRedridge Mountains~25.9, 47.3
- 80
Hand inA Baying of Gnolls
Return to Verner Osgood.
- 81
Hand inUnderbelly Scales
Bring the scales to Verner.
- 80
Foreman OslowRedridge Mountains~27.1, 48.6
- 82
Hand inThe Everstill Bridge
Bring the iron supplies to Foreman Oslow.
- 82
Gershala NightwhisperDarkshore~38.3, 43.0
- 83
DoThe Corruption Abroad
Return to Auberdine. If The Corruption Abroad is not in your log yet and you are now level 18, go through Stormwind instead of using your hearthstone: Argos Nightwhisper in the park offers it, and the Auberdine boat leaves from the harbor. Otherwise use your hearthstone if it is set there. If not, fly from Lakeshire to Stormwind if you know that flight path, or follow the road west through Elwynn Forest, then board the Auberdine boat at Stormwind Harbor’s southernmost dock and stay aboard until Darkshore. In Auberdine, speak with Gershala Nightwhisper about the corruption. Keep any dungeon follow-up separate from the shared route.
Travel directions to Darkshore
- 83
CHAPTER 06 · LEVELS 18–19
Darkshore and Moonglade (levels 18–19)
Back in Auberdine, report to Gershala Nightwhisper for The Corruption Abroad. Priests and Druids can make their optional level-20 trips through Darnassus and Moonglade here. The shared route then heads south for Therylune's escape at the Master's Glaive, Prospector Remtravel, Buzzbox 525 and the Mathystra Relics hand-in to Onu. Kerlonian's escort, Terenthis's cloak for Volcor and Balthule's letter carry you over the border to Maestra's Post, where Delgren's Glowing Soul Gem finishes the free route.
- Choose Escape Through Stealth from Volcor after delivering the cloak, and do not take Escape Through Force as well.
- Kerlonian falls asleep along the road. Use the supplied horn to wake him, and stop when the quest log confirms the escort rather than leading him across the Ashenvale border.
- Remtravel's second Absent Minded Prospector is an optional group escort. Attempt it with help or leave it.
Quest order 50 steps
Gershala NightwhisperDarkshore~38.3, 43.0
- 01
Hand inThe Corruption Abroad
Report to Gershala Nightwhisper in Auberdine and claim the reward. Researching the Corruption is a separate optional dungeon quest; this delivery does not require entering Blackfathom Deeps.
- 01
Class quests
PriestDruid18 steps · choose your class above to show only yours- 02
AcceptElune's Grace
PriestOptionalPriestess Alathea · ~39.2, 81.0From Auberdine, take the boat to Rut’theran Village, then the portal up to Darnassus. Inside the Temple of the Moon, go upstairs to Priestess Alathea’s balcony north of the fountain. Speak with her and accept Elune's Grace. If another priest trainer has already sent you to her with Elune's Grace, hand that in instead: it teaches the same spell, and these steps complete on their own.
Travel directions to Darnassus
- 03
DoElune's Grace
PriestOptionalPriestess Alathea · ~39.2, 81.0The public quest page lists no separate task for Elune's Grace. Stay with Priestess Alathea; this step should complete once the quest is in your log.
- 04
Hand inElune's Grace
PriestOptionalPriestess Alathea · ~39.2, 81.0Turn in Elune's Grace to Priestess Alathea, then check your spellbook for the Elune's Grace spell.
- 05
AcceptThe Great Cat Spirit
DruidOptionalMathrengyl Bearwalker · ~35.2, 8.0From Auberdine, take the boat to Rut’theran Village, then the portal up to Darnassus. In Darnassus’s Cenarion Enclave, enter the northwestern tree building and follow the spiral ramp to Mathrengyl Bearwalker on the balcony one level up. Speak with Mathrengyl Bearwalker and accept The Great Cat Spirit.
- 06
DoThe Great Cat Spirit
DruidOptionalDendrite Starblaze · ~56.2, 30.4At level 20, visit the named Druid trainer for the cat-form referral. Use Teleport: Moonglade and report to Dendrite in Nighthaven.
Travel directions to Moonglade
- 07
Hand inThe Great Cat Spirit
DruidOptionalDendrite Starblaze · ~56.2, 30.4 - 08
AcceptThe Great Cat Spirit
DruidOptionalDendrite Starblaze · ~56.2, 30.4 - 09
DoThe Great Cat Spirit
DruidOptionalGreat Cat Spirit · ~54.6, 75.0Meet the Great Cat Spirit on the southern hill above the bridge. Take the relic trial before entering the dens.
- 10
Hand inThe Great Cat Spirit
DruidOptionalGreat Cat Spirit · ~54.6, 75.0 - 11
AcceptThe Great Cat Spirit
DruidOptionalGreat Cat Spirit · ~54.6, 75.0 - 12
DoThe Great Cat Spirit
DruidOptionalStormrage Barrow Dens — find the trial entrance · ~68.0, 60.2Travel to the Stormrage Barrow Dens area east of the spirit. The marker shows the den area; find the trial’s entrance statue and use its temporary stealth blessing. Search inside for all three relics: Fang, Claw and Silent Shadow. Avoid the powerful spirits, and renew the blessing if needed. Return to the spirit only after all three relics are in your bags.
- 13
Hand inThe Great Cat Spirit
DruidOptionalGreat Cat Spirit · ~54.6, 75.0 - 14
AcceptBlessings of the Great Cat Spirit
DruidOptionalGreat Cat Spirit · ~54.6, 75.0 - 15
DoBlessings of the Great Cat Spirit
DruidOptionalDendrite Starblaze · ~56.2, 30.4Return to Dendrite in Nighthaven with the spirit’s blessing. Accept his final city referral before leaving.
- 16
Hand inBlessings of the Great Cat Spirit
DruidOptionalDendrite Starblaze · ~56.2, 30.4 - 17
AcceptTo Darnassus
DruidOptionalDendrite Starblaze · ~56.2, 30.4 - 18
DoTo Darnassus
DruidOptionalMathrengyl Bearwalker · ~35.2, 8.0Take Silva Fil’naveth’s Druid flight to Rut’theran Village, then use the portal to Darnassus. In Darnassus’s Cenarion Enclave, enter the northwestern tree building and follow the spiral ramp to Mathrengyl Bearwalker on the balcony one level up. Turn in the final lesson and check Cat Form in your spellbook.
Travel directions to Darnassus
- 19
Hand inTo Darnassus
DruidOptionalMathrengyl Bearwalker · ~35.2, 8.0Find Mathrengyl Bearwalker on the balcony one level up the northwestern tree building in Darnassus’s Cenarion Enclave. Use the spiral ramp inside. Speak with Mathrengyl Bearwalker and turn in To Darnassus.
- 02
- 20
GoSuggested level 18
Players are usually around level 18 by this point. If you are lower, finish the accepted work nearby before moving on; the route continues either way.
- 20
TheryluneDarkshore~38.6, 87.3
- 21
AcceptTherylune's Escape
Begin the southern Darkshore outing. If a class lesson took you to Darnassus, take the portal to Rut’theran Village and the Auberdine boat. From Auberdine, follow the road south to the Master’s Glaive. Accept Therylune’s Escape only when ready to start immediately. If she is absent or the approach is unsafe, defer it and continue the southern outing.
Travel directions to Darkshore
- 21
Therylune escape endpointDarkshore~40.5, 87.1
- 22
DoTherylune's Escape
Escort Therylune out of the Master’s Glaive immediately after accepting. Stay with her until the native quest log confirms the escape. Carry the completed report to Therysil on the later Ashenvale coast visit.
- 22
Prospector RemtravelDarkshore~35.7, 83.7
- 23
DoThe Absent Minded Prospector
Find Prospector Remtravel at the southern Darkshore excavation while completing the nearby southern-coast quests.
- 24
Hand inThe Absent Minded Prospector
Return to Prospector Remtravel and claim the reward for The Absent Minded Prospector.
- 25
AcceptThe Absent Minded ProspectorOptional
- 26
DoThe Absent Minded ProspectorOptional
Optional group escort: stay with Remtravel through the excavation and protect him until the quest log confirms success. Attempt this with help; it is not required to continue.
- 23
Beached Sea TurtleDarkshore~31.7, 83.7
- 27
AcceptBeached Sea Turtle
From Prospector Remtravel’s excavation, head west to the shore. Greymist Oracles and Tidehunters (levels 18 to 20) stand around these remains, so pull them one at a time. Inspect the remains and accept Beached Sea Turtle.
- 28
DoBeached Sea Turtle
Take the Strangely Marked Box from the remains and keep it for Gwennyth in Auberdine. The 20–30 guide hands all three southern samples in at its Auberdine stop.
- 27
Beached Sea TurtleDarkshore~31.2, 85.6
- 29
AcceptBeached Sea Turtle
Follow the shore a short way south to the next remains, past more Greymist murlocs. Inspect them and accept Beached Sea Turtle.
- 30
DoBeached Sea Turtle
Take the Sea Turtle Remains and keep them for Gwennyth in Auberdine.
- 29
Beached Sea CreatureDarkshore~31.3, 87.4
- 31
AcceptBeached Sea Creature
Continue south along the shore to the last remains. Inspect them and accept Beached Sea Creature.
- 32
DoBeached Sea Creature
Take the Sea Creature Bones and keep them for Gwennyth in Auberdine. Then leave the shore and head north-east to the Grizzled Thistle Bears. If you left Murkdeep for later, his camp at 36.4,76.5 is just west of the bears. At level 18 or above, fight him now and keep the bounty: the 20–30 guide hands it to Sentinel Glynda Nal’Shea in Auberdine.
- 31
Grizzled Thistle Bears by Buzzbox 525Darkshore~39.6, 81.0
- 33
DoBuzzbox 525
Kill Grizzled Thistle Bears and collect four Grizzled Scalps south of Auberdine and deliver them to Buzzbox 525.
- 33
Buzzbox 525Darkshore~41.4, 80.6
- 34
Hand inBuzzbox 525
Return to Buzzbox 525 and turn in Buzzbox 525.
- 34
OnuDarkshore~43.5, 76.3
- 35
Hand inMathystra Relics
- 36
Hand inSwelling ForcesOptionalArbal · ~43.6, 76.4
Find Arbal in the Grove and hand in Swelling Forces during the same return as Mathystra Relics.
- 37
AcceptThe Sleeper Has AwakenedKerlonian Evershade · ~44.4, 76.4
Speak with Kerlonian Evershade and accept The Sleeper Has Awakened. Then open Kerlonian’s Chest beside him and take the Horn of Awakening. The escort has a 25-minute timer.
- 35
Kerlonian’s bag, south DarkshoreDarkshore~41.8, 90.2
- 38
DoThe Sleeper Has Awakened
Kerlonian follows you once you have the horn. Lead him south along the Darkshore road to his bag near 41.8, 90.2, and use the Horn of Awakening whenever he falls asleep. The escort completes at the bag. Then follow the road south into Ashenvale and hand the quest in to Liladris Moonriver at Maestra’s Post. If he disappears or the attempt fails, defer it through Quest unavailable? and continue the route.
- 38
VolcorDarkshore~45.0, 85.3
- 39
DoA Lost Master
After the northern Darkshore reports, follow the road south and deliver Terenthis’s cloak to Volcor in his cave. Keep the cloak until the delivery.
- 40
Hand inA Lost Master
- 41
AcceptEscape Through Stealth
After delivering the cloak, speak with Volcor and choose Escape Through Stealth. Do not take Escape Through Force as well. If the stealth offer is unavailable, defer this chain and continue south.
- 42
DoEscape Through Stealth
Speak with Volcor to begin the stealth escape and follow his instructions out of the cave. Wait for the native quest log to confirm success. If the event fails or stalls, defer it; no fixed timer is assumed. Continue south when finished and keep the report: the 20–30 guide hands it to Terenthis in Auberdine on its way to the Menethil boat.
- 39
Liladris MoonriverAshenvale~27.3, 35.6
- 43
Hand inThe Sleeper Has Awakened
Return to Liladris Moonriver and claim the reward for The Sleeper Has Awakened.
- 43
Delgren the PurifierAshenvale~26.2, 38.7
- 44
DoThe Tower of Althalaxx
Carry Balthule's letter south into Ashenvale to Delgren the Purifier at Maestra's Post.
- 45
Hand inThe Tower of Althalaxx
- 46
AcceptThe Tower of Althalaxx
- 44
Dark Strand CultistAshenvale~30.8, 31.6
- 47
DoThe Tower of Althalaxx
Kill the Dark Strand cultists and collect the Glowing Soul Gem near Maestra’s Post and return to Delgren before continuing to Astranaar. Avoid the later named-warlock follow-up.
- 47
Delgren the PurifierAshenvale~26.2, 38.7
- 48
Hand inThe Tower of Althalaxx
- 48
- 49
GoCheck level 20 before class travel
Finish Delgren’s report and check your actual level before leaving Maestra’s Post for a class lesson. If you are below 20, gain the rest here first. The next step names the nearest XP. At 20, you can finish your free class lessons or choose the paid continuation, which resumes those lessons from your quest history.
- 49
Dark Strand campAshenvale~30.8, 31.6
- 50
GoReach level 20
Reach level 20 to finish the free route. Most players reach Maestra’s Post around level 19, and this step shows the XP you still need. The nearest XP is beside the post: the Dark Strand cultists and adepts (levels 18 to 19) in the camp north-east of the post where you killed cultists for Delgren, and the Ghostpaw Runners (levels 19 to 20) in the hills to the north. At level 19 each kill is worth about 125 to 150 XP, so allow about seven kills for every 1,000 XP. Pull them one at a time. Finish any outstanding class lesson before choosing the paid Ashenvale continuation. The coast and Windshear quests belong to that continuation; their rewards have not been counted here.
- 50
Follow this chapter in game. Wisp shows your next quest step and nearby objectives beside you. Free, no account needed.
Continue with Alliance levelling: 20–45.
Pre-order the full Alliance 20–60 guide to get 20–45 now in Wisp. An online reader is included, and later bands to 60 are included when released. See the coverage and current purchase availability.
Explore the Alliance 20–60 guide ↗Already own it? Read your 20–45 guide ↗
Reading online? Open the paid reader, choose your race and class, then use “Continuing from the free 1–20 guide?” to find the handoff. Your reading position does not transfer. Review any unfinished quests; completed quests are not automatically skipped. Manual ticks in the paid reader last only for that page visit.
About this route
This route and its XP pacing are being optimised and refined. Your live quest log takes priority if WoW Forever differs at launch.
Route version and known limits
Written from route version 0.15.19, authored against client build 1.60.1.69913.
- This written guide matches prepared Wisp 1.8.0. A complete in-game playthrough, quest availability and measured XP pacing remain unverified.
- Some pickup levels, coordinates and quest conditions come from public quest data. Follow the live quest log when it differs and report a missing offer rather than marking it complete.
- Class coverage is not declared complete. The authored five class branches, optional-chain exclusions and any new beta combinations still require native eligibility and reward checks.
- Class training can add long journeys beyond the shared Teldrassil, Darkshore, Loch Modan, Redridge and Ashenvale path. Approximate chapter levels do not include a guaranteed travel time or levelling speed.
Game imagery © Blizzard Entertainment.
Report a confusing or changed step ↗A connected journeyQuests and turn-ins in a planned order.
Made for your characterYour class quests beside the shared route.
Keep your eyes on the gameFollow the route with Wisp beside you.
Take this route into the game.
Follow this Night Elf route with Wisp, our free leveling and quest addon. All eight starting routes towards level 20 are included. No account needed.
Starting another character?
Explore all 8 starting routes ↗Reached level 20?
Explore Alliance 20–60 · 20–45 released ↗