
Tauren
Levels 1–20.
Follow this route in game. Free beta, no account needed. How to install
Start with the hunts and rites around Camp Narache, then work outwards from Bloodhoof Village before making your first Thunder Bluff visit. This written version follows the Tauren route included in the Wisp beta, keeping the shared journey and your class lessons together.
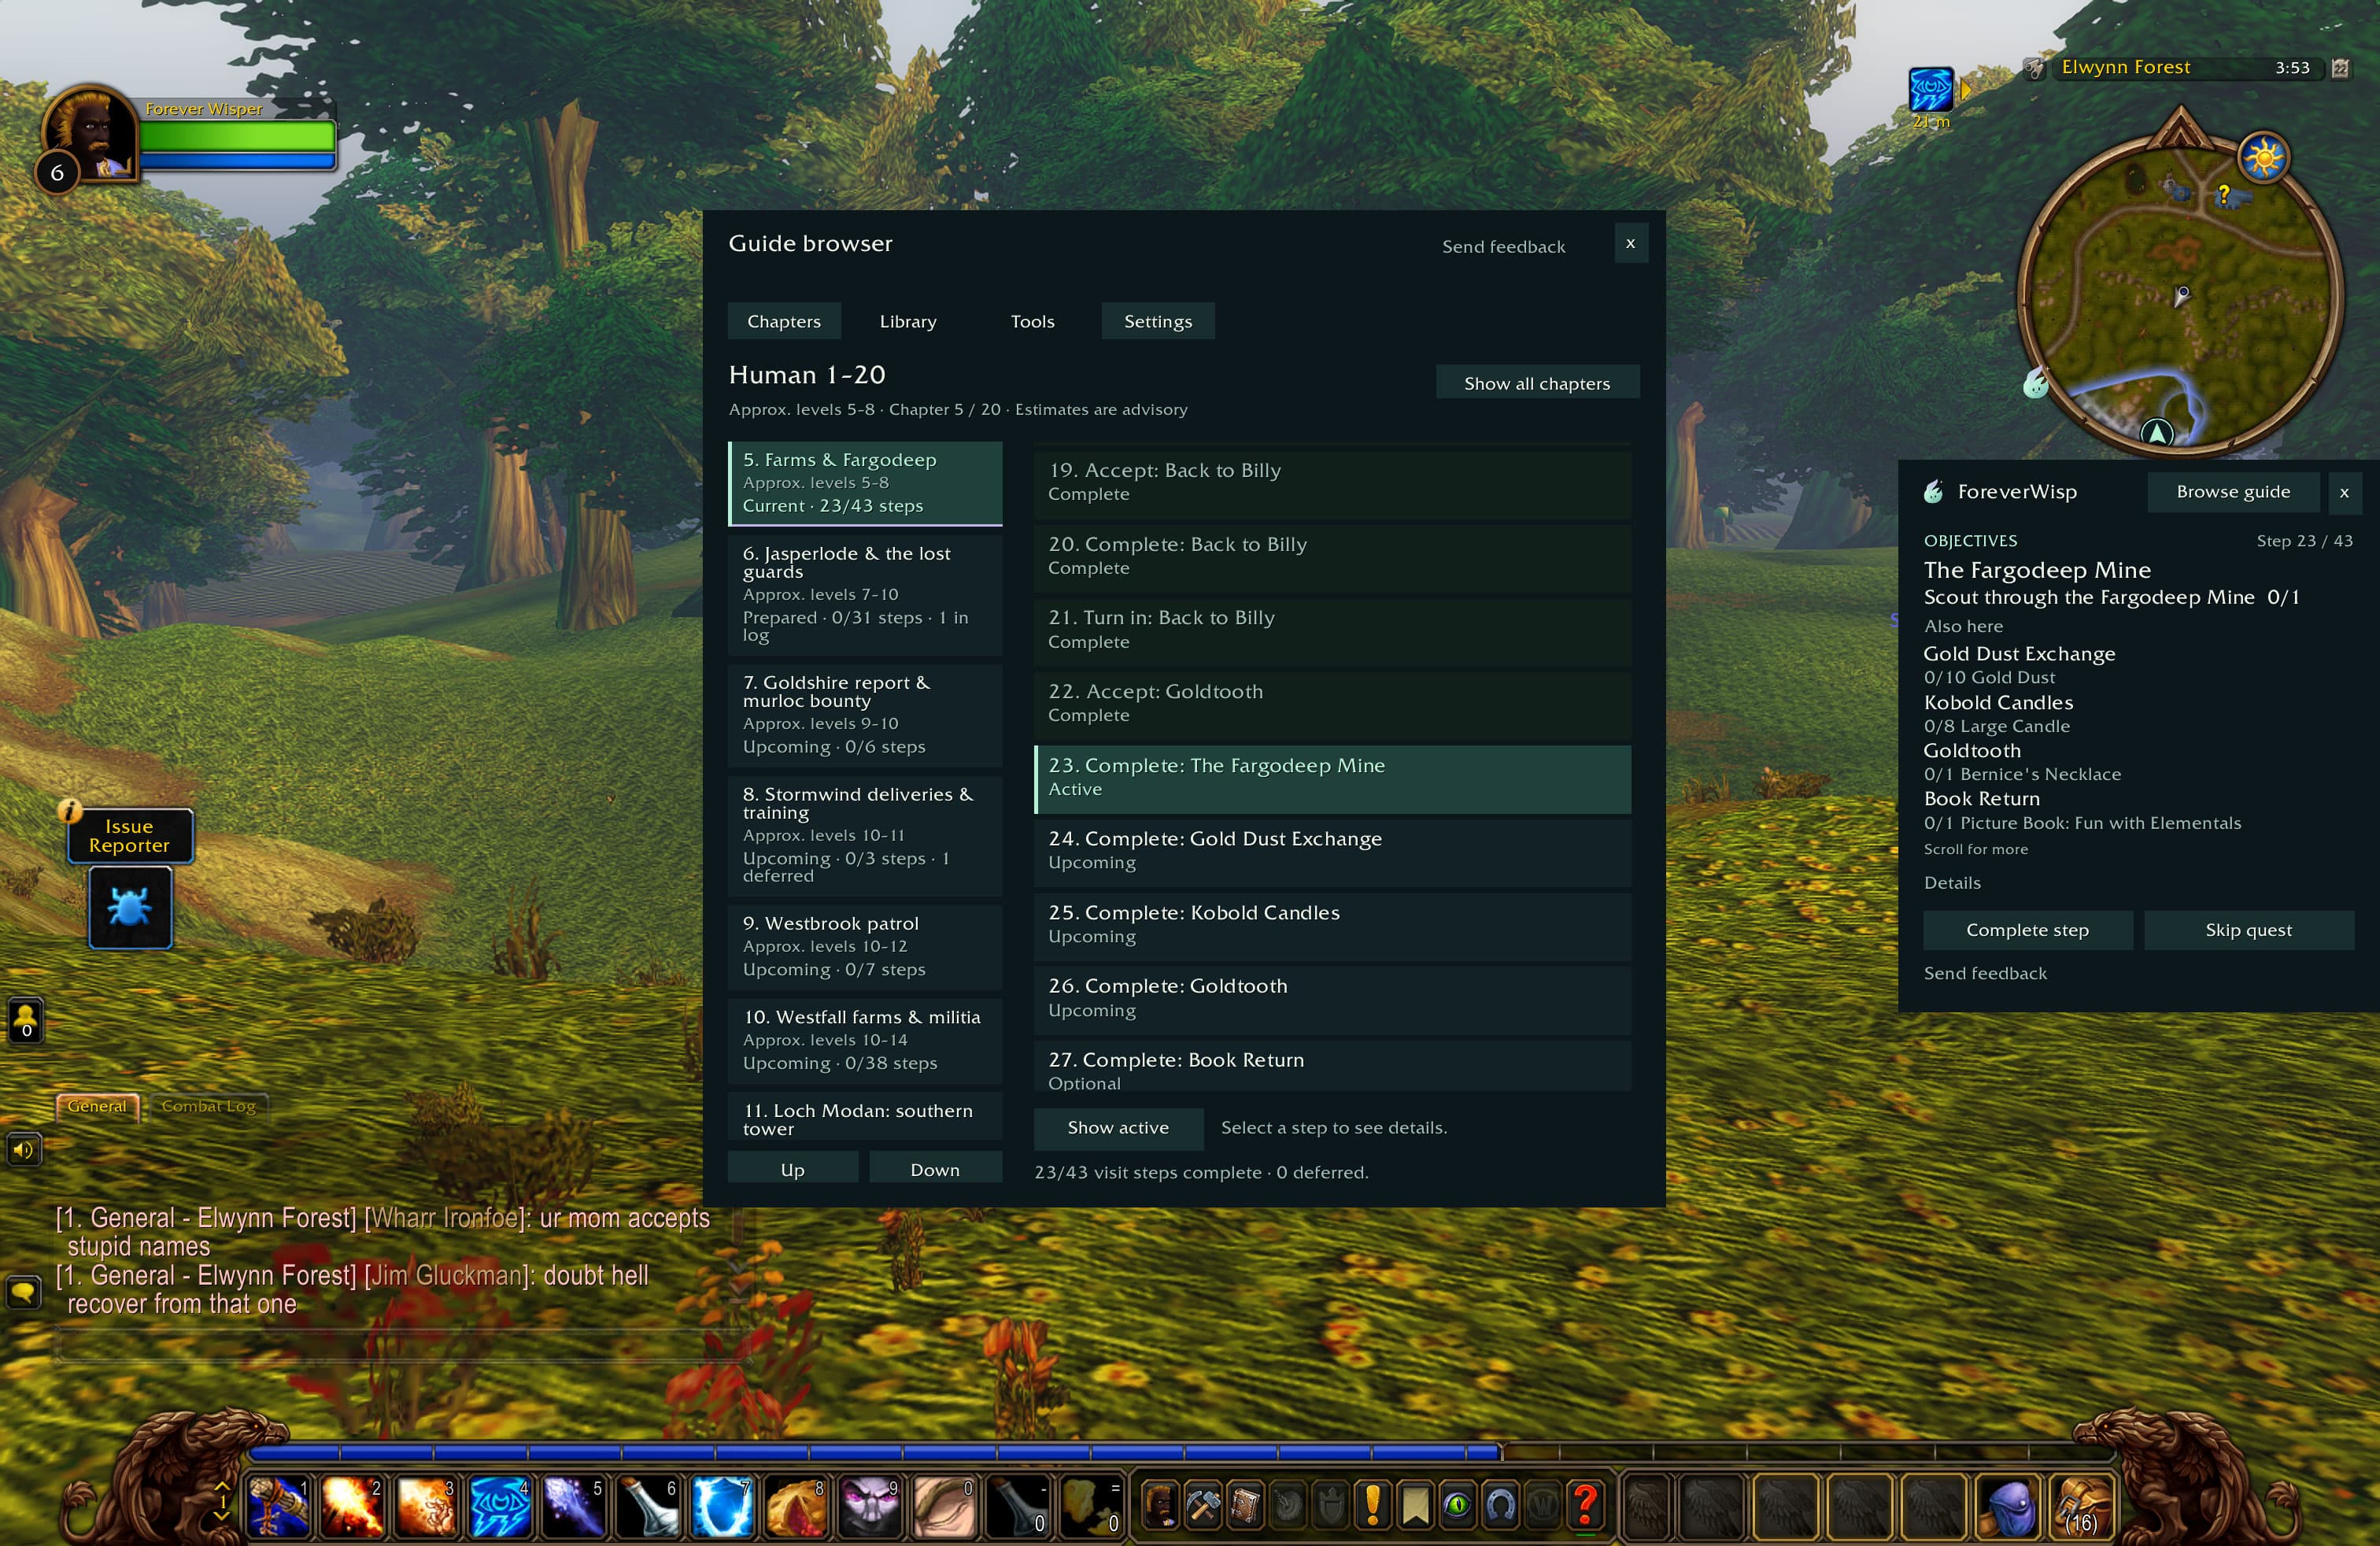
Keep the shared journey. Show the class quests that belong to you.
Showing Tauren steps and applicable class branches. Choose your class to narrow the guide. Level ranges are approximate checkpoints, not guaranteed XP.
A little preparation.
- Choose your class before following the route so trainer notes and class trials match your character.
- Keep delivery items until their named hand-ins. Early examples are the Water Pitcher, Totem of Hawkwind and Bundle of Furs.
- Check the next quest’s minimum level before leaving a hub. Hunter taming is placed beside the Bloodhoof visit but requires level 10, even though that chapter’s general checkpoint is earlier.
- Use optional encounters and XP activities when they suit your level and group. A missing item drop or an unavailable optional boss should not hold up the shared route.
- If a quest is absent, check its prerequisite reward, your quest log and the named giver. In Wisp, use Quest unavailable? to defer the chain rather than marking an unfinished quest as rewarded.
Class quests and unlocks
Warrior: Complete Simple Note in Camp Narache. The route collects Veteran Uzzek during the Thunder Bluff stage, then places Path of Defense after the Crossroads delivery. Its five Singed Scales come from thunder lizards in Thunder Ridge. The reviewed defensive training chain is included, but trainer availability and actual spell receipt still need beta verification. Optional equipment chains are not part of this route’s required progression.
Hunter: After Etched Note, the three level-10 Taming the Beast lessons use an Adult Plainstrider, Prairie Stalker and Swoop in that order. Return each lesson to Yaw Sharpmane before starting the next. Carry Training the Beast to the planned Thunder Bluff visit and finish with Holt Thunderhorn on Hunter Rise. Do not read its placement in an earlier chapter as permission to start below level 10. Pet training rewards remain pending in-client verification.
Shaman: The Earth trial begins at level 4 and gathers Ritual Salves during Brambleblade. The Fire referral starts at level 10 and leads through the Crossroads and Durotar. Call of Water is a level-20 chain with journeys to Hillsbrad, Ashenvale and Silverpine, so it is a milestone at the end rather than a way to reach 20. Keep supplied sapta and trial items until their steps are complete. These chains are authored but their beta offers and spell rewards are not fully verified.
Druid: The route includes the level-10 bear lesson, the level-14 poison chain, the level-16 aquatic lesson and the level-20 Great Cat Spirit chain. Gathering the Cure needs five Earthroot, which can come from trade or a herbalist without changing your professions. Aquatic Form involves a Silverpine journey, while the cat trial uses a temporary stealth blessing to collect three relics. Verify the final form or spell in your spellbook. Full native acceptance and class coverage remain under review.
LEVELS 1–3 · 32 STEPS FOR YOUR SELECTION
Camp Narache and Red Cloud Mesa
Begin with Chief Hawkwind’s water errand and Grull Hawkwind’s hunt. Their objectives share the area around Camp Narache, so finish the plainstrider collection before returning with the pitcher. The next outing combines the cougar hunt with the first visit to Seer Graytongue, then brings you back for the Brambleblade pickups.
STARTCamp Narache
FINISHCamp Narache before Brambleblade Ravine
- The Hunt Begins needs both seven feathers and seven pieces of meat. Check both totals before returning.
- Finish your class’s note introduction when the route brings you back to camp. Shaman Call of Earth appears here for the coming outing, but its minimum level is 4.
Quest order 32 steps
- 01Pick upRequires level 1
The Hunt Begins
Speak with Grull Hawkwind and accept The Hunt Begins.
Mulgore · Grull Hawkwind · Approx. 44.9, 77.1
- 02Pick upRequires level 1
A Humble Task
Speak with Chief Hawkwind and accept A Humble Task.
Mulgore · Chief Hawkwind · Approx. 44.2, 76.1
- 03QuestRequires level 1
A Humble Task
Visit Greatmother Hawkwind at the water well southeast of Camp Narache.
Mulgore · Greatmother Hawkwind · Approx. 50.0, 81.2
- 04Turn inRequires level 1
A Humble Task
Speak with Greatmother Hawkwind and turn in A Humble Task.
Mulgore · Greatmother Hawkwind · Approx. 50.0, 81.2
- 05Pick upRequires level 1
A Humble Task
Speak with Greatmother Hawkwind and accept A Humble Task.
Mulgore · Greatmother Hawkwind · Approx. 50.0, 81.2
Quest prerequisites
- 06QuestRequires level 1
A Humble Task
Take a Water Pitcher from the well and carry it northwest to Chief Hawkwind in Camp Narache.
Mulgore · Water Pitcher · Approx. 50.4, 81.6
Quest prerequisites
- 07QuestRequires level 1
The Hunt Begins
Hunt the plainstriders around Camp Narache and collect seven feathers and seven pieces of meat. Finish the hunt while collecting the water pitcher, before returning to the camp.
Mulgore · Plainstrider · Approx. 50.7, 87.0
- 08Turn inRequires level 1
A Humble Task
Speak with Chief Hawkwind and turn in A Humble Task.
Mulgore · Chief Hawkwind · Approx. 44.2, 76.1
Quest prerequisites
- 09Pick upRequires level 1
Rites of the Earthmother
Speak with Chief Hawkwind and accept Rites of the Earthmother.
Mulgore · Chief Hawkwind · Approx. 44.2, 76.1
Quest prerequisites
- 10Turn inRequires level 1
The Hunt Begins
Speak with Grull Hawkwind and turn in The Hunt Begins.
Mulgore · Grull Hawkwind · Approx. 44.9, 77.1
- 11Pick upRequires level 1
The Hunt Continues
Speak with Grull Hawkwind and accept The Hunt Continues.
Mulgore · Grull Hawkwind · Approx. 44.9, 77.1
Quest prerequisites
- 12Pick upWarriorRequires level 1
Simple Note
Speak with Grull Hawkwind and accept Simple Note.
Mulgore · Grull Hawkwind · Approx. 44.9, 77.1
Quest prerequisites
- 13Pick upHunterRequires level 1
Etched Note
Speak with Grull Hawkwind and accept Etched Note.
Mulgore · Grull Hawkwind · Approx. 44.9, 77.1
Quest prerequisites
- 14Pick upShamanRequires level 1
Rune-Inscribed Note
Speak with Grull Hawkwind and accept Rune-Inscribed Note.
Mulgore · Grull Hawkwind · Approx. 44.9, 77.1
Quest prerequisites
- 15Pick upDruidRequires level 1
Verdant Note
Speak with Grull Hawkwind and accept Verdant Note.
Mulgore · Grull Hawkwind · Approx. 44.9, 77.1
Quest prerequisites
- 16QuestWarriorRequires level 1
Simple Note
Read the introduction and speak to Harutt Thunderhorn at Camp Narache. Finish the native reward before returning to the shared errands.
Mulgore · Harutt Thunderhorn · Approx. 44.0, 76.1
Quest prerequisites
- 17Turn inWarriorRequires level 1
Simple Note
Find Harutt Thunderhorn at Camp Narache and hand in Simple Note. Continue the local errands after this introduction.
Mulgore · Harutt Thunderhorn · Approx. 44.0, 76.1
Quest prerequisites
- 18QuestHunterRequires level 1
Etched Note
Read the introduction and speak to Lanka Farshot at Camp Narache. Finish the native reward before returning to the shared errands.
Mulgore · Lanka Farshot · Approx. 44.3, 75.7
Quest prerequisites
- 19Turn inHunterRequires level 1
Etched Note
Find Lanka Farshot at Camp Narache and hand in Etched Note. Continue the local errands after this introduction.
Mulgore · Lanka Farshot · Approx. 44.3, 75.7
Quest prerequisites
- 20QuestShamanRequires level 1
Rune-Inscribed Note
Read the introduction and speak to Meela Dawnstrider at Camp Narache. Finish the native reward before returning to the shared errands.
Mulgore · Meela Dawnstrider · Approx. 45.0, 75.9
Quest prerequisites
- 21Turn inShamanRequires level 1
Rune-Inscribed Note
Find Meela Dawnstrider at Camp Narache and hand in Rune-Inscribed Note. Continue the local errands after this introduction.
Mulgore · Meela Dawnstrider · Approx. 45.0, 75.9
Quest prerequisites
- 22QuestDruidRequires level 1
Verdant Note
Read the introduction and speak to Gart Mistrunner at Camp Narache. Finish the native reward before returning to the shared errands.
Mulgore · Gart Mistrunner · Approx. 45.1, 75.9
Quest prerequisites
- 23Turn inDruidRequires level 1
Verdant Note
Find Gart Mistrunner at Camp Narache and hand in Verdant Note. Continue the local errands after this introduction.
Mulgore · Gart Mistrunner · Approx. 45.1, 75.9
Quest prerequisites
- 24QuestRequires level 1
The Hunt Continues
Collect ten Mountain Cougar Pelts on the slopes around Camp Narache.
Mulgore · Mountain Cougar · Approx. 55.8, 94.0
Quest prerequisites
- 25QuestRequires level 1
Rites of the Earthmother
Follow the path into the hills south of Camp Narache and speak with Seer Graytongue.
Mulgore · Seer Graytongue · Approx. 42.6, 92.2
Quest prerequisites
- 26Turn inRequires level 1
Rites of the Earthmother
Speak with Seer Graytongue and turn in Rites of the Earthmother.
Mulgore · Seer Graytongue · Approx. 42.6, 92.2
Quest prerequisites
- 27Pick upRequires level 1
Rite of Strength
Speak with Seer Graytongue and accept Rite of Strength.
Mulgore · Seer Graytongue · Approx. 42.6, 92.2
Quest prerequisites
- 28Turn inRequires level 1
The Hunt Continues
Speak with Grull Hawkwind and turn in The Hunt Continues.
Mulgore · Grull Hawkwind · Approx. 44.9, 77.1
Quest prerequisites
- 29Pick upRequires level 1
The Battleboars
Speak with Grull Hawkwind and accept The Battleboars.
Mulgore · Grull Hawkwind · Approx. 44.9, 77.1
Quest prerequisites
- 30Pick upOptionalRequires level 3
Break Sharptusk!
Speak with Brave Windfeather and accept Break Sharptusk!.
Mulgore · Brave Windfeather · Approx. 44.5, 76.5
- 31Pick upRequires level 1
A Task Unfinished
Speak with Antur Fallow and accept A Task Unfinished.
Mulgore · Antur Fallow · Approx. 38.5, 81.5
- 32Pick upShamanRequires level 4
Call of Earth
Speak with Seer Ravenfeather and accept Call of Earth.
Mulgore · Seer Ravenfeather · Approx. 44.7, 76.2
LEVELS 3–5 · 26 STEPS FOR YOUR SELECTION
Brambleblade and Bloodhoof Village
Brambleblade combines the Bristleback belt hunt and Battleboar supplies before a return to Camp Narache. After those rewards and any available class trial, the journey moves to Bloodhoof Village with the Totem of Hawkwind and the Bundle of Furs.
STARTCamp Narache
FINISHBloodhoof Village inn
- Break Sharptusk! is an optional cave encounter. Keep a clear way out and bring help if the pull is too difficult.
- Attack on Camp Narache starts from a Dirt-stained Map drop. Read it if you find one, but continue if it does not drop.
- Shamans gather the Ritual Salves during the shared outing, then complete the Kodo Rock trial before leaving Camp Narache.
Quest order 26 steps
- 01QuestRequires level 1
Rite of Strength
Collect twelve Bristleback Belts in Brambleblade Ravine. Finish the battleboar supplies on the same outing.
Mulgore · Bristleback Quilboar · Approx. 57.8, 81.7
Quest prerequisites
- 02QuestRequires level 1
The Battleboars
Hunt Battleboars at Brambleblade Ravine for eight snouts and eight flanks.
Mulgore · Bristleback Battleboar · Approx. 65.6, 77.9
Quest prerequisites
- 03QuestShamanRequires level 4
Call of Earth
Collect two Ritual Salves from Bristleback Shamans in Brambleblade Ravine during the shared outing. Keep the materials for the Earth trial.
Mulgore · Bristleback Shaman · Approx. 66.1, 77.8
- 04QuestOptionalRequires level 3
Break Sharptusk!
Enter the Bristleback cave in Brambleblade Ravine and recover Chief Sharptusk Thornmantle's head. This is an optional encounter; clear a retreat route and bring help if needed.
Mulgore · Chief Sharptusk Thornmantle · Approx. 64.7, 77.7
- 05Turn inOptionalRequires level 3
Break Sharptusk!
Speak with Brave Windfeather and turn in Break Sharptusk!.
Mulgore · Brave Windfeather · Approx. 44.5, 76.5
- 06Turn inRequires level 1
The Battleboars
Speak with Grull Hawkwind and turn in The Battleboars.
Mulgore · Grull Hawkwind · Approx. 44.9, 77.1
Quest prerequisites
- 07Turn inRequires level 1
Rite of Strength
Speak with Chief Hawkwind and turn in Rite of Strength.
Mulgore · Chief Hawkwind · Approx. 44.2, 76.1
Quest prerequisites
- 08Pick upOptionalRequires level 1
Attack on Camp Narache
Read Dirt-stained Map if it is already in your bags. No farming is required.
- 09QuestOptionalRequires level 1
Attack on Camp Narache
If a Dirt-stained Map drops during the Brambleblade outing, read it and keep the plans for Chief Hawkwind on the Camp Narache return. Continue without it if no map drops.
Mulgore · Chief Hawkwind · Approx. 44.2, 76.1
- 10Turn inOptionalRequires level 1
Attack on Camp Narache
Speak with Chief Hawkwind and turn in Attack on Camp Narache.
Mulgore · Chief Hawkwind · Approx. 44.2, 76.1
- 11Pick upRequires level 1
Rites of the Earthmother
Speak with Chief Hawkwind and accept Rites of the Earthmother.
Mulgore · Chief Hawkwind · Approx. 44.2, 76.1
Quest prerequisites
- 12Turn inShamanRequires level 4
Call of Earth
Return to Seer Ravenfeather in Camp Narache with the materials. Take the Earth Sapta trial before leaving.
Mulgore · Seer Ravenfeather · Approx. 44.7, 76.2
- 13Pick upShamanRequires level 4
Call of Earth
Speak with Seer Ravenfeather and accept Call of Earth.
Mulgore · Seer Ravenfeather · Approx. 44.7, 76.2
Quest prerequisites
- 14QuestShamanRequires level 4
Call of Earth
Head east from Camp Narache toward Kodo Rock, south of the Brambleblade Ravine entrance. Drink the Earth Sapta at the sacred rock and speak to the manifestation.
Mulgore · Minor Manifestation of Earth · Approx. 53.9, 80.5
Quest prerequisites
- 15Turn inShamanRequires level 4
Call of Earth
Head east from Camp Narache toward Kodo Rock, south of the Brambleblade Ravine entrance. Drink Earth Sapta there, turn in the trial and accept the Rough Quartz delivery.
Mulgore · Minor Manifestation of Earth · Approx. 53.9, 80.5
Quest prerequisites
- 16Pick upShamanRequires level 4
Call of Earth
Speak with Minor Manifestation of Earth and accept Call of Earth.
Mulgore · Minor Manifestation of Earth · Approx. 53.9, 80.5
Quest prerequisites
- 17QuestShamanRequires level 4
Call of Earth
Return down the path to Seer Ravenfeather in Camp Narache with the Rough Quartz.
Mulgore · Seer Ravenfeather · Approx. 44.7, 76.2
Quest prerequisites
- 18Turn inShamanRequires level 4
Call of Earth
Bring the Rough Quartz to Seer Ravenfeather in Camp Narache. Keep your Earth Totem and check Stoneskin Totem in your spellbook.
Mulgore · Seer Ravenfeather · Approx. 44.7, 76.2
Quest prerequisites
- 19QuestRequires level 1
Rites of the Earthmother
Follow the road out of Red Cloud Mesa to Bloodhoof Village and give the Totem of Hawkwind to Baine Bloodhoof.
Mulgore · Baine Bloodhoof · Approx. 47.5, 60.2
Quest prerequisites
- 20Turn inRequires level 1
Rites of the Earthmother
Speak with Baine Bloodhoof and turn in Rites of the Earthmother.
Mulgore · Baine Bloodhoof · Approx. 47.5, 60.2
Quest prerequisites
- 21Pick upRequires level 3
Rite of Vision
Speak with Baine Bloodhoof and accept Rite of Vision.
Mulgore · Baine Bloodhoof · Approx. 47.5, 60.2
Quest prerequisites
- 22QuestRequires level 3
Rite of Vision
Speak with Zarlman Two-Moons in Bloodhoof Village about your next rite.
Mulgore · Zarlman Two-Moons · Approx. 47.8, 57.5
Quest prerequisites
- 23Turn inRequires level 3
Rite of Vision
Speak with Zarlman Two-Moons and turn in Rite of Vision.
Mulgore · Zarlman Two-Moons · Approx. 47.8, 57.5
Quest prerequisites
- 24Pick upRequires level 3
Rite of Vision
Speak with Zarlman Two-Moons and accept Rite of Vision.
Mulgore · Zarlman Two-Moons · Approx. 47.8, 57.5
Quest prerequisites
- 25QuestRequires level 1
A Task Unfinished
Carry the Bundle of Furs to Innkeeper Kauth in Bloodhoof Village. Keep the bundle until the inn visit.
Mulgore · Innkeeper Kauth · Approx. 46.6, 61.1
- 26Turn inRequires level 1
A Task Unfinished
Speak with Innkeeper Kauth and turn in A Task Unfinished.
Mulgore · Innkeeper Kauth · Approx. 46.6, 61.1
LEVELS 5–7 · 25 STEPS FOR YOUR SELECTION
Bloodhoof Village and the eastern plain
Collect the Bloodhoof errands before setting out across the surrounding plains. Rite of Vision, Poison Water and Swoop Hunting overlap with travel to the ravaged caravan. Report the caravan findings to Morin Cloudstalker to collect the Venture Company follow-ups, then return to Bloodhoof for the cleansing sequence.
STARTBloodhoof Village
FINISHBloodhoof Village after the caravan report
- Sharing the Land has three separate enemy counts. Finish all three rather than judging progress from the total number of kills.
- The caravan step involves inspecting the Sealed Supply Crate. Complete its report before expecting The Venture Co. and Supervisor Fizsprocket.
- Winterhoof Cleansing follows Poison Water and leads into Thunderhorn Totem. Keep the supplied cleansing item for the well visit.
Quest order 25 steps
- 01Pick upRequires level 1
Sharing the Land
Speak with Baine Bloodhoof and accept Sharing the Land.
Mulgore · Baine Bloodhoof · Approx. 47.5, 60.2
- 02Pick upRequires level 4
Poison Water
Speak with Mull Thunderhorn and accept Poison Water.
Mulgore · Mull Thunderhorn · Approx. 48.5, 60.4
- 03Pick upRequires level 4
Swoop Hunting
Speak with Harken Windtotem and accept Swoop Hunting.
Mulgore · Harken Windtotem · Approx. 48.7, 59.3
- 04Pick upRequires level 5
Dangers of the Windfury
Speak with Ruul Eagletalon and accept Dangers of the Windfury.
Mulgore · Ruul Eagletalon · Approx. 47.4, 62.0
- 05Pick upRequires level 5
The Ravaged Caravan
Speak with Morin Cloudstalker and accept The Ravaged Caravan.
Mulgore · Morin Cloudstalker · Approx. 57.2, 61.2
- 06QuestRequires level 3
Rite of Vision
Collect two Well Stones at the Winterhoof well and two Ambercorns from the surrounding plains, then return to Zarlman in Bloodhoof Village.
Mulgore · Winterhoof Water Well · Approx. 53.7, 66.3
Quest prerequisites
- 07QuestRequires level 1
Sharing the Land
Defeat ten Palemane Tanners, eight Skinners and five Poachers in the camps southwest of Bloodhoof Village. Check all three counts before returning to Baine.
Mulgore · Palemane Tanner · Approx. 48.7, 71.2
- 08QuestRequires level 4
Poison Water
Collect six Prairie Wolf Paws and four Plainstrider Talons in the plains around Bloodhoof Village for Mull Thunderhorn.
Mulgore · Prairie Wolf · Approx. 50.7, 64.6
- 09QuestRequires level 4
Swoop Hunting
Collect eight Trophy Swoop Quills while hunting the Bloodhoof plains for Poison Water and travelling to Morin’s caravan. Finish this accepted hunt before returning to Bloodhoof Village.
Mulgore · Wiry Swoop · Approx. 53.9, 58.7
- 10QuestRequires level 5
The Ravaged Caravan
Inspect the ravaged caravan east of Bloodhoof Village and read the Sealed Supply Crate.
Mulgore · Sealed Supply Crate · Approx. 53.7, 48.2
- 11Turn inRequires level 5
The Ravaged Caravan
Return to Sealed Supply Crate and turn in The Ravaged Caravan.
Mulgore · Sealed Supply Crate · Approx. 53.7, 48.2
- 12Pick upRequires level 5
The Ravaged Caravan
Inspect Sealed Supply Crate and accept The Ravaged Caravan.
Mulgore · Sealed Supply Crate · Approx. 53.7, 48.2
Quest prerequisites
- 13QuestRequires level 5
The Ravaged Caravan
Bring the Venture Company documents from the caravan back to Morin Cloudstalker on the road east of Bloodhoof Village.
Mulgore · Morin Cloudstalker · Approx. 57.2, 61.2
Quest prerequisites
- 14Turn inRequires level 5
The Ravaged Caravan
Speak with Morin Cloudstalker and turn in The Ravaged Caravan.
Mulgore · Morin Cloudstalker · Approx. 57.2, 61.2
Quest prerequisites
- 15Pick upRequires level 5
The Venture Co.
Speak with Morin Cloudstalker and accept The Venture Co..
Mulgore · Morin Cloudstalker · Approx. 57.2, 61.2
Quest prerequisites
- 16Pick upOptionalRequires level 5
Supervisor Fizsprocket
Speak with Morin Cloudstalker and accept Supervisor Fizsprocket.
Mulgore · Morin Cloudstalker · Approx. 57.2, 61.2
Quest prerequisites
- 17Turn inRequires level 3
Rite of Vision
Speak with Zarlman Two-Moons and turn in Rite of Vision.
Mulgore · Zarlman Two-Moons · Approx. 47.8, 57.5
Quest prerequisites
- 18Pick upRequires level 3
Rite of Vision
Speak with Zarlman Two-Moons and accept Rite of Vision.
Mulgore · Zarlman Two-Moons · Approx. 47.8, 57.5
Quest prerequisites
- 19Turn inRequires level 4
Swoop Hunting
Speak with Harken Windtotem and turn in Swoop Hunting.
Mulgore · Harken Windtotem · Approx. 48.7, 59.3
- 20Turn inRequires level 4
Poison Water
Speak with Mull Thunderhorn and turn in Poison Water.
Mulgore · Mull Thunderhorn · Approx. 48.5, 60.4
- 21Pick upRequires level 4
Winterhoof Cleansing
Speak with Mull Thunderhorn and accept Winterhoof Cleansing.
Mulgore · Mull Thunderhorn · Approx. 48.5, 60.4
Quest prerequisites
- 22QuestRequires level 4
Winterhoof Cleansing
Use the Winterhoof Cleansing Totem at the polluted well southeast of Bloodhoof Village.
Mulgore · Winterhoof Water Well · Approx. 53.7, 66.3
Quest prerequisites
- 23Turn inRequires level 4
Winterhoof Cleansing
Speak with Mull Thunderhorn and turn in Winterhoof Cleansing.
Mulgore · Mull Thunderhorn · Approx. 48.5, 60.4
Quest prerequisites
- 24Pick upRequires level 4
Thunderhorn Totem
Speak with Mull Thunderhorn and accept Thunderhorn Totem.
Mulgore · Mull Thunderhorn · Approx. 48.5, 60.4
Quest prerequisites
- 25Turn inRequires level 1
Sharing the Land
Speak with Baine Bloodhoof and turn in Sharing the Land.
Mulgore · Baine Bloodhoof · Approx. 47.5, 60.2
LEVELS 7–9 · 22 STEPS FOR YOUR SELECTION
The rites and Bael'dun
This outing follows the Water of the Seers vision and the Bael’dun task, then returns to the cleansing chain. Bloodhoof is also the home of the Hunter taming lessons, which sit here to keep the trainer and nearby animals together when your level allows them.
STARTBloodhoof Village with the seer water
FINISHBloodhoof Village after the second cleansing
- Follow the vision to Seer Wiserunner instead of heading straight for a map marker.
- For Dwarven Digging, looting tools is only the first part. Break them at the forge until you have five Broken Tools.
- Hunters must be level 10 for the taming sequence. Each animal is a separate lesson with a return to Yaw Sharpmane, followed by the Training the Beast referral for Thunder Bluff.
Quest order 22 steps
- 01Pick upRequires level 6
Dwarven Digging
Speak with Baine Bloodhoof and accept Dwarven Digging.
Mulgore · Baine Bloodhoof · Approx. 47.5, 60.2
- 02QuestRequires level 4
Thunderhorn Totem
Collect six Stalker Claws from Prairie Stalkers and six Cougar Claws from Flatland Cougars around Bloodhoof Village. Keep both sets for Mull Thunderhorn.
Mulgore · Prairie Stalker · Approx. 55.8, 57.9
Quest prerequisites
- 03QuestRequires level 3
Rite of Vision
Drink the Water of the Seers at Bloodhoof Village and follow the vision to Seer Wiserunner. Stay with the vision rather than cutting straight across the terrain.
Mulgore · Seer Wiserunner · Approx. 32.7, 36.1
Quest prerequisites
- 04Turn inRequires level 3
Rite of Vision
Speak with Seer Wiserunner and turn in Rite of Vision.
Mulgore · Seer Wiserunner · Approx. 32.7, 36.1
Quest prerequisites
- 05Pick upRequires level 3
Rite of Wisdom
Speak with Seer Wiserunner and accept Rite of Wisdom.
Mulgore · Seer Wiserunner · Approx. 32.7, 36.1
Quest prerequisites
- 06QuestRequires level 6
Dwarven Digging
Defeat Bael'dun dwarves at the excavation and take their tools. Break the tools at the forge until you have five Broken Tools.
Mulgore · Bael'dun Digger · Approx. 33.8, 49.7
- 07Turn inRequires level 6
Dwarven Digging
Speak with Baine Bloodhoof and turn in Dwarven Digging.
Mulgore · Baine Bloodhoof · Approx. 47.5, 60.2
- 08Turn inRequires level 4
Thunderhorn Totem
Speak with Mull Thunderhorn and turn in Thunderhorn Totem.
Mulgore · Mull Thunderhorn · Approx. 48.5, 60.4
Quest prerequisites
- 09Pick upRequires level 4
Thunderhorn Cleansing
Speak with Mull Thunderhorn and accept Thunderhorn Cleansing.
Mulgore · Mull Thunderhorn · Approx. 48.5, 60.4
Quest prerequisites
- 10QuestRequires level 4
Thunderhorn Cleansing
Take the Thunderhorn Cleansing Totem to the Thunderhorn well north of Bloodhoof Village and use it there.
Mulgore · Stormbull Water Well · Approx. 44.5, 45.3
Quest prerequisites
- 11Turn inRequires level 4
Thunderhorn Cleansing
Speak with Mull Thunderhorn and turn in Thunderhorn Cleansing.
Mulgore · Mull Thunderhorn · Approx. 48.5, 60.4
Quest prerequisites
- 12Pick upRequires level 4
Wildmane Totem
Speak with Mull Thunderhorn and accept Wildmane Totem.
Mulgore · Mull Thunderhorn · Approx. 48.5, 60.4
Quest prerequisites
- 13Pick upHunterRequires level 10
Taming the Beast
Accept Taming the Beast from Yaw Sharpmane in Bloodhoof Village.
Mulgore · Yaw Sharpmane · Approx. 47.8, 55.7
- 14QuestHunterRequires level 10
Taming the Beast
Use this lesson’s Taming Rod on an Adult Plainstrider in the plains west of Bloodhoof Village, near 43.0, 55.0. Wait for the tame to finish, then return the rod to Yaw Sharpmane. Dismiss a temporary trial pet if the game requires it before the next lesson.
Mulgore · Adult Plainstrider · Approx. 43.0, 55.0
- 15Turn inHunterRequires level 10
Taming the Beast
Return to Yaw Sharpmane in Bloodhoof Village with the lesson’s rod. Turn in Taming the Beast and accept the next lesson before leaving.
Mulgore · Yaw Sharpmane · Approx. 47.8, 55.7
- 16Pick upHunterRequires level 10
Taming the Beast
Accept Taming the Beast from Yaw Sharpmane in Bloodhoof Village.
Mulgore · Yaw Sharpmane · Approx. 47.8, 55.7
Quest prerequisites
- 17QuestHunterRequires level 10
Taming the Beast
Use this lesson’s Taming Rod on a Prairie Stalker in the plains northwest of Bloodhoof Village, near 42.8, 53.0. Wait for the tame to finish, then return the rod to Yaw Sharpmane. Dismiss a temporary trial pet if the game requires it before the next lesson.
Mulgore · Prairie Stalker · Approx. 42.8, 53.0
Quest prerequisites
- 18Turn inHunterRequires level 10
Taming the Beast
Return to Yaw Sharpmane in Bloodhoof Village with the lesson’s rod. Turn in Taming the Beast and accept the next lesson before leaving.
Mulgore · Yaw Sharpmane · Approx. 47.8, 55.7
Quest prerequisites
- 19Pick upHunterRequires level 10
Taming the Beast
Accept Taming the Beast from Yaw Sharpmane in Bloodhoof Village.
Mulgore · Yaw Sharpmane · Approx. 47.8, 55.7
Quest prerequisites
- 20QuestHunterRequires level 10
Taming the Beast
Use this lesson’s Taming Rod on a Swoop in the plains north of Bloodhoof Village, near 46.1, 49.6. Wait for the tame to finish, then return the rod to Yaw Sharpmane. Dismiss a temporary trial pet if the game requires it before the next lesson.
Mulgore · Swoop · Approx. 46.1, 49.6
Quest prerequisites
- 21Turn inHunterRequires level 10
Taming the Beast
Return to Yaw Sharpmane in Bloodhoof Village and turn in the final taming lesson. Accept Training the Beast during this visit; its hand-in is included in the upcoming city stop.
Mulgore · Yaw Sharpmane · Approx. 47.8, 55.7
Quest prerequisites
- 22Pick upHunterRequires level 10
Training the Beast
Accept Training the Beast from Yaw Sharpmane in Bloodhoof Village.
Mulgore · Yaw Sharpmane · Approx. 47.8, 55.7
Quest prerequisites
LEVELS 9–10 · 70 STEPS FOR YOUR SELECTION
Northern Mulgore and Thunder Bluff
Finish the northern Mulgore hunts and final cleansing, then combine the Cairne, Hamuul and Melor deliveries in Thunder Bluff. The route collects relevant class referrals during this city visit before travelling through Camp Taurajo to the Crossroads. Class trials may add a substantial outing before the shared Barrens journey resumes.
STARTBloodhoof Village
FINISHCrossroads for the Barrens continuation
- Supervisor Fizsprocket is optional. Complete the outside Venture Company workers before deciding whether to enter the mine.
- The Demon Scarred Cloak is a delivery if you already found the item. Do not make a separate Ghost Howl hunt just to start it.
- Druids should speak to Lunaclaw’s spirit after the bear trial. Defeating Lunaclaw alone does not finish that step.
- The Barrens Oases referral is collected at the existing Hamuul visit and delivered during the first Crossroads visit.
Quest order 70 steps
- 01Pick upRequires level 10
The Hunter's Way
Speak with Skorn Whitecloud and accept The Hunter's Way.
Mulgore · Skorn Whitecloud · Approx. 46.8, 60.2
- 02QuestRequires level 5
Dangers of the Windfury
Collect eight Windfury Talons from harpies in the eastern hills. Avoid pulling several from the upper ledges at once.
Mulgore · Windfury Harpy · Approx. 61.6, 71.4
- 03QuestRequires level 5
The Venture Co.
Defeat fourteen Venture Co. Workers and six Supervisors at the eastern mine. Complete outside workers before pushing into the mine.
Mulgore · Venture Co. Worker · Approx. 60.1, 49.1
Quest prerequisites
- 04QuestOptionalRequires level 5
Supervisor Fizsprocket
If you choose this extra encounter, reach Supervisor Fizsprocket inside the Venture Company mine and recover his clipboard. Leave by the cleared entrance.
Mulgore · Supervisor Fizsprocket · Approx. 64.9, 43.3
Quest prerequisites
- 05QuestRequires level 4
Wildmane Totem
Collect eight Prairie Alpha Teeth in northern Mulgore for the final cleansing totem.
Mulgore · Prairie Wolf Alpha · Approx. 61.5, 61.6
Quest prerequisites
- 06QuestRequires level 10
The Hunter's Way
Collect four Flatland Prowler Claws in northern Mulgore, then take them to Melor Stonehoof in Thunder Bluff.
Mulgore · Flatland Prowler · Approx. 62.8, 58.4
- 07Turn inRequires level 5
Dangers of the Windfury
Speak with Ruul Eagletalon and turn in Dangers of the Windfury.
Mulgore · Ruul Eagletalon · Approx. 47.4, 62.0
- 08Turn inRequires level 5
The Venture Co.
Speak with Morin Cloudstalker and turn in The Venture Co..
Mulgore · Morin Cloudstalker · Approx. 57.2, 61.2
Quest prerequisites
- 09Turn inOptionalRequires level 5
Supervisor Fizsprocket
Speak with Morin Cloudstalker and turn in Supervisor Fizsprocket.
Mulgore · Morin Cloudstalker · Approx. 57.2, 61.2
Quest prerequisites
- 10Turn inRequires level 4
Wildmane Totem
Speak with Mull Thunderhorn and turn in Wildmane Totem.
Mulgore · Mull Thunderhorn · Approx. 48.5, 60.4
Quest prerequisites
- 11Pick upRequires level 4
Wildmane Cleansing
Speak with Mull Thunderhorn and accept Wildmane Cleansing.
Mulgore · Mull Thunderhorn · Approx. 48.5, 60.4
Quest prerequisites
- 12Pick upOptionalRequires level 6
The Demon Scarred Cloak
Read Demon Scarred Cloak if it is already in your bags. No farming is required.
- 13QuestOptionalRequires level 6
The Demon Scarred Cloak
If you already found the Demon Scarred Cloak, read it and take it to Skorn Whitecloud during this Bloodhoof Village visit. Do not search for Ghost Howl just to start this optional delivery.
Mulgore · Skorn Whitecloud · Approx. 46.8, 60.2
- 14Turn inOptionalRequires level 6
The Demon Scarred Cloak
Speak with Skorn Whitecloud and turn in The Demon Scarred Cloak.
Mulgore · Skorn Whitecloud · Approx. 46.8, 60.2
- 15QuestRequires level 4
Wildmane Cleansing
Use the Wildmane Cleansing Totem at the Wildmane well in northern Mulgore.
Mulgore · Wildmane Water Pump · Approx. 42.8, 14.0
Quest prerequisites
- 16Pick upRequires level 7
A Sacred Burial
Speak with Lorekeeper Raintotem and accept A Sacred Burial.
Mulgore · Lorekeeper Raintotem · Approx. 59.9, 25.6
- 17QuestRequires level 7
A Sacred Burial
Defeat eight Bristleback Interlopers in the Red Rocks burial grounds and return to Lorekeeper Raintotem.
Mulgore · Bristleback Interloper · Approx. 61.2, 22.8
- 18QuestRequires level 3
Rite of Wisdom
Travel to Red Rocks east of Thunder Bluff and speak with the Ancestral Spirit. Use the path into the burial grounds.
Mulgore · Ancestral Spirit · Approx. 61.5, 21.0
Quest prerequisites
- 19Turn inRequires level 3
Rite of Wisdom
Speak with Ancestral Spirit and turn in Rite of Wisdom.
Mulgore · Ancestral Spirit · Approx. 61.5, 21.0
Quest prerequisites
- 20Pick upRequires level 3
Journey into Thunder Bluff
Speak with Ancestral Spirit and accept Journey into Thunder Bluff.
Mulgore · Ancestral Spirit · Approx. 61.5, 21.0
Quest prerequisites
- 21Turn inRequires level 7
A Sacred Burial
Speak with Lorekeeper Raintotem and turn in A Sacred Burial.
Mulgore · Lorekeeper Raintotem · Approx. 59.9, 25.6
- 22Turn inRequires level 4
Wildmane Cleansing
Speak with Mull Thunderhorn and turn in Wildmane Cleansing.
Mulgore · Mull Thunderhorn · Approx. 48.5, 60.4
Quest prerequisites
- 23Pick upRequires level 4
Thunderhorn's Report
Speak with Mull Thunderhorn and accept Thunderhorn's Report.
Mulgore · Mull Thunderhorn · Approx. 48.4, 60.4
Quest prerequisites
- 24QuestRequires level 3
Journey into Thunder Bluff
Take the report to Cairne Bloodhoof on Thunder Bluff's central rise. Use a lift to reach the city.
Thunder Bluff · Cairne Bloodhoof · Approx. 60.3, 51.7
Quest prerequisites
- 25Turn inRequires level 3
Journey into Thunder Bluff
Speak with Cairne Bloodhoof and turn in Journey into Thunder Bluff.
Thunder Bluff · Cairne Bloodhoof · Approx. 60.3, 51.7
Quest prerequisites
- 26QuestRequires level 4
Thunderhorn's Report
Bring Mull Thunderhorn’s report to Hamuul Runetotem on Thunder Bluff’s Elder Rise. Use the lifts and bridges; combine this with the Cairne and Melor visit.
Thunder Bluff · Arch Druid Hamuul Runetotem · Approx. 78.4, 28.4
Quest prerequisites
- 27Turn inRequires level 4
Thunderhorn's Report
Give Thunderhorn’s report to Hamuul Runetotem. If he also offers The Barrens Oases, take it for the Crossroads visit; skip the referral if you are below level 10.
Thunder Bluff · Arch Druid Hamuul Runetotem · Approx. 78.4, 28.4
Quest prerequisites
- 28Pick upOptionalRequires level 10
The Barrens Oases
If Hamuul offers The Barrens Oases while you are here, accept it for the Crossroads. Continue the route if you are below level 10; do not grind or return for this referral.
Thunder Bluff · Arch Druid Hamuul Runetotem · Approx. 78.6, 28.6
- 29Turn inRequires level 10
The Hunter's Way
Speak with Melor Stonehoof and turn in The Hunter's Way.
Thunder Bluff · Melor Stonehoof · Approx. 61.5, 80.9
- 30Pick upRequires level 10
Sergra Darkthorn
Speak with Melor Stonehoof and accept Sergra Darkthorn.
Thunder Bluff · Melor Stonehoof · Approx. 61.5, 80.9
Quest prerequisites
- 31Pick upDruidRequires level 10
Moonglade
Speak with Turak Runetotem and accept Moonglade.
Thunder Bluff · Turak Runetotem · Approx. 76.5, 27.2
- 32QuestDruidRequires level 10
Moonglade
Check the newly offered Teleport: Moonglade spell, cast it and meet Dendrite upstairs in Nighthaven. If the spell is absent, return to the trainer before attempting overland travel.
Moonglade · Dendrite Starblaze · Approx. 56.2, 30.6
- 33Turn inDruidRequires level 10
Moonglade
Speak with Dendrite Starblaze and turn in Moonglade.
Moonglade · Dendrite Starblaze · Approx. 56.2, 30.6
- 34Pick upDruidRequires level 10
Great Bear Spirit
Speak with Dendrite Starblaze and accept Great Bear Spirit.
Moonglade · Dendrite Starblaze · Approx. 56.2, 30.6
Quest prerequisites
- 35QuestDruidRequires level 10
Great Bear Spirit
Speak with the Great Bear Spirit in northwestern Moonglade. Finish its dialogue, then return to Dendrite in Nighthaven.
Moonglade · Great Bear Spirit · Approx. 39.1, 27.5
Quest prerequisites
- 36Turn inDruidRequires level 10
Great Bear Spirit
Speak with Dendrite Starblaze and turn in Great Bear Spirit.
Moonglade · Dendrite Starblaze · Approx. 56.2, 30.6
Quest prerequisites
- 37Pick upDruidRequires level 10
Back to Thunder Bluff
Speak with Dendrite Starblaze and accept Back to Thunder Bluff.
Moonglade · Dendrite Starblaze · Approx. 56.2, 30.6
Quest prerequisites
- 38QuestDruidRequires level 10
Back to Thunder Bluff
Use Bunthen Plainswind’s druid flight to Thunder Bluff. Return to Turak Runetotem for the final bear trial.
Thunder Bluff · Turak Runetotem · Approx. 76.5, 27.2
Quest prerequisites
- 39Turn inDruidRequires level 10
Back to Thunder Bluff
Speak with Turak Runetotem and turn in Back to Thunder Bluff.
Thunder Bluff · Turak Runetotem · Approx. 76.5, 27.2
Quest prerequisites
- 40Pick upDruidRequires level 10
Body and Heart
Speak with Turak Runetotem and accept Body and Heart.
Thunder Bluff · Turak Runetotem · Approx. 76.5, 27.2
Quest prerequisites
- 41QuestDruidRequires level 10
Body and Heart
Reach the Moonkin Stone beside the Mulgore–Barrens pass, west of Camp Taurajo. Use the supplied Cenarion dust at the stone, defeat Lunaclaw, then speak with the spirit it leaves behind. The kill alone does not finish the trial.
The Barrens · Moonkin Stone · Approx. 42.0, 60.9
Quest prerequisites
- 42Turn inDruidRequires level 10
Body and Heart
Return to Turak Runetotem in Thunder Bluff, hand in the trial and check Bear Form before continuing the shared route.
Thunder Bluff · Turak Runetotem · Approx. 76.5, 27.2
Quest prerequisites
- 43Pick upShamanRequires level 10
Call of Fire
Speak with Xanis Flameweaver and accept Call of Fire.
Thunder Bluff · Xanis Flameweaver · Approx. 25.2, 21.0
- 44Pick upWarriorRequires level 10
Veteran Uzzek
Speak with Krang Stonehoof and accept Veteran Uzzek.
Mulgore · Krang Stonehoof · Approx. 49.5, 60.6
- 45QuestHunterRequires level 10
Training the Beast
Enter Thunder Bluff by a lift and cross the bridges to Hunter Rise. Speak with Holt Thunderhorn in Hunter Rise in Thunder Bluff for your pet-training lesson.
Thunder Bluff · Holt Thunderhorn · Approx. 57.3, 89.8
Quest prerequisites
- 46Turn inHunterRequires level 10
Training the Beast
Enter Thunder Bluff by a lift and cross the bridges to Hunter Rise. Turn in Training the Beast to Holt Thunderhorn in Hunter Rise in Thunder Bluff. Check your pet-training abilities before continuing.
Thunder Bluff · Holt Thunderhorn · Approx. 57.3, 89.8
Quest prerequisites
- 47Pick upRequires level 9
Journey to the Crossroads
Speak with Kirge Sternhorn and accept Journey to the Crossroads.
The Barrens · Kirge Sternhorn · Approx. 44.9, 58.6
- 48QuestRequires level 9
Journey to the Crossroads
Follow the main road north from Camp Taurajo to the Crossroads and speak with Thork.
The Barrens · Thork · Approx. 51.5, 30.9
- 49Turn inRequires level 9
Journey to the Crossroads
Speak with Thork and turn in Journey to the Crossroads.
The Barrens · Thork · Approx. 51.5, 30.9
- 50QuestShamanRequires level 10
Call of Fire
Take the fire trial referral to Kranal Fiss at the farm north of the Crossroads.
The Barrens · Kranal Fiss · Approx. 56.0, 19.9
- 51Turn inShamanRequires level 10
Call of Fire
Speak with Kranal Fiss and turn in Call of Fire.
The Barrens · Kranal Fiss · Approx. 56.0, 19.9
- 52Pick upShamanRequires level 10
Call of Fire
Speak with Kranal Fiss and accept Call of Fire.
The Barrens · Kranal Fiss · Approx. 56.0, 19.9
Quest prerequisites
- 53QuestShamanRequires level 10
Call of Fire
Cross into Durotar and follow the ascending path on the western side of the southern mountain to Telf Joolam. Stay on the path around the cliff.
Durotar · Telf Joolam · Approx. 38.5, 59.0
Quest prerequisites
- 54Turn inShamanRequires level 10
Call of Fire
Speak with Telf Joolam and turn in Call of Fire.
Durotar · Telf Joolam · Approx. 38.5, 59.0
Quest prerequisites
- 55Pick upShamanRequires level 10
Call of Fire
Speak with Telf Joolam and accept Call of Fire.
Durotar · Telf Joolam · Approx. 38.5, 59.0
Quest prerequisites
- 56QuestShamanRequires level 10
Call of Fire
Collect one Fire Tar from a Razormane spellcaster east of the Crossroads and one Reagent Pouch from Burning Blade Cultists in the cave above the ravine northeast of Razor Hill. Approach the cave along the high eastern side of the ravine. Return both materials to Telf.
The Barrens · Razormane Water Seeker · Approx. 54.4, 25.0
Quest prerequisites
- 57Turn inShamanRequires level 10
Call of Fire
Speak with Telf Joolam and turn in Call of Fire.
Durotar · Telf Joolam · Approx. 38.5, 59.0
Quest prerequisites
- 58Pick upShamanRequires level 10
Call of Fire
Speak with Telf Joolam and accept Call of Fire.
Durotar · Telf Joolam · Approx. 38.5, 59.0
Quest prerequisites
- 59QuestShamanRequires level 10
Call of Fire
At the shrine above Telf, drink the Fire Sapta and defeat the Minor Manifestation of Fire. Take its Glowing Ember to the Brazier of the Dormant Flame with the supplied torch.
Durotar · Minor Manifestation of Fire · Approx. 38.7, 58.3
Quest prerequisites
- 60Turn inShamanRequires level 10
Call of Fire
Return to Brazier of the Dormant Flame and turn in Call of Fire.
Durotar · Brazier of the Dormant Flame · Approx. 39.0, 58.2
Quest prerequisites
- 61Pick upShamanRequires level 10
Call of Fire
Inspect Brazier of the Dormant Flame and accept Call of Fire.
Durotar · Brazier of the Dormant Flame · Approx. 39.0, 58.2
Quest prerequisites
- 62QuestShamanRequires level 10
Call of Fire
Carry the Torch of the Eternal Flame back to Kranal Fiss north of the Crossroads. Keep the Fire Totem after the reward.
The Barrens · Kranal Fiss · Approx. 56.0, 19.9
Quest prerequisites
- 63Turn inShamanRequires level 10
Call of Fire
Speak with Kranal Fiss and turn in Call of Fire.
The Barrens · Kranal Fiss · Approx. 56.0, 19.9
Quest prerequisites
- 64QuestWarriorRequires level 10
Veteran Uzzek
Meet Uzzek at Far Watch Post beside the Durotar crossing. Take his defensive training before the scale hunt.
The Barrens · Uzzek · Approx. 61.4, 21.1
- 65Turn inWarriorRequires level 10
Veteran Uzzek
Speak with Uzzek and turn in Veteran Uzzek.
The Barrens · Uzzek · Approx. 61.4, 21.1
- 66Pick upWarriorRequires level 10
Path of Defense
Speak with Uzzek and accept Path of Defense.
The Barrens · Uzzek · Approx. 61.4, 21.1
Quest prerequisites
- 67QuestWarriorRequires level 10
Path of Defense
Collect five Singed Scales from thunder lizards in Thunder Ridge, in northwestern Durotar. Return to Uzzek at Far Watch Post after the fifth scale.
Durotar · Thunder Lizard · Approx. 40.5, 29.8
Quest prerequisites
- 68Turn inWarriorRequires level 10
Path of Defense
Return to Uzzek, turn in Path of Defense and check the abilities awarded in the native reward window. Rejoin the shared route after this lesson; the weapon follow-up is a separate choice.
The Barrens · Uzzek · Approx. 61.4, 21.1
Quest prerequisites
- 69QuestRequires level 10
Sergra Darkthorn
Speak with Sergra Darkthorn at the Crossroads. Reach the Barrens through the eastern road and Camp Taurajo, then follow the main road north.
The Barrens · Sergra Darkthorn · Approx. 52.2, 31.0
Quest prerequisites
- 70Turn inRequires level 10
Sergra Darkthorn
Speak with Sergra Darkthorn and turn in Sergra Darkthorn.
The Barrens · Sergra Darkthorn · Approx. 52.2, 31.0
Quest prerequisites
LEVELS 10–12 · 25 STEPS FOR YOUR SELECTION
Crossroads and the eastern camps
The Crossroads becomes your next hub. Pick up the plainstrider, raptor and Razormane tasks together, then return for the follow-up attack and supply recovery. Keep the Ratchet delivery and pool investigation for their later outings instead of making separate trips now.
STARTCrossroads; independent mainland entry, no starter reward required
FINISHCrossroads after the first eastern outing
- Disrupt the Attacks requires Water Seekers, Thornweavers and Hunters. Check each counter before returning.
- Supplies for the Crossroads follows the first attack quest. Recover the crates during the follow-up clearing of the Razormane camps.
- This chapter is also a mainland starting point for an existing character. It does not require every Mulgore reward first, though each quest still has its own requirements.
Quest order 25 steps
- 01Pick upRequires level 10
Plainstrider Menace
Speak with Sergra Darkthorn and accept Plainstrider Menace.
The Barrens · Sergra Darkthorn · Approx. 52.2, 31.0
- 02Pick upRequires level 9
Disrupt the Attacks
Speak with Thork and accept Disrupt the Attacks.
The Barrens · Thork · Approx. 51.5, 30.9
- 03Pick upRequires level 9
Raptor Thieves
Speak with Gazrog and accept Raptor Thieves.
The Barrens · Gazrog · Approx. 51.9, 30.3
- 04Pick upRequires level 10
The Forgotten Pools
Speak with Tonga Runetotem and accept The Forgotten Pools.
The Barrens · Tonga Runetotem · Approx. 52.3, 31.9
- 05QuestOptionalRequires level 10
The Barrens Oases
Carry Hamuul’s message to Tonga Runetotem on the first Crossroads visit. Complete the remaining Thunder Bluff stops and follow the planned road journey before handing it in.
The Barrens · Tonga Runetotem · Approx. 52.3, 31.9
- 06Turn inOptionalRequires level 10
The Barrens Oases
Speak with Tonga Runetotem and turn in The Barrens Oases.
The Barrens · Tonga Runetotem · Approx. 52.3, 31.9
- 07Pick upRequires level 10
Fungal Spores
Speak with Apothecary Helbrim and accept Fungal Spores.
The Barrens · Apothecary Helbrim · Approx. 51.4, 30.1
- 08Pick upRequires level 9
Wharfmaster Dizzywig
Speak with Apothecary Helbrim and accept Wharfmaster Dizzywig.
The Barrens · Apothecary Helbrim · Approx. 51.4, 30.1
- 09QuestRequires level 10
Plainstrider Menace
Hunt plainstriders around the Crossroads until you have seven beaks. Loot those you encounter while working toward the eastern quilboar camps.
The Barrens · Greater Plainstrider · Approx. 53.0, 31.5
- 10QuestRequires level 9
Disrupt the Attacks
At the Razormane camps east of the Crossroads, kill eight Water Seekers, eight Thornweavers and three Hunters. Check all three counts before returning.
The Barrens · Razormane Water Seeker · Approx. 55.0, 27.0
- 11QuestRequires level 9
Raptor Thieves
Loot twelve raptor heads during your journeys through the Barrens. Take nearby raptors as you pass; finish the count before your next Crossroads return.
The Barrens · Sunscale Lashtail · Approx. 52.9, 33.0
- 12Turn inRequires level 9
Disrupt the Attacks
Speak with Thork and turn in Disrupt the Attacks.
The Barrens · Thork · Approx. 51.5, 30.9
- 13Pick upRequires level 9
The Disruption Ends
Speak with Thork and accept The Disruption Ends.
The Barrens · Thork · Approx. 51.5, 30.9
Quest prerequisites
- 14Pick upRequires level 9
Supplies for the Crossroads
Speak with Thork and accept Supplies for the Crossroads.
The Barrens · Thork · Approx. 51.5, 30.9
Quest prerequisites
- 15Turn inRequires level 9
Raptor Thieves
Speak with Gazrog and turn in Raptor Thieves.
The Barrens · Gazrog · Approx. 51.9, 30.3
- 16Pick upRequires level 9
Stolen Silver
Speak with Gazrog and accept Stolen Silver.
The Barrens · Gazrog · Approx. 51.9, 30.3
Quest prerequisites
- 17Turn inRequires level 10
Plainstrider Menace
Speak with Sergra Darkthorn and turn in Plainstrider Menace.
The Barrens · Sergra Darkthorn · Approx. 52.2, 31.0
- 18Pick upRequires level 10
The Zhevra
Speak with Sergra Darkthorn and accept The Zhevra.
The Barrens · Sergra Darkthorn · Approx. 52.2, 31.0
Quest prerequisites
- 19QuestRequires level 10
The Zhevra
Collect four hooves from Zhevra Runners in the open plains around the Crossroads.
The Barrens · Zhevra Runner · Approx. 54.0, 33.0
Quest prerequisites
- 20QuestRequires level 9
The Disruption Ends
Continue to the northern Razormane camps. Defeat eight Geomancers and eight Defenders, then kill Kreenig Snarlsnout and take his tusk.
The Barrens · Razormane Geomancer · Approx. 56.8, 25.4
Quest prerequisites
- 21QuestRequires level 9
Supplies for the Crossroads
Recover the stolen supply crates from the Razormane camps while clearing their defenders.
The Barrens · Crossroads' Supply Crates · Approx. 58.4, 27.0
Quest prerequisites
- 22Turn inRequires level 9
The Disruption Ends
Speak with Thork and turn in The Disruption Ends.
The Barrens · Thork · Approx. 51.5, 30.9
Quest prerequisites
- 23Turn inRequires level 9
Supplies for the Crossroads
Speak with Thork and turn in Supplies for the Crossroads.
The Barrens · Thork · Approx. 51.5, 30.9
Quest prerequisites
- 24Turn inRequires level 10
The Zhevra
Speak with Sergra Darkthorn and turn in The Zhevra.
The Barrens · Sergra Darkthorn · Approx. 52.2, 31.0
Quest prerequisites
- 25Pick upRequires level 10
Prowlers of the Barrens
Speak with Sergra Darkthorn and accept Prowlers of the Barrens.
The Barrens · Sergra Darkthorn · Approx. 52.2, 31.0
Quest prerequisites
LEVELS 12–13 · 16 STEPS FOR YOUR SELECTION
The Forgotten Pools
Work the Forgotten Pools investigation, fungal gathering and Kolkar tasks into the same western outing. The harpy hunt joins this loop before a Crossroads return opens the next oasis and harpy assignments. Several accepted follow-ups are carried forward rather than finished immediately.
STARTCrossroads with the pool investigation
FINISHCrossroads after the western loop
- The pool investigation is underwater. Inspect the bubbling fissure and surface before your breath runs out.
- Collect Centaur Bracers alongside the named Kolkar work instead of scheduling a separate farming trip.
- The Stagnant Oasis and Verog are handled on the later return from the Ratchet coast.
Quest order 16 steps
- 01Pick upRequires level 12
Harpy Raiders
Speak with Darsok Swiftdagger and accept Harpy Raiders.
The Barrens · Darsok Swiftdagger · Approx. 51.6, 30.9
- 02Pick upRequires level 11
Kolkar Leaders
Speak with Regthar Deathgate and accept Kolkar Leaders.
The Barrens · Regthar Deathgate · Approx. 45.3, 28.4
- 03Pick upRequires level 9
Centaur Bracers
Speak with Regthar Deathgate and accept Centaur Bracers.
The Barrens · Regthar Deathgate · Approx. 45.3, 28.4
- 04QuestRequires level 10
The Forgotten Pools
Enter the Forgotten Pools northwest of the Crossroads and inspect the bubbling fissure underwater. Surface before your breath runs out.
The Barrens · Approx. 45.1, 22.5
- 05QuestRequires level 10
Fungal Spores
Gather four Fungal Spores around the Forgotten Pools during the same visit as the underwater investigation.
The Barrens · Laden Mushroom · Approx. 44.6, 25.6
- 06QuestRequires level 11
Kolkar Leaders
Find Barak Kodobane at the Forgotten Pools and recover his head. Complete the pool investigation and gather spores during this outing.
The Barrens · Barak Kodobane · Approx. 42.8, 23.5
- 07QuestRequires level 9
Centaur Bracers
Collect fifteen Centaur Bracers from Kolkar during the oasis outings. Do this alongside the named-leader quests instead of making a separate farming trip.
The Barrens · Kolkar Wrangler · Approx. 43.5, 26.8
- 08Turn inRequires level 11
Kolkar Leaders
Speak with Regthar Deathgate and turn in Kolkar Leaders.
The Barrens · Regthar Deathgate · Approx. 45.3, 28.4
- 09Pick upOptionalRequires level 11
Verog the Dervish
Speak with Regthar Deathgate and accept Verog the Dervish.
The Barrens · Regthar Deathgate · Approx. 45.3, 28.4
Quest prerequisites
- 10Turn inRequires level 9
Centaur Bracers
Speak with Regthar Deathgate and turn in Centaur Bracers.
The Barrens · Regthar Deathgate · Approx. 45.3, 28.4
- 11QuestRequires level 12
Harpy Raiders
Travel northwest into the Witchwing harpy grounds and collect eight talons. Pull enemies away from the camp edges to avoid fighting several at once.
The Barrens · Witchwing Harpy · Approx. 41.9, 19.3
- 12Turn inRequires level 12
Harpy Raiders
Speak with Darsok Swiftdagger and turn in Harpy Raiders.
The Barrens · Darsok Swiftdagger · Approx. 51.6, 30.9
- 13Pick upRequires level 12
Harpy Lieutenants
Speak with Darsok Swiftdagger and accept Harpy Lieutenants.
The Barrens · Darsok Swiftdagger · Approx. 51.6, 30.9
Quest prerequisites
- 14Turn inRequires level 10
The Forgotten Pools
Speak with Tonga Runetotem and turn in The Forgotten Pools.
The Barrens · Tonga Runetotem · Approx. 52.3, 31.9
- 15Pick upRequires level 10
The Stagnant Oasis
Speak with Tonga Runetotem and accept The Stagnant Oasis.
The Barrens · Tonga Runetotem · Approx. 52.3, 31.9
Quest prerequisites
- 16Turn inRequires level 10
Fungal Spores
Speak with Apothecary Helbrim and turn in Fungal Spores.
The Barrens · Apothecary Helbrim · Approx. 51.4, 30.1
LEVELS 13–14 · 26 STEPS FOR YOUR SELECTION
Ratchet and the pirate coast
Deliver the Secure Crate at Ratchet, collect the town’s next errands and clear the pirate camps south of town. The shipment reports bring you back to Ratchet before a second collection outing, followed by Stolen Silver and the Stagnant Oasis on the return towards the Crossroads.
STARTCrossroads eastern road; crate retained
FINISHRatchet after recovering the stolen shipment
- Parts and Pieces shares the first pirate outing. Keep its five Handfuls of Complicated Parts for Wrenix.
- Stolen Booty requires the Shipment of Boots and Telescopic Lens. Look for the objects rather than expecting pirate kills alone to finish it.
- Baron Longshore is optional. If Verog’s event later fails to progress, defer that encounter rather than waiting indefinitely.
Quest order 26 steps
- 01QuestRequires level 9
Wharfmaster Dizzywig
Carry the Secure Crate east along the road to Ratchet. Deliver it to Wharfmaster Dizzywig at the docks.
The Barrens · Wharfmaster Dizzywig · Approx. 63.4, 38.5
- 02Turn inRequires level 9
Wharfmaster Dizzywig
Speak with Wharfmaster Dizzywig and turn in Wharfmaster Dizzywig.
The Barrens · Wharfmaster Dizzywig · Approx. 63.4, 38.5
- 03Pick upRequires level 9
Southsea Freebooters
Speak with Gazlowe and accept Southsea Freebooters.
The Barrens · Gazlowe · Approx. 62.7, 36.2
- 04Pick upRequires level 10
Samophlange
Speak with Sputtervalve and accept Samophlange.
The Barrens · Sputtervalve · Approx. 63.0, 37.2
- 05Pick upOptionalRequires level 11
WANTED: Baron Longshore
Inspect WANTED and accept WANTED: Baron Longshore.
The Barrens · WANTED · Approx. 62.6, 37.5
- 06Pick upRequires level 13
Raptor Horns
Speak with Mebok Mizzyrix and accept Raptor Horns.
The Barrens · Mebok Mizzyrix · Approx. 62.4, 37.6
- 07Pick upRequires level 13
Miner's Fortune
Speak with Wharfmaster Dizzywig and accept Miner's Fortune.
The Barrens · Wharfmaster Dizzywig · Approx. 63.4, 38.5
- 08Pick upRequires level 9
Parts and Pieces
Speak with Wrenix the Wretched and accept Parts and Pieces.
The Barrens · Wrenix the Wretched · Approx. 63.0, 36.4
- 09QuestRequires level 9
Southsea Freebooters
Clear twelve Southsea Brigands and six Southsea Cannoneers from the pirate camps south of Ratchet.
The Barrens · Southsea Brigand · Approx. 63.6, 43.4
- 10QuestRequires level 9
Parts and Pieces
Recover five Handfuls of Complicated Parts in the upper pirate camp south of Ratchet while clearing Southsea Freebooters. Keep them for Wrenix on the next return to town.
The Barrens · Upper pirate camp south of Ratchet — machine parts · Approx. 63.6, 43.4
- 11QuestOptionalRequires level 11
WANTED: Baron Longshore
If you choose this extra encounter, find Baron Longshore among the pirates south of Ratchet and recover his head. Clear the surrounding enemies first.
The Barrens · Baron Longshore · Approx. 64.2, 47.1
- 12Turn inRequires level 9
Southsea Freebooters
Speak with Gazlowe and turn in Southsea Freebooters.
The Barrens · Gazlowe · Approx. 62.7, 36.2
- 13Pick upRequires level 9
The Missing Shipment
Speak with Gazlowe and accept The Missing Shipment.
The Barrens · Gazlowe · Approx. 62.7, 36.2
Quest prerequisites
- 14Turn inOptionalRequires level 11
WANTED: Baron Longshore
Speak with Gazlowe and turn in WANTED: Baron Longshore.
The Barrens · Gazlowe · Approx. 62.7, 36.2
- 15Turn inRequires level 9
Parts and Pieces
Speak with Wrenix the Wretched and turn in Parts and Pieces.
The Barrens · Wrenix the Wretched · Approx. 63.0, 36.4
- 16QuestRequires level 9
The Missing Shipment
Take Gazlowe's ledger down to Wharfmaster Dizzywig at the Ratchet docks.
The Barrens · Wharfmaster Dizzywig · Approx. 63.4, 38.5
Quest prerequisites
- 17Turn inRequires level 9
The Missing Shipment
Speak with Wharfmaster Dizzywig and turn in The Missing Shipment.
The Barrens · Wharfmaster Dizzywig · Approx. 63.4, 38.5
Quest prerequisites
- 18Pick upRequires level 9
The Missing Shipment
Speak with Wharfmaster Dizzywig and accept The Missing Shipment.
The Barrens · Wharfmaster Dizzywig · Approx. 63.4, 38.5
Quest prerequisites
- 19QuestRequires level 9
The Missing Shipment
Return the ledger to Gazlowe in Ratchet and collect his next shipment task before leaving.
The Barrens · Gazlowe · Approx. 62.7, 36.2
Quest prerequisites
- 20Turn inRequires level 9
The Missing Shipment
Speak with Gazlowe and turn in The Missing Shipment.
The Barrens · Gazlowe · Approx. 62.7, 36.2
Quest prerequisites
- 21Pick upRequires level 9
Stolen Booty
Speak with Gazlowe and accept Stolen Booty.
The Barrens · Gazlowe · Approx. 62.7, 36.2
Quest prerequisites
- 22QuestRequires level 9
Stolen Booty
Return to the pirate camp and recover the Shipment of Boots and Telescopic Lens. These are objects to collect, so inspect the camp rather than only killing pirates.
The Barrens · Drizzlik's Emporium · Approx. 62.6, 49.6
Quest prerequisites
- 23QuestRequires level 9
Stolen Silver
After recovering Stolen Booty, continue inland to the raptor grounds and retrieve the Stolen Silver. Keep it for the Crossroads return. Clear a safe approach rather than pulling the entire nest.
The Barrens · Stolen Silver · Approx. 58.0, 53.9
Quest prerequisites
- 24QuestRequires level 10
The Stagnant Oasis
On the return from the southern pirate and raptor grounds, investigate the underwater fissure at the Stagnant Oasis. Use the quest’s seeds there as directed, then surface. Keep the report for the Crossroads return.
The Barrens · Bubbling Fissure · Approx. 55.6, 42.8
Quest prerequisites
- 25QuestOptionalRequires level 11
Verog the Dervish
Work through the centaurs near the Stagnant Oasis until Verog appears, then defeat him and recover his head. If the event will not progress, defer it instead of waiting indefinitely.
The Barrens · Verog event area · Approx. 53.0, 41.6
Quest prerequisites
- 26Turn inRequires level 9
Stolen Booty
Speak with Gazlowe and turn in Stolen Booty.
The Barrens · Gazlowe · Approx. 62.7, 36.2
Quest prerequisites
LEVELS 14–16 · 57 STEPS FOR YOUR SELECTION
The northern works and harpies
This chapter joins the northern hunts, Samophlange work and Sludge Fen tasks before returning the recovered items to Ratchet. It then follows the harpy and Echeyakee rewards. Druids have additional poison and aquatic lessons here, with minimum levels and travel that go beyond the shared outing.
STARTRatchet; console task accepted
FINISHCrossroads after northern objectives
- Samophlange is a sequence of console interactions, valves and a key. Complete each hand-in and collect the next stage before leaving the machine.
- Begin Wizzlecrank’s escort only when ready to stay with the shredder through its ambushes.
- Druids can obtain Earthroot through trade for Gathering the Cure. If it is unavailable, defer that chain and continue shared quests. The later aquatic lesson requires level 16.
Quest order 57 steps
- 01QuestRequires level 10
Prowlers of the Barrens
Hunt Savannah Prowlers in the plains north of the Crossroads and collect seven claws.
The Barrens · Savannah Prowler · Approx. 44.5, 31.9
Quest prerequisites
- 02QuestRequires level 10
Samophlange
Follow the northern road toward the Venture Company research site and inspect its control console.
The Barrens · Control Console · Approx. 52.4, 11.7
- 03Turn inRequires level 10
Samophlange
Return to Control Console and turn in Samophlange.
The Barrens · Control Console · Approx. 52.4, 11.7
- 04Pick upRequires level 10
Samophlange
Inspect Control Console and accept Samophlange.
The Barrens · Control Console · Approx. 52.4, 11.7
Quest prerequisites
- 05QuestRequires level 10
Samophlange
Close the Fuel Control, Regulator and Main Control valves around the machine, then inspect the console again.
The Barrens · Main Control Valve · Approx. 52.3, 11.6
Quest prerequisites
- 06Turn inRequires level 10
Samophlange
Return to Control Console and turn in Samophlange.
The Barrens · Control Console · Approx. 52.4, 11.7
Quest prerequisites
- 07Pick upRequires level 10
Samophlange
Inspect Control Console and accept Samophlange.
The Barrens · Control Console · Approx. 52.4, 11.7
Quest prerequisites
- 08QuestRequires level 10
Samophlange
Defeat Tinkerer Sniggles, loot the Console Key and return to the control console.
The Barrens · Tinkerer Sniggles · Approx. 52.8, 10.4
Quest prerequisites
- 09Turn inRequires level 10
Samophlange
Return to Control Console and turn in Samophlange.
The Barrens · Control Console · Approx. 52.4, 11.7
Quest prerequisites
- 10Pick upRequires level 10
Samophlange
Inspect Control Console and accept Samophlange.
The Barrens · Control Console · Approx. 52.4, 11.7
Quest prerequisites
- 11Pick upDruidRequires level 14
Lessons Anew
Speak with Turak Runetotem and accept Lessons Anew.
Thunder Bluff · Turak Runetotem · Approx. 76.5, 27.2
- 12QuestDruidRequires level 14
Lessons Anew
After receiving the lesson, use Teleport: Moonglade and report to Dendrite in Nighthaven.
Moonglade · Dendrite Starblaze · Approx. 56.2, 30.6
- 13Turn inDruidRequires level 14
Lessons Anew
Speak with Dendrite Starblaze and turn in Lessons Anew.
Moonglade · Dendrite Starblaze · Approx. 56.2, 30.6
- 14Pick upDruidRequires level 14
The Principal Source
Speak with Dendrite Starblaze and accept The Principal Source.
Moonglade · Dendrite Starblaze · Approx. 56.2, 30.6
Quest prerequisites
- 15QuestDruidRequires level 14
The Principal Source
Return to the Barrens and climb the path up Dreadmist Peak. Fill the supplied sampler in the pool at the summit, then return to Tonga at the Crossroads.
The Barrens · Dreadmist Peak pool · Approx. 48.0, 18.0
Quest prerequisites
- 16Turn inDruidRequires level 14
The Principal Source
Speak with Tonga Runetotem and turn in The Principal Source.
The Barrens · Tonga Runetotem · Approx. 52.3, 31.9
Quest prerequisites
- 17Pick upDruidRequires level 14
Gathering the Cure
Speak with Tonga Runetotem and accept Gathering the Cure.
The Barrens · Tonga Runetotem · Approx. 52.3, 31.9
Quest prerequisites
- 18QuestDruidRequires level 14
Gathering the Cure
Collect five Kodo Horns from Lost Barrens Kodos in the northern Barrens. Also obtain five Earthroot from a herbalist, your own gathering if trained, or a trade. Do not change professions for this quest. Keep the materials until the hand-in; if Earthroot is unavailable or unaffordable, defer this chain and continue shared quests.
The Barrens · Lost Barrens Kodo · Approx. 42.1, 30.1
Quest prerequisites
- 19Turn inDruidRequires level 14
Gathering the Cure
Speak with Tonga Runetotem and turn in Gathering the Cure.
The Barrens · Tonga Runetotem · Approx. 52.3, 31.9
Quest prerequisites
- 20Pick upDruidRequires level 14
Curing the Sick
Speak with Tonga Runetotem and accept Curing the Sick.
The Barrens · Tonga Runetotem · Approx. 52.3, 31.9
Quest prerequisites
- 21QuestDruidRequires level 14
Curing the Sick
Use the Curative Animal Salve on ten Sickly Gazelles in the northern Barrens. Heal the animals with the quest item rather than killing them. Once all ten count, teleport to Moonglade and report to Dendrite.
The Barrens · Sickly Gazelle · Approx. 48.8, 23.8
Quest prerequisites
- 22Turn inDruidRequires level 14
Curing the Sick
Speak with Dendrite Starblaze and turn in Curing the Sick.
Moonglade · Dendrite Starblaze · Approx. 56.2, 30.6
Quest prerequisites
- 23Pick upDruidRequires level 14
Power over Poison
Speak with Dendrite Starblaze and accept Power over Poison.
Moonglade · Dendrite Starblaze · Approx. 56.2, 30.6
Quest prerequisites
- 24QuestDruidRequires level 14
Power over Poison
Use Bunthen Plainswind’s druid flight to Thunder Bluff. Return to Turak Runetotem to finish the poison lesson, then resume the shared route.
Thunder Bluff · Turak Runetotem · Approx. 76.5, 27.2
Quest prerequisites
- 25Turn inDruidRequires level 14
Power over Poison
Speak with Turak Runetotem and turn in Power over Poison.
Thunder Bluff · Turak Runetotem · Approx. 76.5, 27.2
Quest prerequisites
- 26QuestRequires level 13
Miner's Fortune
At the Venture Company work sites, defeat Overseers and Enforcers until you recover the Cat's Eye Emerald. Loot each eligible enemy.
The Barrens · Venture Co. Enforcer · Approx. 61.9, 5.6
- 27Pick upOptionalRequires level 13
Ignition
Speak with Wizzlecrank's Shredder and accept Ignition.
The Barrens · Wizzlecrank's Shredder · Approx. 56.5, 7.5
- 28QuestOptionalRequires level 13
Ignition
At the Sludge Fen, recover the Ignition Key from Supervisor Lugwizzle and take it to Wizzlecrank's Shredder.
The Barrens · Supervisor Lugwizzle · Approx. 56.3, 8.6
- 29Turn inOptionalRequires level 13
Ignition
Speak with Wizzlecrank's Shredder and turn in Ignition.
The Barrens · Wizzlecrank's Shredder · Approx. 56.5, 7.5
- 30Pick upOptionalRequires level 13
The Escape
Speak with Wizzlecrank's Shredder and accept The Escape.
The Barrens · Wizzlecrank's Shredder · Approx. 56.5, 7.5
Quest prerequisites
- 31QuestOptionalRequires level 13
The Escape
Start Wizzlecrank's escape only when ready. Stay near the shredder, defend it through the ambushes and finish the escort before returning to Ratchet.
Quest prerequisites
- 32QuestRequires level 10
Samophlange
Carry the recovered Samophlange back to Sputtervalve in Ratchet.
The Barrens · Sputtervalve · Approx. 63.0, 37.2
Quest prerequisites
- 33Turn inRequires level 10
Samophlange
Speak with Sputtervalve and turn in Samophlange.
The Barrens · Sputtervalve · Approx. 63.0, 37.2
Quest prerequisites
- 34Turn inOptionalRequires level 13
The Escape
Speak with Sputtervalve and turn in The Escape.
The Barrens · Sputtervalve · Approx. 63.0, 37.2
Quest prerequisites
- 35Turn inRequires level 13
Miner's Fortune
Speak with Wharfmaster Dizzywig and turn in Miner's Fortune.
The Barrens · Wharfmaster Dizzywig · Approx. 63.4, 38.5
- 36QuestRequires level 12
Harpy Lieutenants
Return to the deeper Witchwing camps and collect six rings from Witchwing Slayers.
The Barrens · Witchwing Slayer · Approx. 39.8, 16.8
Quest prerequisites
- 37Turn inRequires level 10
Prowlers of the Barrens
Speak with Sergra Darkthorn and turn in Prowlers of the Barrens.
The Barrens · Sergra Darkthorn · Approx. 52.2, 31.0
Quest prerequisites
- 38Pick upRequires level 10
Echeyakee
Speak with Sergra Darkthorn and accept Echeyakee.
The Barrens · Sergra Darkthorn · Approx. 52.2, 31.0
Quest prerequisites
- 39Turn inRequires level 12
Harpy Lieutenants
Speak with Darsok Swiftdagger and turn in Harpy Lieutenants.
The Barrens · Darsok Swiftdagger · Approx. 51.6, 30.9
Quest prerequisites
- 40Pick upOptionalRequires level 12
Serena Bloodfeather
Speak with Darsok Swiftdagger and accept Serena Bloodfeather.
The Barrens · Darsok Swiftdagger · Approx. 51.6, 30.9
Quest prerequisites
- 41QuestRequires level 10
Echeyakee
Use the Horn of Echeyakee at the large kodo bones in the northeastern plains. Defeat the summoned white lion and loot its hide.
The Barrens · Echeyakee summoning bones · Approx. 55.8, 17.2
Quest prerequisites
- 42QuestOptionalRequires level 12
Serena Bloodfeather
If you choose this encounter, continue into the northern harpy grounds and recover Serena Bloodfeather's head. Clear a retreat path first.
The Barrens · Serena Bloodfeather · Approx. 39.2, 12.2
Quest prerequisites
- 43Turn inRequires level 10
Echeyakee
Speak with Sergra Darkthorn and turn in Echeyakee.
The Barrens · Sergra Darkthorn · Approx. 52.2, 31.0
Quest prerequisites
- 44Pick upRequires level 10
The Angry Scytheclaws
Speak with Sergra Darkthorn and accept The Angry Scytheclaws.
The Barrens · Sergra Darkthorn · Approx. 52.2, 31.0
Quest prerequisites
- 45Turn inOptionalRequires level 12
Serena Bloodfeather
Speak with Darsok Swiftdagger and turn in Serena Bloodfeather.
The Barrens · Darsok Swiftdagger · Approx. 51.6, 30.9
Quest prerequisites
- 46Pick upDruidRequires level 16
A Lesson to Learn
Speak with Turak Runetotem and accept A Lesson to Learn.
Thunder Bluff · Turak Runetotem · Approx. 76.5, 27.2
- 47QuestDruidRequires level 16
A Lesson to Learn
Take the level-sixteen lesson from your city trainer, then teleport to Moonglade and speak with Dendrite.
Moonglade · Dendrite Starblaze · Approx. 56.2, 30.6
- 48Turn inDruidRequires level 16
A Lesson to Learn
Speak with Dendrite Starblaze and turn in A Lesson to Learn.
Moonglade · Dendrite Starblaze · Approx. 56.2, 30.6
- 49Pick upDruidRequires level 16
Trial of the Lake
Speak with Dendrite Starblaze and accept Trial of the Lake.
Moonglade · Dendrite Starblaze · Approx. 56.2, 30.6
Quest prerequisites
- 50QuestDruidRequires level 16
Trial of the Lake
Dive into Lake Elune’ara and retrieve a Shrine Bauble from a Bauble Container. Return to the Shrine of Remulos beside Tajarri and use the bauble before its native timer expires. If it expires, obtain another bauble; an expired attempt is not completion.
Moonglade · Bauble Container · Approx. 54.3, 55.7
Quest prerequisites
- 51Turn inDruidRequires level 16
Trial of the Lake
Speak with Tajarri and turn in Trial of the Lake.
Moonglade · Tajarri · Approx. 36.5, 40.1
Quest prerequisites
- 52Pick upDruidRequires level 16
Trial of the Sea Lion
Speak with Tajarri and accept Trial of the Sea Lion.
Moonglade · Tajarri · Approx. 36.5, 40.1
Quest prerequisites
- 53QuestDruidRequires level 16
Trial of the Sea Lion
Collect Aquatic Agility from the submerged lockbox in the Sludge Fen pool at 56.7,8.3 in the Barrens. For Aquatic Endurance, use the Orgrimmar zeppelin to Tirisfal, then follow the road into Silverpine. The second box lies offshore west of the northern wreck, at 29.6,29.2 on the Silverpine map. Watch breath and fatigue; return to the surface if needed. With both halves, teleport to Moonglade and combine them beside Tajarri at the Shrine of Remulos. Bring the joined pendant to Dendrite.
The Barrens · Strange Lockbox · Approx. 56.7, 8.3
Quest prerequisites
- 54Turn inDruidRequires level 16
Trial of the Sea Lion
Speak with Dendrite Starblaze and turn in Trial of the Sea Lion.
Moonglade · Dendrite Starblaze · Approx. 56.2, 30.6
Quest prerequisites
- 55Pick upDruidRequires level 16
Aquatic Form
Speak with Dendrite Starblaze and accept Aquatic Form.
Moonglade · Dendrite Starblaze · Approx. 56.2, 30.6
Quest prerequisites
- 56QuestDruidRequires level 16
Aquatic Form
Use Bunthen Plainswind’s druid flight to Thunder Bluff. Deliver the joined pendant to Turak Runetotem and check Aquatic Form before rejoining the route.
Thunder Bluff · Turak Runetotem · Approx. 76.5, 27.2
Quest prerequisites
- 57Turn inDruidRequires level 16
Aquatic Form
Speak with Turak Runetotem and turn in Aquatic Form.
Thunder Bluff · Turak Runetotem · Approx. 76.5, 27.2
Quest prerequisites
LEVELS 16–18 · 18 STEPS FOR YOUR SELECTION
Oases and the raptor nests
Visit the raptor nests with both The Angry Scytheclaws and Raptor Horns active, then work the oasis objectives before collecting the Taurajo and Stonetalon leads. This prepares the next two legs of the journey without sending you straight to every new quest giver.
STARTCrossroads with oasis and nest tasks
FINISHCrossroads before the Camp Taurajo journey
- Place a feather at each of the three Scytheclaw nests. Having enough feathers alone does not complete the task.
- Hezrul Bloodmark is optional and travels with guards. Bring help or leave it for later if the group is too strong.
- Collect Deepmoss Spider Eggs and Ziz Fizziks before the planned Stonetalon trip so their tasks share the forest outing.
Quest order 18 steps
- 01QuestRequires level 10
The Angry Scytheclaws
Loot feathers from Sunscale raptors and place one at each of the three Scytheclaw nests. Visit all three nests before leaving the raptor grounds.
The Barrens · Blue Raptor Nest · Approx. 52.6, 46.1
Quest prerequisites
- 02QuestRequires level 13
Raptor Horns
Collect five Intact Raptor Horns from Sunscale Scytheclaws while working at their nests.
The Barrens · Sunscale Scytheclaw · Approx. 52.6, 46.0
- 03Turn inOptionalRequires level 11
Verog the Dervish
Speak with Regthar Deathgate and turn in Verog the Dervish.
The Barrens · Regthar Deathgate · Approx. 45.3, 28.4
Quest prerequisites
- 04Pick upOptionalRequires level 11
Hezrul Bloodmark
Speak with Regthar Deathgate and accept Hezrul Bloodmark.
The Barrens · Regthar Deathgate · Approx. 45.3, 28.4
Quest prerequisites
- 05Turn inRequires level 10
The Stagnant Oasis
Speak with Tonga Runetotem and turn in The Stagnant Oasis.
The Barrens · Tonga Runetotem · Approx. 52.3, 31.9
Quest prerequisites
- 06Pick upRequires level 10
Altered Beings
Speak with Tonga Runetotem and accept Altered Beings.
The Barrens · Tonga Runetotem · Approx. 52.3, 31.9
Quest prerequisites
- 07Turn inRequires level 9
Stolen Silver
Speak with Gazrog and turn in Stolen Silver.
The Barrens · Gazrog · Approx. 51.9, 30.3
Quest prerequisites
- 08Turn inRequires level 10
The Angry Scytheclaws
Speak with Sergra Darkthorn and turn in The Angry Scytheclaws.
The Barrens · Sergra Darkthorn · Approx. 52.2, 31.0
Quest prerequisites
- 09Pick upRequires level 10
Jorn Skyseer
Speak with Sergra Darkthorn and accept Jorn Skyseer.
The Barrens · Sergra Darkthorn · Approx. 52.2, 31.0
Quest prerequisites
- 10Pick upRequires level 14
Lost in Battle
Speak with Mankrik and accept Lost in Battle.
The Barrens · Mankrik · Approx. 52.0, 31.6
- 11Pick upOptionalRequires level 14
Consumed by Hatred
Speak with Mankrik and accept Consumed by Hatred.
The Barrens · Mankrik · Approx. 52.0, 31.6
- 12QuestRequires level 10
Altered Beings
At the oases, kill Altered Snapjaws and collect eight shells. Finish this while working on the nearby centaur objectives.
The Barrens · Oasis Snapjaw · Approx. 46.2, 38.3
Quest prerequisites
- 13QuestOptionalRequires level 11
Hezrul Bloodmark
If you choose this encounter, locate Hezrul Bloodmark near the Lushwater Oasis and recover his head. He travels with guards; bring help if the group is too strong.
The Barrens · Hezrul Bloodmark · Approx. 46.0, 41.1
Quest prerequisites
- 14Turn inRequires level 10
Altered Beings
Speak with Tonga Runetotem and turn in Altered Beings.
The Barrens · Tonga Runetotem · Approx. 52.3, 31.9
Quest prerequisites
- 15Turn inOptionalRequires level 11
Hezrul Bloodmark
Speak with Regthar Deathgate and turn in Hezrul Bloodmark.
The Barrens · Regthar Deathgate · Approx. 45.3, 28.4
Quest prerequisites
- 16Turn inRequires level 13
Raptor Horns
Speak with Mebok Mizzyrix and turn in Raptor Horns.
The Barrens · Mebok Mizzyrix · Approx. 62.4, 37.6
- 17Pick upRequires level 15
Deepmoss Spider Eggs
Speak with Mebok Mizzyrix and accept Deepmoss Spider Eggs.
The Barrens · Mebok Mizzyrix · Approx. 62.4, 37.6
- 18Pick upRequires level 16
Ziz Fizziks
Speak with Sputtervalve and accept Ziz Fizziks.
The Barrens · Sputtervalve · Approx. 63.0, 37.2
LEVELS 16–18 · 7 STEPS FOR YOUR SELECTION
Stonetalon: Camp Aparaje
Enter Stonetalon through Camp Aparaje. Complete Avenge My Village, return to Makaba for the next assignment, then clear Grundig Darkcloud and the required Brutes before heading deeper into the zone. Goblin Invaders is collected here for the later Windshear work.
STARTRatchet; road through the Crossroads and west to the Stonetalon border
FINISHThe entrance road after Makaba’s two reports
- Turn in Avenge My Village before expecting Kill Grundig Darkcloud. The return to Makaba is part of the chain.
- Clear the camp edge and the approach to Grundig before tackling him. The Brute count is separate from the named kill.
Quest order 7 steps
- 01Pick upRequires level 13
Goblin Invaders
Speak with Seereth Stonebreak and accept Goblin Invaders.
The Barrens · Seereth Stonebreak · Approx. 35.3, 27.9
- 02Pick upRequires level 12
Avenge My Village
Speak with Makaba Flathoof and accept Avenge My Village.
The Barrens · Makaba Flathoof · Approx. 35.2, 27.8
- 03QuestRequires level 12
Avenge My Village
At Camp Aparaje just inside Stonetalon, defeat eight Grimtotem Ruffians and six Grimtotem Mercenaries. Clear the camp edge first, then report to Makaba at the Barrens border for the next assignment.
Stonetalon Mountains · Grimtotem Ruffian · Approx. 83.9, 85.0
- 04Turn inRequires level 12
Avenge My Village
Speak with Makaba Flathoof and turn in Avenge My Village.
The Barrens · Makaba Flathoof · Approx. 35.2, 27.8
- 05Pick upRequires level 12
Kill Grundig Darkcloud
Speak with Makaba Flathoof and accept Kill Grundig Darkcloud.
The Barrens · Makaba Flathoof · Approx. 35.2, 27.8
Quest prerequisites
- 06QuestRequires level 12
Kill Grundig Darkcloud
Return to Camp Aparaje and defeat Grundig Darkcloud and six Grimtotem Brutes. Clear the path and nearby guards before approaching Grundig; report to Makaba before continuing farther into Stonetalon.
Stonetalon Mountains · Grundig Darkcloud · Approx. 73.7, 86.1
Quest prerequisites
- 07Turn inRequires level 12
Kill Grundig Darkcloud
Speak with Makaba Flathoof and turn in Kill Grundig Darkcloud.
The Barrens · Makaba Flathoof · Approx. 35.2, 27.8
Quest prerequisites
LEVELS 17–19 · 15 STEPS FOR YOUR SELECTION
Sishir Canyon and Windshear Crag
Combine Blood Feeders with the Deepmoss egg collection in Sishir Canyon, then visit Ziz Fizziks and work the logging camp at Windshear Crag. The return takes the eggs and engineering report to Ratchet together.
STARTStonetalon entrance; road to Malaka’jin
FINISHRatchet after the two retained deliveries
- Open one egg sac at a time and deal with hatchlings before opening another. Keep all fifteen eggs for Mebok in Ratchet.
- Goblin Invaders and the Super Reaper blueprints share the work site. Gerenzo and the high scaffold routes are not needed for this blueprint task.
- Further Instructions ends this outing with the Ratchet delivery. The next trip back to Stonetalon is outside this chapter.
Quest order 15 steps
- 01Pick upRequires level 13
Blood Feeders
Speak with Xen'Zilla and accept Blood Feeders.
Stonetalon Mountains · Xen'Zilla · Approx. 71.3, 95.0
- 02QuestRequires level 13
Blood Feeders
Hunt ten Deepmoss Creepers and seven Deepmoss Venomspitters in Sishir Canyon north of Malaka’jin. Collect the Deepmoss Eggs in the same outing and finish both spider counters before returning to Xen’zilla.
Stonetalon Mountains · Deepmoss Creeper · Approx. 59.0, 73.8
- 03QuestRequires level 15
Deepmoss Spider Eggs
Collect fifteen Deepmoss Eggs from egg sacs in Sishir Canyon while completing Blood Feeders. Clear the nearby spiders, then open one sac at a time and deal with any hatchlings before opening another. Keep all eggs for Mebok in Ratchet.
Stonetalon Mountains · Deepmoss egg sacs in Sishir Canyon · Approx. 59.0, 73.8
- 04Turn inRequires level 13
Blood Feeders
Speak with Xen'Zilla and turn in Blood Feeders.
Stonetalon Mountains · Xen'Zilla · Approx. 71.3, 95.0
- 05QuestRequires level 16
Ziz Fizziks
Travel from Ratchet through the Crossroads and west into Stonetalon. Meet Ziz Fizziks at the western edge of Windshear Crag during the planned forest outing.
Stonetalon Mountains · Ziz Fizziks · Approx. 59.0, 62.6
- 06Turn inRequires level 16
Ziz Fizziks
Speak with Ziz Fizziks and turn in Ziz Fizziks.
Stonetalon Mountains · Ziz Fizziks · Approx. 59.0, 62.6
- 07Pick upRequires level 16
Super Reaper 6000
Speak with Ziz Fizziks and accept Super Reaper 6000.
Stonetalon Mountains · Ziz Fizziks · Approx. 59.0, 62.6
- 08QuestRequires level 13
Goblin Invaders
In Windshear Crag, defeat fifteen Venture Co. Loggers. Work from the western edge and complete the nearby operator-blueprint objective before returning along the entrance road.
Stonetalon Mountains · Venture Co. Logger · Approx. 74.3, 59.1
- 09QuestRequires level 16
Super Reaper 6000
Defeat Venture Co. Operators in Windshear Crag until you recover the Super Reaper 6000 Blueprints. Collect them while completing Goblin Invaders; avoid Gerenzo and the high scaffold routes, which are not required for this quest.
Stonetalon Mountains · Venture Co. Operator · Approx. 70.0, 55.9
- 10Turn inRequires level 16
Super Reaper 6000
Speak with Ziz Fizziks and turn in Super Reaper 6000.
Stonetalon Mountains · Ziz Fizziks · Approx. 59.0, 62.6
- 11Pick upRequires level 16
Further Instructions
Speak with Ziz Fizziks and accept Further Instructions.
Stonetalon Mountains · Ziz Fizziks · Approx. 59.0, 62.6
Quest prerequisites
- 12Turn inRequires level 13
Goblin Invaders
Speak with Seereth Stonebreak and turn in Goblin Invaders.
The Barrens · Seereth Stonebreak · Approx. 35.3, 27.9
- 13QuestRequires level 16
Further Instructions
Carry the engineering report back to Sputtervalve in Ratchet on the same return as the Deepmoss Eggs. The next delivery back to Stonetalon is outside this outing.
The Barrens · Sputtervalve · Approx. 63.0, 37.2
Quest prerequisites
- 14Turn inRequires level 16
Further Instructions
Speak with Sputtervalve and turn in Further Instructions.
The Barrens · Sputtervalve · Approx. 63.0, 37.2
Quest prerequisites
- 15Turn inRequires level 15
Deepmoss Spider Eggs
Speak with Mebok Mizzyrix and turn in Deepmoss Spider Eggs.
The Barrens · Mebok Mizzyrix · Approx. 62.4, 37.6
LEVELS 18–20 · 73 STEPS FOR YOUR SELECTION
Taurajo hunts and the Crossroads return
Return to the southern Barrens for Taurajo’s hunts, the Bristleback outing and the final Crossroads deliveries. Northwatch, its escort and the longer tusk hunt are optional choices. At level 20, Shaman and Druid branches add their water and cat lessons after the main levelling milestones.
STARTRatchet; collect Korran’s hunt at the Crossroads before the road south
FINISHCrossroads after the egg hand-in
- Keep one Blood Shard while completing Tribes at War. The route uses the initial hand-in, not repeated shard-for-buff exchanges.
- If taking Consumed by Hatred, collect its sixty tusks alongside Tribes at War. You do not need to finish the optional hunt after reaching the guide’s level goal.
- Egg Hunt uses Korran’s Digging Claw at egg mounds. Keep both the claw and twelve eggs for the Crossroads hand-in.
- Optional XP entries are recovery choices, not a checklist of every area you must grind. Use a suitable activity only when a required level is still out of reach.
Quest order 73 steps
- 01Pick upRequires level 17
Egg Hunt
On the road from Ratchet to the southern Barrens, stop at the Crossroads and accept Egg Hunt from Korran. Keep it for the Field of Giants outing after the Camp Taurajo work.
The Barrens · Korran · Approx. 51.1, 29.6
- 02Pick upOptionalRequires level 13
The Guns of Northwatch
Speak with Captain Thalo'thas Brightsun and accept The Guns of Northwatch.
The Barrens · Captain Thalo'thas Brightsun · Approx. 62.3, 39.0
- 03QuestOptionalRequires level 13
The Guns of Northwatch
If you choose the Northwatch outing, collect ten Theramore Medals and defeat Captain Fairmount, Cannoneer Whessan and Cannoneer Smythe inside the hold. Clear the towers carefully and bring help if needed.
The Barrens · Captain Fairmount · Approx. 61.9, 54.6
- 04Pick upOptionalRequires level 13
Free From the Hold
Speak with Gilthares Firebough and accept Free From the Hold.
The Barrens · Gilthares Firebough · Approx. 62.0, 55.0
- 05QuestOptionalRequires level 13
Free From the Hold
If you choose to help Gilthares, clear the immediate Northwatch approach before starting his escort. Stay with him and protect him all the way back toward Ratchet.
- 06Turn inOptionalRequires level 13
The Guns of Northwatch
Speak with Captain Thalo'thas Brightsun and turn in The Guns of Northwatch.
The Barrens · Captain Thalo'thas Brightsun · Approx. 62.3, 39.0
- 07Turn inOptionalRequires level 13
Free From the Hold
Speak with Captain Thalo'thas Brightsun and turn in Free From the Hold.
The Barrens · Captain Thalo'thas Brightsun · Approx. 62.3, 39.0
- 08QuestRequires level 14
Lost in Battle
Find the fallen woman near the buildings west of the road north of Camp Taurajo. Inspect her before your next return to Mankrik at the Crossroads.
The Barrens · Beaten Corpse · Approx. 49.3, 50.3
- 09QuestRequires level 10
Jorn Skyseer
Continue south on the main road to Camp Taurajo and speak with Jorn Skyseer.
The Barrens · Jorn Skyseer · Approx. 44.9, 59.1
Quest prerequisites
- 10Turn inRequires level 10
Jorn Skyseer
Speak with Jorn Skyseer and turn in Jorn Skyseer.
The Barrens · Jorn Skyseer · Approx. 44.9, 59.1
Quest prerequisites
- 11Pick upRequires level 10
Ishamuhale
Speak with Jorn Skyseer and accept Ishamuhale.
The Barrens · Jorn Skyseer · Approx. 44.9, 59.1
Quest prerequisites
- 12Pick upRequires level 14
Tribes at War
Speak with Mangletooth and accept Tribes at War.
The Barrens · Mangletooth · Approx. 44.5, 59.3
- 13QuestRequires level 14
Tribes at War
Defeat six Bristleback Water Seekers, twelve Thornweavers and twelve Geomancers in the Bristleback camps north of Camp Taurajo. Loot and retain a Blood Shard while clearing those targets. Separate caster pulls and complete all three counters before returning to Mangletooth.
The Barrens · Bristleback Water Seeker · Approx. 47.2, 53.8
- 14QuestOptionalRequires level 14
Consumed by Hatred
If you chose this extended hunt, collect sixty Bristleback Quilboar Tusks while completing Tribes at War north of Camp Taurajo. Pick up both quests before the Bristleback outing and finish their outstanding objectives together before returning north to Mankrik. Stop at the guide goal if you reach level 20; the tusk hunt remains optional.
The Barrens · Bristleback Water Seeker · Approx. 47.2, 53.8
- 15QuestRequires level 10
Ishamuhale
Obtain a Fresh Zhevra Carcass and take it to Ishamuhale's dead tree northwest of Ratchet. Use it to summon Ishamuhale, then recover the fang.
The Barrens · Ishamuhale's dead tree · Approx. 59.8, 30.6
Quest prerequisites
- 16Turn inRequires level 14
Lost in Battle
Speak with Mankrik and turn in Lost in Battle.
The Barrens · Mankrik · Approx. 52.0, 31.6
- 17Turn inOptionalRequires level 14
Consumed by Hatred
Speak with Mankrik and turn in Consumed by Hatred.
The Barrens · Mankrik · Approx. 52.0, 31.6
- 18Turn inRequires level 10
Ishamuhale
Speak with Jorn Skyseer and turn in Ishamuhale.
The Barrens · Jorn Skyseer · Approx. 44.9, 59.1
Quest prerequisites
- 19Pick upRequires level 10
Enraged Thunder Lizards
Speak with Jorn Skyseer and accept Enraged Thunder Lizards.
The Barrens · Jorn Skyseer · Approx. 44.9, 59.1
Quest prerequisites
- 20Turn inRequires level 14
Tribes at War
Speak with Mangletooth and turn in Tribes at War.
The Barrens · Mangletooth · Approx. 44.5, 59.3
- 21Pick upRequires level 14
Blood Shards of Agamaggan
Speak with Mangletooth and accept Blood Shards of Agamaggan.
The Barrens · Mangletooth · Approx. 44.5, 59.3
Quest prerequisites
- 22QuestRequires level 14
Blood Shards of Agamaggan
Give Mangletooth one Blood Shard kept from the preceding Bristleback outing. This is the initial quest hand-in; repeated shard-for-buff exchanges are not required for the guide.
The Barrens · Mangletooth · Approx. 44.5, 59.3
Quest prerequisites
- 23Turn inRequires level 14
Blood Shards of Agamaggan
Speak with Mangletooth and turn in Blood Shards of Agamaggan.
The Barrens · Mangletooth · Approx. 44.5, 59.3
Quest prerequisites
- 24QuestRequires level 10
Enraged Thunder Lizards
Collect three Thunder Lizard Blood from thunder lizards in the southern Barrens during your return toward Camp Taurajo.
The Barrens · Thunderhead · Approx. 43.8, 60.6
Quest prerequisites
- 25Turn inRequires level 10
Enraged Thunder Lizards
Speak with Jorn Skyseer and turn in Enraged Thunder Lizards.
The Barrens · Jorn Skyseer · Approx. 44.9, 59.1
Quest prerequisites
- 26Pick upRequires level 10
Cry of the Thunderhawk
Speak with Jorn Skyseer and accept Cry of the Thunderhawk.
The Barrens · Jorn Skyseer · Approx. 44.9, 59.1
Quest prerequisites
- 27QuestRequires level 10
Cry of the Thunderhawk
Hunt a Thunderhawk in the southern Barrens and bring its wings back to Jorn at Camp Taurajo.
The Barrens · Thunderhawk Cloudscraper · Approx. 46.7, 61.5
Quest prerequisites
- 28Turn inRequires level 10
Cry of the Thunderhawk
Speak with Jorn Skyseer and turn in Cry of the Thunderhawk.
The Barrens · Jorn Skyseer · Approx. 44.9, 59.1
Quest prerequisites
- 29QuestRequires level 17
Egg Hunt
Use Korran’s provided Digging Claw at the egg mounds in the Field of Giants south of Camp Taurajo to collect twelve Silithid Eggs. Clear nearby silithid guards and work one mound at a time. Keep the Digging Claw and all twelve eggs for Korran at the Crossroads.
The Barrens · Silithid Mound · Approx. 47.3, 70.4
- 30Turn inRequires level 17
Egg Hunt
Return twelve Silithid Eggs and the Digging Claw to Korran at the Crossroads.
The Barrens · Korran · Approx. 51.1, 29.6
- 31Pick upShamanRequires level 20
Call of Water
Speak with Xanis Flameweaver and accept Call of Water.
Thunder Bluff · Xanis Flameweaver · Approx. 25.2, 21.0
- 32QuestShamanRequires level 20
Call of Water
Visit the city Shaman trainer at level 20, then meet Islen Waterseer on the coast south of Ratchet.
The Barrens · Islen Waterseer · Approx. 65.8, 43.8
- 33Turn inShamanRequires level 20
Call of Water
Speak with Islen Waterseer and turn in Call of Water.
The Barrens · Islen Waterseer · Approx. 65.8, 43.8
- 34Pick upShamanRequires level 20
Call of Water
Speak with Islen Waterseer and accept Call of Water.
The Barrens · Islen Waterseer · Approx. 65.8, 43.8
Quest prerequisites
- 35QuestShamanRequires level 20
Call of Water
Follow the Barrens road south to Brine's hut. Take her first water sample task before descending.
The Barrens · Brine · Approx. 43.4, 77.4
Quest prerequisites
- 36Turn inShamanRequires level 20
Call of Water
Speak with Brine and turn in Call of Water.
The Barrens · Brine · Approx. 43.4, 77.4
Quest prerequisites
- 37Pick upShamanRequires level 20
Call of Water
Speak with Brine and accept Call of Water.
The Barrens · Brine · Approx. 43.4, 77.4
Quest prerequisites
- 38QuestShamanRequires level 20
Call of Water
Fill the Empty Brown Waterskin at the watering hole just below Brine's hut, then return to her.
The Barrens · Quilboar Watering Hole · Approx. 44.3, 76.8
Quest prerequisites
- 39Turn inShamanRequires level 20
Call of Water
Speak with Brine and turn in Call of Water.
The Barrens · Brine · Approx. 43.4, 77.4
Quest prerequisites
- 40Pick upShamanRequires level 20
Call of Water
Speak with Brine and accept Call of Water.
The Barrens · Brine · Approx. 43.4, 77.4
Quest prerequisites
- 41QuestShamanRequires level 20
Call of Water
Use the Orgrimmar zeppelin to Tirisfal and the road through Silverpine to Tarren Mill. Fill the red waterskin at the town well, then return it to Brine.
Hillsbrad Foothills · Tarren Mill village approach; find the well inside the village · Approx. 61.6, 19.2
Quest prerequisites
- 42Turn inShamanRequires level 20
Call of Water
Speak with Brine and turn in Call of Water.
The Barrens · Brine · Approx. 43.4, 77.4
Quest prerequisites
- 43Pick upShamanRequires level 20
Call of Water
Speak with Brine and accept Call of Water.
The Barrens · Brine · Approx. 43.4, 77.4
Quest prerequisites
- 44QuestShamanRequires level 20
Call of Water
Follow the northern Barrens road into Ashenvale. Fill the blue waterskin at the Ruins of Stardust fountain southwest of Astranaar, avoiding the Alliance town, then return to Brine.
Ashenvale · Ruins of Stardust Fountain · Approx. 33.5, 67.5
Quest prerequisites
- 45Turn inShamanRequires level 20
Call of Water
Speak with Brine and turn in Call of Water.
The Barrens · Brine · Approx. 43.4, 77.4
Quest prerequisites
- 46Pick upShamanRequires level 20
Call of Water
Speak with Brine and accept Call of Water.
The Barrens · Brine · Approx. 43.4, 77.4
Quest prerequisites
- 47QuestShamanRequires level 20
Call of Water
Bring the Vial of Purest Water to Islen on the coast south of Ratchet. Keep the Water Sapta and remaining drops for the shrine trial.
The Barrens · Islen Waterseer · Approx. 65.8, 43.8
Quest prerequisites
- 48Turn inShamanRequires level 20
Call of Water
Speak with Islen Waterseer and turn in Call of Water.
The Barrens · Islen Waterseer · Approx. 65.8, 43.8
Quest prerequisites
- 49Pick upShamanRequires level 20
Call of Water
Speak with Islen Waterseer and accept Call of Water.
The Barrens · Islen Waterseer · Approx. 65.8, 43.8
Quest prerequisites
- 50QuestShamanRequires level 20
Call of Water
Travel to Silverpine by the Tirisfal zeppelin. From the road north of the Sepulcher, approach the coast and follow it south to the shrine. Drink Water Sapta, defeat the hostile Corrupt Manifestation and loot its bracers. Place them and the remaining pure water on the brazier.
Silverpine Forest · Brazier of Everfount · Approx. 38.2, 44.5
Quest prerequisites
- 51Turn inShamanRequires level 20
Call of Water
Return to Brazier of Everfount and turn in Call of Water.
Silverpine Forest · Brazier of Everfount · Approx. 38.2, 44.5
Quest prerequisites
- 52Pick upShamanRequires level 20
Call of Water
Inspect Brazier of Everfount and accept Call of Water.
Silverpine Forest · Brazier of Everfount · Approx. 38.2, 44.5
Quest prerequisites
- 53QuestShamanRequires level 20
Call of Water
Stay at the shrine after the ritual. Speak with the Minor Manifestation of Water that appears and take its shard delivery before leaving.
Silverpine Forest · Minor Manifestation of Water · Approx. 38.6, 44.6
Quest prerequisites
- 54Turn inShamanRequires level 20
Call of Water
Speak with Minor Manifestation of Water and turn in Call of Water.
Silverpine Forest · Minor Manifestation of Water · Approx. 38.6, 44.6
Quest prerequisites
- 55Pick upShamanRequires level 20
Call of Water
Speak with Minor Manifestation of Water and accept Call of Water.
Silverpine Forest · Minor Manifestation of Water · Approx. 38.6, 44.6
Quest prerequisites
- 56QuestShamanRequires level 20
Call of Water
Return the Shard of Water to Islen south of Ratchet. Keep the Water Totem and check Healing Stream Totem in the spellbook.
The Barrens · Islen Waterseer · Approx. 65.8, 43.8
Quest prerequisites
- 57Turn inShamanRequires level 20
Call of Water
Speak with Islen Waterseer and turn in Call of Water.
The Barrens · Islen Waterseer · Approx. 65.8, 43.8
Quest prerequisites
- 58Pick upDruidRequires level 20
The Great Cat Spirit
Speak with Turak Runetotem and accept The Great Cat Spirit.
Thunder Bluff · Turak Runetotem · Approx. 76.4, 27.6
- 59QuestDruidRequires level 20
The Great Cat Spirit
At level 20, visit the named Druid trainer for the cat-form referral. Use Teleport: Moonglade and report to Dendrite in Nighthaven.
Moonglade · Dendrite Starblaze · Approx. 56.2, 30.4
- 60Turn inDruidRequires level 20
The Great Cat Spirit
Speak with Dendrite Starblaze and turn in The Great Cat Spirit.
Moonglade · Dendrite Starblaze · Approx. 56.2, 30.4
- 61Pick upDruidRequires level 20
The Great Cat Spirit
Speak with Dendrite Starblaze and accept The Great Cat Spirit.
Moonglade · Dendrite Starblaze · Approx. 56.2, 30.4
Quest prerequisites
- 62QuestDruidRequires level 20
The Great Cat Spirit
Meet the Great Cat Spirit on the southern hill above the bridge. Take the relic trial before entering the dens.
Moonglade · Great Cat Spirit · Approx. 54.6, 75.0
Quest prerequisites
- 63Turn inDruidRequires level 20
The Great Cat Spirit
Speak with Great Cat Spirit and turn in The Great Cat Spirit.
Moonglade · Great Cat Spirit · Approx. 54.6, 75.0
Quest prerequisites
- 64Pick upDruidRequires level 20
The Great Cat Spirit
Speak with Great Cat Spirit and accept The Great Cat Spirit.
Moonglade · Great Cat Spirit · Approx. 54.6, 75.0
Quest prerequisites
- 65QuestDruidRequires level 20
The Great Cat Spirit
Travel to the Stormrage Barrow Dens area east of the spirit. The marker shows the den area; find the trial’s entrance statue and use its temporary stealth blessing. Search inside for all three relics: Fang, Claw and Silent Shadow. Avoid the powerful spirits, and renew the blessing if needed. Return to the spirit only after all three relics are in your bags.
Moonglade · Stormrage Barrow Dens — find the trial entrance · Approx. 68.0, 60.2
Quest prerequisites
- 66Turn inDruidRequires level 20
The Great Cat Spirit
Speak with Great Cat Spirit and turn in The Great Cat Spirit.
Moonglade · Great Cat Spirit · Approx. 54.6, 75.0
Quest prerequisites
- 67Pick upDruidRequires level 20
Blessings of the Great Cat Spirit
Speak with Great Cat Spirit and accept Blessings of the Great Cat Spirit.
Moonglade · Great Cat Spirit · Approx. 54.6, 75.0
Quest prerequisites
- 68QuestDruidRequires level 20
Blessings of the Great Cat Spirit
Return to Dendrite in Nighthaven with the spirit’s blessing. Accept his final city referral before leaving.
Moonglade · Dendrite Starblaze · Approx. 56.2, 30.4
Quest prerequisites
- 69Turn inDruidRequires level 20
Blessings of the Great Cat Spirit
Speak with Dendrite Starblaze and turn in Blessings of the Great Cat Spirit.
Moonglade · Dendrite Starblaze · Approx. 56.2, 30.4
Quest prerequisites
- 70Pick upDruidRequires level 20
To Thunder Bluff
Speak with Dendrite Starblaze and accept To Thunder Bluff.
Moonglade · Dendrite Starblaze · Approx. 56.2, 30.4
Quest prerequisites
- 71QuestDruidRequires level 20
To Thunder Bluff
Use the Druid return flight for Thunder Bluff and speak with the named trainer. Turn in the final lesson and check Cat Form in your spellbook.
Thunder Bluff · Turak Runetotem · Approx. 76.4, 27.6
Quest prerequisites
- 72Turn inDruidRequires level 20
To Thunder Bluff
Speak with Turak Runetotem and turn in To Thunder Bluff.
Thunder Bluff · Turak Runetotem · Approx. 76.4, 27.6
Quest prerequisites
- 73On the way
Reach level 20
If you are below level 20, choose Find XP to review the nearby combat option. You can return here at any time. Once you reach 20, choose whether to continue any unfinished quests.
Need more XP? 21 optional catch-up steps
Use these only if you need extra experience. They are separate from the main route and may have their own prerequisites.
- 01On the wayOptional
Optional XP near Mulgore
Hunt Plainstriders on the open ground near Camp Narache.
Mulgore · Plainstrider · Approx. 50.7, 87.0
- 02On the wayOptional
Optional XP near Mulgore
Hunt Plainstriders on the open ground near Camp Narache.
Mulgore · Plainstrider · Approx. 50.7, 87.0
- 03On the wayOptional
Optional XP near Mulgore
Hunt Prairie Wolves on the plains around Bloodhoof Village. Keep the village route available for supplies.
Mulgore · Prairie Wolf · Approx. 50.7, 64.6
- 04On the wayOptional
Optional XP near Mulgore
Hunt Prairie Wolves on the plains around Bloodhoof Village. Keep the village route available for supplies.
Mulgore · Prairie Wolf · Approx. 50.7, 64.6
- 05On the wayOptional
Optional XP near Mulgore
Hunt Prairie Stalkers on the plains east of Bloodhoof Village.
Mulgore · Prairie Stalker · Approx. 55.8, 57.9
- 06On the wayOptional
Optional XP near Mulgore
Hunt Prairie Wolf Alphas on the eastern plains. Choose single enemies and avoid dense groups.
Mulgore · Prairie Wolf Alpha · Approx. 61.5, 61.6
- 07On the wayOptional
Optional XP near Mulgore
Hunt Prairie Wolf Alphas on the eastern plains. Choose single enemies and avoid dense groups.
Mulgore · Prairie Wolf Alpha · Approx. 61.5, 61.6
- 08On the wayOptional
Optional XP near The Barrens
Hunt Greater Plainstriders around the Crossroads. Stay on the nearby plains so you can return to town easily.
The Barrens · Greater Plainstrider · Approx. 53.0, 31.5
- 09On the wayOptional
Optional XP near The Barrens
Hunt Greater Plainstriders around the Crossroads. Stay on the nearby plains so you can return to town easily.
The Barrens · Greater Plainstrider · Approx. 53.0, 31.5
- 10On the wayOptional
Optional XP near The Barrens
Hunt Greater Plainstriders around the Crossroads. Stay on the nearby plains so you can return to town easily.
The Barrens · Greater Plainstrider · Approx. 53.0, 31.5
- 11On the wayOptional
Optional XP near The Barrens
Hunt Greater Plainstriders around the Crossroads. Stay on the nearby plains so you can return to town easily.
The Barrens · Greater Plainstrider · Approx. 53.0, 31.5
- 12On the wayOptional
Optional XP near The Barrens
Hunt Zhevra Runners on the plains east of the Crossroads. Choose isolated enemies that still give XP.
The Barrens · Zhevra Runner · Approx. 54.0, 33.0
- 13On the wayOptional
Optional XP near The Barrens
Hunt Zhevra Runners on the plains east of the Crossroads. Choose isolated enemies that still give XP.
The Barrens · Zhevra Runner · Approx. 54.0, 33.0
- 14On the wayOptional
Optional XP near The Barrens
Use ordinary Bristleback Water Seekers north of Camp Taurajo if you need XP for the next pickup. Finish any accepted Bristleback objectives here first, then use isolated Water Seekers only while kills award XP. Avoid the caster packs.
The Barrens · Bristleback Water Seeker · Approx. 47.2, 53.8
- 15On the wayOptional
Optional XP near Stonetalon Mountains
In Stonetalon, use isolated Deepmoss Creepers beside the road southeast of Windshear Crag. Finish any accepted spider or egg work on this visit before additional combat. Stay outside caves and stop when the displayed level target is reached.
Stonetalon Mountains · Deepmoss Creeper · Approx. 59.0, 73.8
- 16On the wayOptional
Optional XP near The Barrens
Hunt Zhevra Runners on the plains east of the Crossroads. Choose isolated enemies that still give XP.
The Barrens · Zhevra Runner · Approx. 54.0, 33.0
- 17On the wayOptional
Optional XP near The Barrens
Use ordinary Bristleback Water Seekers north of Camp Taurajo if you need XP for the next pickup. Finish any accepted Bristleback objectives here first, then use isolated Water Seekers only while kills award XP. Avoid the caster packs.
The Barrens · Bristleback Water Seeker · Approx. 47.2, 53.8
- 18On the wayOptional
Optional XP near Stonetalon Mountains
In Stonetalon, use isolated Deepmoss Creepers beside the road southeast of Windshear Crag. Finish any accepted spider or egg work on this visit before additional combat. Stay outside caves and stop when the displayed level target is reached.
Stonetalon Mountains · Deepmoss Creeper · Approx. 59.0, 73.8
- 19On the wayOptional
Optional XP near The Barrens
Use ordinary Bristleback Water Seekers north of Camp Taurajo if you need XP for the next pickup. Finish any accepted Bristleback objectives here first, then use isolated Water Seekers only while kills award XP. Avoid the caster packs.
The Barrens · Bristleback Water Seeker · Approx. 47.2, 53.8
- 20On the wayOptional
Nearby combat for XP
Use ordinary Bristlebacks north of Camp Taurajo only while kills award XP and individual pulls are manageable. Reassess after five minutes and return to the route when ready.
The Barrens · Bristleback Water Seeker · Approx. 47.2, 53.8
- 21On the wayOptional
Optional XP near Stonetalon Mountains
In Stonetalon, use isolated Deepmoss Creepers beside the road southeast of Windshear Crag. Finish any accepted spider or egg work on this visit before additional combat. Stay outside caves and stop when the displayed level target is reached.
Stonetalon Mountains · Deepmoss Creeper · Approx. 59.0, 73.8
The same route, beside you in game.
Wisp puts your next step, quest progress and directions in one panel. All eight starting routes are included in the free beta.
Get the free Wisp beta ↗About this beta route
Based on Wisp 0.1.10 in public beta 0.22.0-beta.1, for client build 1.60.1.69913. Full playthrough testing and XP tuning are in progress. Your live quest log takes priority if the beta changes.
- This is the written companion to the released beta route, not a claim that a complete Tauren 1–20 playthrough has been verified. XP pacing, changed quests and some location references remain under review.
- Class notes cover the Warrior, Hunter, Shaman and Druid branches authored in this route. They are not a complete inventory of every possible Forever race and class combination.
- Optional boss encounters, escorts and drop-started quests can be skipped. Level-20 class lessons require reaching 20 first and may take you beyond the main levelling journey.
Game imagery © Blizzard Entertainment.
Report a confusing or changed step ↗Starting another character?
Explore all 8 starting routes ↗